10 Tips for Stunning Sunset Photos
Sunset photos that convey the true beauty of the scene can be challenging. More often that not, the reality of the photo looks nothing like what we’re seeing with the naked eye, especially the glorious colour.
But with just a handful of tips, you can take gorgeous sunset photos that are a true representation of what you see.
Oh and whether you want to capture a sunset or a sunrise, all our tips are interchangeable. The only difference is the time of day you’re out shooting. But for ease of writing, we’ll refer to sunsets in this tutorial.
1. Plan for Success
For the best chance at getting shots you love, there’s a few things you need to think about ahead of time:
- Location
- Time & weather
- Gear
2. Choosing a Perfect Location for Sunset Photos
Whether your vision for your sunset photos is on a beach, an open field, or anything else, the sky is going to be the hero of your shot. For that reason it makes sense that it should take up at least half to 3/4 of your frame. So spend some time scoping out locations that will give a view of the setting sun that is uninterrupted by objects that will obscure it.
Also look for spots with some elements in the scene that you can use as foreground elements to help you create photos with big visual impact. Think trees, grasses, a curved shoreline, a pier, a bridge, rocks, even an urban skyline as long as you can see the setting sun.
Also this might seem obvious, but wherever you choose, determine what direction it faces – the sun only sets in the west!
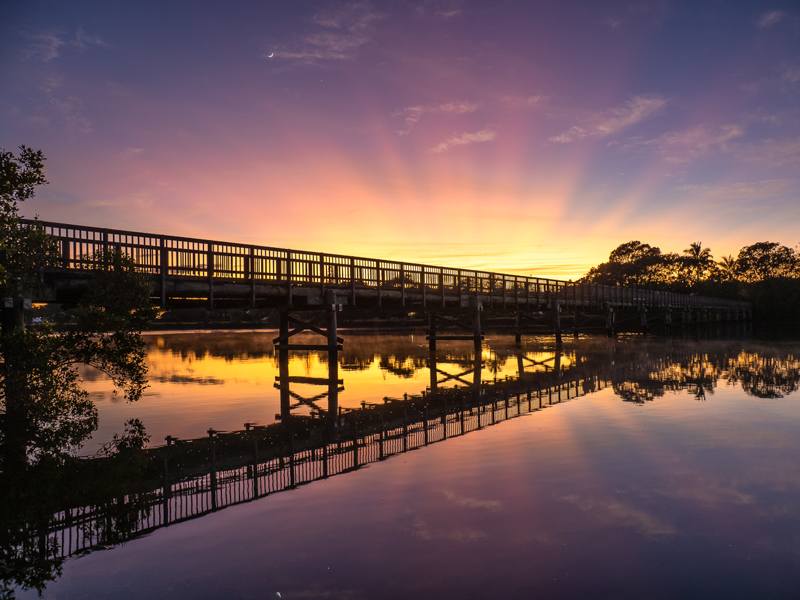
Lisa Weller, Advanced Grad
3. Timing & Weather
Best Time to Shoot
Use an app to find out what time the sun sets in the area you’ll be shooting, and arrive at least half an hour before. You need time to set up, and experiment with compositions and angles. The window of time between the moment when the sunset is in the perfect position and creating beautiful colour in the sky, and dipping below the horizon and out of sight is very small. It can be as little as a minute, so you want to be ready.
But also, the light before sunset when the sky fills with pinkish hues can be beautiful (hello golden hour). So take the opportunity to get some great shots at this time too.
Related: How to Capture Breathtaking Golden Hour Photos
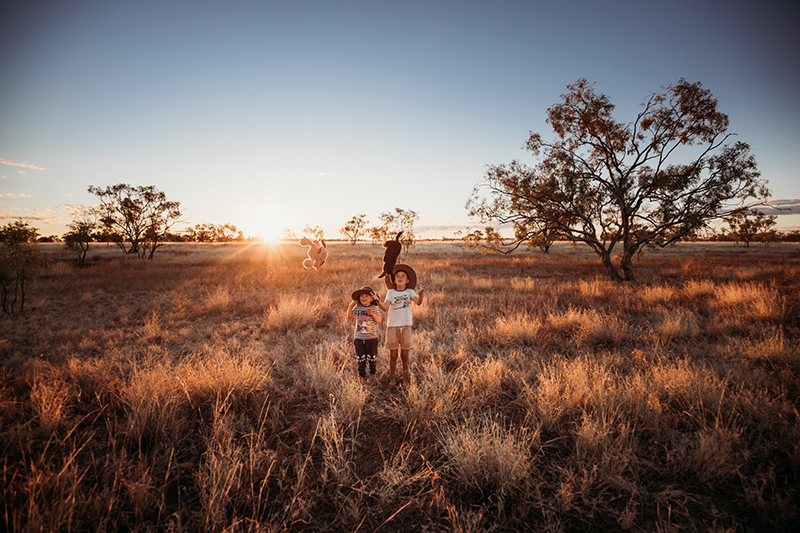
Kirsty Nealon, Advanced Graduate
Weather
Clear skies will give you a beautiful golden hour and a colourful sunset.
But don’t let a little cloud cover put you off. You’ll still get colour, and you’ll also get some incredible texture like these shots below.
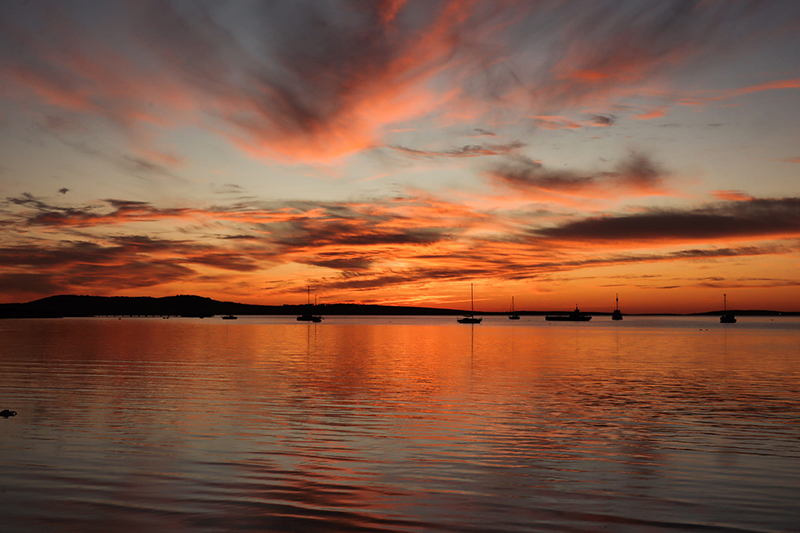
Fiona Hoopman, Enthusiast Grad
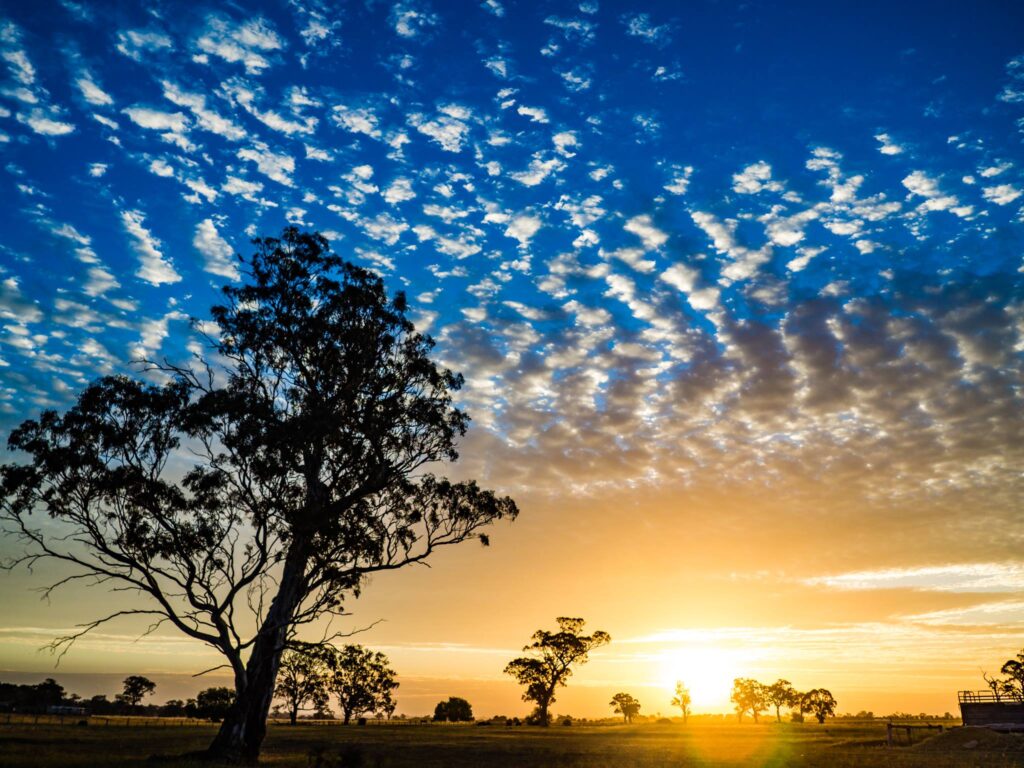
Kirsty MacCallum, Advanced Grad
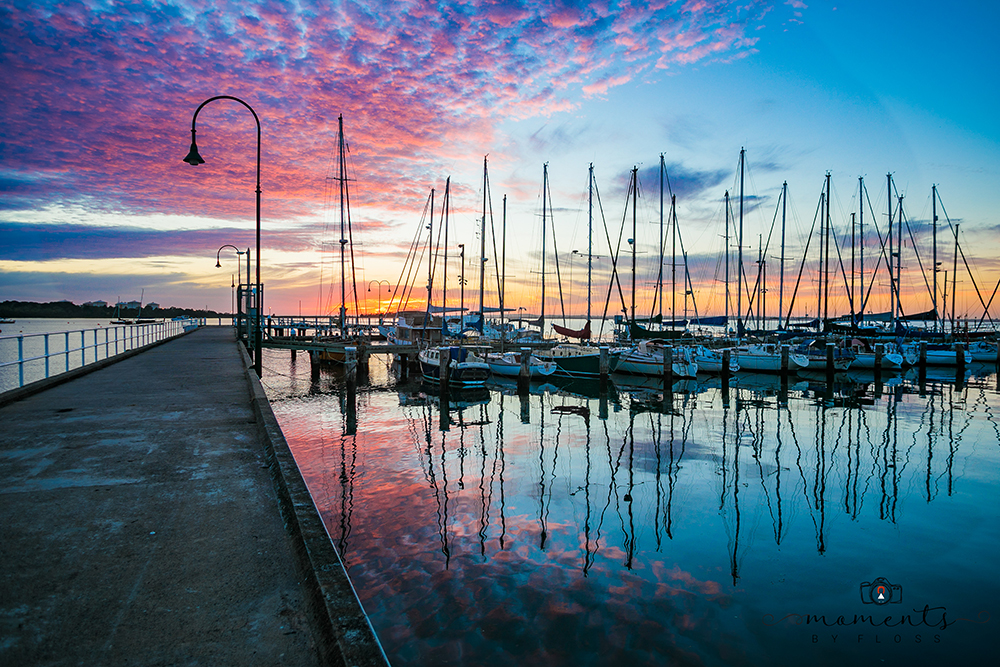
Floss Butterworth, Advanced Grad
Also don’t be put off by full cloud cover. Even if the weather hides the sun and cancels your chance of the colour you envisioned, you could get something beautifully moody and dramatic like this instead.
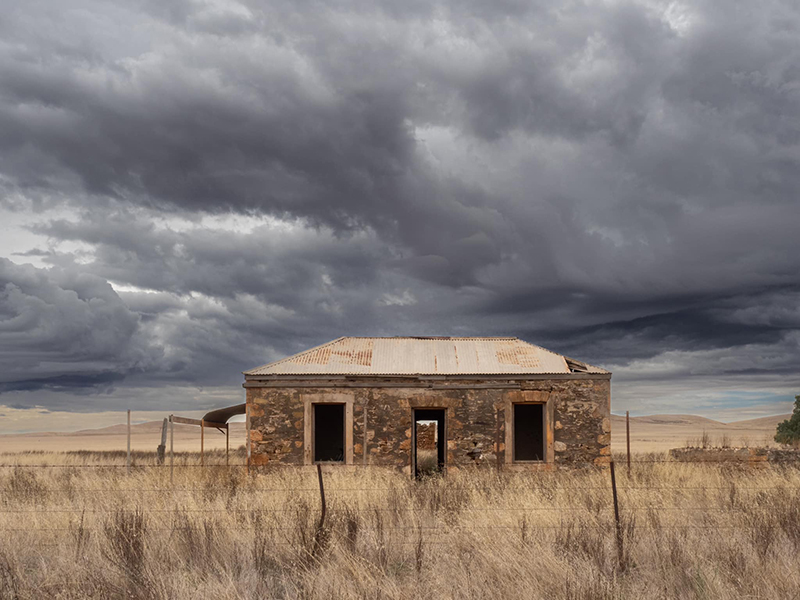
Floss Butterworth, Advanced Grad
4. The Gear
Camera
It doesn’t matter if your camera is a 15 year old entry level DSLR, or the latest schmick mirrorless. As long as it has manual mode capability, you can get beautiful sunset photos with it. If you’re not shooting in manual mode yet, consider jumping over – it’s the only way to get total creative control. Read the blog post below to get started.
Related: How to Shoot in Manual Mode
That being said, if you’re already fallen in love with landscape photography maybe you’re ready to level it up. A full frame camera will capture more colour detail and you’ll get images that are a lot crisper and can be enlarged quite big without losing quality.
Lens
A wide-angle lens allows you to capture huge expanses of sky. What’s more, they distort the scene which makes clouds and skies appear to go on forever.
So grab one if you can and let the magic unfold! The wider the better – around 18mm is a great choice for a crop sensor camera, and 24mm for a full frame. But if the only lenses you have available are longer, that’s ok – you can still capture a sunset.
This shot below was captured with a focal length of 16mm on a full frame camera and you can see how much was captured in the frame, and how much it stretches the sky and clouds which looks amazing.
Related: What Lens Should I Use
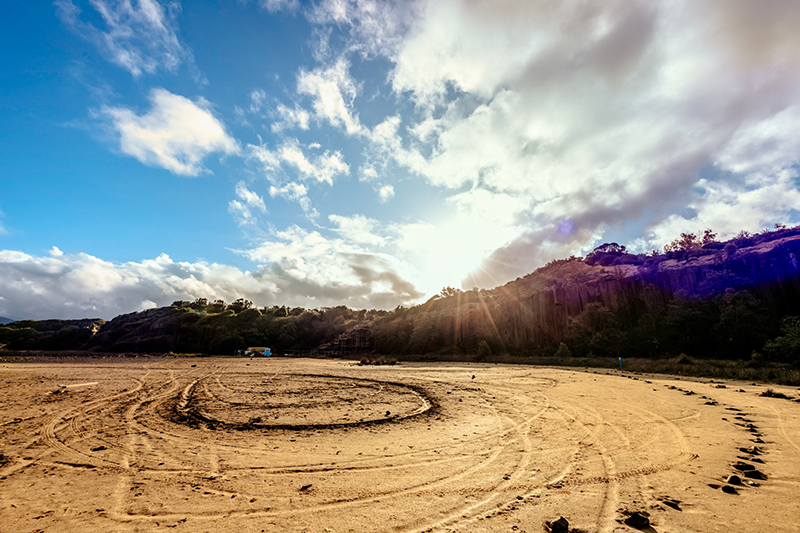
Emma Davis, CLG Instructor – SS 1/250 f/13 ISO 160 – Focal length 16mm
Tripod
You can capture a sunset without a tripod, if you use a combination of a wide aperture (low f stop value eg. f/2.8), fast shutter speed (minimum 1/50) and an ISO to balance.
But if you want to capture effects that need a slow shutter speed (eg. silky water or moving clouds), you’ll need a tripod. Slow shutter speeds capture camera shake and unwanted blur when you shoot handheld and you definitely want to avoid that at all costs.
If you don’t have a tripod look for locations with a flat surface where you can safely rest your camera and still frame a great composition. But if you want to buy a tripod (and you’re overwhelmed with choice!)… the article below has a great tripod buying guide.
Related: Landscape Photography Gear Guide
Remote Release
Even if you’re using a tripod, you can still get motion blur in your photo when you press the shutter button if you’re using a very slow shutter speed.
So you need to release your shutter remotely and you can do that in few ways:
- Use the camera’s inbuilt timer
- Shutter remote (buy inexpensively from Amazon, Ebay or camera stores)
- Phone apps
5. How to Choose Your Settings for Sunsets
ISO
Start with a minimum aperture and adjust only if you need more light after you’ve set your shutter speed and aperture.
Shutter Speed
First up we’ll assume you just want to capture beautiful colour in the sky, without any of the creative effects you can acheive using slow shutter speeds.
Set your shutter speed to anything from 1/60 and up, and the only reason to adjust it will be to let in or block out light.
Aperture
Generally speaking when you’re capturing a landscape you want to get everything in focus from front to back and this means using narrow apertures of around f/14 – f/32. But when it comes to sunsets, you can be a lot more flexible with depth of field, as most of the foreground and surroundings will be too dark to see any detail you’ve captured.
So be guided by your shutter speed. Set your aperture to f/5.6 and take a test shot. If your exposure isn’t what you want, open it up for more light (smaller f stop value) or close it down for less light (higher f stop value). Or you can adjust your shutter speed – slower for more light, faster for less light. Just don’t go slower than 1/50 or you’ll need a tripod.
If you can’t get enough light in your exposure once your shutter speed and aperture is exactly where you need it without compromising your vision or other technicalities, then you can start increasing your ISO to capture more light.
Bracketing Basics
You might have heard about bracketing and wondered what it is. It’s like taking three shots in one go – normal, darker, and brighter.
Do you need it?
I would say if you’re experienced enough in manual mode to review your image and change settings really fast, then you don’t need it. If you’re new to manual mode, it’s like a safety net for getting that perfect exposure.
If you want to try it but you’re not sure how, it will be in your menu settings. If you can’t find in search for bracketing in your user guide as it will vary from camera to camera.
But here’s the other thing – maybe your experience suggests you don’t need bracketing. But what if it helped you create a shot you might never have tried otherwise?
Bracketing will create 3 different exposures and potentially 3 different effects. And in that set of 3 images, you might find an exposure or effect you’d never have considered trying because it’s outside the box of what you imagined would work for the scene in front of you. And what if… you create magic?
White Balance
For most genres and situations, we recommend auto white balance because most cameras get it right every time, and it’s an easy tweak in editing if it’s not quite right.
But when you’re capturing a sunset, auto white balance can turn that beautiful warm light into blue, consistently and considerably. Yikes! Why put yourself through that for an entire series of images if you don’t need to?
If you’re capturing a scene with golden light, switch to cloudy settings to retain that warm vibe that’s making your heart sing. If you’re capturing a moody scene with cool light and it’s a big feature of your vision, switch to tungsten so that it doesn’t try to correct the blue tones in the scene.
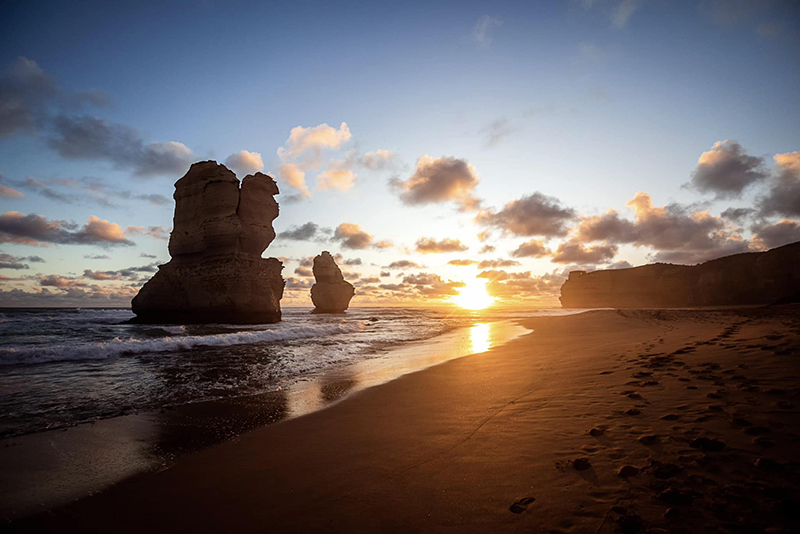
Deb Signorelli, CLG Advanced Grad – use the cloudy white balance setting to retain the warm light
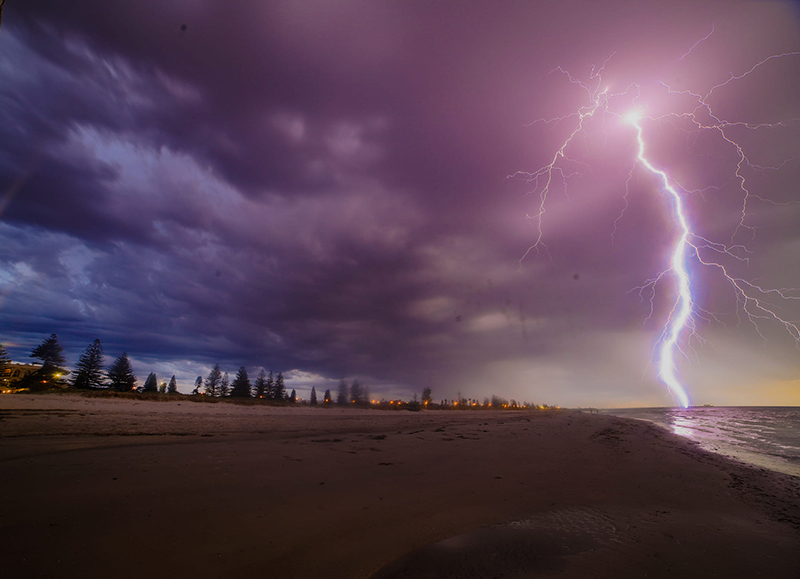
Jypsie Cronan, Advanced Grad – use the tungsten white balance setting to retain cool light
6. How to Capture Magical Colour
It can be tempting to aim for a ‘correct’ exposure for all our shots when we’re starting out in photography. And by that I mean a photo with just the right balance of dark and light tones, like this shot. Not too dark, not too bright, but just right… for this photo.
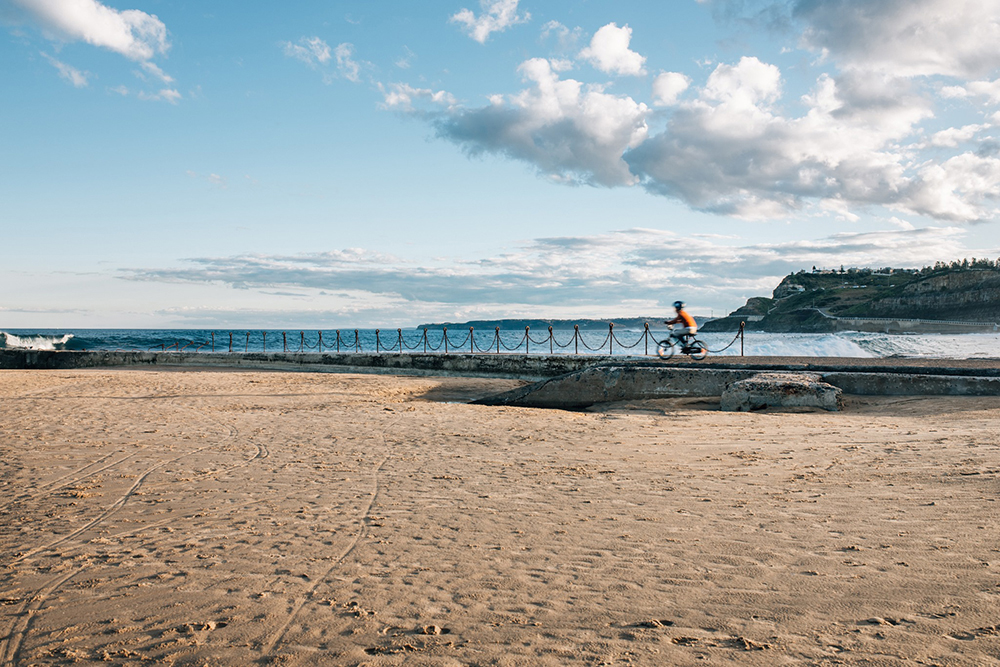
Kirsty Nealon, Advanced Grad
But before you start taking those test shots, you need to think about this…
The hero of a sunset is the golden glow of the sun, and the incredible colours that appear in the sky in those last moments… and this is what you should be aiming to expose perfectly.
To make the most of those enchanting colors, expose darker than you normally would. Take test shots and if you don’t see beautiful colour in the sky, adjust to expose a little darker until you get something you’re happy with.
You’ll need to work fast, remember that window is small!
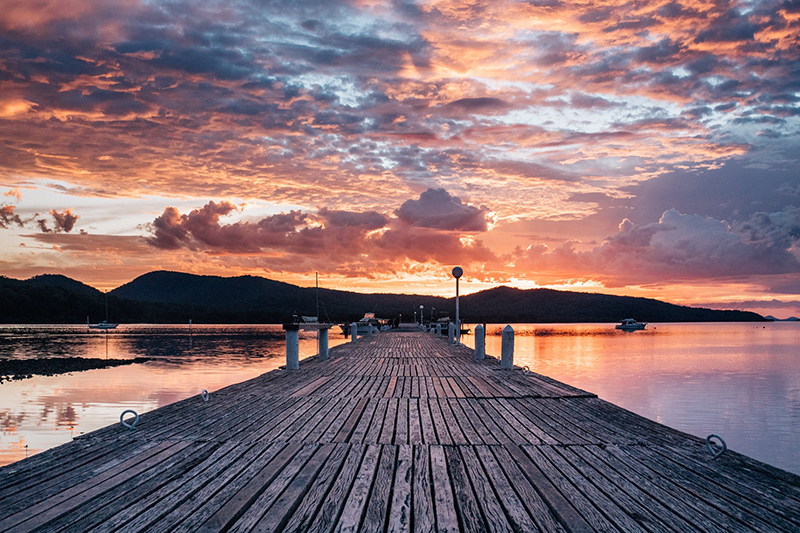
Kirsty Nealon, Advanced Grad – expose darker to capture colour in the sky
EV Meter Misconceptions
If you like to use your EV meter to help you choose your initial settings, you need to understand its limitations in low light.
In most situations your camera’s EV meter is a great guide. But it can get confused by low light, because its job is to get an exposure that is not too dark, and not too bright. So it will read the light as being too dark, and try to expose lighter to compensate. And in doing so, you’ll lose all that glorious colour.
You can still use your EV meter but aim for it to sit to the left of centre. In other words, you’ll be tricking it into exposing a lot darker than it wants to.
Highlight Warning
As well as capturing colour, you also want to expose so that any white left in the sky is now blown out. So turn on your camera’s highights warning and aim to reduce the blinkies. A tiny little blown out white is ok if you’re attemting to balance it with not underexposing too much, but big expanses of blinkies are telling you the scene is overexposed.
7. How to Capture Creative Effects
When we’re starting out in photography, our natural inclination is to always use fast shutter speeds to avoid any unwanted blur. But when it comes to landscape photography, shutter speed is a fantastic tool for capturing photos with big wow factor.
Water and clouds are two of the most common elements we can play with.
Use a fast shutter speed (1/500 or faster) to freeze action, like waves crashing or a foamy surf. For larger waves in a wild surf you might need a very fast shutter speed of around 1000. This was captured at SS 1600 only as there was an abundance of light, however the same effect could have been achieved with a slower shutter speed.
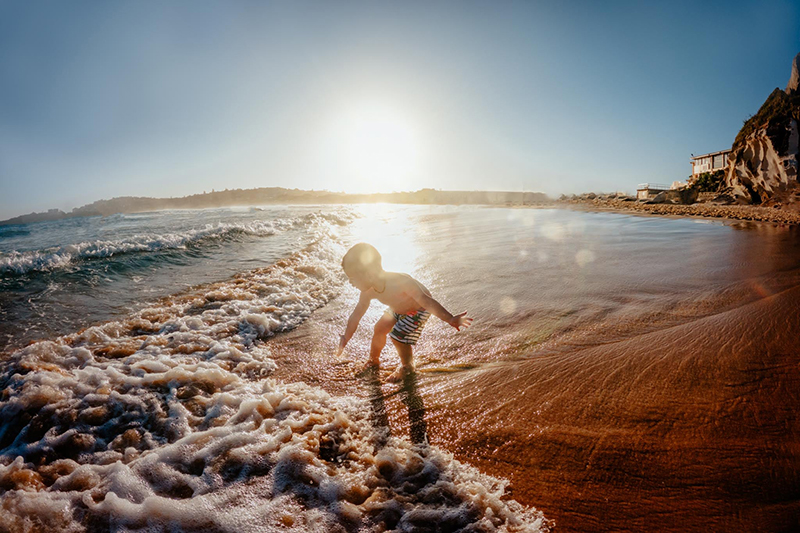
Emma Davis, CLG Instructor – SS 1600 f/2.5 ISO 100
Try around 1/2 sec if you want to capture a silky effect in moving water. You’ll need to experiment – the faster the water is moving, the slower your shutter speed will need to create a smooth effect.
Go slower again to give still water a surreal, dreamy effect like this.
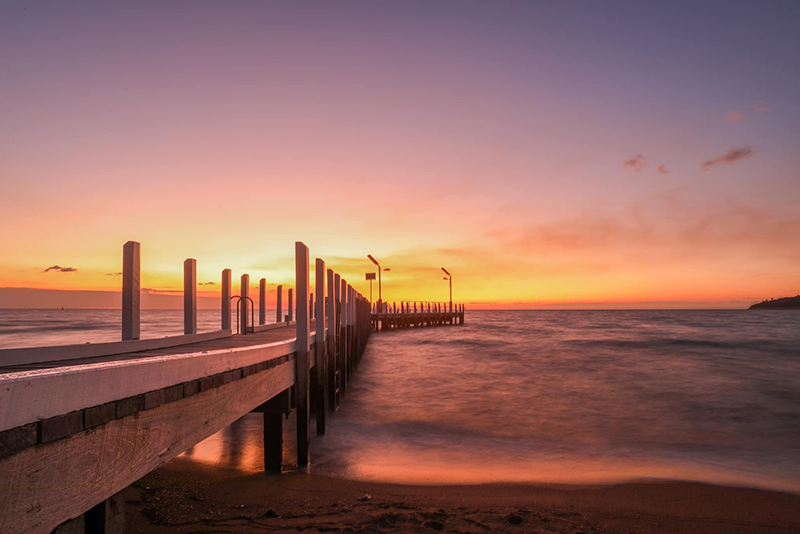
Floss Butterworth, Advanced Grad – SS 6 Sec f/22 ISO 100
If you’re capturing a sunset on a cold foggy night, give the fog a silky effect with a slow shutter speed.
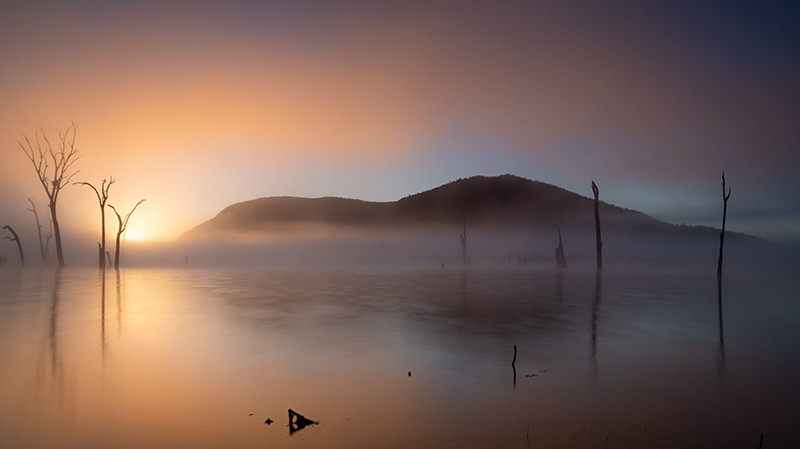
Lisa Weller, Advanced Grad – SS 4 sec f/4 ISO 200
If your location is somewhere other than water, eg. a beautiful open rural field with wild flowers, you might need to freeze the motion of anything being moved by a breeze. In that instance, you’d want a minimum of 1/250, depending on the speed of motion of the element you need to freeze.
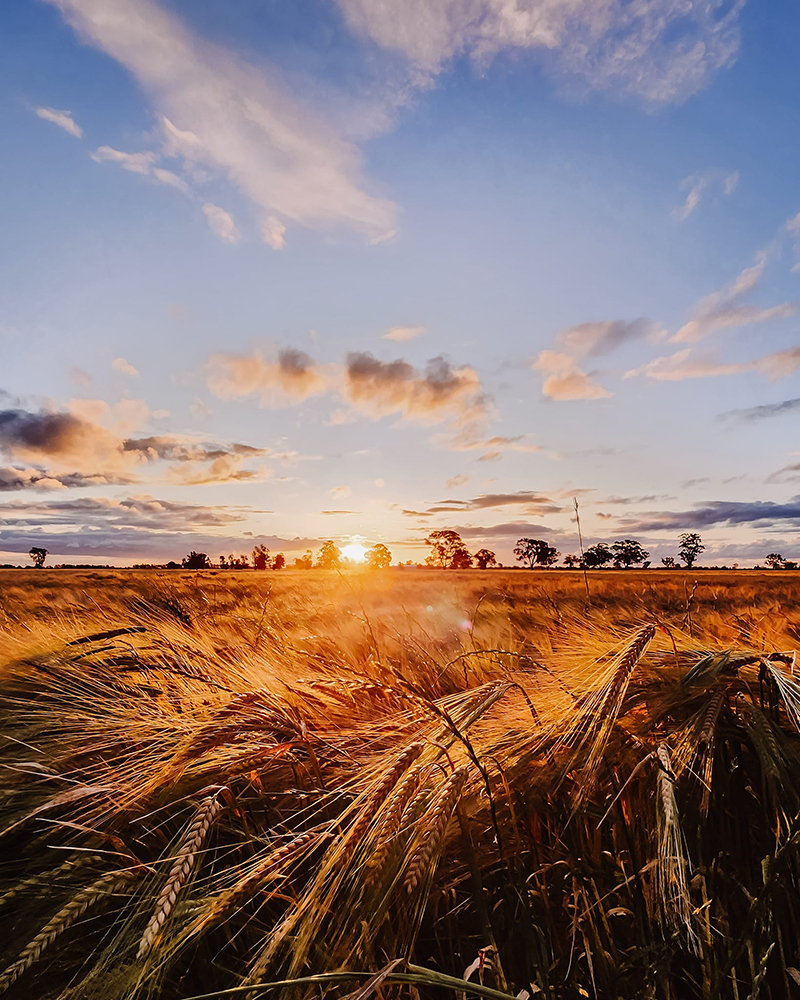
Bec Nave, Advanced Grad
8. Capturing True Beauty
It can be challenging to capture the true beauty of scenes as we see them, and often we can’t put our finger on why we didn’t quite nail it. However, just a few insider tips will empower you to effectively convey your visual experiences.
Rule of Thirds
Imagine the scene divided into a tic-tac-toe grid. Frame the sky so that it takes up half to 2/3rds of the frame. If you have foreground elements, they should reach up to at least the 1/3rd line of the grid to feel intentionally included and balanced. This shot below is a great example of this.
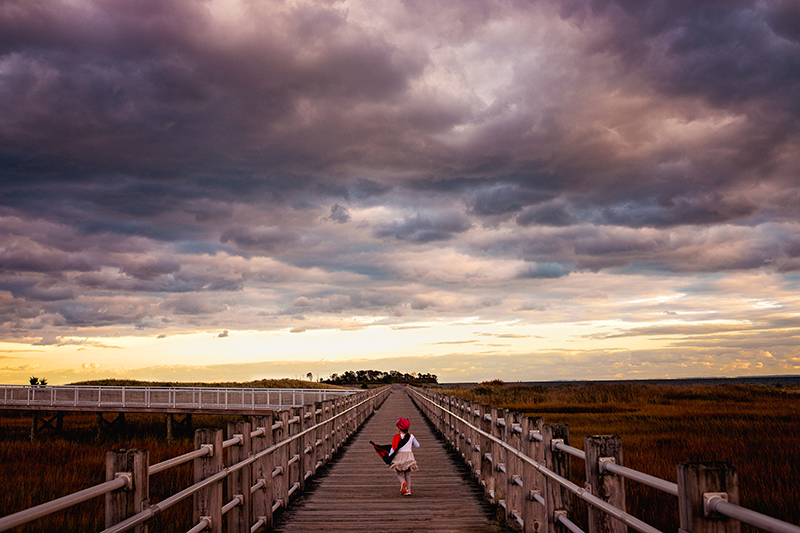
Elizabeth Marie, Advanced Grad
Foreground elements coming higher into the frame is ok too. In this shot below Betsy got down low and intentionally framed her foreground elements to reach up high and allowed the sunset to filter through. The sunset is still the hero, but the key word here is “intentional”. In other words, have a purpose and make sure it works.
That being said… always give it a go! You never know what magic you’ll create when you just shoot.
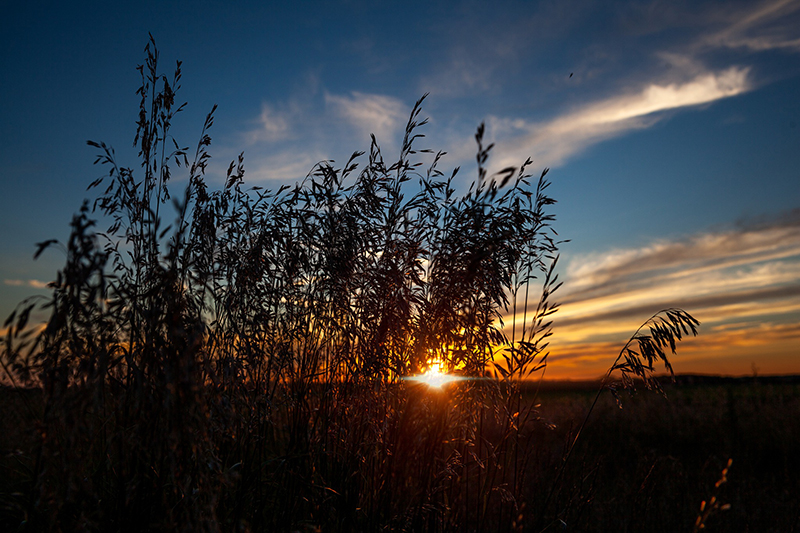
Betsy Cease, CLG Advanced Grad
Negative Space
When capturing sunset photos negative space is the most powerful compositional tool in your kit. It’s an effective way to showcase the vastness of a scene, and gives you a huge canvas to capture as much sky and colour as possible.
When you include some foreground elements in the frame with a lot of negative space, ensure the balance is harmonious. Over time you’ll develop a natural eye for when it’s working and whenit’s not. But until then, two of the easiest ways to ensure harmony in your arrangement of the elements is:
- Make sure the extra elements don’t look accidentally included or cut off at the edge of the frame; and
- Allow them flow a smidge over the 1/3rd line either horizontial or vertically (or both).
Related: How to Use Negative Space Effectively
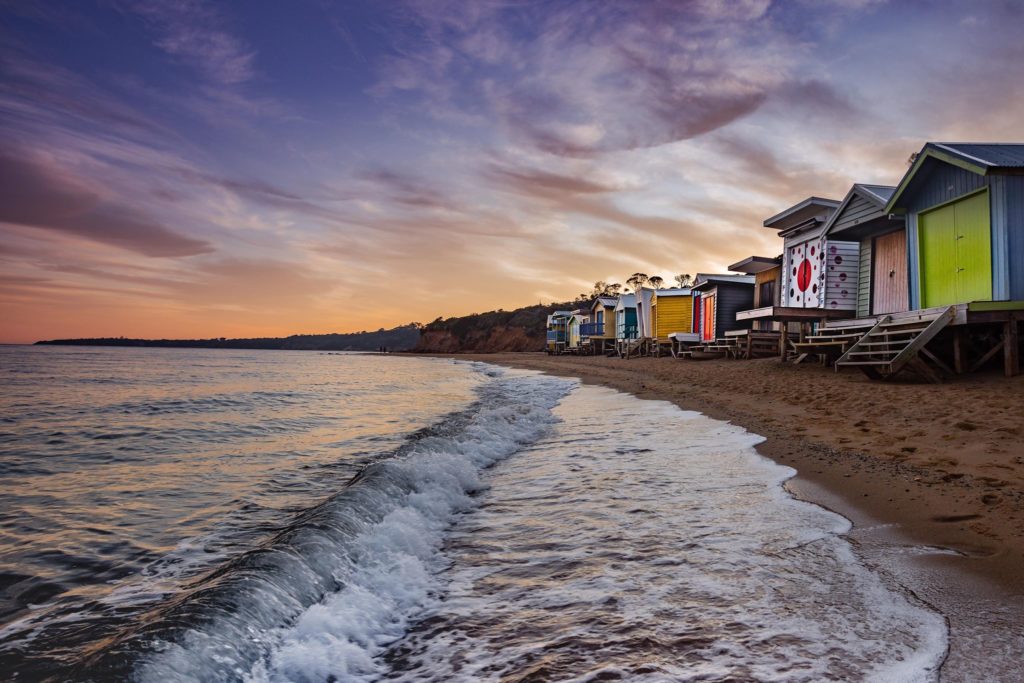
Floss Butterworth, Advanced Grad
Go Wide or Go Home!
We mentioned earlier that a wide angle lens is the most popular for landscapes and sunset photos. Well, focal length also happens to be one of those things you can’t quite put your finger on when your photos don’t match what you’re seeing.
Use the widest angle you have available to you and use that distortion to your advantage! This article below takes a deep dive into how to use wide angle lenses to create images with big wow factor.
Related: Wide Angle Fun

Bec Nave, CLG Advanced Grad
Look for Reflections
Reflections are an easy way to elevate any landscape photo, and sunset photos are no different. A really dynamic way to include them if possible is to look for the lght of the sunset reflecting in a body of water and capture that.
Very early in the day is a great time for perfectly sharp reflections when the water is at its most still.

Lisa Weller, Advanced Grad
Foreground Elements are Supporting Actors
Excluding foreground elements is a common mistake that beginners to landsape photography often make. They attempt to frame out anything that isn’t their main focal point, and end up with a photo that’s not quite right and they’re not sure why.
Foreground elements add context and scale, plus depth and interest to the scene and in turn, creates a fantastic shot. Think of those extra elements as supporting actors to the star of your shot and in most instances your star needs them in order to shine.
The list of elements that can work as foreground elements is endless, but here’s a few:
- Trees
- Grasses
- Rocks
- Birds and other wildlife
- Waves
- Leading lines
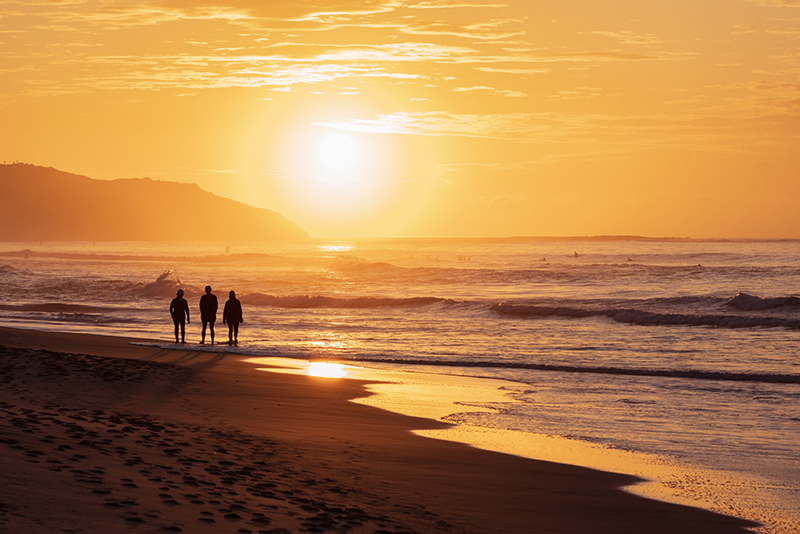
Marie Horvath, Enthusiast Grad – the curved shoreline acts as a leading line
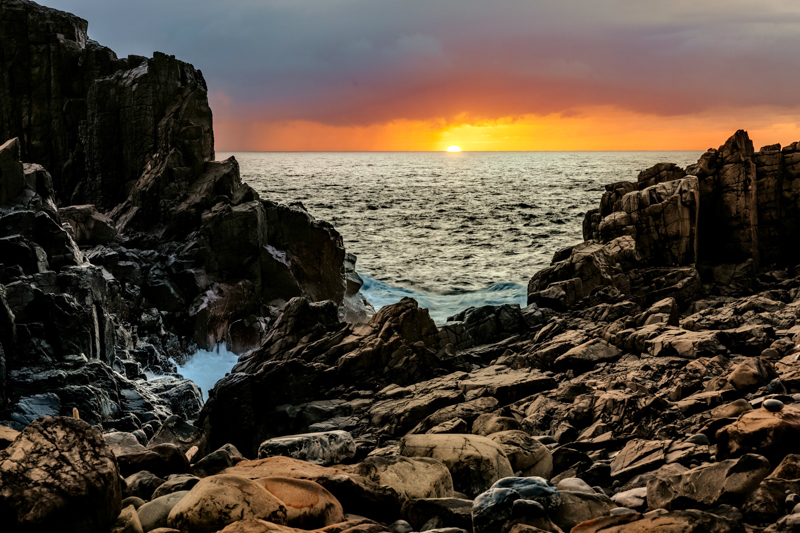
Emma Davis, CLG Instructor – rocks and the crash of waves provide textured interest and frame the sunset
You can even include objects such as powerlines and other surburban objects that in the harsh light of day don’t necessarily make an attractive image. But when silhouetted,they provide strong lines that can really complement the scene.
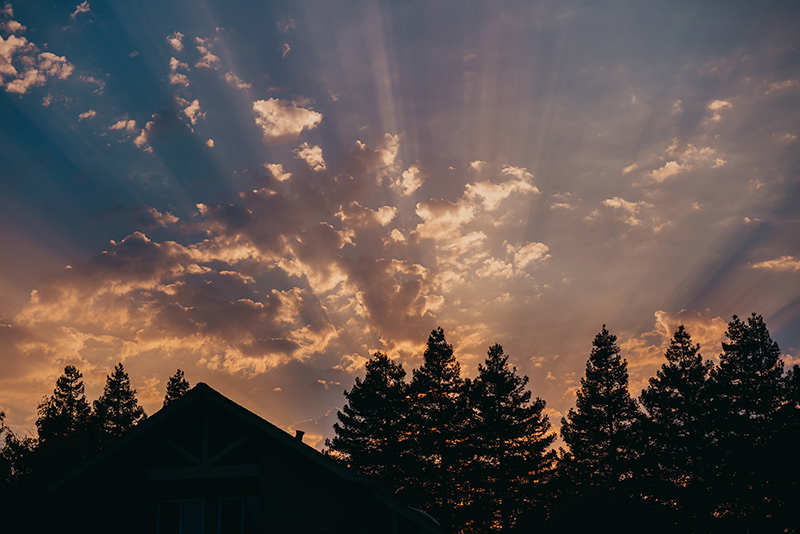
Nicoleta Philpot, Enthusiast Grad – the strong lines and detail of these foreground elements work beautifully in silhouette
Points of Interest
You might ask what’s the difference between a point of interest and a foreground element?
Firstly, a point of interest can work as a foreground element as well. But to me the main difference is a point of interest is included more intentionally as a focal point, and is intended to draw you eye to it. Whereas foreground elements are included only to add depth, texture, layers, context… and a little interest.
Objects that make great focal points in sunset images (note this list is by no means exhaustive!).
- Lighthouse
- Boats
- Windmill
- Jetty or pier
- People
- Animals
- Trees
- City skyline
- Reflections
- Movement
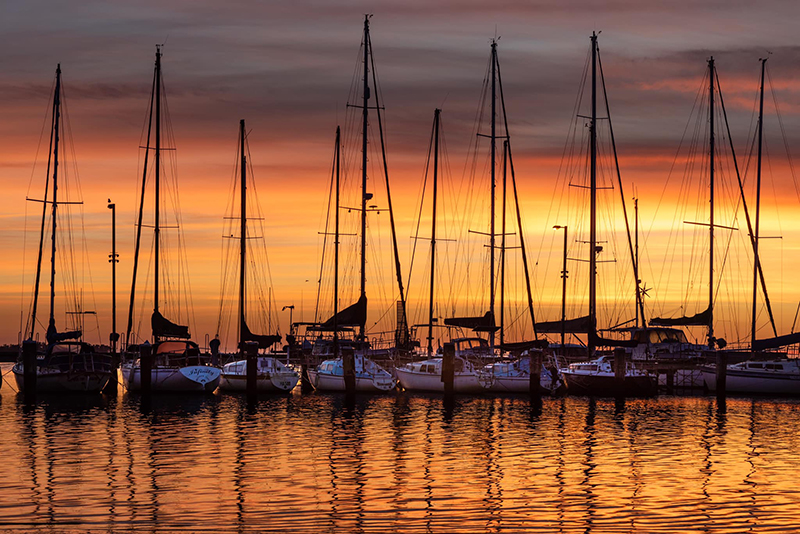
Floss Butterworth, Advanced Grad – boats and reflections provide a point of interest againstthe backdrop of that hero sky
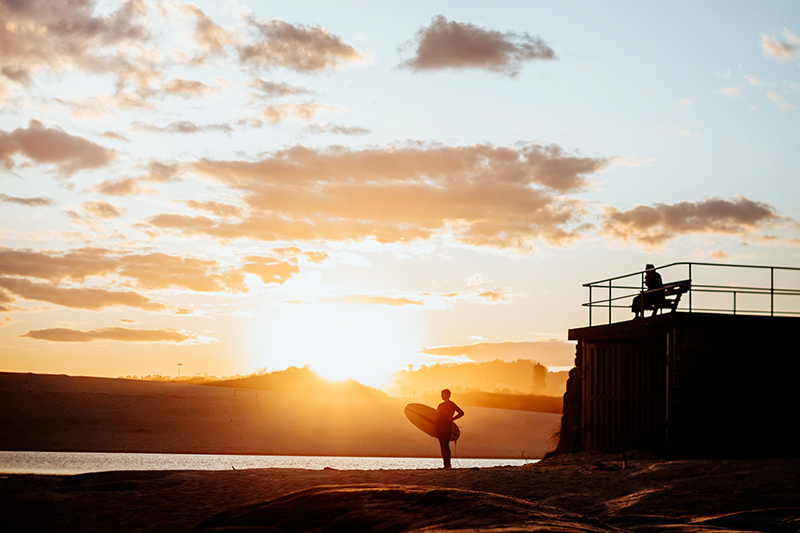
Emma Davis, CLG Instructor – we love the balance of elements in this glorious sunset photo

Bec Nave, Advanced Grad – an unexpected but powerful inclusion of a tractor as a point of interest against this magnificent sky
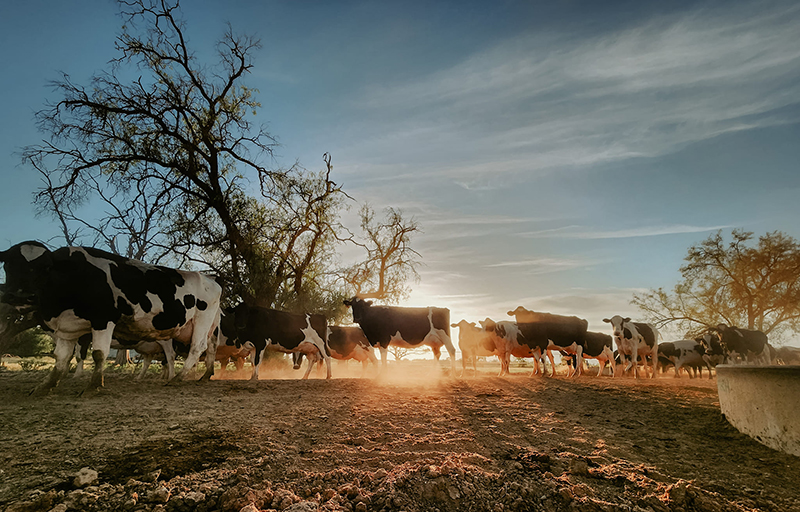
Bec Nave, Advanced Grad – farm animals as a point of interest, with the added bonus of casting shadows in the foreground.
9. Where to Focus
Ok so now you have some great ideas to frame some stunning, wall worthy sunset photos with wow factor… you might be wondering where to focus.
Well that depends on what’s in you frame, and what your aperture is.
If you’re shooting at very narrow apertures to get everything in focus (eg. f/22), you could take the decision out of the equation and simply set your lens to manual focus, turn your focus ring to infinity and take the shot.
Or if you have a focal point in the scene, focus on that.
Lastly if the entire scene is your subject and you have no additional focal point, find something in the middle ground and lock focus there.
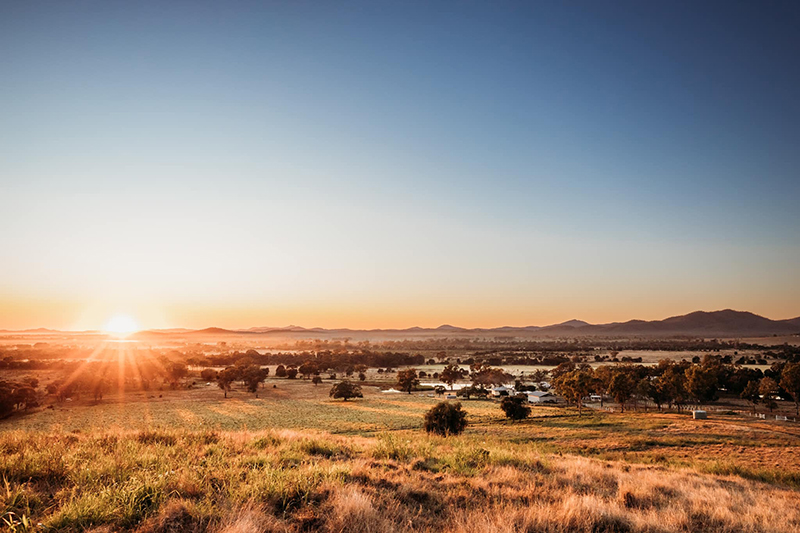
Kirsty Nealon, Advanced Grad – when the entire scene is your subject and you have no intentional points of focal interest, lock focus on something in the middle ground.
10. Sunset Silhouettes
Silhouette photos are fun to create when you’re capturing sunsets. They can also work as your foreground element.
If you want to try it, we have an article that teaches you how to set up, the exact settings you need and what looks best as a silhouette subject.
Related: Take Perfect Sunset Silhouette Photos
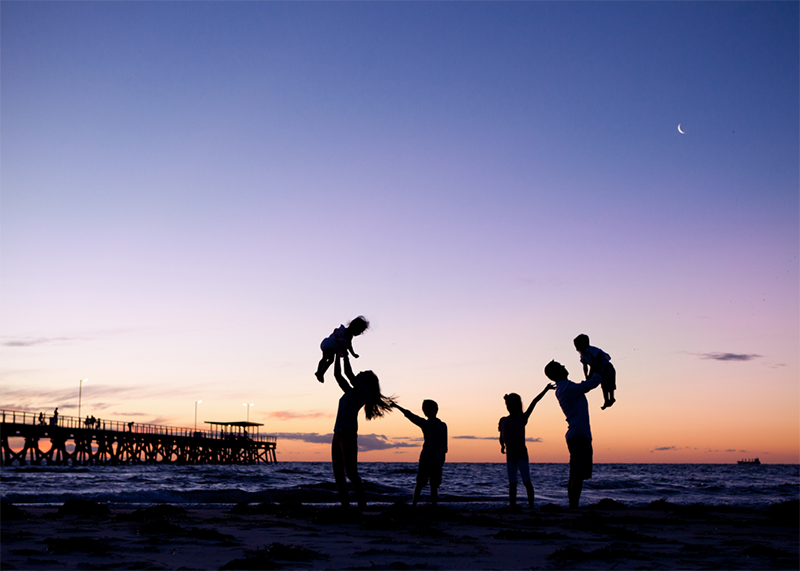
Louise Glendon, CLG
Join my new workshop and learn How to Shoot Pro-Quality Photos With Your DSLR… and it’s totally FREE to join! Register here…

Leave a Reply Cancel reply
PRIVACY POLICY & SITE TERMS AND CONDITONS
CLICK LOVE GROW ™ Pty Ltd - COPYRIGHT 2024 ©
x
Join Now
Enter your info below to join the challenge!
Want a friendly reminder when I go live?
Pop in your number and I’ll shoot you a text.
* We will send text reminders for our live calls during the challenge! Reply ‘STOP’ to end or ‘HELP’ for help.
We promise not to ever share your details with anyone or send you spam! Check our privacy policy and terms of service.
Be the first to comment