Travel & Landscape Photography – A Beginners Guide
I love travel and landscape photography, but when it comes to shooting those genres myself… let’s just say it’s lucky I’m good at portraits!
So when we wanted to write an in depth guide to travel photography for beginners, we turned to Veraine Spiller, arguably our most travelled CLG grad. That experience shows in travel photography so beautiful it will make the even most dedicate homebody want to pack a bag and hit the road!
The result of this collab is the single most comprehensive guide to travel photography you’ll ever need, covering exactly what goes into travel and landscape photos that have wow factor. Follow these super easy and practical steps and you will be taking your own stunning travel photos in no time!
Over to you Veraine…
Over the past 12 years I’ve traveled extensively and get such a thrill at seeing new places, and being able to capture beautiful postcard-like photos. I’m very happy to share my tips to help you as you venture into travel photography.
1. Composition
Composition is critical in landscape and travel photography, so don’t rush it! Take your time, walk around and try to envision how you want your photo to look. The following steps are the first things to consider, and will help you make mindful choices that will lay the foundation for a travel photo that showcases your subject in a way that is engaging and dynamic:
- Choose a focal point
- Look for foreground elements to include
- Look for distractions to exclude
Choose a Focal Point
Choosing your focal point is your first decision, and everything else you include should serve at least one of the following purposes:
- Frame your focal point
- Add context
- Tell a story
- Add depth
- Add interest
- Convey size and scale
- Work as a leading line
- Or all of the above!
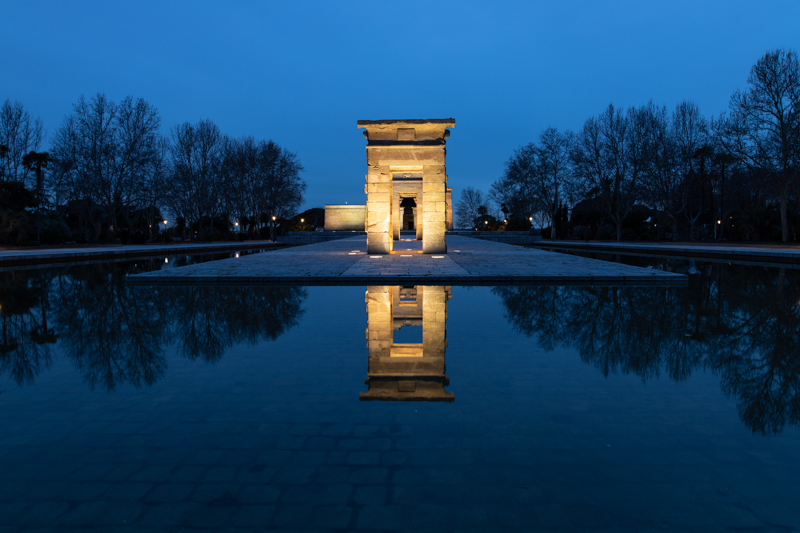
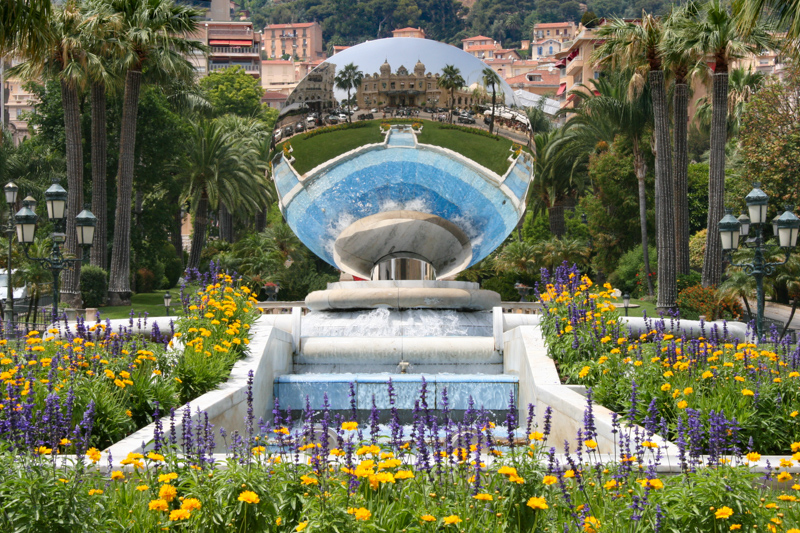
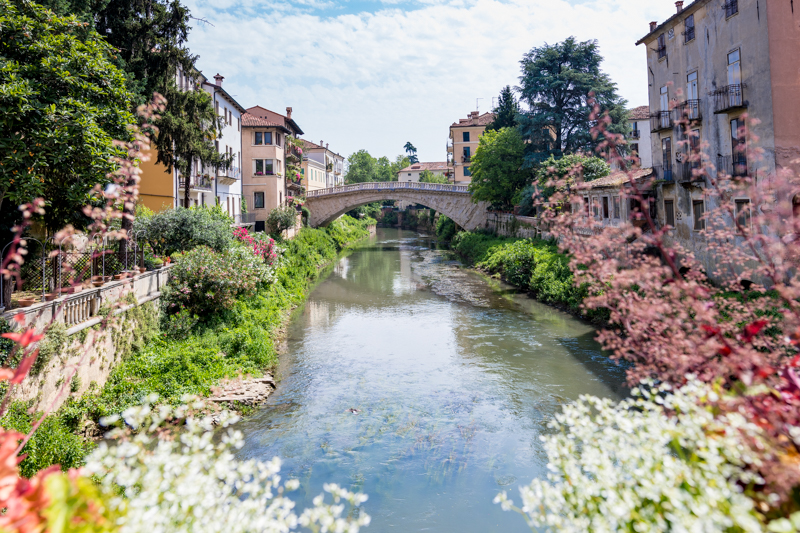
Once you decide your focal point, position it using the ‘rule of thirds’ if possible. That said, there are times when centering your focal point will work.
Related: When to Break the Rule of Thirds
In the following two images, centering the subject worked due to the symmetry of the subject and the scene.
Include Foreground Elements
Then I look for something interesting to include in the foreground.
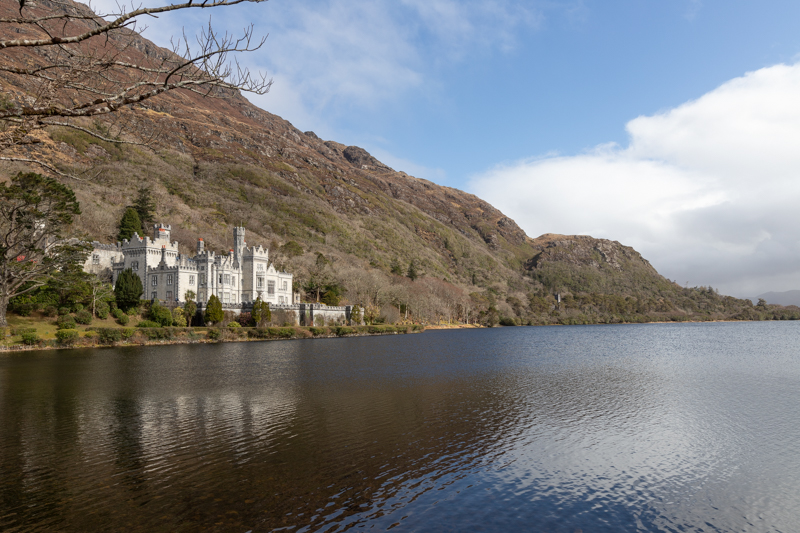
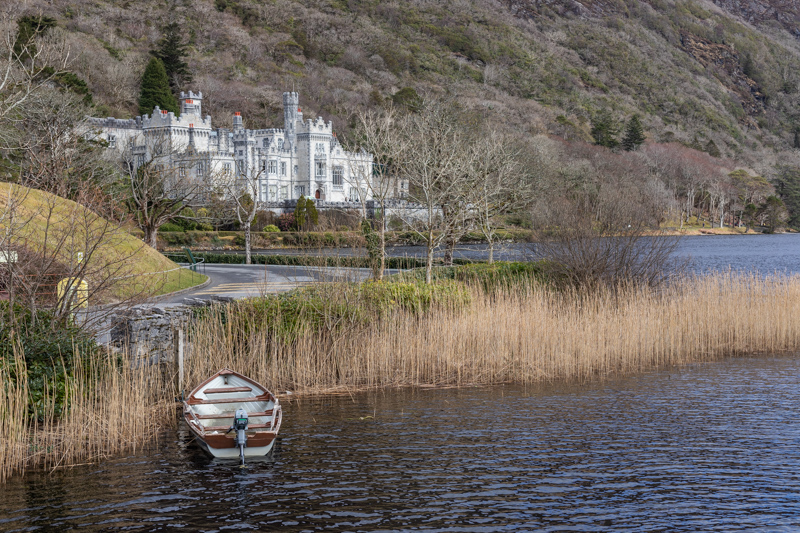
In the following set, the first photo has its merits. It has triangles on the horizon, but it lacks foreground interest apart from the fuzzy reflection. If the lake had been glass-like with a well defined reflection, I think it would have been more successful.
The second photo includes the boat in the foreground which adds a storytelling element. The boat and the grasses add depth, and the path curving around to the left leads the eye to the abbey. The sparse trees in the mid-ground also tell a story as they reflect the time of year this the photo was taken. Lastly the tress on each side of the path frame the abbey in the background.
Distractions
Notice any distracting objects and try to move so they aren’t in the picture or at least minimized. Objects that will clutter up your shot and detract from your subject can include:
- Tourists
- Rubbish bins
- Vehicles including parked vehicles
- Light poles, etc.
Maintain Context
All that said, don’t be too brutal! A common mistake I see people make in travel and landscape photography is attempting to completely isolate the focal point, because they think the surrounding elements will be viewed as clutter.
Sometimes they do this by taking the shot from a position that enables them to easily exclude surrounding element. Other times they do it by by cropping very tightly.
However, often the result is a composition that is less than pleasing. Those elements they’ve framed or cropped out may have added context or depth. And cropping too close can feel unnaturally tight and distort the perspective.
Instead, learn to know which elements you should embrace, that form part of the story, and can serve an essential purpose in the image.
I was so excited to see this little church covered in snow (I live in hot Australia!), so I trudged through knee deep snow to get to it. But after I took the first ‘excited’ photo, I felt it lacked context, was somewhat flat, and closed at the top. What’s more, the surrounding elements as a whole created quite a pretty scene so it was a shame to exclude them.
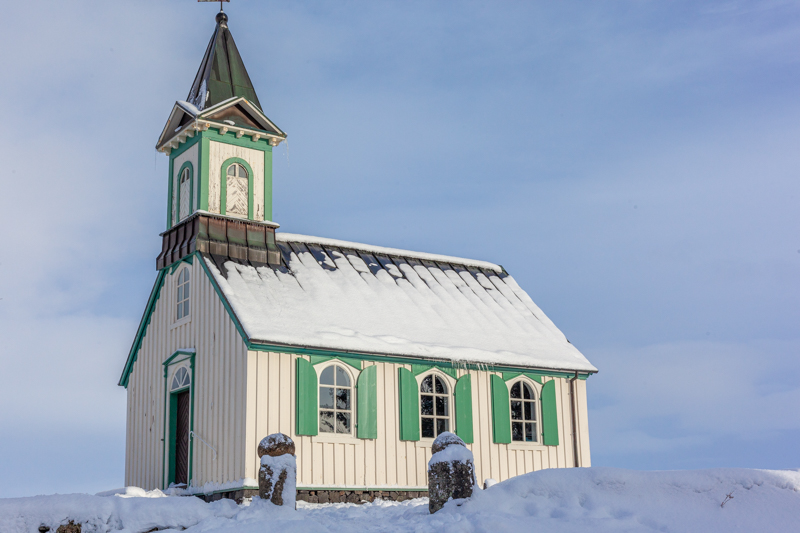
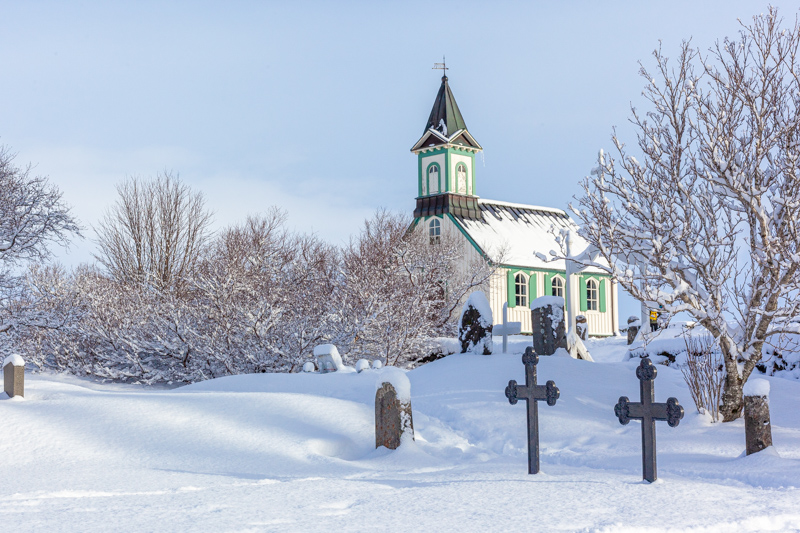
So I thought more about my composition and the look I really wanted, scouted around and zoomed out with my feet (in more deep snow!) and made these compositional choices instead:
- I included the crosses which added depth, context and told a story;
- Including the slope of the land showed the church was higher up than its surroundings which conveyed a sense of importance;
- I left some room around the top of the spire to ensure a more open feel;
- I used the trees to frame the church, and their bare branches added to the mood;
- I waited for the sun to pop out from behind a cloud onto the roof.
2. Compositional Tools
There are a number of compositional tools at your disposal that can help you decide where to place all the elements within the frame. In my photography I predominantly use the following:
- Shapes
- Leading lines
- Framing
- Perspective
- Size & Scale
- Negative Space
Shapes
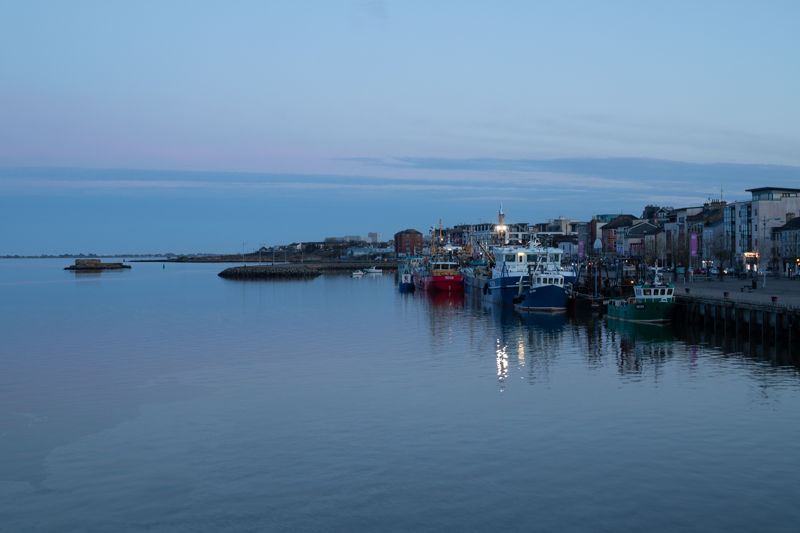
Shapes can create powerful compositions, so look for them in the scene and compose around them. For example you’ll often find triangles where a mountain meets the sky, or where the land juts out to sea.
Leading Lines
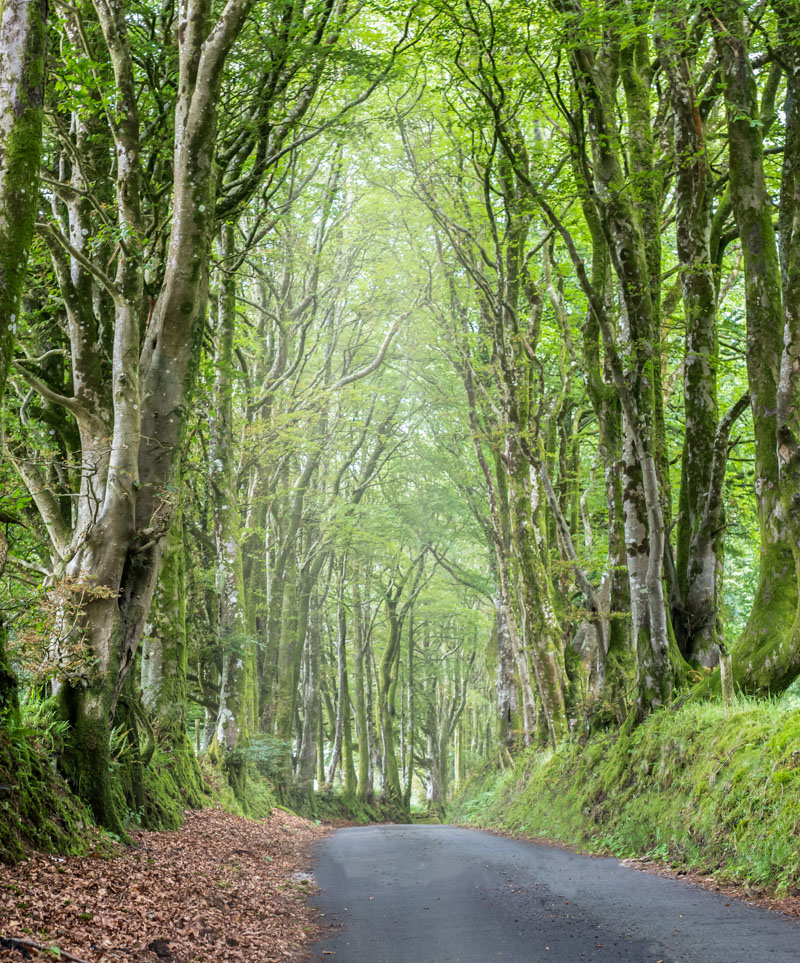
Alternatively, look for leading lines that will guide your viewer through your photo. In this shot, the road works to lead the eye in and around, and adds depth by disappearing into the frame. It’s important to note if the road ended at the edge of the frame it would have led the viewers eye out.
Framing
Framing is one of the strongest compositional tools you can use to bring attention to your subject. Anything can work as a frame and add atmosphere to your travel photos.
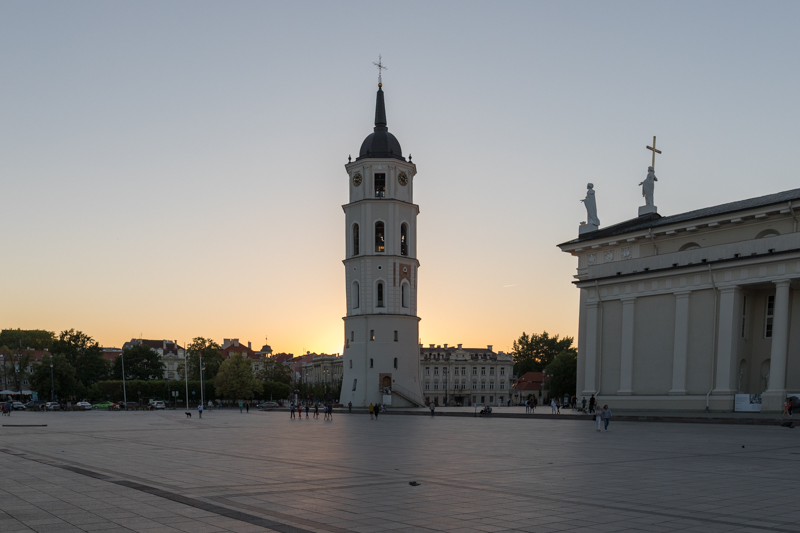
In the first image below, I felt the Belfry was competing with other elements for attention. By moving myself I was able to frame the photo with the overhanging tree and thus exclude the building on the right, ensuring the Belfry was the focus point against the orange sunset.
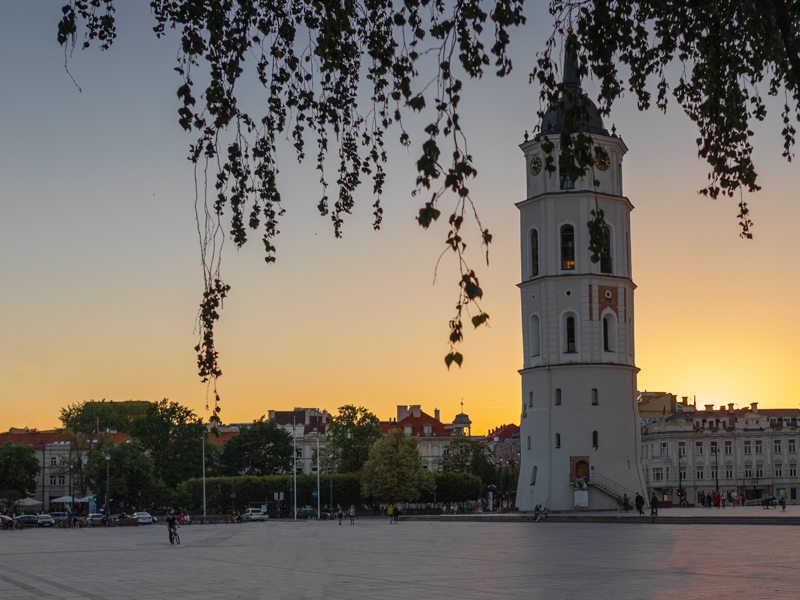
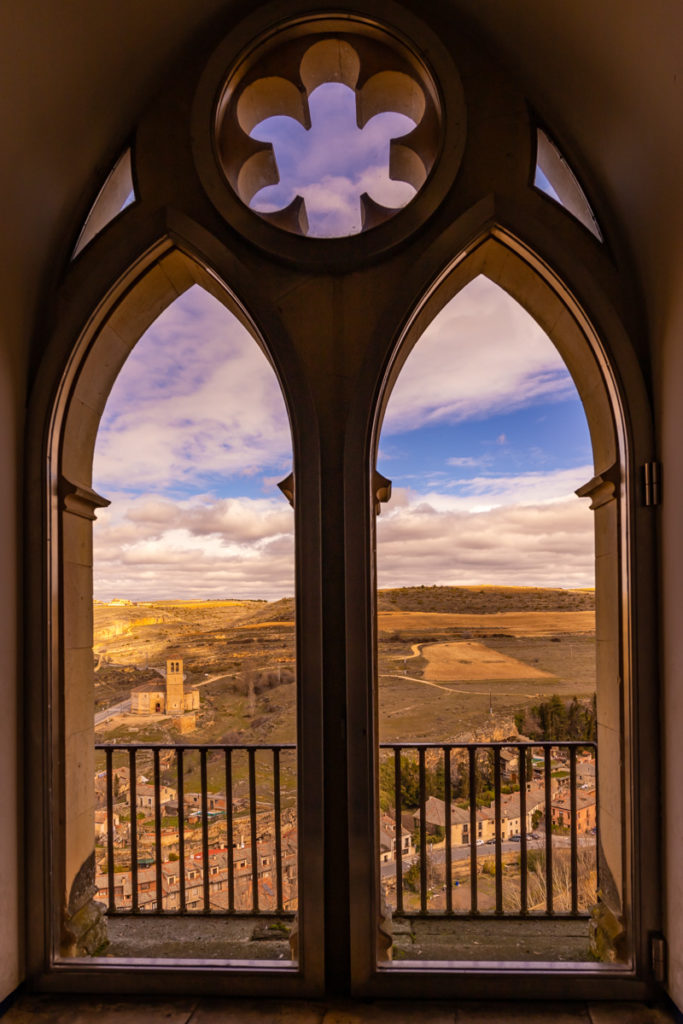
Framing can also give the viewer the feeling they’re ‘peeking’ into the scene, and this is a great way to convey serenity, majesty, or intimacy.
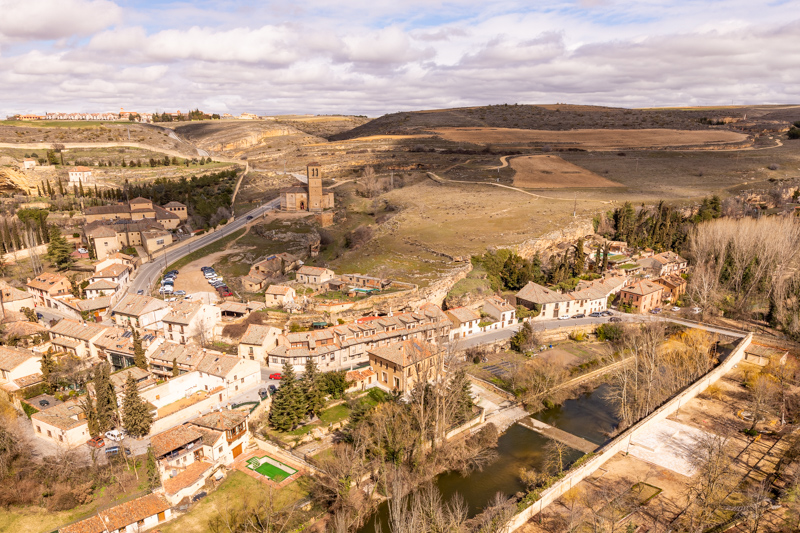
In the shot below, using the window breaks up a flat landscape, and creates creating a much prettier, framed photo.
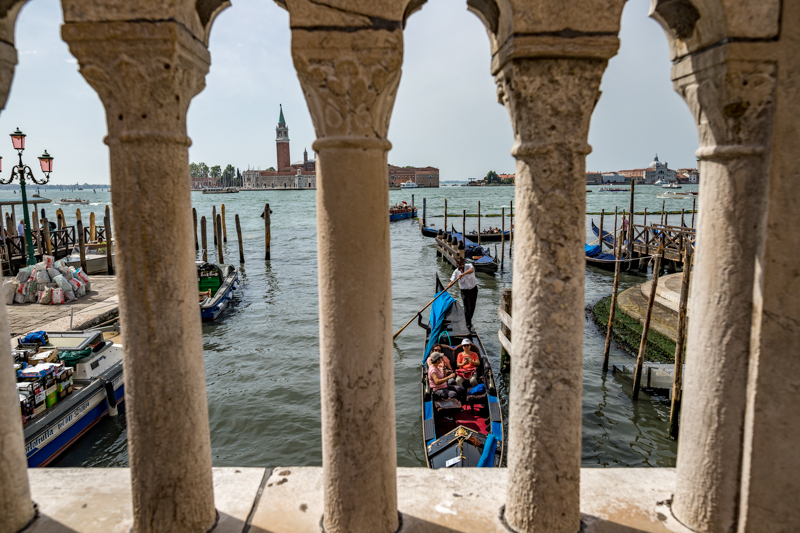
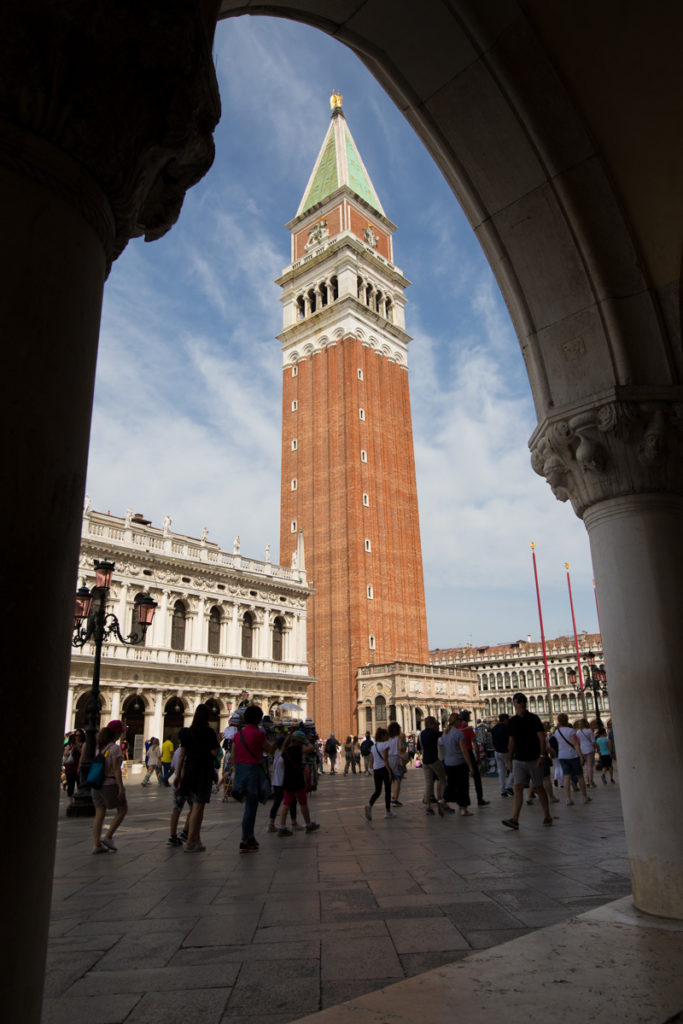
I have hundreds of photos from my four visits to Venice, which means I already have all the typical shots. So trying to find different ways to capture the city is challenging, but framing can create something unique.
Perspective
Take notice of the position you’re taking the photo from – your ‘point of view’. Experiment by standing up high, and squatting down low (I’ve always got grubby knees!) to get different perspectives.
Alternatively, walk up steps that are opposite to get higher, or climb up on rocks (just be careful!).
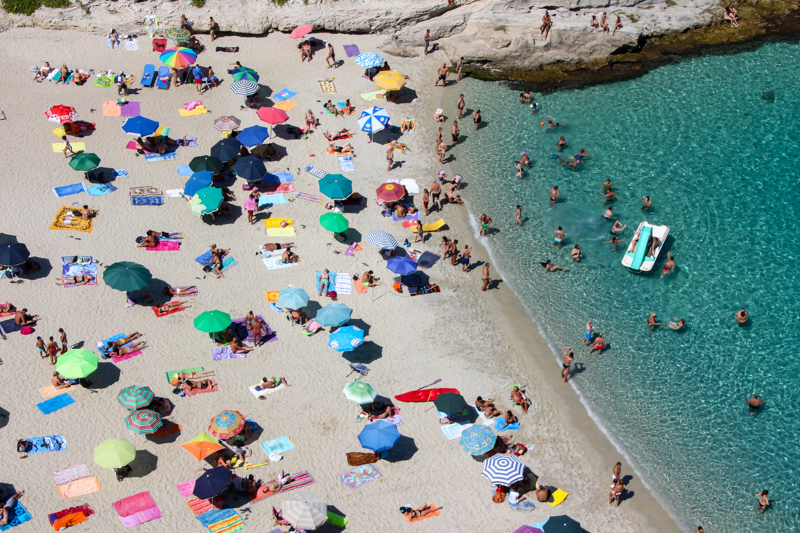
When I’m on a balcony, I like to peer over the edge to see if there is anything interesting I can capture down below.
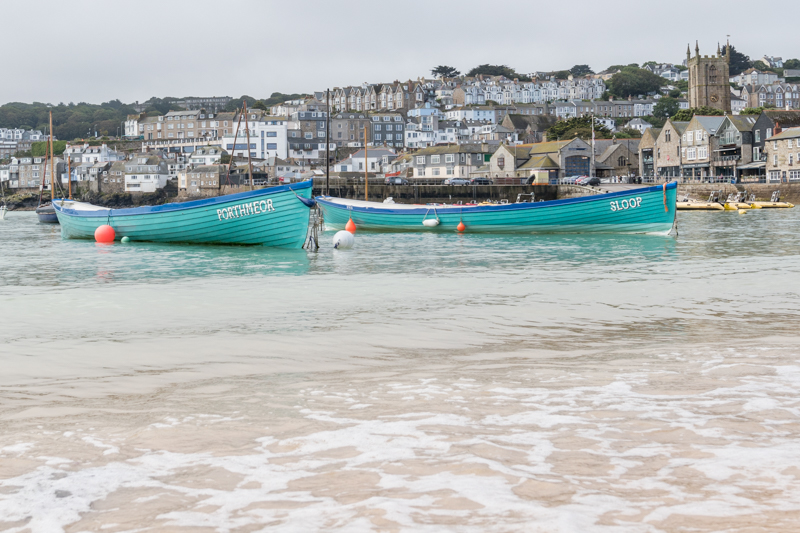
In the image below, the flat grey sky and lack of dynamic light let the shot down. My eye also didn’t know where to settle, as there was no obvious focal point. By going down onto the sand and squatting, I was able to make the following changes and capture a more compelling landscape photo:
- I chose a more obvious focal point of the boats;
- The vibrant colour of the boats balanced out the cold flat light and completely lifted the scene;
- I was able to include less of the sky and more of the sea;
- The small waves and seafoam added a sense of movement and life that was lacking in the original frame.
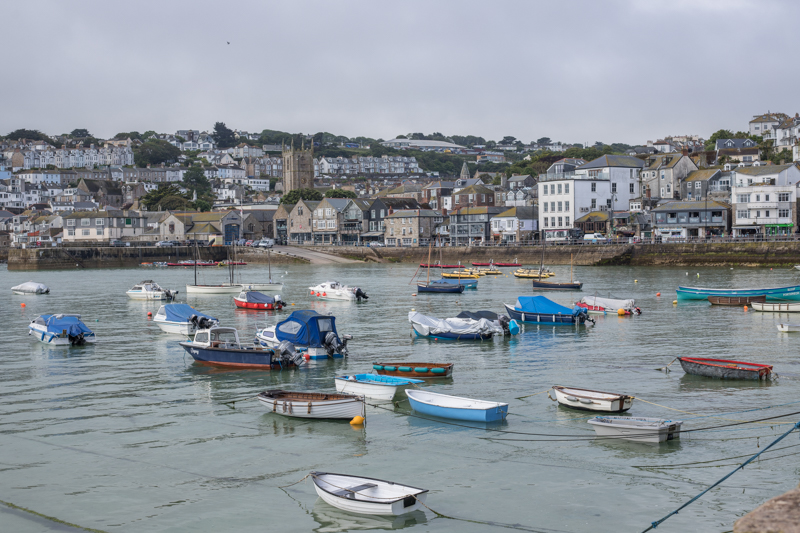
Looking over a balcony can surprise you with a different perspective on a common scene.
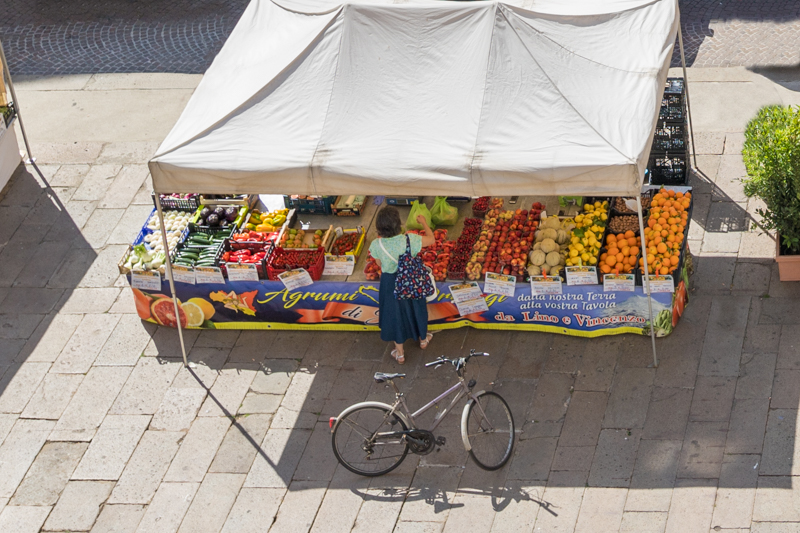
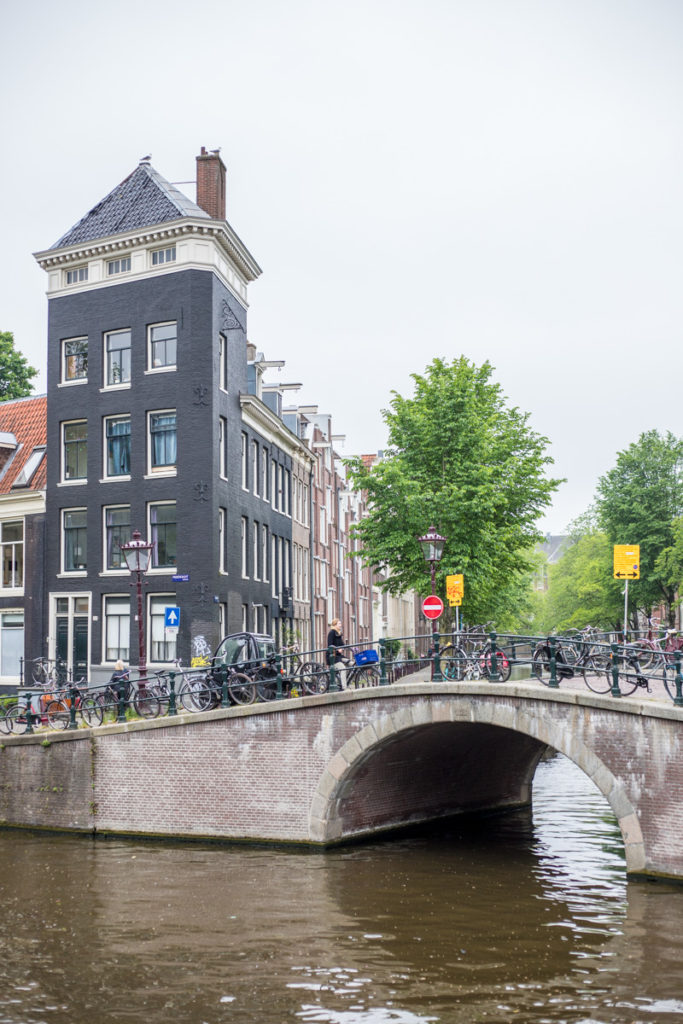
In the second image, waiting for a customer (and bonus bicycle) adds both a human element, interest and depth.
Size & Scale
Sometimes a key highlight of your subject or the environment is the sheer size. But conveying that is often one of the biggest challenges in travel photography – how often have you taken a landscape photo for that reason, but you weren’t able to do it justice?
There are a couple of ways you can overcome this.
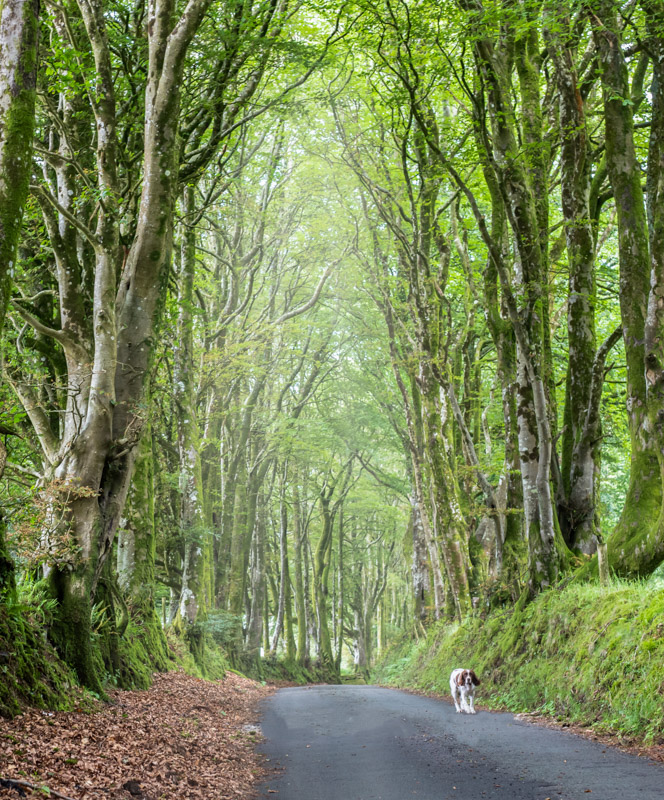
I originally began by framing this shot using the road as a leading line. I framed using the rule of thirds, making it naturally pleasing to the human eye.
And then out of nowhere the dog appeared! I could see instantly that he provided scale, so I took another shot to include him. Along with the portrait orientation, the inclusion of the little dog easily conveys the impressive size of that beautiful canopy of trees and the sense of space.
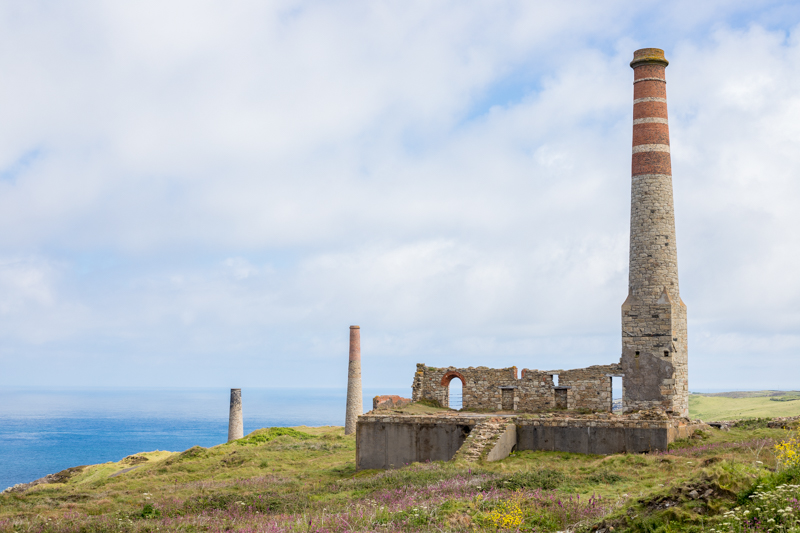
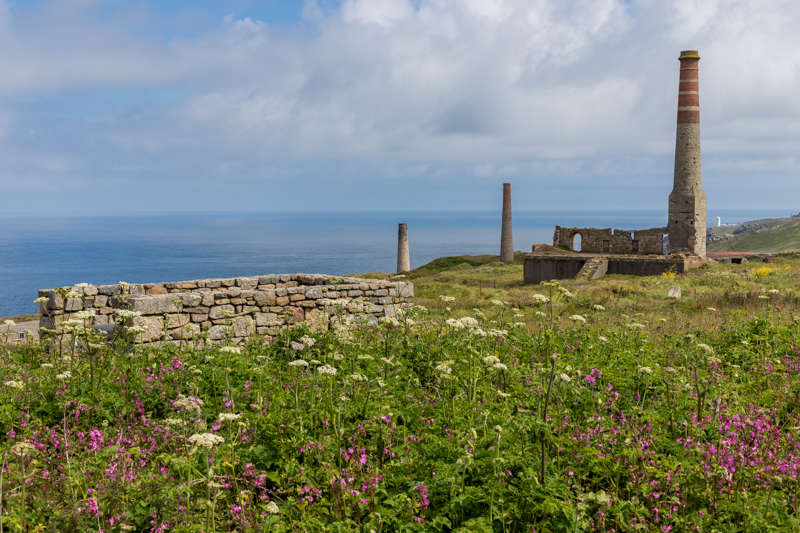
The old chimney stacks from the tin mines perched on the edge of the cliff in this set are a terrific focal point and make quite a dramatic landscape photo. By including more of the foreground and the old wall, the photo is enhanced and adds a sense of depth.
Negative Space
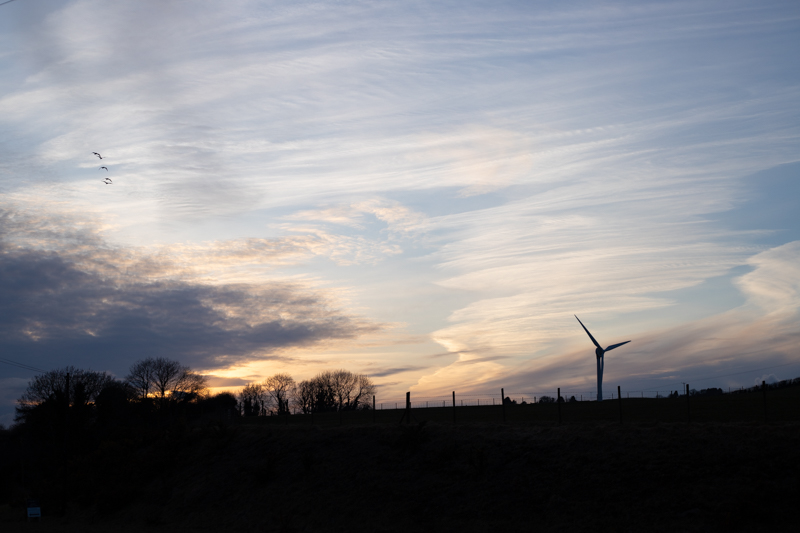
In this shot below, I’ve used negative space to convey size, and the rule of thirds helped me decide where to place the elements. Including the silhouette of the trees and windmill gives context and adds interest. Allowing the sky to take up a good 2/3rds of the frame, easily conveys the beautifully vast open space.
3. Focal Length
I travel with only two lenses, and they’re prime lenses at that (50mm and 24mm). So my travel photography includes frequent zooming with my feet!
When you have a zoom lens, you can do both without needing to move, assuming you’ve already scoped out the best position to shoot from. But regardless of whether you use a prime or zoom lens, when it comes to focal length I have two decisions to make:
- Whether to include the whole scene or get in close; and
- The look I want to create.
In travel photography sometimes including the whole scene can detract from the subject, especially when there are so many tourists around. At times like that, getting in close is the only way to obtain a good photo.
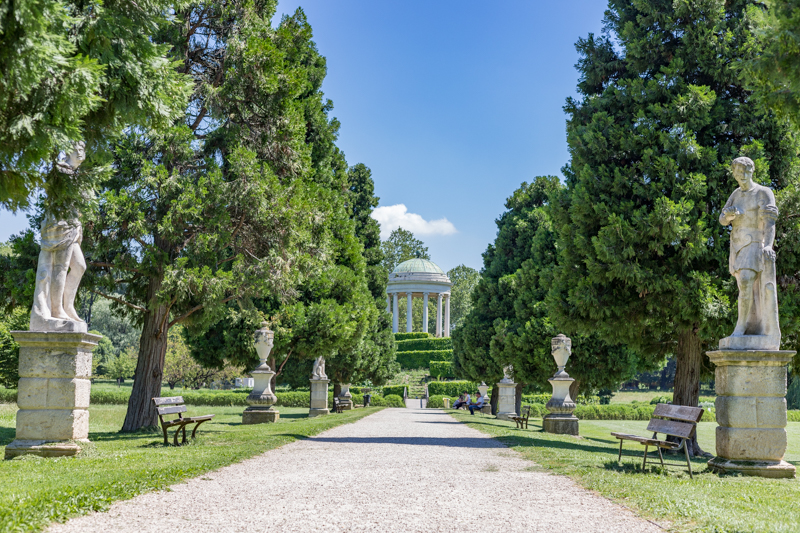
I found this pretty little park and spent some time taking photos from different angles. When I got in close, the photo did not do the gazebo and the scene around it any justice.
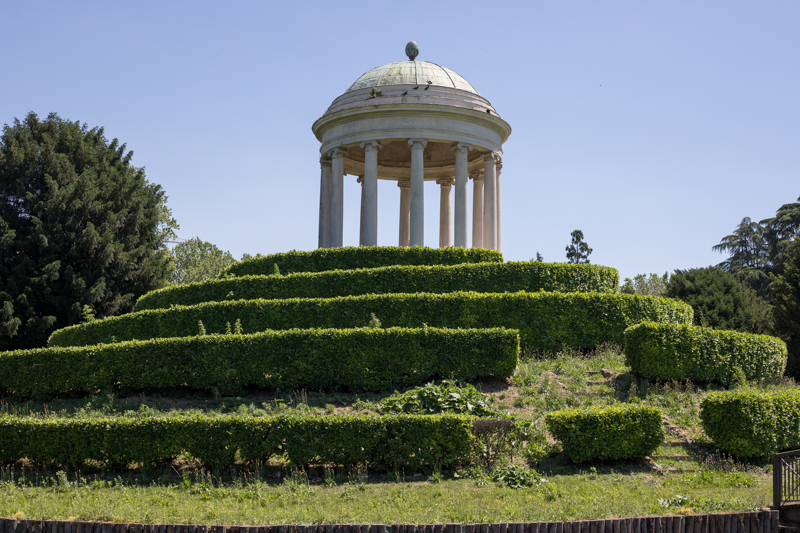
But when I zoomed out (on foot) I was able to include foreground elements that added depth and framed the gazebo. I squatted down and used the path as a leading line to the gazebo. This position also enabled me to include the row of statues, which are ‘so Italian’, and thus add a storytelling element.
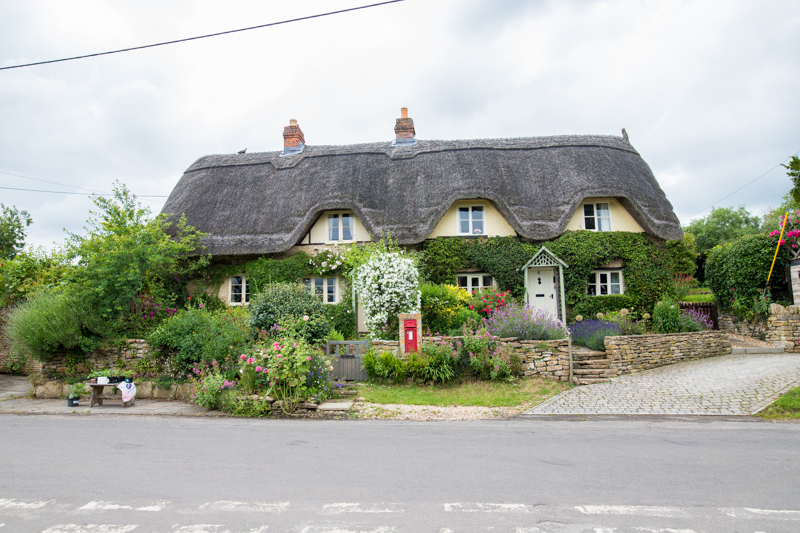
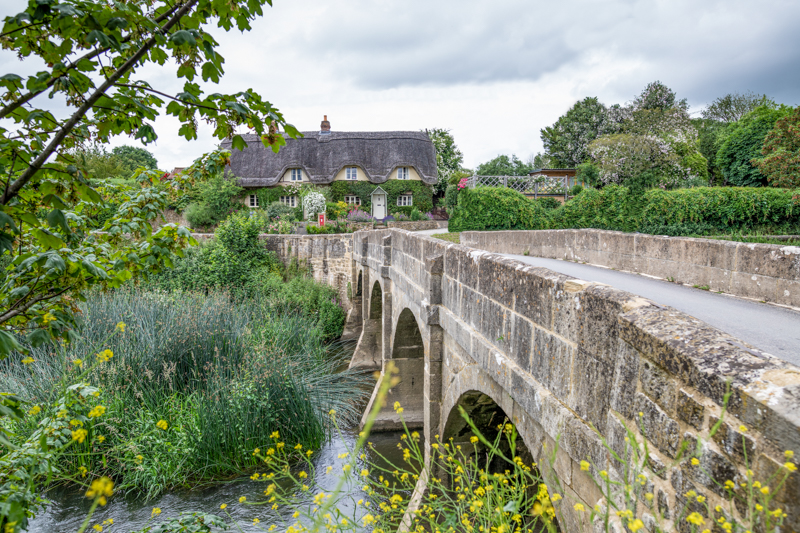
Likewise, capturing this beautiful thatched roofed cottage close up did it no justice. I scouted around and decided to cross the bridge and use it as my foreground and a leading line to the house, thus creating a much prettier photo.
Use Lens Distortion to Your Advantage
But focal length is not just about how much you want to include in the scene. Wider angle lenses distort the scene as it elongates and stretches the elements in the frame, and is most noticeable in the elements that are closest to the lens.
So what does that mean for landscape photography? Using a wide angle lens can make your clouds look longer and stretch back further. It can exaggerate size, helping you make a scene that is already striking in scale, even more so. It can also enable you to include a large proportion of the environment whilst placing your subject close in the frame so that it’s not lost.
4. Orientation
Deciding whether to frame in a landscape (horizontal) or portrait (vertical) orientation is crucial.
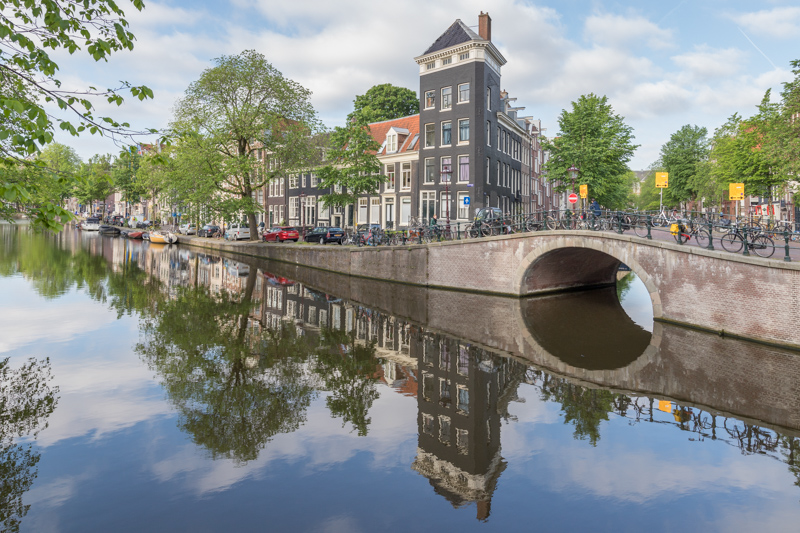
In this set I would have missed out on the lovely reflection had I chosen portrait orientation with my 50mm lens. Instead I used my 24mm lens and framed in a landscape orientation to make the most of the reflection.
I waited a few minutes for the wind to die down because the calmer the water, the more defined your reflection will be.
5. Reflections
I have a passion for reflections, so much that I love emerging from my accommodation to see that it has been raining. I wander around around the streets searching the puddles hoping to find interesting reflections.
It’s so much fun, don’t worry about what people think of you! It’s worth it for the variety it will bring to your travel photos!
The time of day really has no bearing, so it’s a great way to create interesting and dynamic photos when the sky is grey and everything looks drab. It’s even better if the shop lights are on during the day, or look for traffic light/street lights.
Squatting down amidst throngs of tourists and waiting patiently for them to get out of my frame, rewarded me with some beautiful clean reflections.
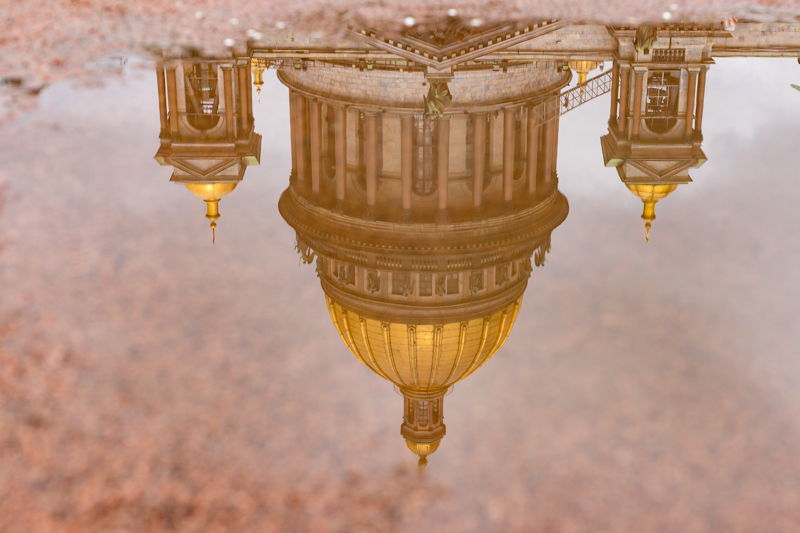
With the lake almost iced over, this reflection through a break made an interesting photo.
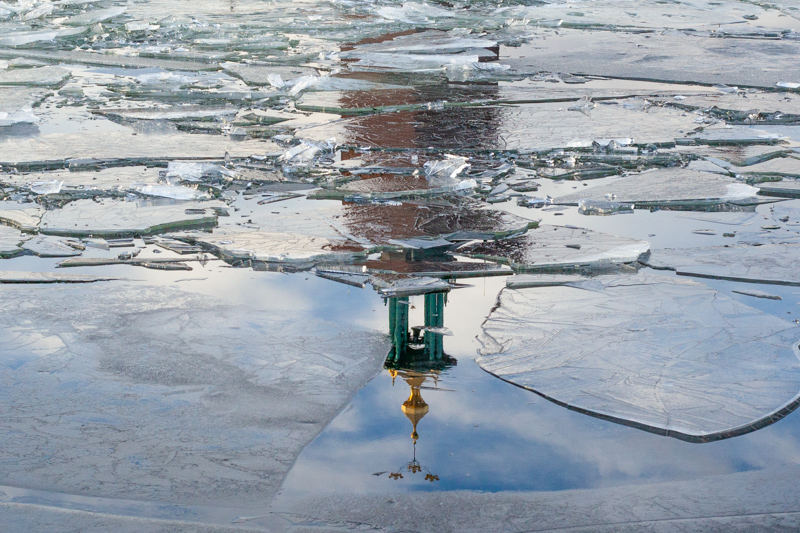
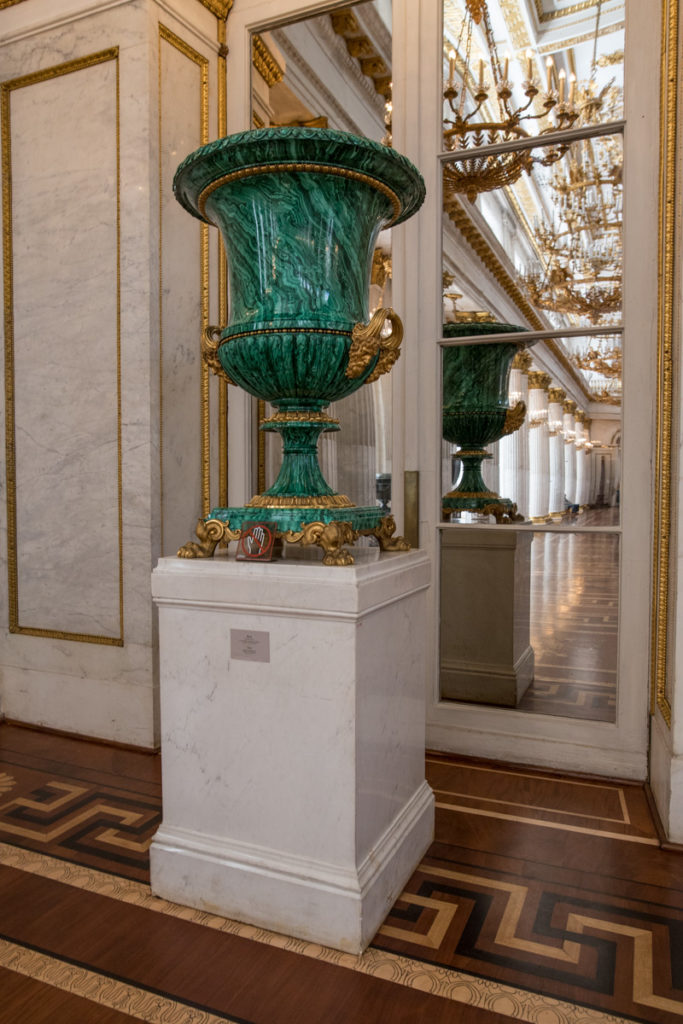
After taking a photo of this beautiful room and the visitors, I felt it was lacking that ‘wow’ factor. I looked around and spotted this beautiful pot reflected in the mirror with glimpses of the room. I waited for a few minutes for the tourists to move out of the reflection then snapped it. I find this much more interesting than just the room alone.
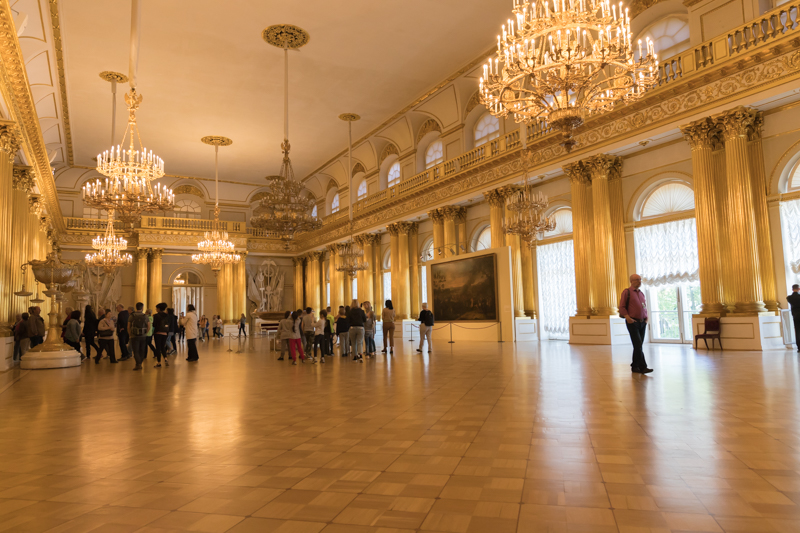
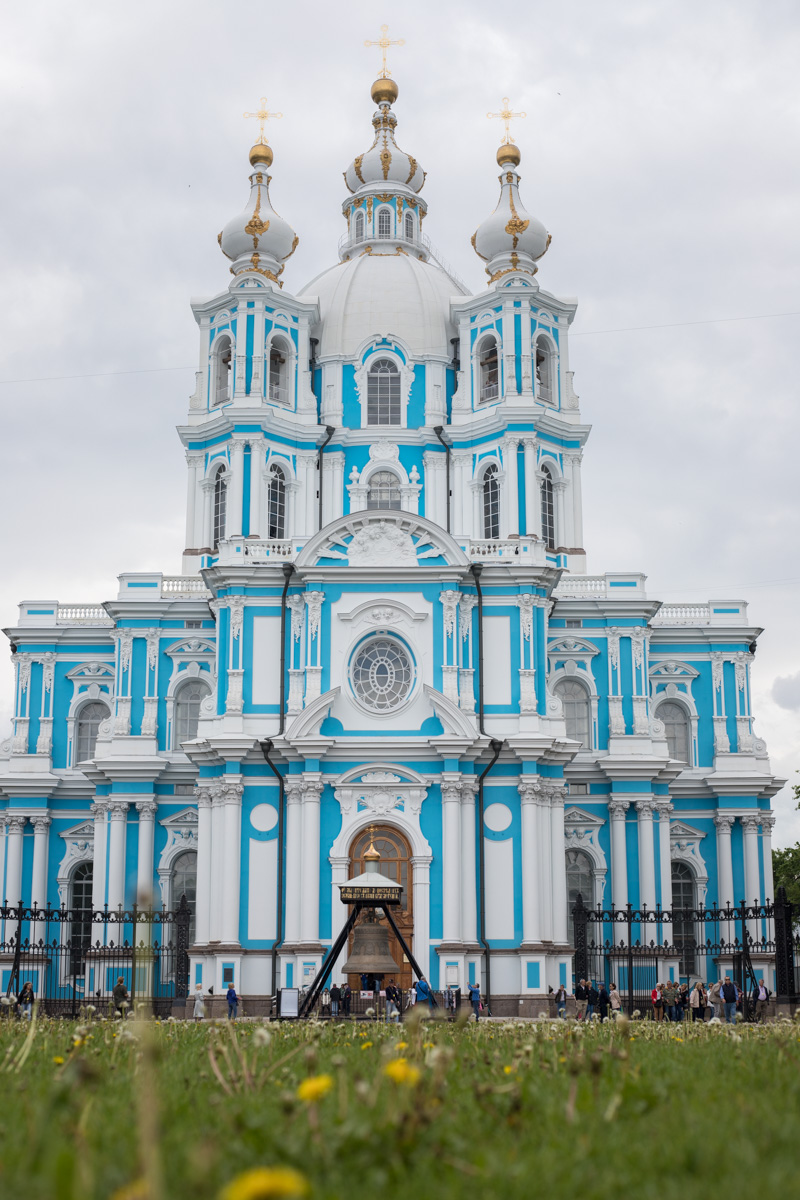
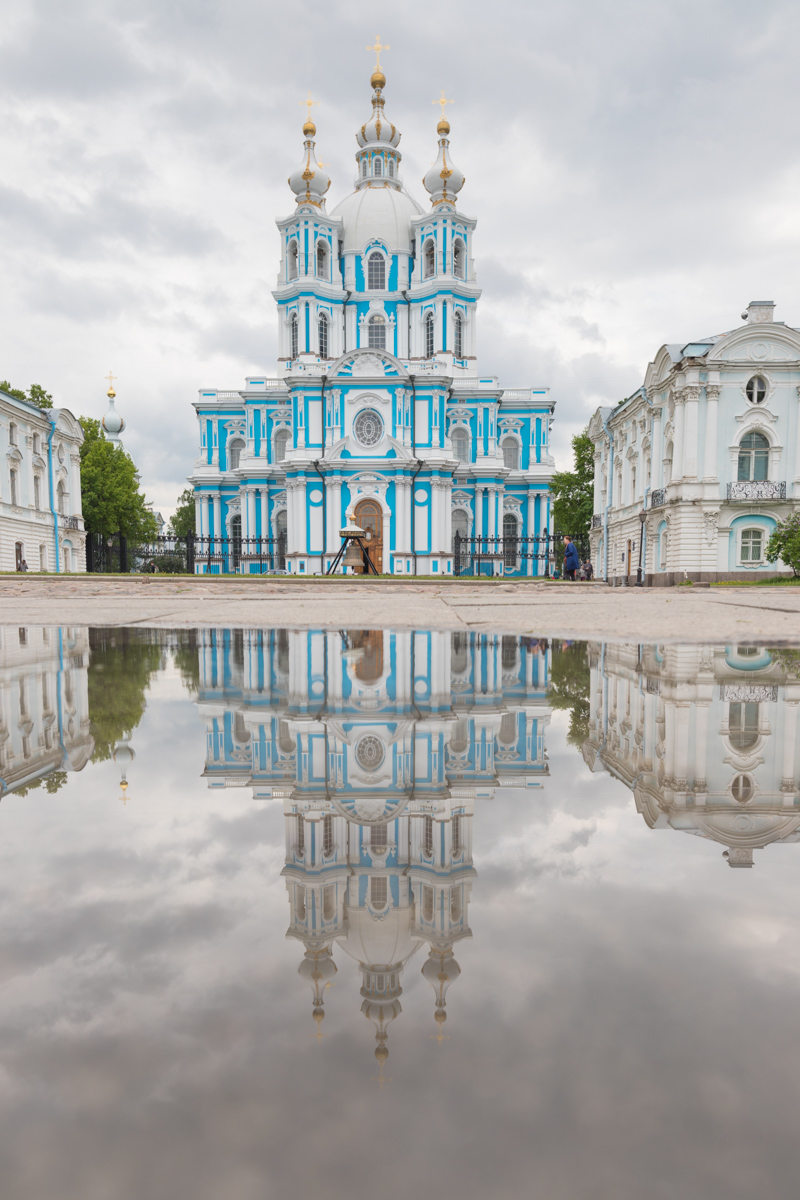
I thought this building was lovely when we stopped in our minibus, but I loved it even more when I saw the refection of it in the puddle. I was so excited, I never made it inside the Convent! But I was content, as I had this great photo.
6. People
Generally landscape photography images don’t include people, but at times it’s unavoidable especially in high tourist areas. In those instances just try to ensure they’re not the main focus, ie. not in the foreground or blocking any key elements in the frame.
However in travel photography, I often like to include a person or two as it adds a human element to the story. People can also be used to convey size where the vastness of the scene or subject is the key focus of the shot.
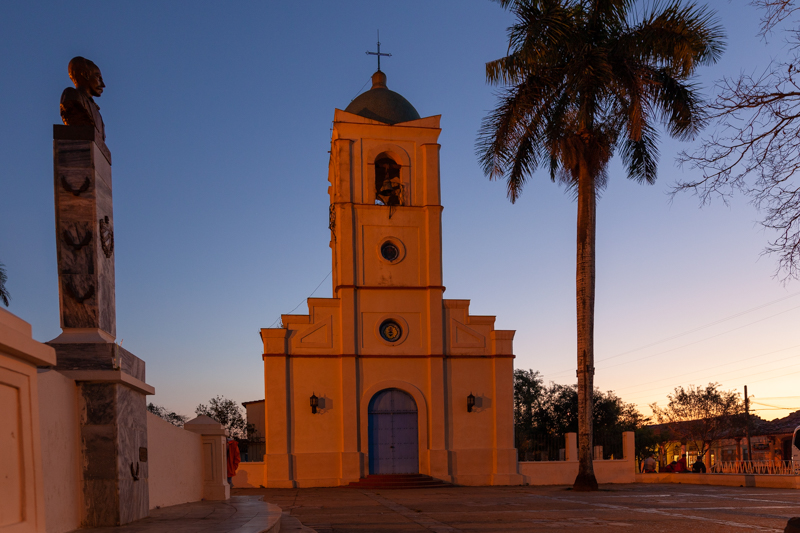
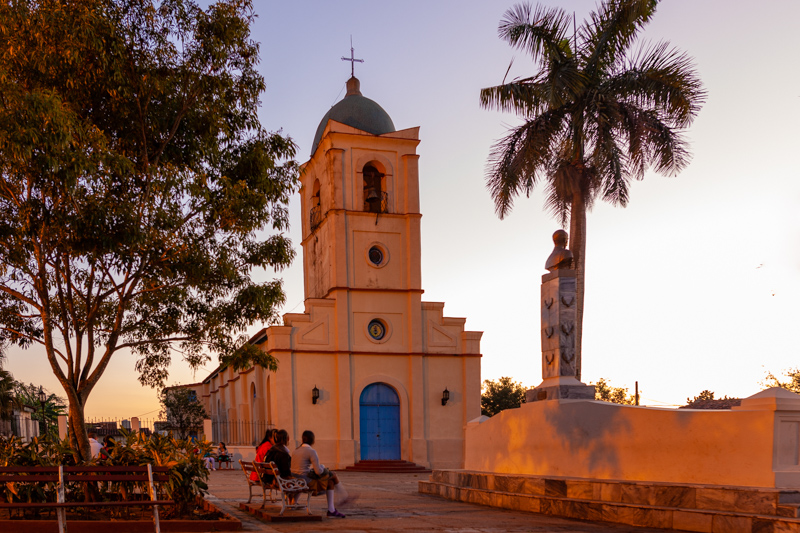
In the photos below, the first shot is flat as it has little foreground elements, and the church feels austere and almost foreboding. So I made the following changes and the resulting shot is much improved.
- I waited for the sun to come up a little more;
- I moved to include a more interesting foreground;
- The inclusion of the girls adds life to the scene – suddenly the church feels more welcoming;
- The wall on the right leads the viewer’s eye to my focal point.
7. Light
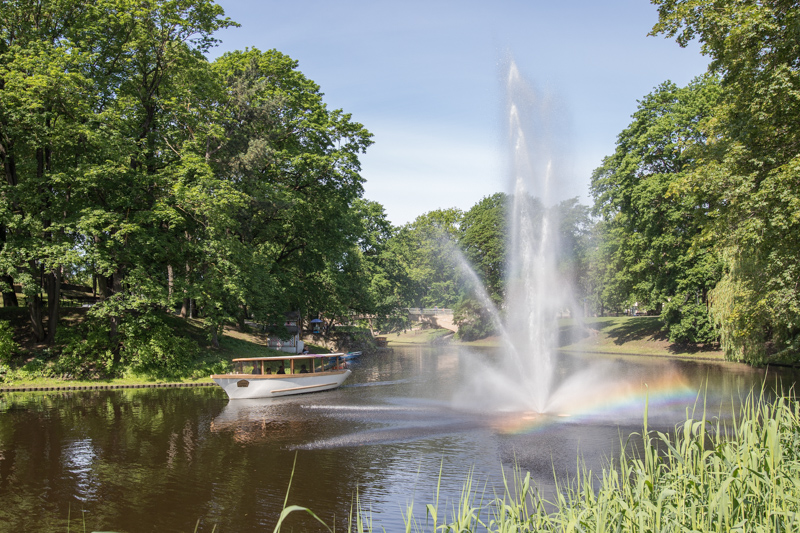
Look for the most flattering angle to capture whatever light there is, be it the sun on the sea making it sparkle or coming through a fountain making the droplets glisten.
We all know the importance of light in photography. When traveling, you often can’t control the timing of your visits, and you have to make the best of the light you have. Take your time and observe how to use the available light to your advantage. Consider the following and use accordingly:
- Is the sun about to come out from behind a cloud and shine on the field in the distance or on your main focus point? If so, wait it out and then get your shot;
- If it’s low in the sky, you might be able to capture a starburst by positioning it behind a tree or peeking out beside a building;
- If the sky is a flat solid grey, try to minimize it by filling the frame with more foreground and mid-ground elements (you don’t always have to obey the rule of thirds);
- A dark and brooding sky can add a dramatic atmosphere to your photo so when you stumble across this kind of light, make the most of it;
- If you’re able, re-visit a spot at the golden hour or at night for a different look.
Related: How to Capture a Starburst
Bright midday sun can be used to create some beautiful landscape photos.
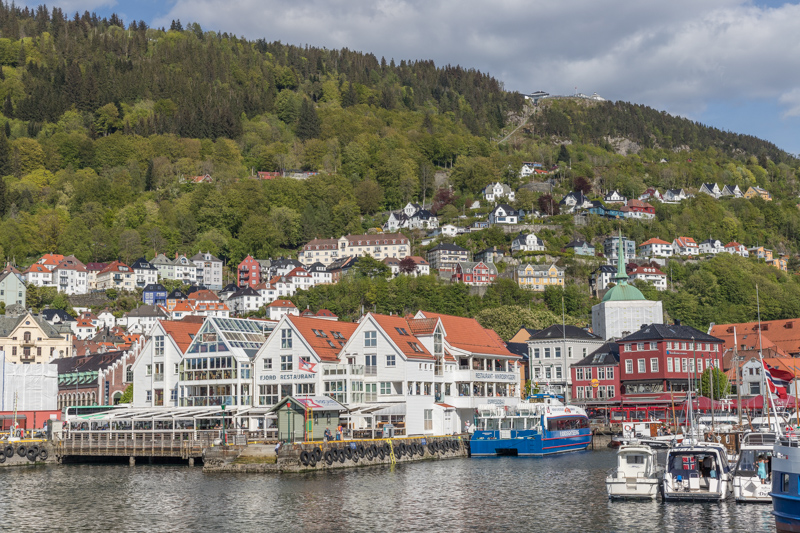
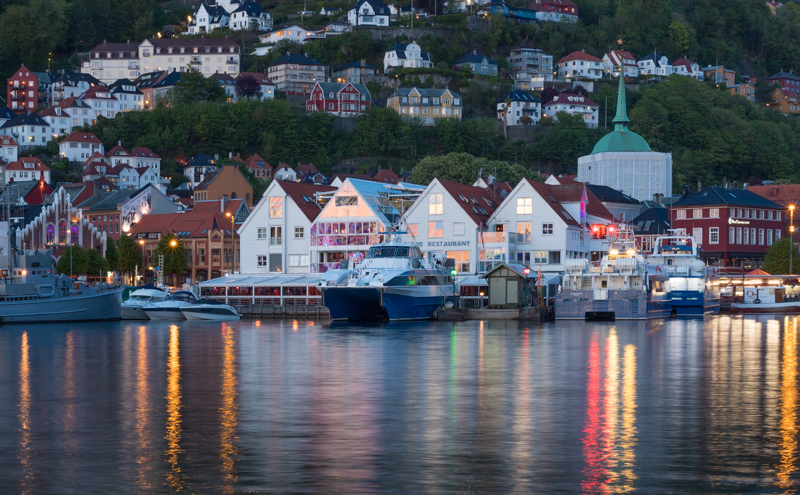
The light in this shot below was soft due to cloud coverage, but overall the resulting image was a little dull. But it was such a beautiful scene and I was determined to it justice. Fortunately as I was staying here for a few days, I was able to return to this spot and re-shoot at night, transforming the scene into a stunning photo. (Bergen, Norway)
But sometimes when the light isn’t working, you can’t always return later to shoot in the golden hour. So look for creative ways to shoot in full sun, or dull light.
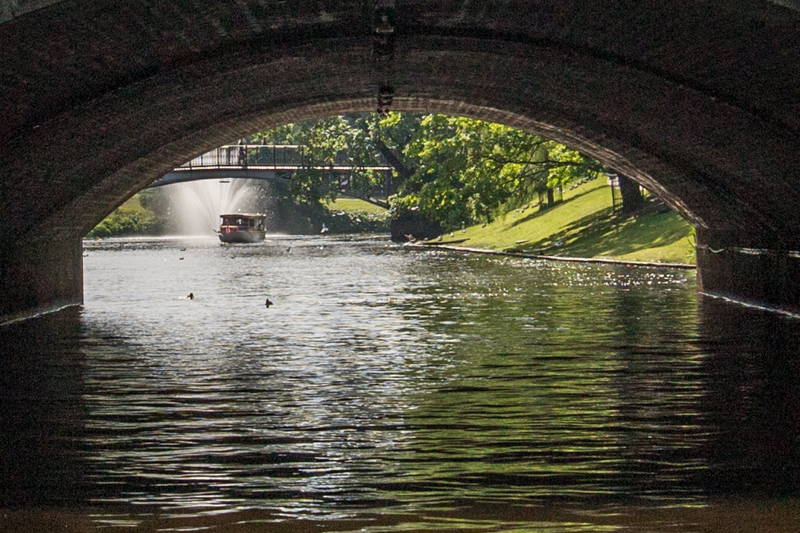
8. Shutter Speed
As is often the case with other genres, in travel photography the first decision you need to make with regard to shutter speed is whether you want to freeze or capture motion.
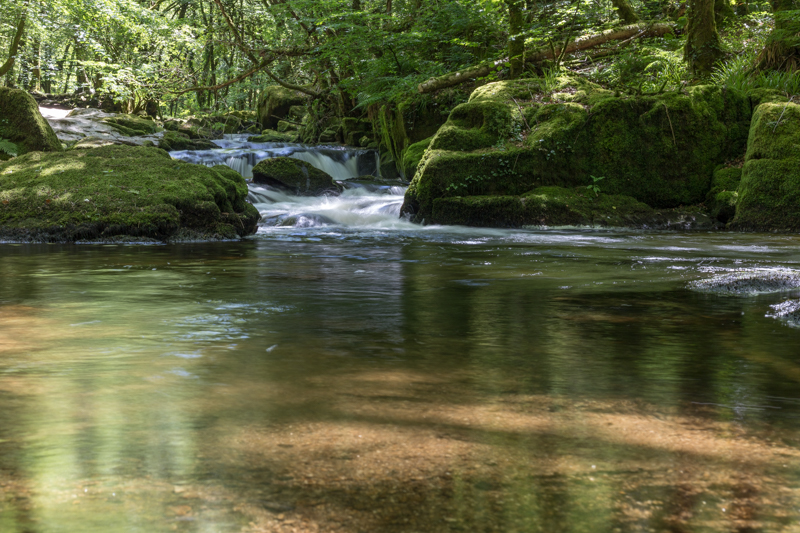
I love waterfalls and using a slow shutter speed to capture the flow of water, which gives that gorgeous silky effect you often see in water landscape photos.
However I don’t always carry a tripod, so in those instances I improvise and use my backpack. I balance my camera on my bag (place it on a plastic bag if wet), and use the 2 second timer to avoid camera shake that can come from pressing the shutter button.
Using live view mode is perfect to do this. It enables me to zoom in on the screen and manually focus before I take the photo.
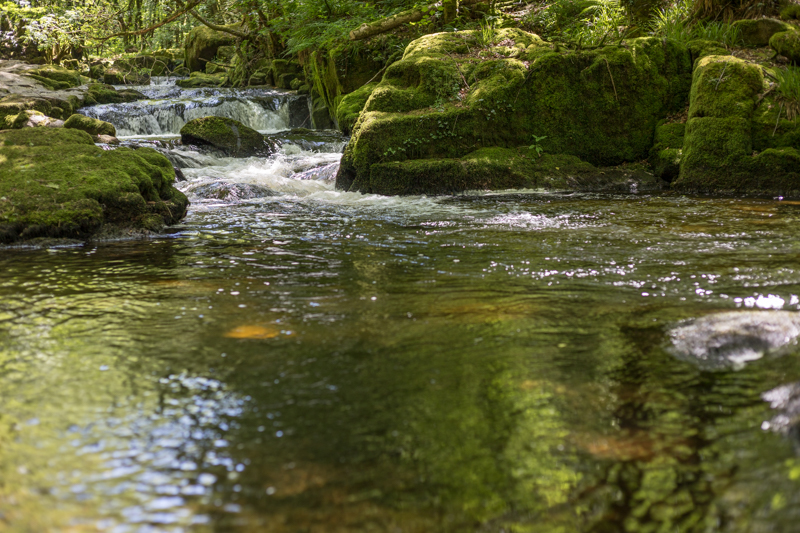
The next image was shot using backpack as resting place, with 2 second timer. The extra 5 minutes it took to set up and focus was worth it. Note the silky water effect and calmer water does a much better job of conveying the serenity of this scene.
Above all, travel photography is fun, but also remember to put your camera down sometimes and really soak up the scenery and the atmosphere.
A HUGE thank you and much love to Veraine for her fabulously comprehensive guide to beautiful travel photography! If you want to check out more of her work, you’ll find her at Veraines View and on Instagram.
If you loved these tips and want more, check out our new photography workshop – Landscape & Night Sky Photography. It starts on 1st May, click HERE to find out more and reserve your spot when doors open.

Leave a Reply Cancel reply
PRIVACY POLICY & SITE TERMS AND CONDITONS
CLICK LOVE GROW ™ Pty Ltd - COPYRIGHT 2024 ©
x
Join Now
Enter your info below to join the challenge!
Want a friendly reminder when I go live?
Pop in your number and I’ll shoot you a text.
* We will send text reminders for our live calls during the challenge! Reply ‘STOP’ to end or ‘HELP’ for help.
We promise not to ever share your details with anyone or send you spam! Check our privacy policy and terms of service.
Fantastic article, really enjoyed it