Delicious Black & White Photo Essentials
Avoid these Mistakes in Your B&W Photos!
A beautiful black & white photo will be dramatic, artistic, eye catching and richly textured. We can render any image black & white with the press of a button in any editing program. But does that ensure a beautifully rich black & white work of art?
Read on to learn how to avoid making crucial mistakes in your b&w photography…
Bronwyn Pickering
True Crimes – Flat Black & White Photos!
The simple answer is no, it doesn’t. All that does is remove the colour and results in a flat black & white image.
When I was first starting out in photography, I remember another photographer critiquing a beautiful black & white image of another photographer friend, declaring it to be “grey”.
Huh? How could it NOT be grey? It can’t just be black & white, it has to have greys in between. I didn’t see what she saw and I didn’t understand her critique.
What she meant was the image was flat, and lacked depth. And to understand what we mean when we describe an image as flat or grey, we need to understand a little about tonal range and key.
A Word on Colour
What place does colour have in a blog post about black & white images? A VIP place! Read on…
All colour has a tonal value, and this value refers to the colour’s brightness and depth.
Consider this pastel image… you can see there are multiple colours.
However, when we convert the photo to greyscale, we can see each M&M looks about the same shade of grey. This is because each colour has roughly the same tonal value.

A great black and white should have tones ranging from pure black (or close to pure black), through shadows, midtones, and highlights right through to pure white (or close to pure white).
Even when we take images that are predominantly white tones (high key) or predominantly dark tones (low key) there needs to be a variation so that our image has definition, depth and visual interest.
So when we say an image is flat, what we mean is there is no depth to the photo, resulting from an almost complete lack of true blacks or true whites, and very little variation in tones from black to white. When this photographer referred to my friend’s image as “grey”, she simply meant it had no true blacks or whites, ONLY greys.
So how do we avoid a flat image?
By ensuring your image has lots of variation from dark to light, otherwise known as shadows to highlights or blacks to whites.
However sometimes you might want to create a high key or low key image. A high key image has predominantly light tones (phone 1) and a low key image has predominantly dark tones (photo 2).
So how do you avoid a flat black & white in those instances? By insuring your blacks are true black, and your whites are true white. In other words, no grey.
In photo 1 the darkness of his eyelashes, hair and eyes pop in this high key photo.

Photo 1 – July Dorion-Thidaudeau
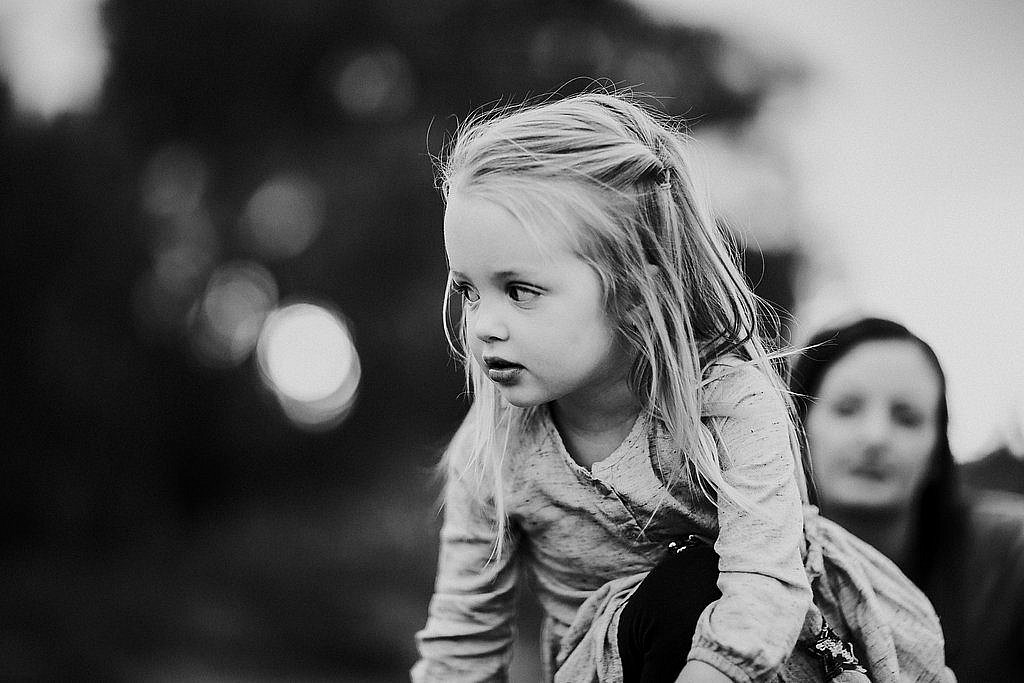
In this image, the dark tones behind her add depth and contrast beautifully with the perfectly illuminated subject.

Photo 2 – Bronwyn Pickering
Purposeful Black & Whites!
Once we grasp this concept, we can begin to understand whether or not a photo has the ingredients to be a beautiful black & white conversion.
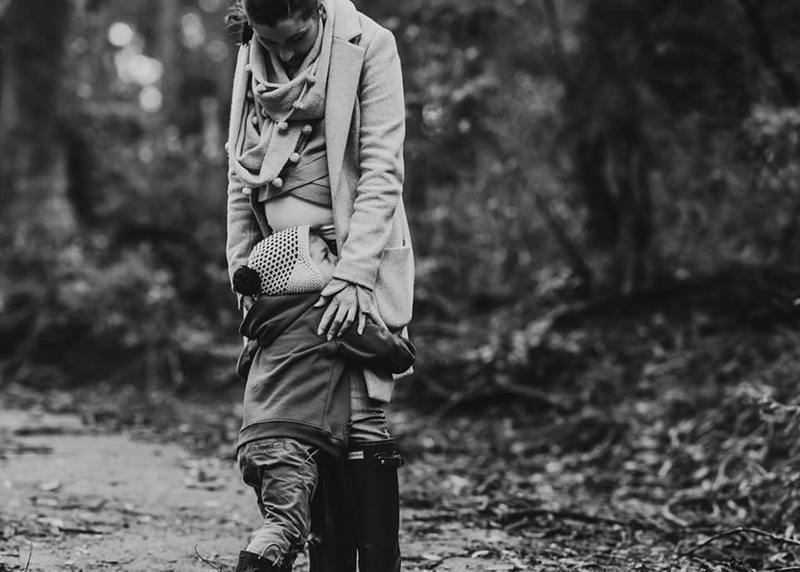
We can also set up our shots to purposefully ensure they convert beautifully, simply by the mindful use of contrasting tones and texture, for example the knitted hat in this shot.
Pam Vorias
So to summarise, what are the ingredients for a beautifully rich black & white image?
- A good tonal range from true black to true white.
- Good contrast, but not so much that we lose detail in the highlight (whites) or shadow (blacks) areas.
- The addition of texture will further enhance its beauty.
All of the above will ensure a black & white photo that has depth, texture, and wow factor.
So when we’re shooting with the specific intention of rendering our images black & white, we need to take in our scene or subject and take note of the tonal range, the overall key that will result, and the textures within.
BYO Tonal Range
In some situations, for example when shooting a portrait, we can add texture, and tonal range through the use of clothing, accessories, and props. For example, when I photograph children outdoors, I have two old timber kitchen chairs I use.
One is red, and one is white. I bring both, and if the child is wearing predominantly light colours, I’ll use the red chair for the contrast in tones. Likewise if they’re wearing predominantly dark colours, I’ll use the white chair.
This is especially noticeable when I’m converting the images to black & white. As an added benefit, the age of the timber chairs brings added texture to the images.
One benefit of black & white is when our background is cluttered and it cannot be avoided, rendering the image black & white, presuming you have good tones and texture to work with, along with the use of shallow apertures, it can render that background even more unnoticeable, and ensure our subject is more clearly defined.
Editing Help!?
Lastly, when it comes to editing black & whites, forget the greyscale button! Click here for a fabulous tutorial on an easy but effective black & white processing method, with additional help on what to look for to know when your black & white is effective or overdone.
Happy shooting!
JOIN the Free 5 Day Mini Course
5 Days, 5 Videos Lessons = Photos You'll LOVE!
Learn How to Use Your DIGITAL Camera!

Leave a Reply Cancel reply
PRIVACY POLICY & SITE TERMS AND CONDITONS
CLICK LOVE GROW ™ Pty Ltd - COPYRIGHT 2024 ©
x
Join Now
Enter your info below to join the challenge!
Want a friendly reminder when I go live?
Pop in your number and I’ll shoot you a text.
* We will send text reminders for our live calls during the challenge! Reply ‘STOP’ to end or ‘HELP’ for help.
We promise not to ever share your details with anyone or send you spam! Check our privacy policy and terms of service.
Is there a way to print these out as PDF’s?
Hi Kim, thanks for your your message – you can definitely print out the blog post page… but we don’t have them as PDFs sorry! Xx
[…] A recipe for delicious black and white photography, Click. Love. Grow. […]