How To Create Rainbows In Your Pictures
How To Take Stunning Rainbow Reflection Pictures
One of our most recent themed challenges in our Grad’s group was to create a rainbow reflection picture. We were so inspired by all these fabulous images, so rich in vibrant colours and fun effects, that we decided rainbow photography would be the subject of this week’s highlights reel and tutorial.
All of the pictures were created using either a CD (remember those?), a glass prism, or coloured pipe cleaners. What amazed us was how the photos that were taken using a CD offered so many unexpected portrait opportunities. By simply changing either the direction of the light source and the angle or distance of the CD in relation to their lens, our students came up with completely different effects!
There are many ways to create a rainbow reflection in pictures, and a huge variety of effects you can create! However, there’s one overriding element that needs to be present no matter what you’re using or what effect you’re aiming for – and that’s strong, direct light. This is why open shade or an overcast day simply won’t work. So if you don’t have direct bright sunlight, get a light with a torch or similar.
Ready to check out our students’ work, grab all the tips, and go try rainbow photography yourself? Yes!
1. Metallic Pipe Cleaners
Jess created this fantastic portrait by holding brightly coloured, metallic pipe cleaners just in front of the lens so that they were out of focus. The boy was backlit, which ensured lots of bright directional light could catch the pipe cleaners.

Jess Stoakes, Advanced Graduate – Settings: Shutter Speed 1/800, Aperture f/2.2, ISO 100, Lens: 50mm
Same but different… same technique, different effect. To shoot a beautiful rainbow picture, experiment with the position of the pipe cleaners, their distance from the lens, and the colours you use to vary the effects.
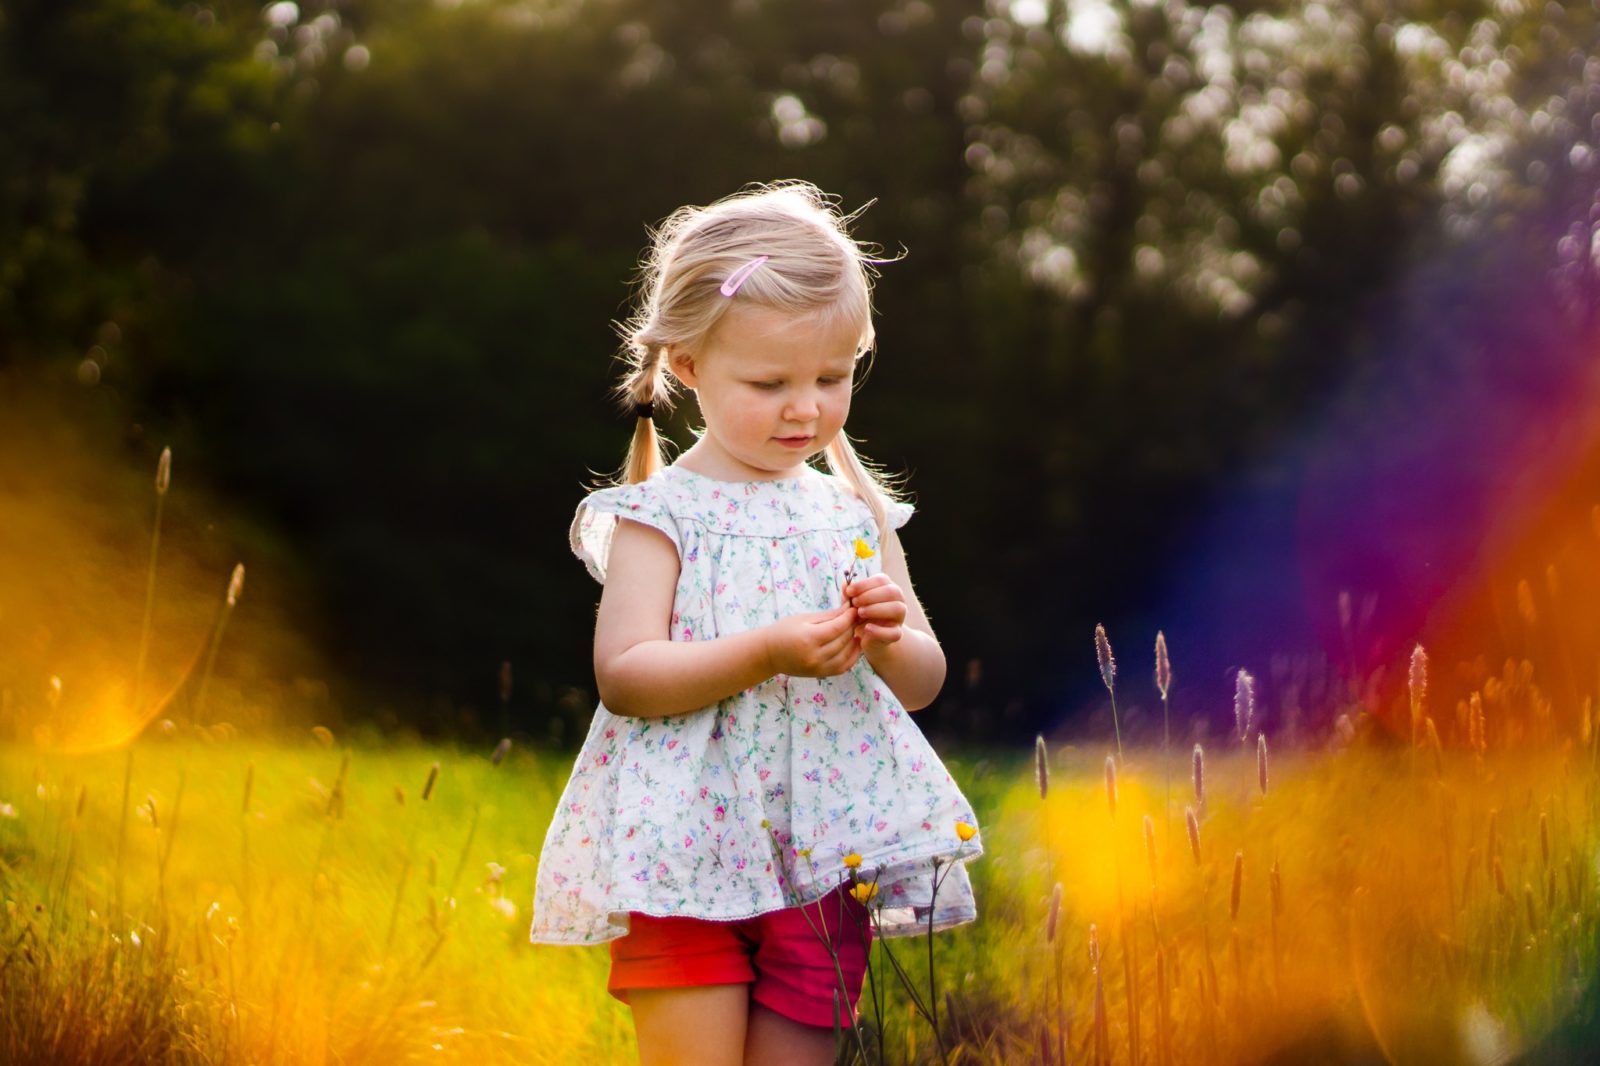
Estella Ward, Graduate
2. Glass Prism
Lenna created her rainbow picture by standing near a window’s light and holding a prism next to her lens, tilting it until the light hit it in a way that threw the reflection onto the wall. She levelled up her image to something even more special by using a wall with patterns created by hard light filtering through venetian blinds.
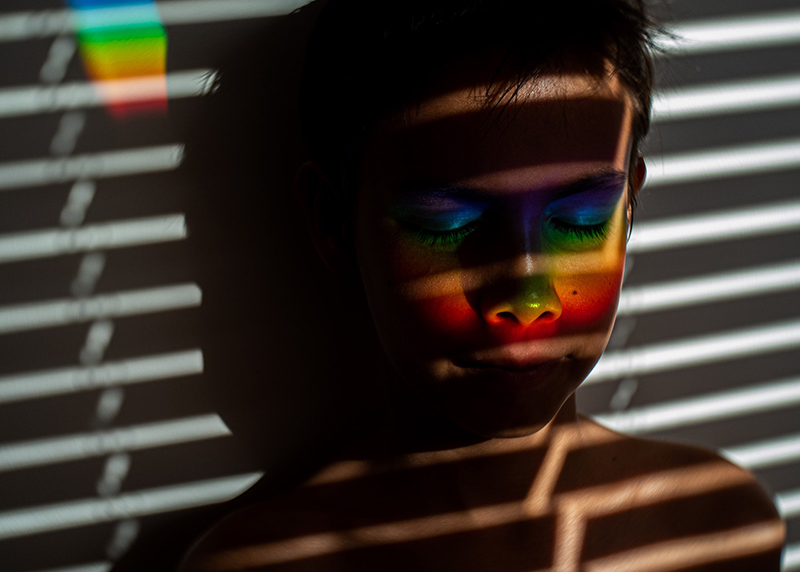
Lenna Castro, Advanced Graduate – Settings: Shutter speed 1/500, Aperture f/4, ISO 200, Lens: Lensbaby Sol45
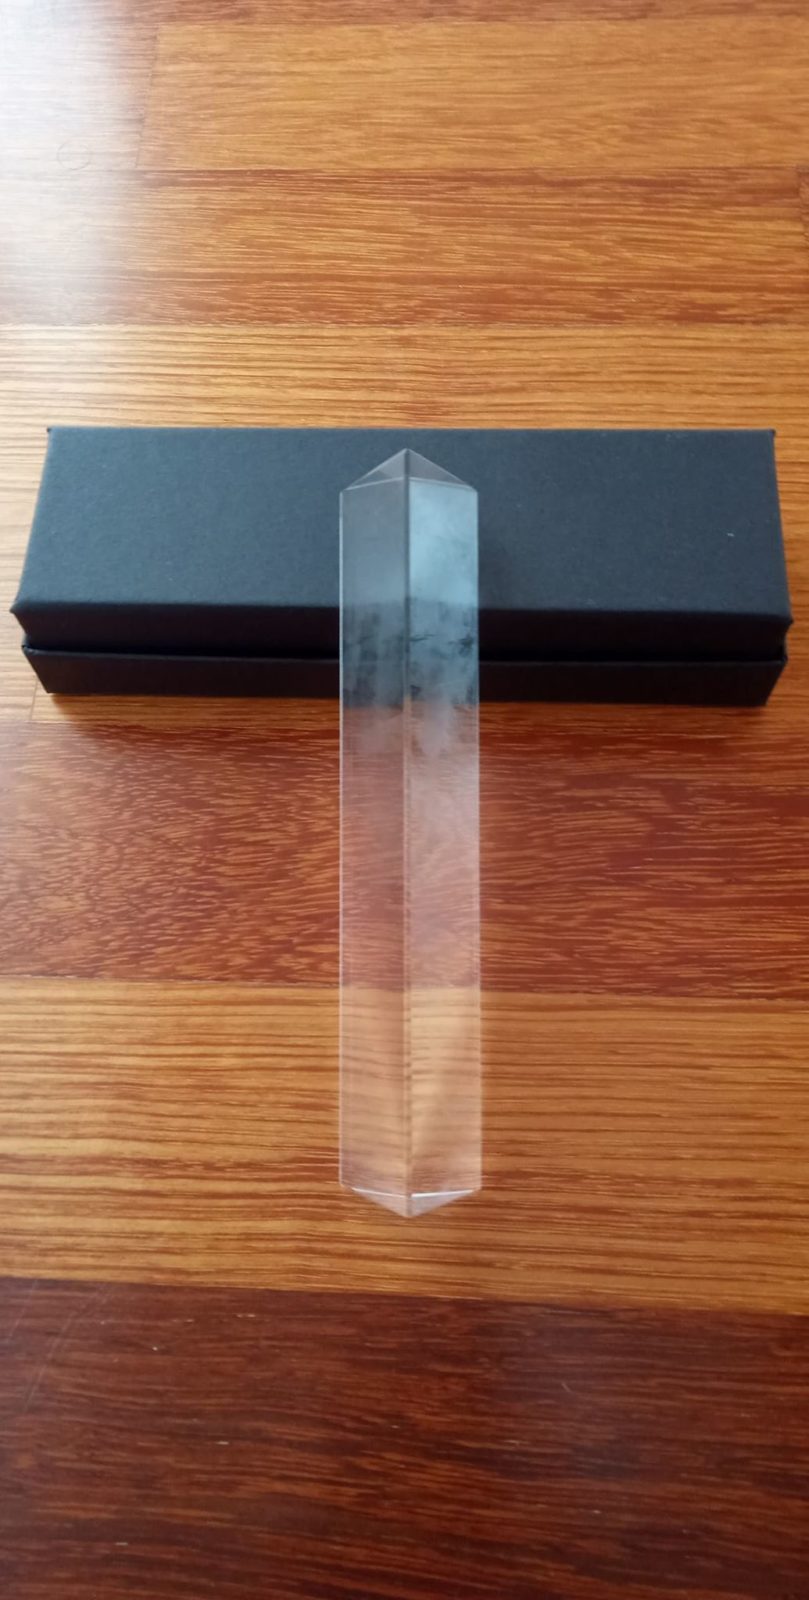
Prisms are inexpensive and easy to find on eBay, Amazon, and many other retailers.
When it comes to rainbow photography, it’s not all about portraits and abstracts! Katie held a prism to the side of her lens in bright sunlight to cast a rainbow across this delicate dandelion. She also worked on her selective focus, enhancing this subtle reflection even more.
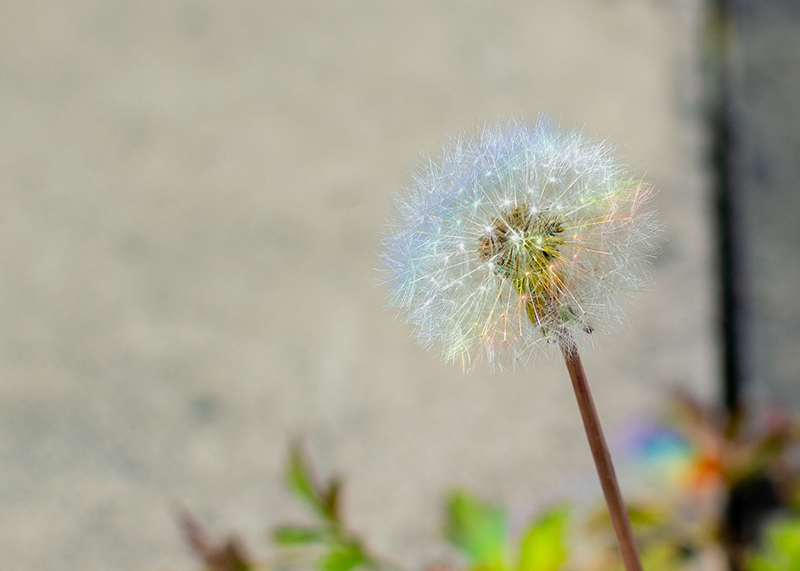
Katie Lian, Advanced Graduate – Settings: Shutter speed 1/1000, Aperture f/3.2, ISO 100, Lens: 35mm
3. CD Reflections – 7 Ways!
Use a CD to create a rainbow reflection picture by simply positioning it near your lens with its metallic side facing in. Start experimenting with the angle until the light hits it and throws a reflection where you want it. The following photos show how much variation you can get with really small adjustments!
Harsh Light Fun
Bek took this picture at midday with the sun high in the sky and a little to her right. She positioned the CD slightly in front of the lens and experimented with angles until the sun caught the CD, creating a rainbow reflection frame around her daughter.
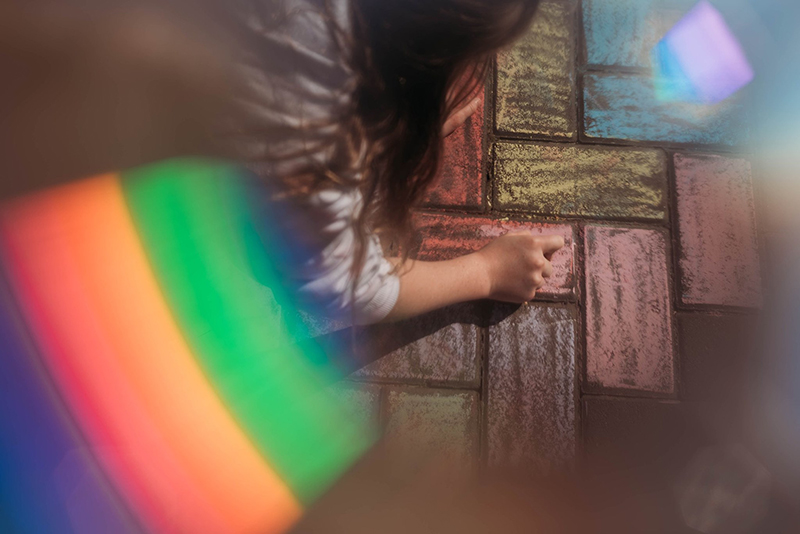
Bek Alexander, Advanced Graduate – Settings: Shutter speed 1/4000, Aperture f/3.5, ISO 100, Lens: 50mm
Low Light Rainbow Portrait
For this very close up portrait, Jess propped a CD against a glass to hold it up in front of a window with bright light streaming through. She experimented with the angle until it cast a reflection on the floor. Jess then had her son lay down in the rainbow, right on the pocket of light.
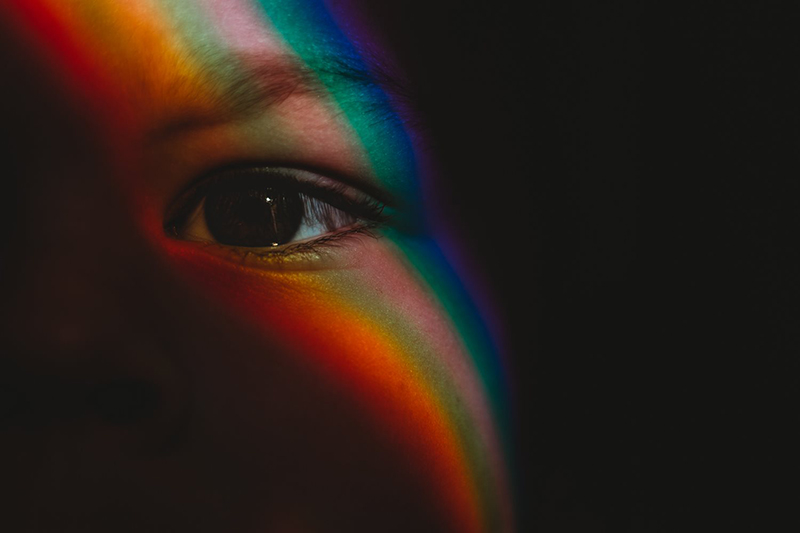
Jess Stoakes, Advanced Graduate – Shutter speed 1/250, Aperture f/2.5, ISO 100, Lens: 50mm
Bright, direct light from the window cast a rainbow reflection on the floor which is in shadow, enabling Jess to create a low light portrait.
Rainbow + Light Bokeh
For this beautiful pop of light bokeh, Julie hung some twinkle lights in the background. She then held her phone with the flashlight on and a CD in the same hand (see photo below) and experimented with the angles until seeing the rainbow across her daughter’s face. Just how she had envisioned for the shot!
For a great light bokeh like this, put as much distance between the lights and your subject as you can.
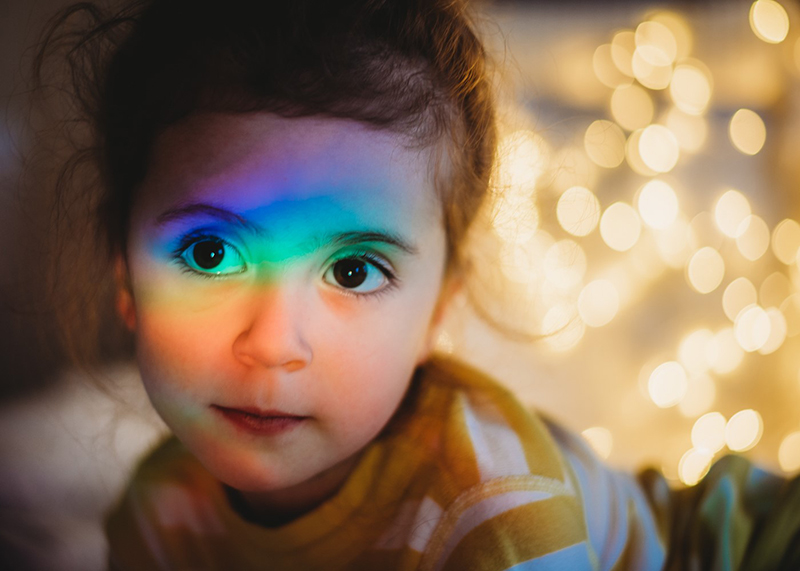
Julie Arace, Graduate – Settings: Shutter speed 1/80, Aperture f/1.8, ISO 320, Lens: 50mm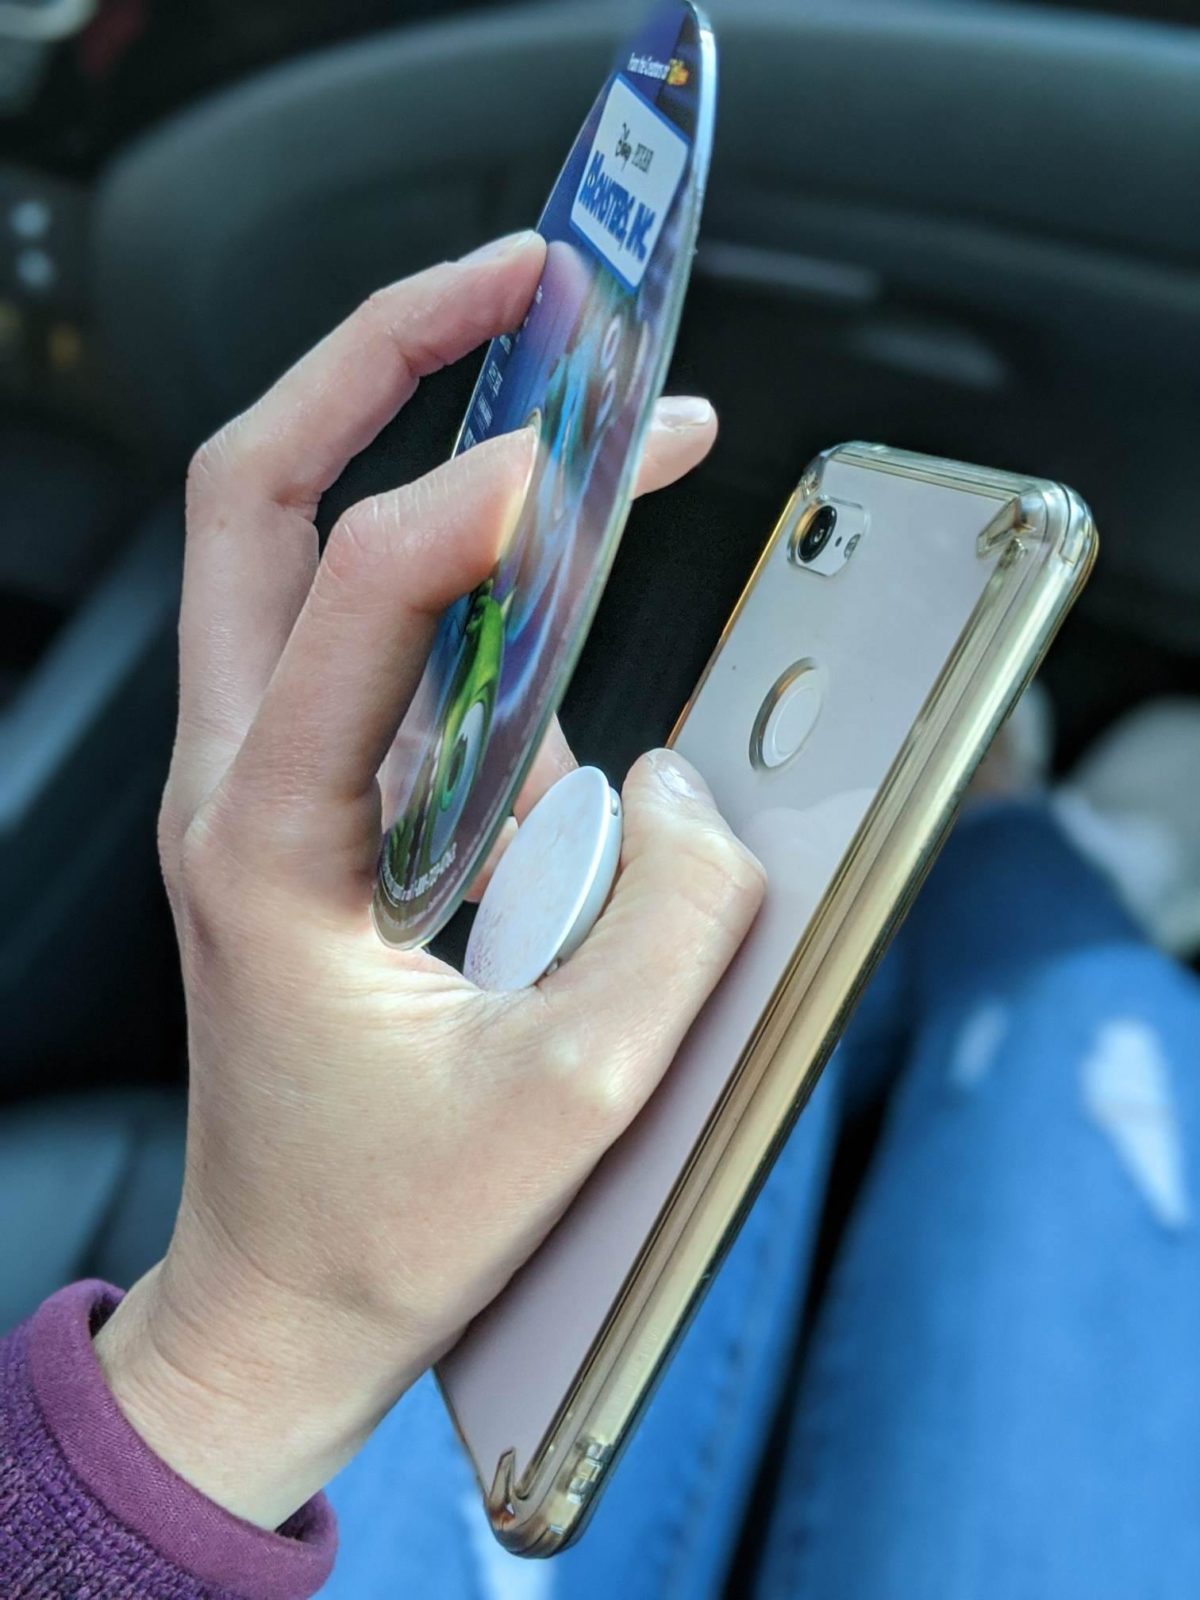
Eye Rainbow Images
Another way to create a rainbow reflection picture using a CD is to shoot through the CD hole. I know right? Crazy town!
In all of the following images, the CD was held directly in front of the lens with the metallic side in. The only thing that varied was the distance from lens to CD, and in some instances, the light source.
This fabulous rainbow eye effect photography was created by holding the CD approximately 2 inches away in front of the lens, shooting directly into the sun during the golden hour.
During processing, Emma cropped the corners to remove the vignette created by the CD and used split toning to accentuate the colours in the reflection.
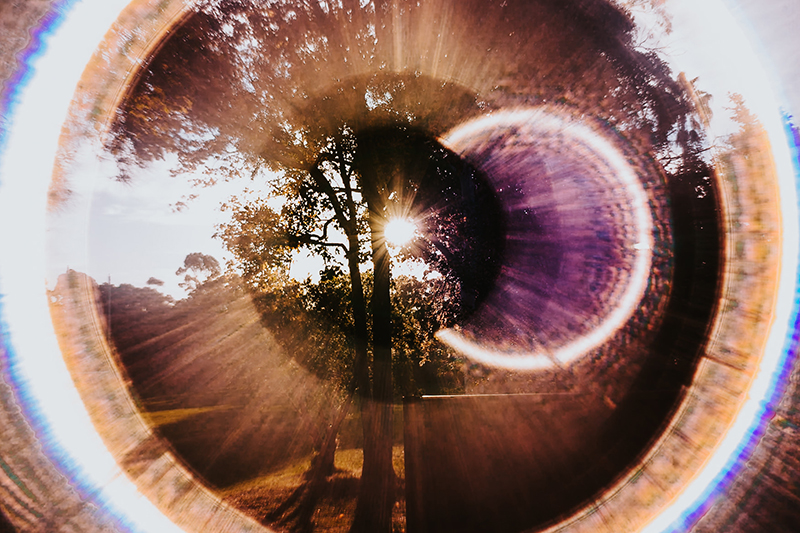
Emma Davis, Advanced Graduate – Settings: Shutter speed 1/320, Aperture f/5, ISO 160, Lens: 35mm
Kaleidoscope Colour
This beautiful abstract picture was shot in similarly to the rainbow eye above, but the CD was held closer to the lens, approximately half an inch. The result? The rainbow was less defined, and the colours were richer. The CD also caught part of Emma’s reflection. Look for her arms and tattoos kaleidoscoped into the colours of the image.
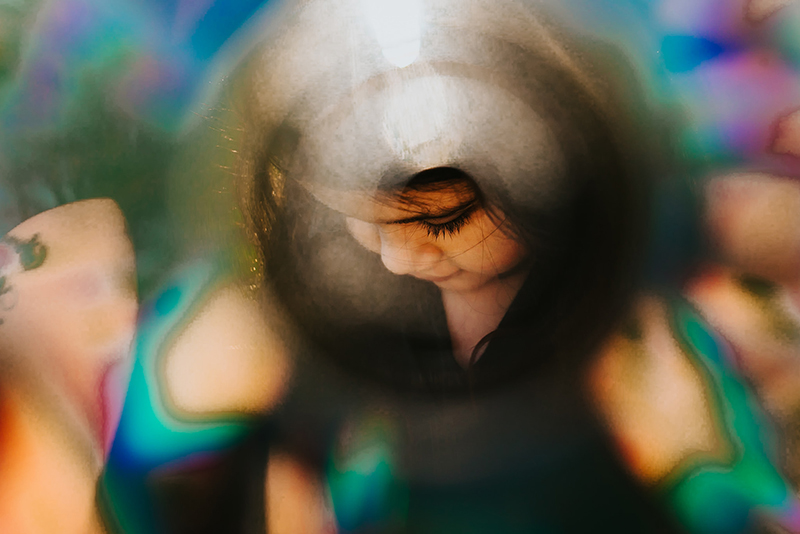
Emma Davis, Advanced Graduate – Settings: Shutter Speed 1/320, Aperture f/3.5, ISO 200, Lens: 35mm
Related: Bring Magic to Your Photos with Lensbaby Omni
Torchlight Reflections
Danielle created this beauty effect by using her phone’s torchlight. She placed it on a table next to her, aiming it at the CD she was holding in front of her lens.
Danielle then played around with the position and angle of the CD until she was happy with both the reflection and her daughter’s spot through the CD hole.
This picture was enhanced by the backlight coming through the window and paper hearts mirroring the colours of her rainbow reflection.
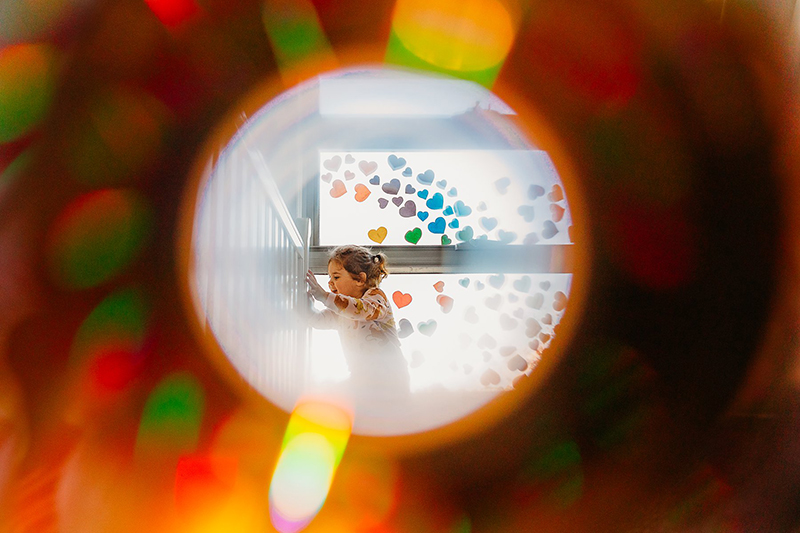
Danielle Anderson, Graduate – Settings: Shutter speed 1/320, Aperture f/4, ISO 800, Lens: 24-70 shot at 24mm
Rainbow Frames
Megan took this picture in full sun around lunchtime.
She had the sun a little behind and to the left of her subject. She held the CD at arm’s length and had her daughter stand around 20 inches away from it, looking through the hole. Megan then cropped the original image to remove her own reflection and to highlight the stronger colours on the right.
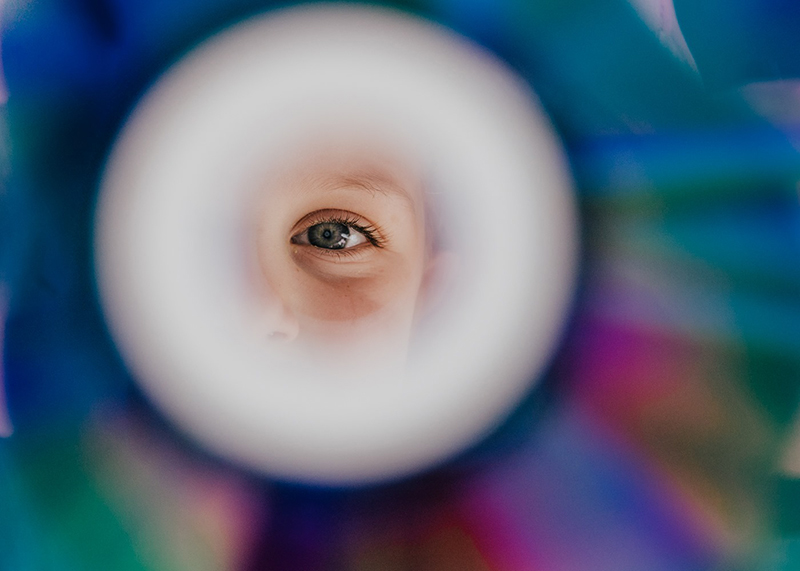
Megan Rutherford, Advanced Graduate – Settings: Shutter speed 1/800, Aperture f3.5, ISO 100, Lens: 24-70mm lens shot at 38mm
For this shot, Kirsty held the CD close enough to the point that it was touching the end of her lens, and angled it very slightly to achieve different effects. Her daughter was backlit in quite bright sunlight, catching the starburst you can see just behind her.
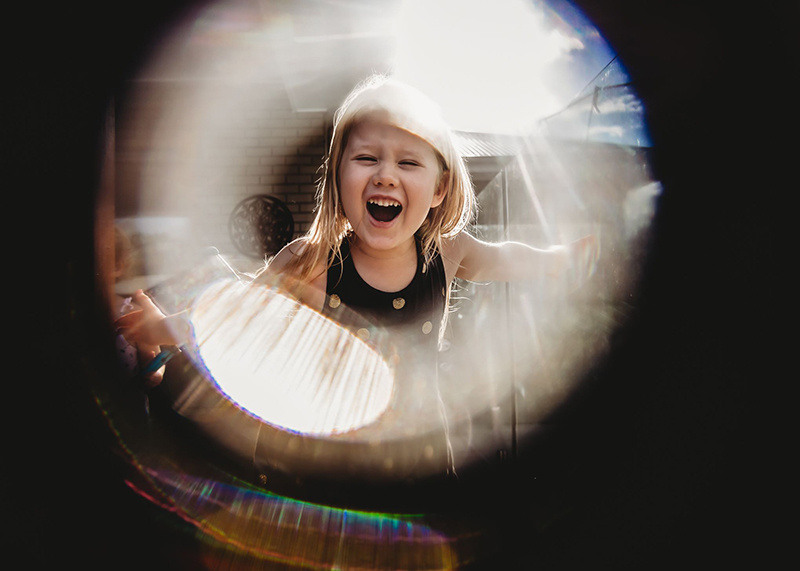
Kirsty McKenzie, Graduate – Settings: Shutter speed 1/1000, Aperture f/2.8, ISO 100
Free Photography Workshop
Join my new workshop and learn How to Shoot Pro-Quality Photos With Your DSLR… and it’s totally FREE to join! Register here…
JOIN the Free 5 Day Mini Course
5 Days, 5 Videos Lessons = Photos You'll LOVE!
Learn How to Use Your DIGITAL Camera!

Leave a Reply Cancel reply
PRIVACY POLICY & SITE TERMS AND CONDITONS
CLICK LOVE GROW ™ Pty Ltd - COPYRIGHT 2024 ©
x
Join Now
Enter your info below to join the challenge!
Want a friendly reminder when I go live?
Pop in your number and I’ll shoot you a text.
* We will send text reminders for our live calls during the challenge! Reply ‘STOP’ to end or ‘HELP’ for help.
We promise not to ever share your details with anyone or send you spam! Check our privacy policy and terms of service.
Be the first to comment