19 Inspiring Ideas for Creative Self Portraits
Want to get in front of the lens more often, but don’t know where to start? Feeling super awkward posing for the camera? Or maybe you have no problem with confidence but you’re stuck in a creative rut!
Well, we have just the solution! This collection of creative self portraits from our graduates community has something for everyone.
Whether you’re a newbie trying to summon up the courage to take your first self portrait, or a seasoned pro looking for ways to inject extra magic into your selfies, you’re guaranteed to find inspo here!
Dress Up
It was fun when you were kids, and playing dress up is still fun when you’re all grown up – especially when it’s for a self portrait!
In the image below, Humera has recreated Johannes Vermeer’s iconic painting Girl With A Pearl Earring, both with the costume she has chosen and the way she has composed her image.
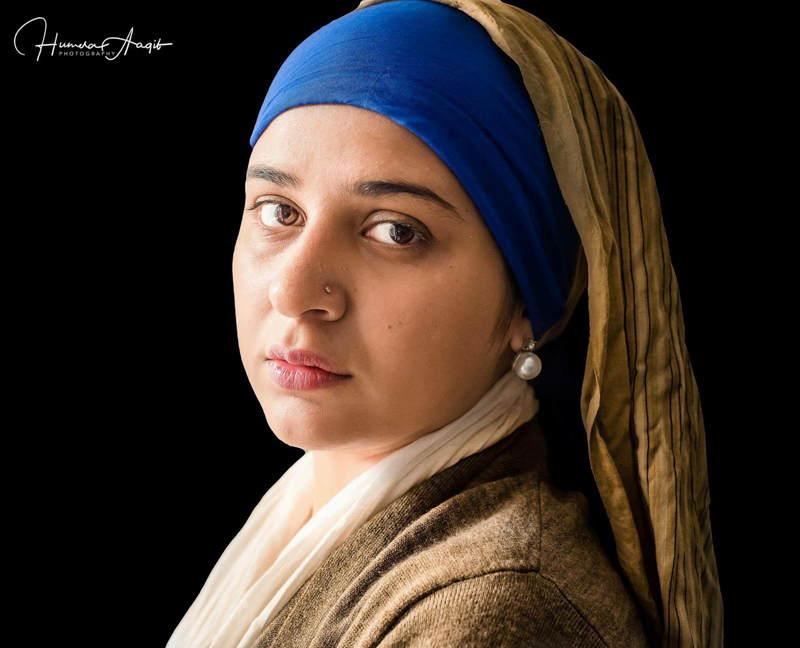
Humera Aaqib, Advanced Graduate
In this next image, Suyong has taken it one step further. In her self portrait, she is wearing a traditional Japanese kimono, and she has strengthened the storytelling by including the fan and flowers in her frame.
The high contrast black and white conversion and dramatic light in her self portrait stands out against the softer tones in the surrounding elements.
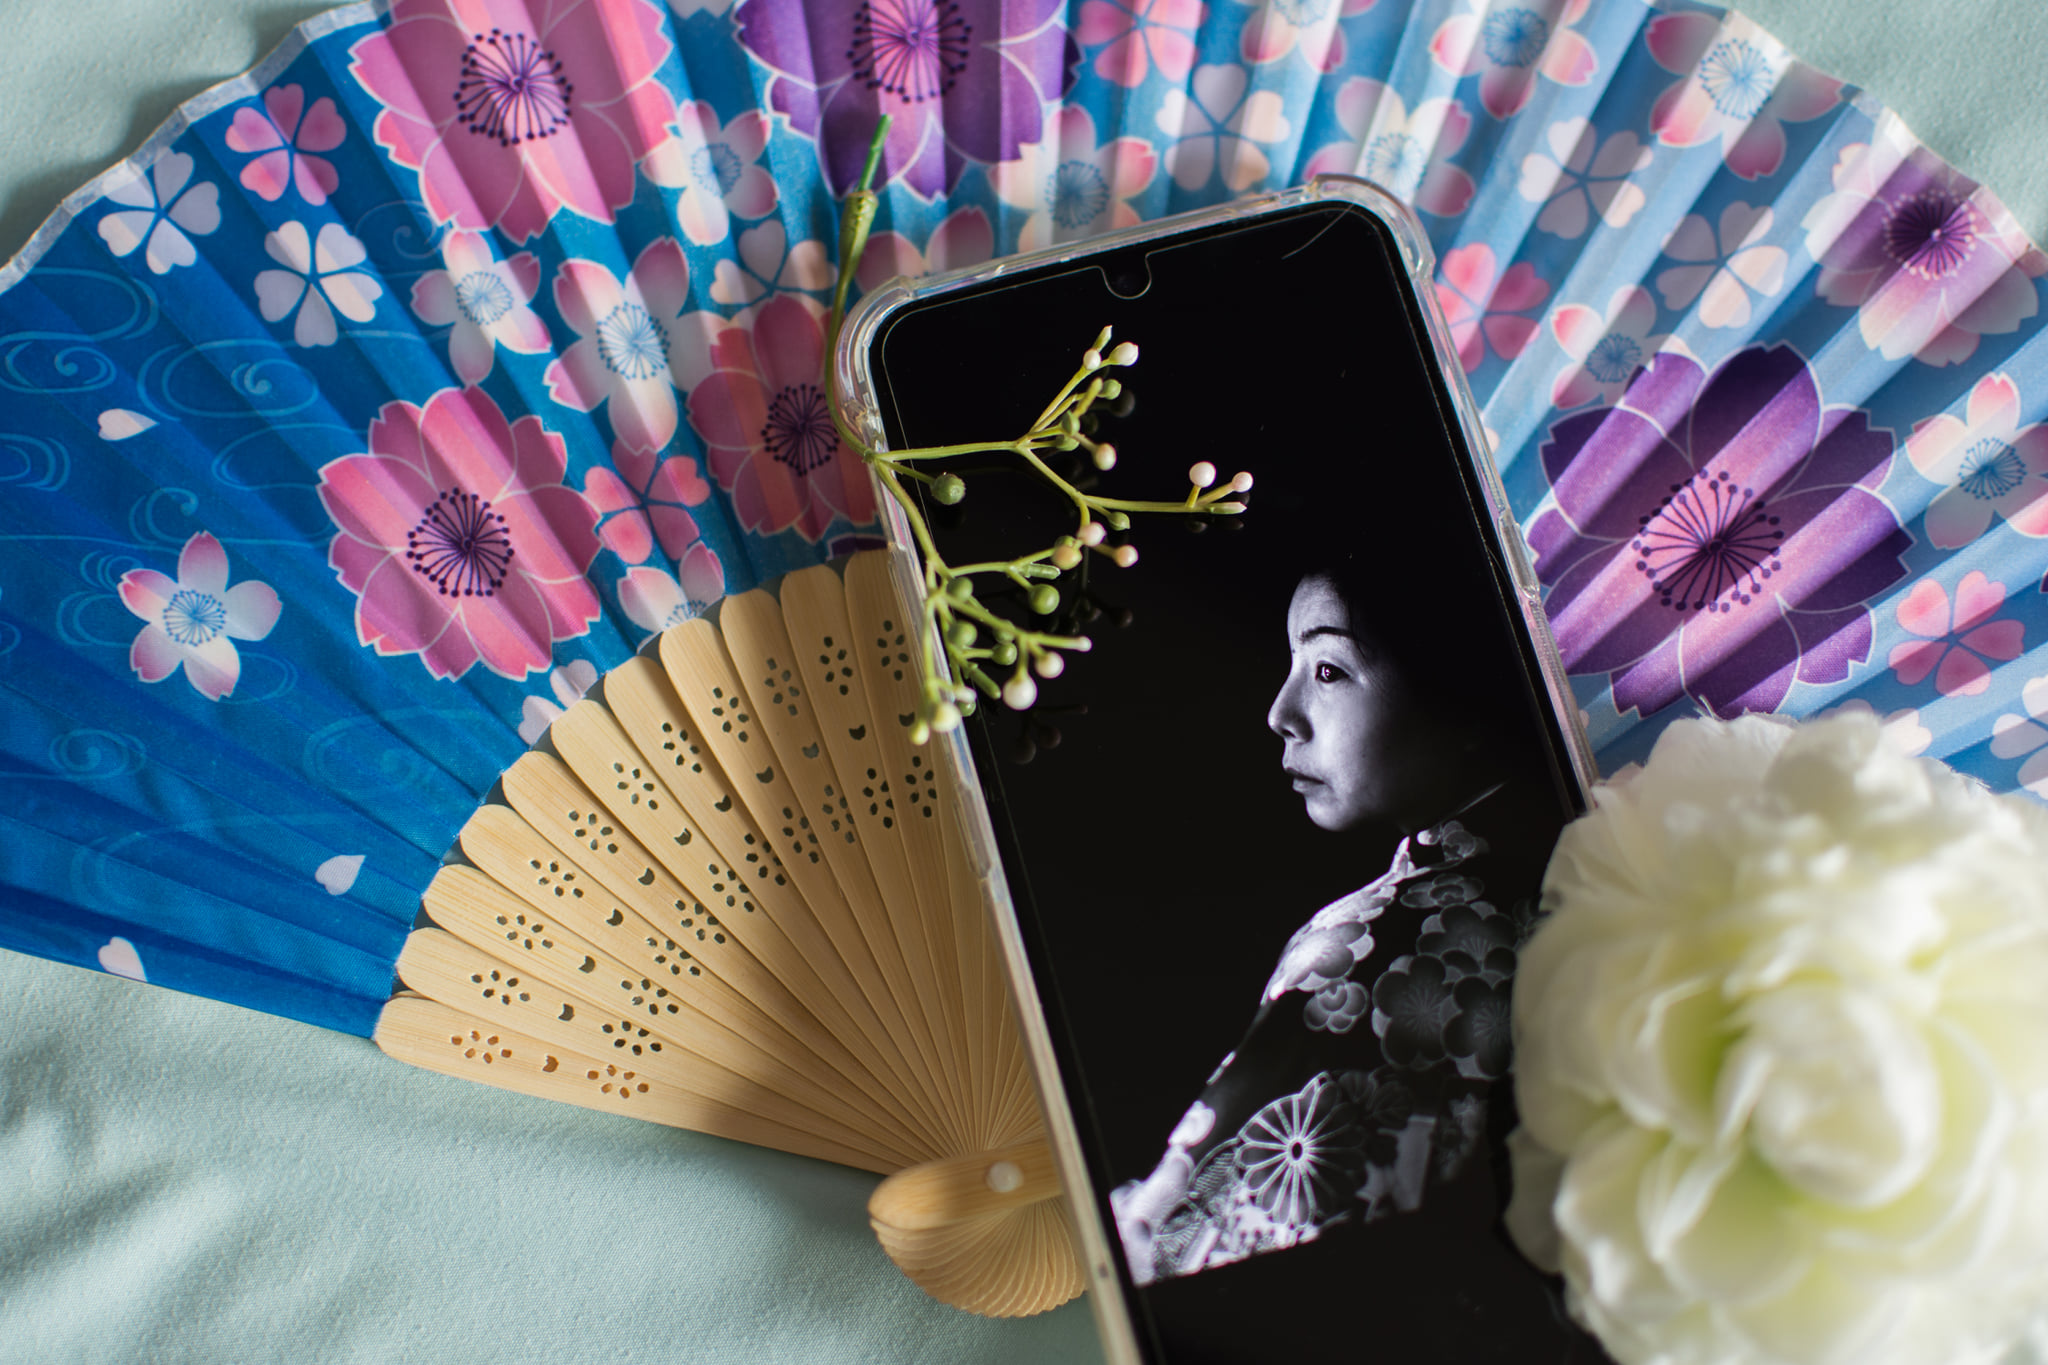
Suyong Pak, Advanced Graduate
If full costume isn’t your thing, you can still incorporate elements of theatre in your self portraits. The colour, texture and movement of the fabric adds drama to the image below image.
To set up, this shot will be easiest if you have a remote shutter. First, position an object where you plan to stand. Frame the shot and grab focus on the object, then lock it by flicking the lens to manual focus. Get into position, and throw the fabric into the air. As it flutters down in front of you, take several shots with your remote shutter. Make sure you’re looking at the camera – if you can see the lens around the edges of the fabric, then the lens can you see and you won’t be obscured.
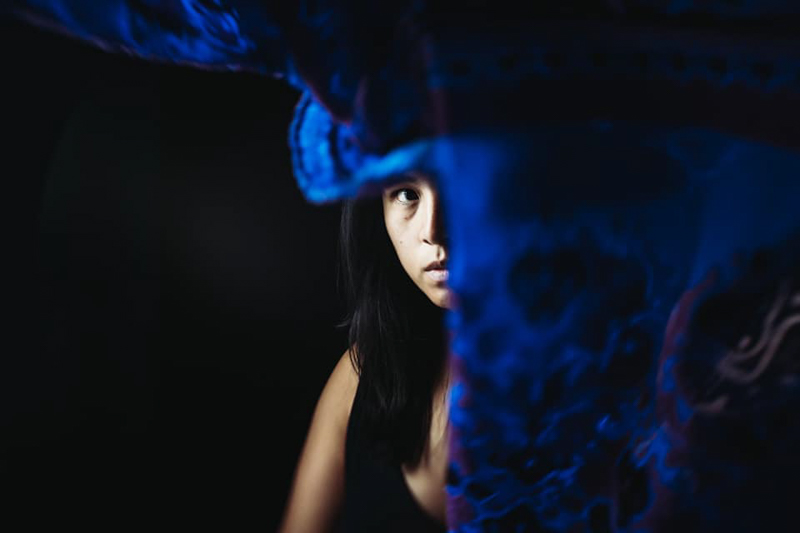
Hope de la Rosa, Advanced Graduate
Shadow Play
There are SO many ways to incorporate shadows in your self portraits. For example, look for hard light shadow patterns that you can use as framing. In the below image, Pam is laying on the floor and she is framed by the strong shadow lines cast from a window to the left of the camera.
Related: Try Hard Light Shadow Photography
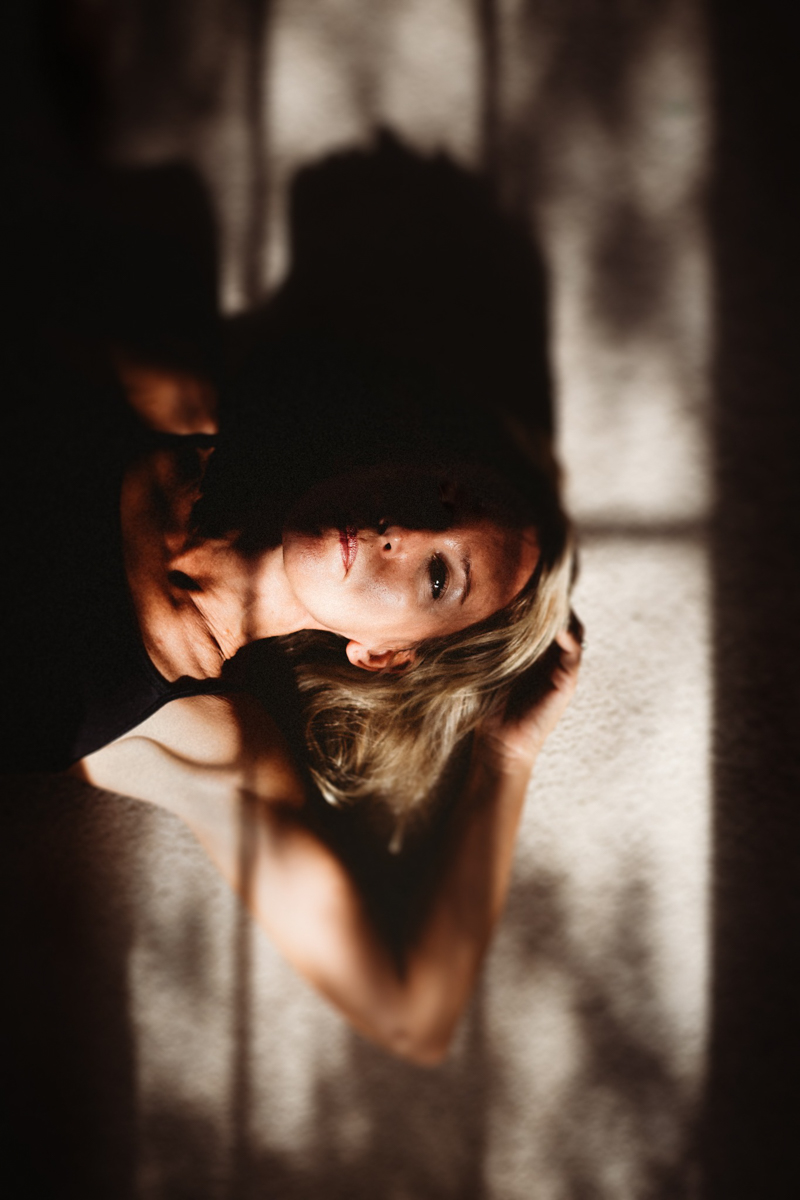
Pam Gosenheimer, Advanced Graduate
In this next shot, the shadow IS the subject – again, the key is strong, dramatic light which gives you a clear, well-defined shadow shape.
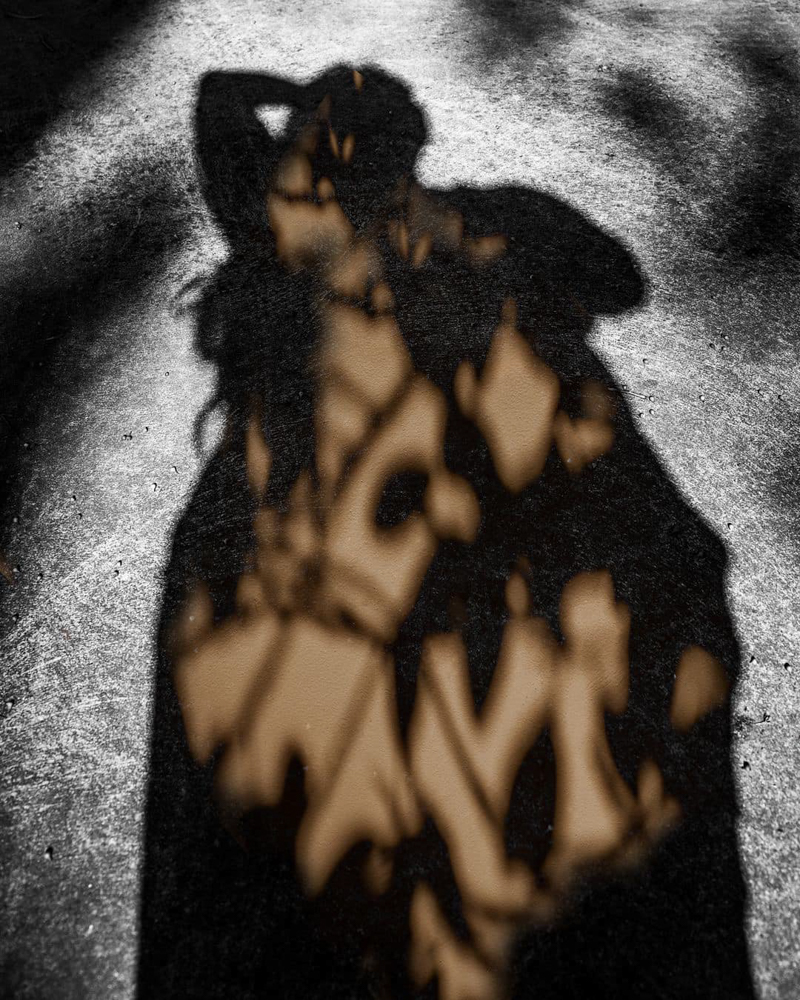
Deb Signorelli, Advanced Graduate
And another shadow self portrait. This time there are multiple subjects, and the inclusion of background elements contributes to the storytelling. In shots like this, expose for the highlights so as not to blow them out. The narrower your aperture, the sharper your shadows. Around f3.5 and narrower (bigger number) will give you well defined shadows.
Related: A Day In The Light
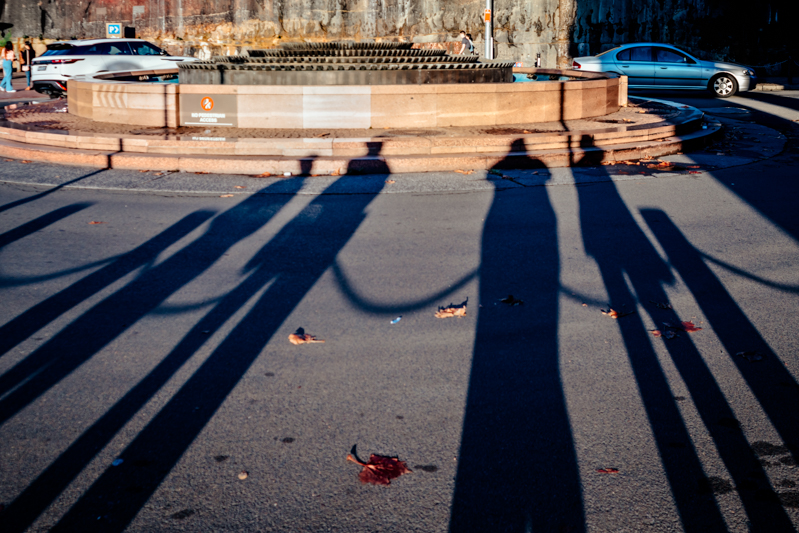
Emma Davis, CLG Instructor
Backlight
Backlight your self portrait for something a little more creative. In this way you can put yourself in semi silhouette and create a dreamy feel. Meter for the highlights to avoid blowing them out, and this will put you in shadow a little.
The lens flares captured here add a dreamy feel, but if you want to avoid them, use a lens hood to block them out.
Related: What is Metering?
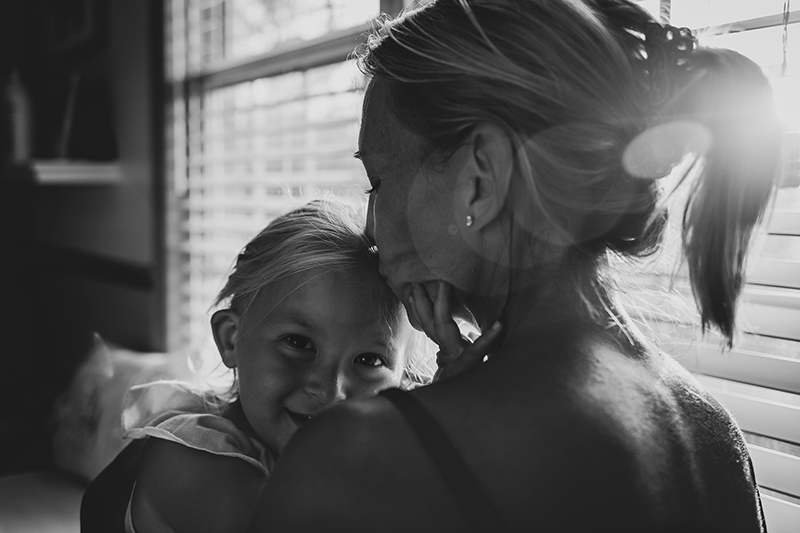
Pam Gosenheimer, Advanced Graduate
The degree to which it silhouettes you is determined by how much contrast there is between you and the light. The brighter the light and the darker the room you’re facing, the more in shadow you will be.
The key to this shot below is her face is turned ever so slightly toward the camera so that we can see a hint of her features. If she were turned more toward the window, it would be a faceless portrait.
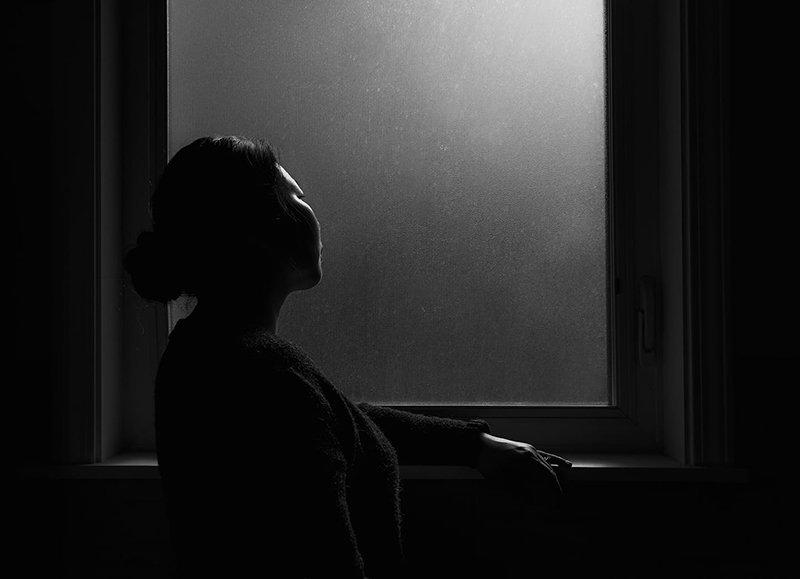
Suyong Pak, Advanced Graduate
In this next shot, the room is darker and the light source is stronger which gives greater contrast and creates a complete silhouette. The light is positioned in front of her, so her body obscures the brightest part of the light, leaving that gorgeous rim light highlighting her hair and the edges of her silhouette.
Related: How To Take Perfect Silhouette Photos
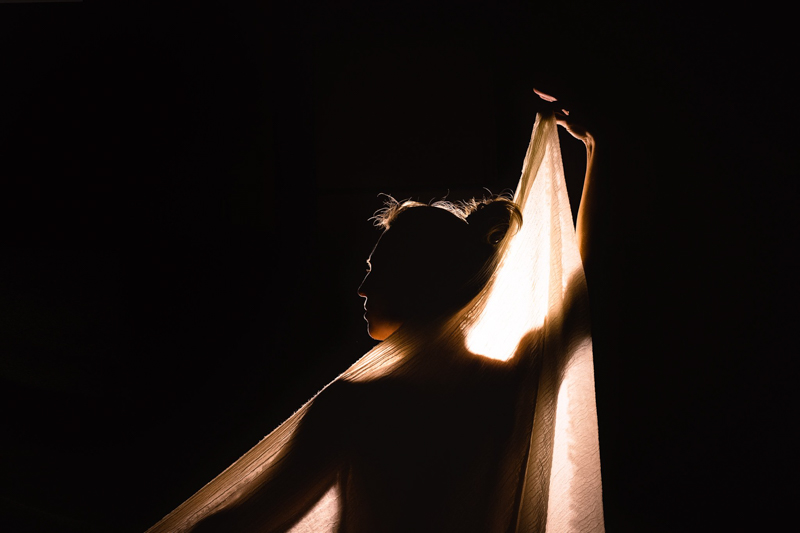
Pam Gosenheimer-Thorne, Advanced Graduate
It’s All In The Details
Getting in nice and close allows you to focus on the smaller details. In these next two images, the tight crop draws the viewer straight to the subject’s eye. To achieve fabulous catchlights like the ones you can see here, make sure you are facing towards the light source.
Related: How To Look Great In Your Self Portraits
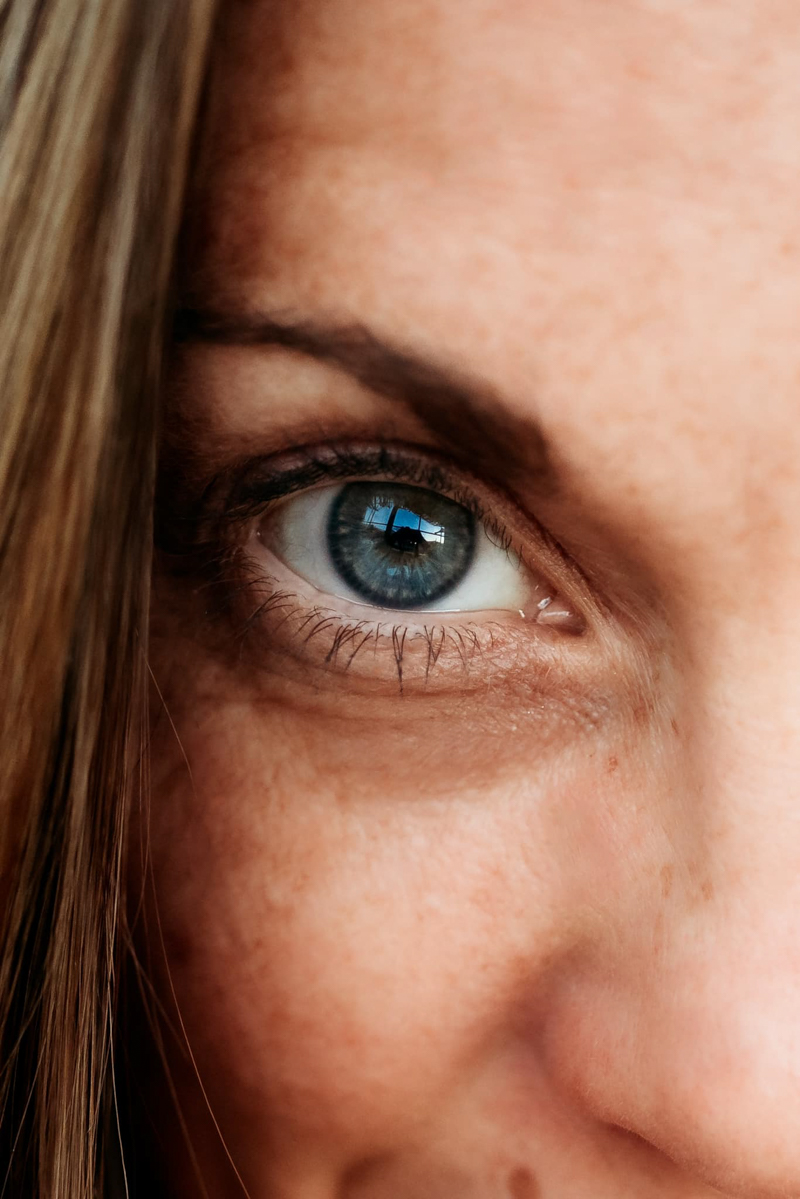
Amanda Marenghi, Graduate
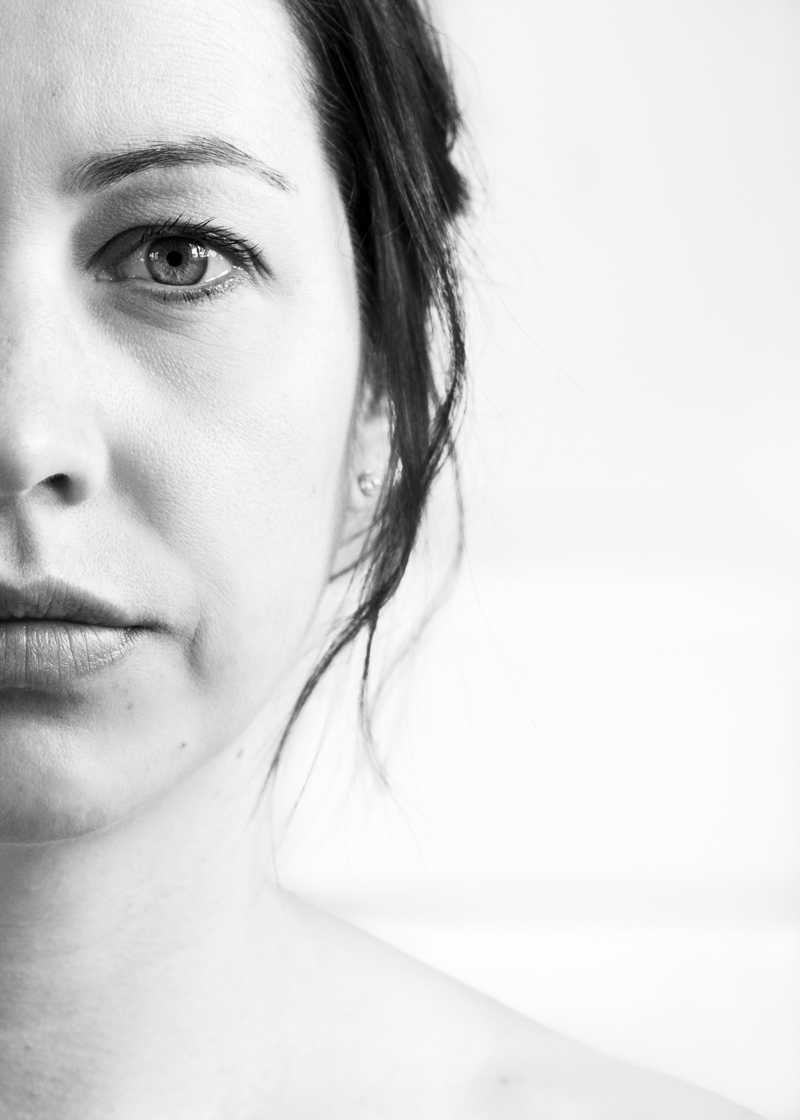
Claire Roads, Advanced Graduate
In this next image, Hope has had someone write words across her back and the words are the subject of her self portrait. By keeping the rest of the frame clean and simple, our eye is drawn straight to those powerful words.

Hope de la Rosa, Advanced Graduate
The tight crop in this next shot works well because it is balanced out by the sharp detail in the subject’s hand and the camera, while the pops of bright red and background blur round out the frame.
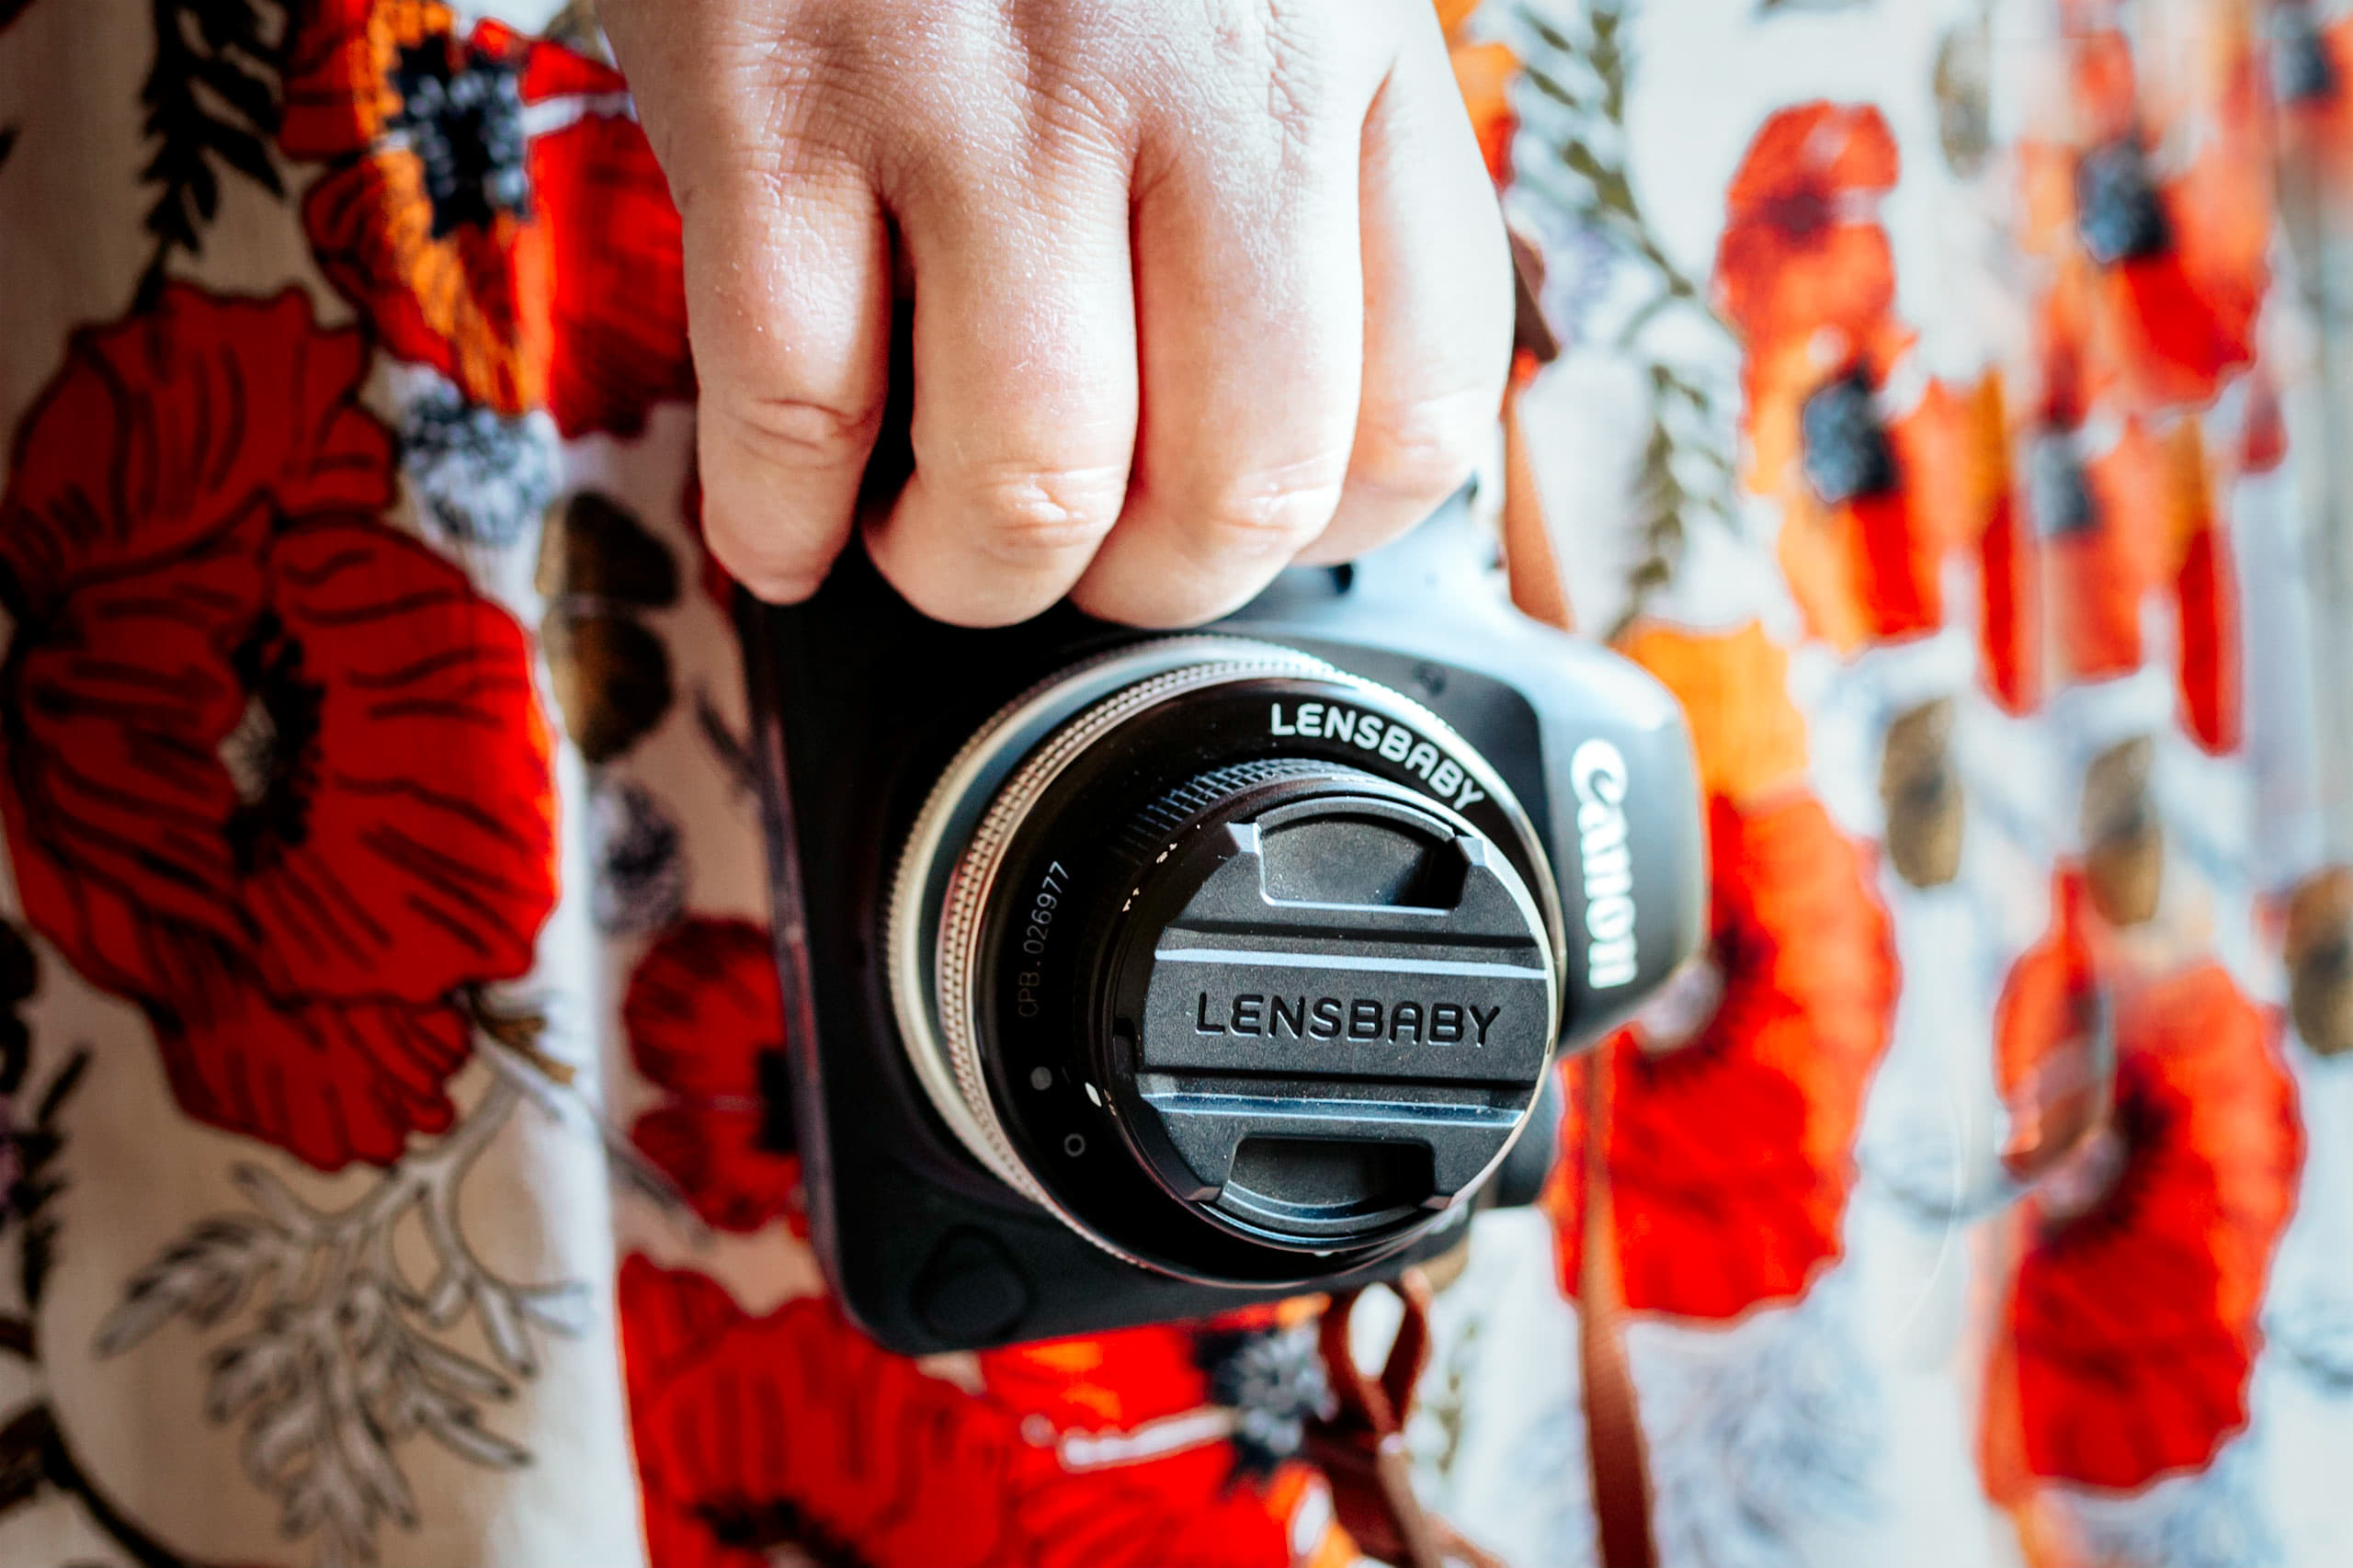
Emma Davis, CLG Instructor
Layering
Including layers in your frame is a great way to create depth, and can also invoke a sense of mystery and intrigue as is the case in the image below. Here, Anna has used the ferns to frame her face, and positioned herself so the shadow the fern is casting falls across her face, adding another layer.
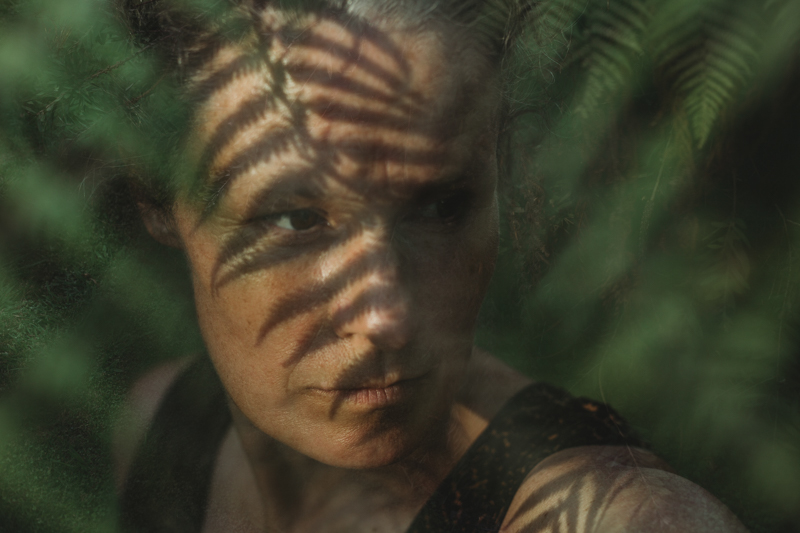
Anna Menendez, Graduate
Movement
Incorporating movement in your self portraits can be a great way to shake off the awkwardness of posing for the camera. Choose a slow shutter speed, as Bek and Hope have in the images below, then move slowly in front of the camera to create intentional motion blur.
For best results, use a tripod and remote shutter or timer. If you don’t have a tripod, find a sturdy surface, such as a table or bookshelf, to rest your camera on.
Related: 17 Ways To Use Reflections In Your Self Portraits
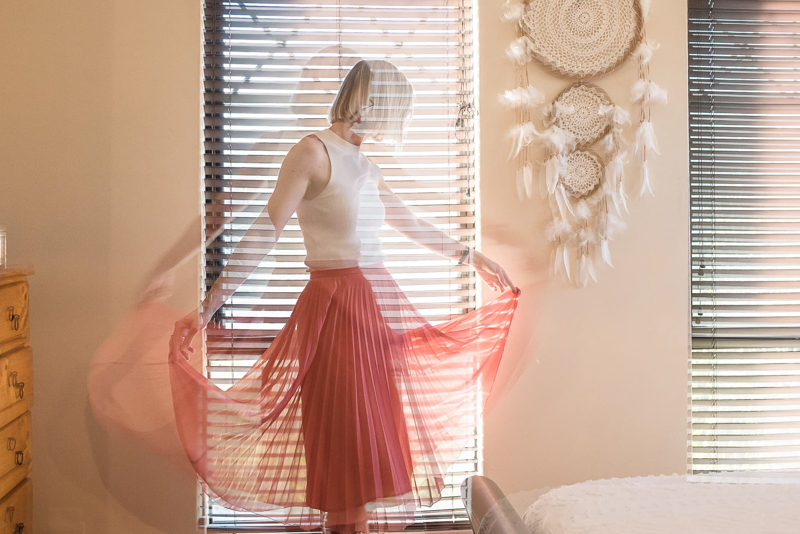
Bek Alexander, Advanced Graduate
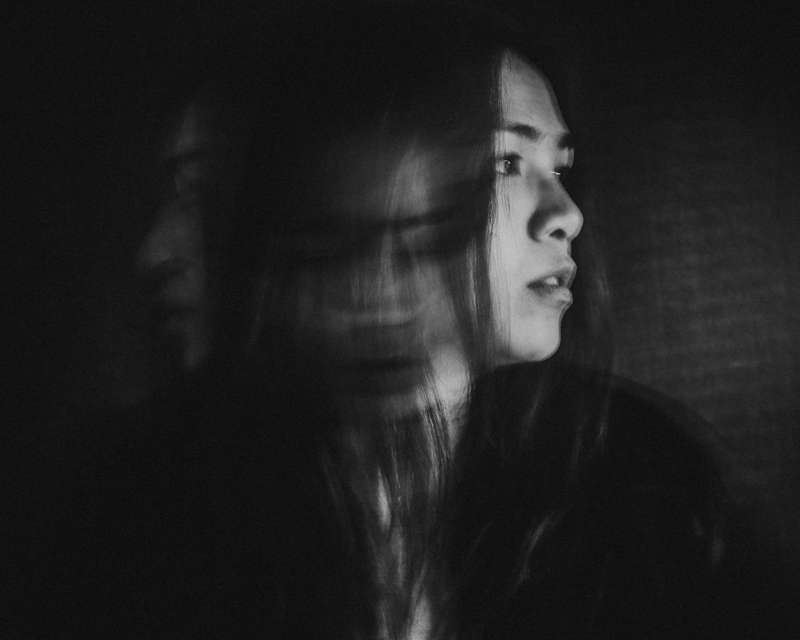
Hope de la Rosa, Advanced Graduate – Shutter Speed 3.2 sec
Multiple Exposures
Why not take layering one step further by creating a double or multiple exposure self portrait?!
Traditionally created by making more than one exposure on a slide or frame of film, multiple exposures are simply the combining of two or more photos to create a single image.
Many digital cameras now include this function, or they can be created in software such as Adobe Photoshop. The tutorial below shares a how-to for Photoshop, check it out and create your own double exposure self portrait!
Related: 12 Outside The Box Photo Ideas That Rock
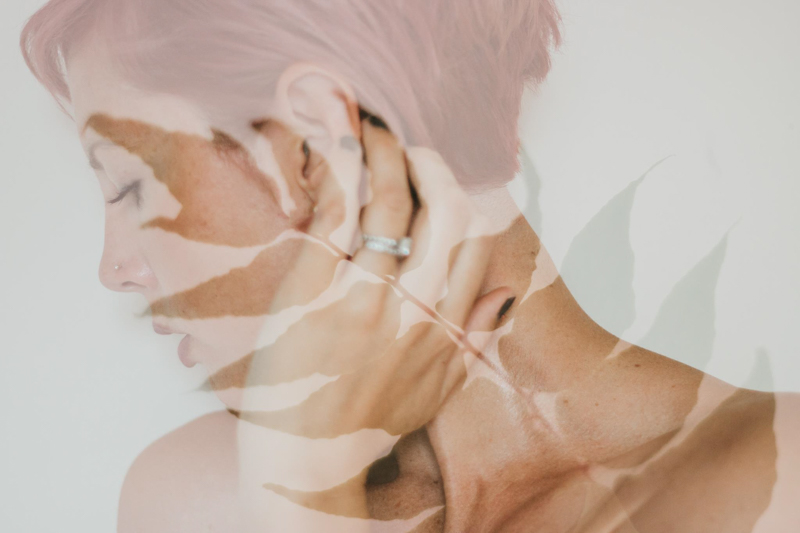
Kailey Nagymarosi, Advanced Graduate
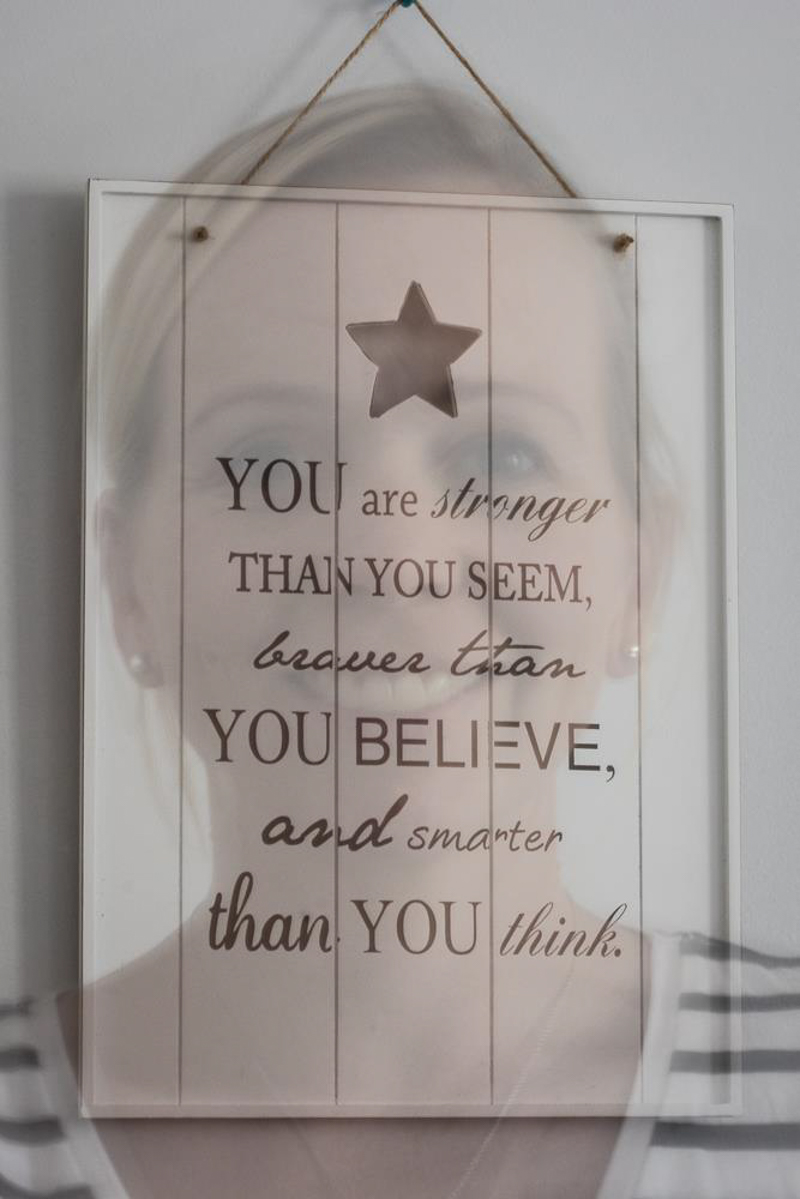
Sue Thorn, Advanced Graduate
In this next shot, Hope has used both movement and double exposures to create this shot.
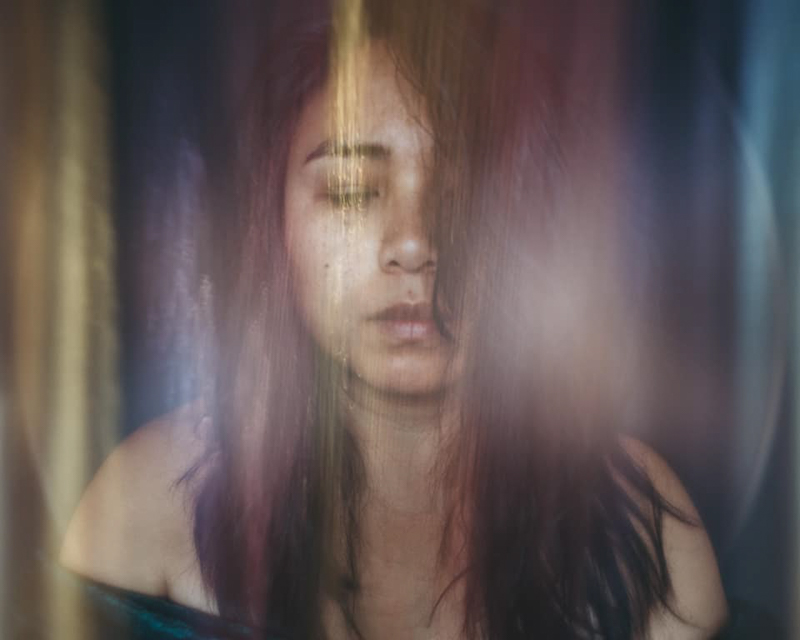
Hope de la Rosa, Advanced Graduate
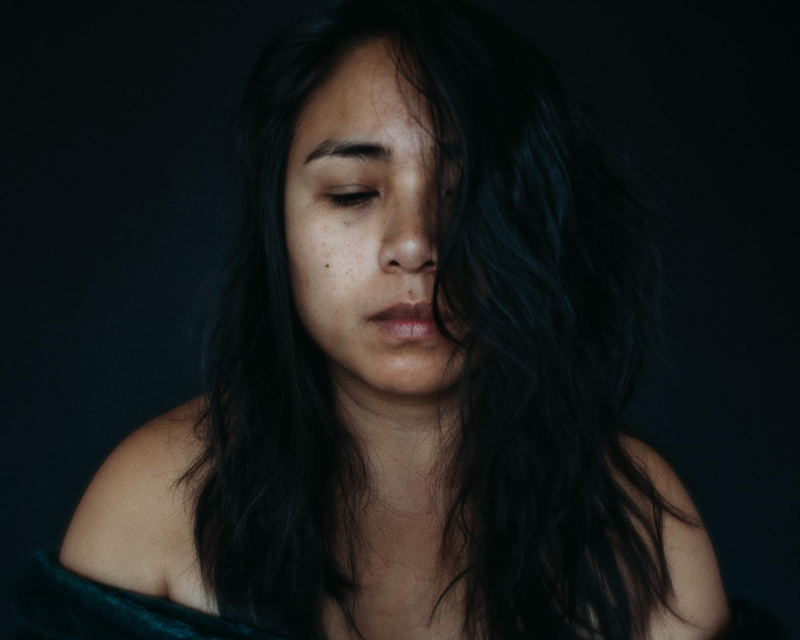
The first shot is a straight portrait of herself, shot in moody light.
Related: How to Shoot Dark & Moody
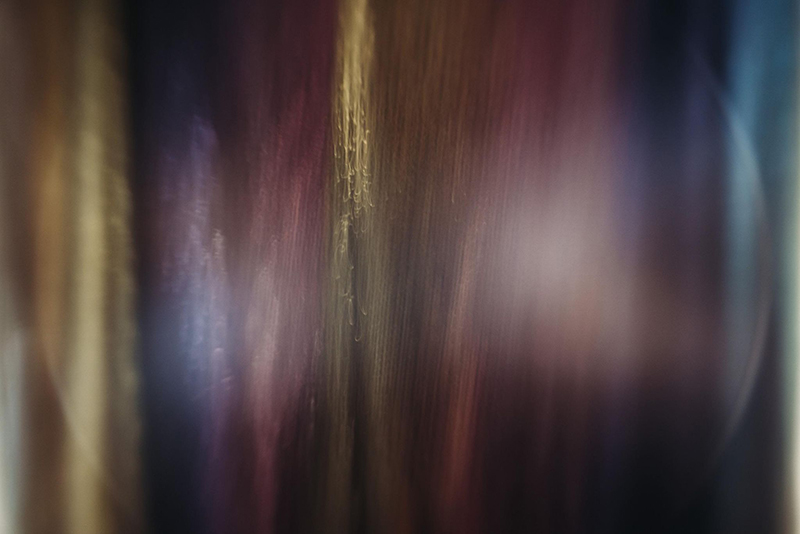
And her second shot which she used to overlay the portrait in Photoshgop to create a double exposure, is an ICM (intentional camera movement) shot of a rainbow sequined dress.
ICM is a technique where you move your camera in a certain direction whilst the shutter is open. So you’re creating motion with intentional movement, and capturing that motion with a slow shutter speed. To capture a shot like this, move your camera vertically from top down while the shutter is open. Use a slow shutter speed of anything from around 1/2 a second to 4 seconds. The blur effect you create is controlled by a combination of how fast you move the camera, and your chosen shutter speed. the pattern is created by the direction you move the camera. Move the camera vertically for a vertical pattern, horizontally for horizontal patterns, and circular for a circular pattern. You can also create the motion by zooming in or out with a zoom lens whilst the shutter is open.
So there are a few variables that go into creating an ICM shot! And if you’re trying it for the first time, you’ll probably need to experiment to get the shot you envision.
I hope this collection of creative self portraits has helped spark a few ideas for you, too! For more inspiration, tips and ideas, visit our FREE Facebook community.
Join my new workshop and learn Simple Steps For Taking Pro-Quality Photos of Your Kids & Family…and it’s totally FREE to join! Register here…

Leave a Reply Cancel reply
PRIVACY POLICY & SITE TERMS AND CONDITONS
CLICK LOVE GROW ™ Pty Ltd - COPYRIGHT 2024 ©
x
Join Now
Enter your info below to join the challenge!
Want a friendly reminder when I go live?
Pop in your number and I’ll shoot you a text.
* We will send text reminders for our live calls during the challenge! Reply ‘STOP’ to end or ‘HELP’ for help.
We promise not to ever share your details with anyone or send you spam! Check our privacy policy and terms of service.
Be the first to comment