White Balance – What is it & Why Does it Matter?
White balance sounds confusing… and I know it’s a subject that you’ll sometimes avoid when you’re first starting out. But I promise it’s not a complicated topic, so let’s have a look!
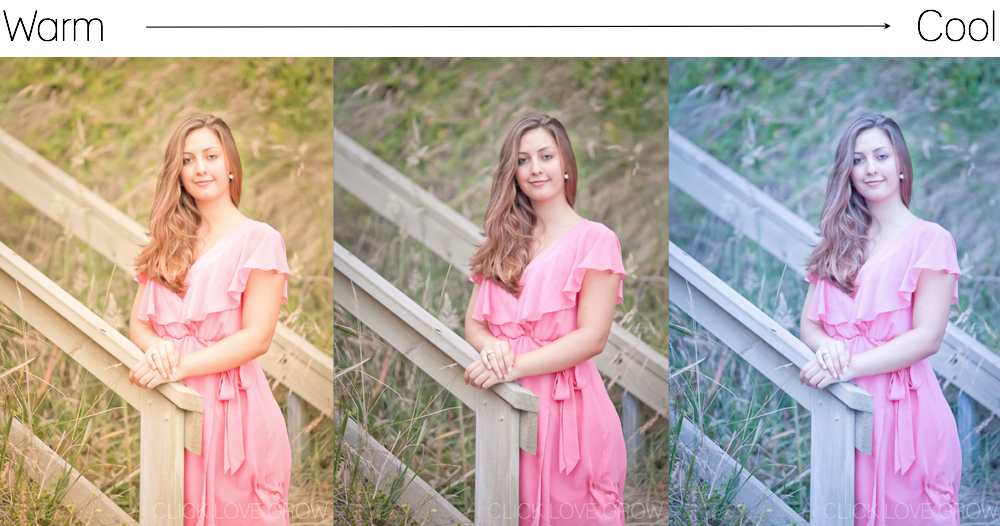
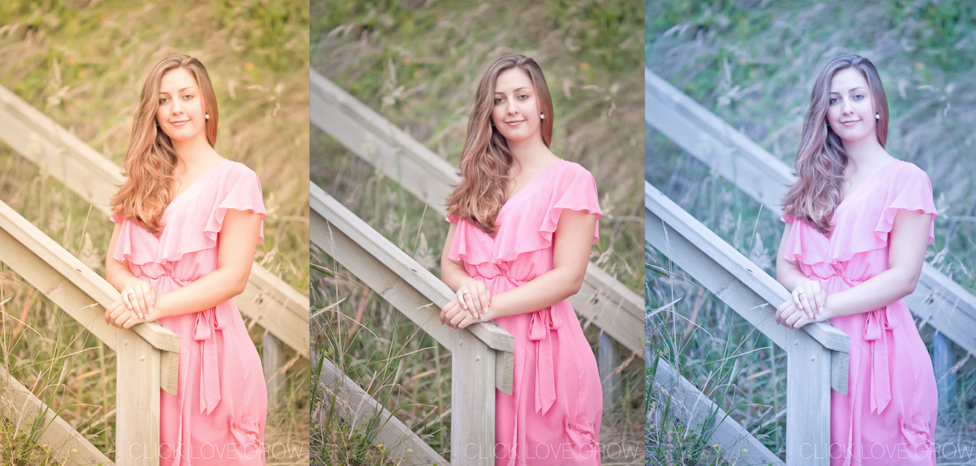
White balance is the colour temperature of an image, and it ranges from warm (orange hues) to cool (blue hues).
When we edit or adjust white balance the goal is to ensure a realistic reproduction of the colour in a scene.
See the example below of how different white balance temperatures affect the appearance of an image.

Our eyes (or our brain) see the colour white as true white regardless of the lighting that we’re in.
However when a digital camera sees white, it’s affected by the lighting situation. Our camera will capture the colour temperature of the light, and sometimes it gets it right, sometimes it doesn’t.
Get the white right!
When our white balance is perfect, our whites are true white, and the other colours in the scene will also be reproduced correctly. Also, the overall hue will not be too warm (yellow/red/orange) or too cool (blue/green), unless it is meant to be (eg. the warm glow of a summer sunset, or the blue hue of a cold, wintery scene).
Bottom line, you only need to focus on getting those whites right. If the white is right, you can likely assume the other colours are spot on aswell.

So how do we ensure the whites are right?
We could get very technical on this topic (and some articles do, which makes them so confusing)! We could talk about colour temperature, light temperature meters, degrees Kelvin etc, etc. But to be honest that’s not going to help you understand it!
There are a couple of easy options you can rely on and stick with indefinitely if you want and if won’t adversely affect your photos.
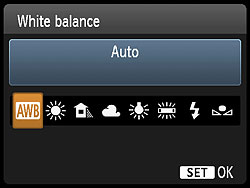
Auto WB
The Auto WB option on most cameras will produce fairly good results in daylight and natural light indoors. So it’s a safe option to use when shooting in these conditions. Other lighting conditions, for example indoors under artificial light, may not always produce the most natural white balance. This can result in images that are too cool (blue) or too warm (orange).
Preset WB
Digital cameras have a range of white balance presets for use in different lighting conditions. Most will offer a choice of shade, cloudy, daylight, tungsten, fluorescent, flash, custom and temperature. The first few options are fairly obvious, and the latter two are for advanced users and involve the use of a grey card and a light temperature meter. It’s important to remember these settings are still a best guess by the camera, so don’t set and forget. Keep your eye on the whites and adjust your settings if you need to.

Shoot RAW
If you shoot in RAW and Auto WB you have full capacity to adjust the white balance in editing. Most editing programs have a white balance ‘slider’ that let’s you adjust the colour temperature. With practice your eye will becoms accustomed to seeing that hint of blue or yellow in overly cool or overly warm photos.
Related: JPG vs RAW – What’s the Difference?
Handy tip!
Landscapes – Do you get frustrated when your camera doesn’t capture the perfect hues of a sunset? In this scenario your camera is seeing that warm golden light and neutralises it when picking a White Balance setting for the photo.
This is why your images look nothing like the scene before you. So when photographing a sunset or sunrise, try selecting a WB preset that is designed for a cool light, such as cloudy or shade, and trick the camera into warming up the scene.
The opposite applies if you’re attempting to photograph a winter scene and the camera is warming the image. Try shooting with a WB preset usually designed for warm light, such as tungsten. Or you can take the brave step to start shooting in RAW and then tweak your photos in an editing program to achieve the look you’re really after!
Portraits – Even though we’re typically trying to achieve ‘white whites’, in portrait photography we’re most focused on ensuring that our subject’s skin tone is as natural as possible. If your subject is looking a little green, orange or purple, it’s likely that your white balance is out, and that the lighting that you were shooting in was throwing a colour cast onto your subject.
This again can be corrected by paying attention at the time of shooting, and then either moving the subject into an area with more natural light, or possibly removing something in the scene that may be throwing the colour cast (think a brightly coloured wall, or sweater or toy).
Then consider adjusting your presets to one that gives you a more natural look… or finally you can shoot in raw and then make adjustments during your editing.
Let us know if you have any White Balance questions or tips in the comments below.
Join my new workshop and learn How to Shoot Pro-Quality Photos With Your DSLR… and it’s totally FREE to join! Register here…

Leave a Reply Cancel reply
PRIVACY POLICY & SITE TERMS AND CONDITONS
CLICK LOVE GROW ™ Pty Ltd - COPYRIGHT 2024 ©
x
Join Now
Enter your info below to join the challenge!
Want a friendly reminder when I go live?
Pop in your number and I’ll shoot you a text.
* We will send text reminders for our live calls during the challenge! Reply ‘STOP’ to end or ‘HELP’ for help.
We promise not to ever share your details with anyone or send you spam! Check our privacy policy and terms of service.
Be the first to comment