6 Reasons Why You’re Getting Blurry Photos
Blurry photos – have you ever wondered why sometimes your photos are tack sharp… and then other times they’re a bit soft and blurry? It’s all so hit and miss, and very frustrating!
Whether you’re an enthusiast photographer with a fancy DSLR, or you just love taking photos with your phone, the reasons for blurry photos are universal.
There are quite a few reasons why we get blurry photos. Understanding why it’s happening will help you get sharp images more often than not, and on purpose.
1. Moving Subjects
When your subject is moving, you need a fast shutter speed to freeze that motion. The faster your subject is moving, the faster your shutter speed needs to be.
If you’re using a fully automatic compact camera, you can try using the sports mode. Sports mode is not just for sports… it’s just called that because it’s designed to capture fast movement.
If you’re taking photos in low light, and in auto your camera will lower the shutter speed to let in more light so your photo is properly exposed. Your camera doesn’t know what you’re trying to achieve and if it’s fast action photos of kid, then your photos will be blurry.
Related: How to Freeze Motion for Sharp Photos
Sue Thorn, Advanced Graduate
2. Missing Focus
If you’re using the manual focus function in your camera, it can be quite easy to miss focus, especially when shooting at very shallow apertures.
If you’re using auto focus, and your camera is deciding which focus point to use, it will generally grab onto the nearest or the brightest object in the frame.
That could be your portrait subject’s hat or something brightly lit in the background of a photo, instead of your subject or their eyes, which wasn’t what you intended.
You need to switch your focus points to manually select them (check your camera’s user guide to find out how), and if this is something you’ve always struggled with, and it has also affected your composition, it will change your life!
Related: How to Master your Focus
3. Shallow Depth of Field
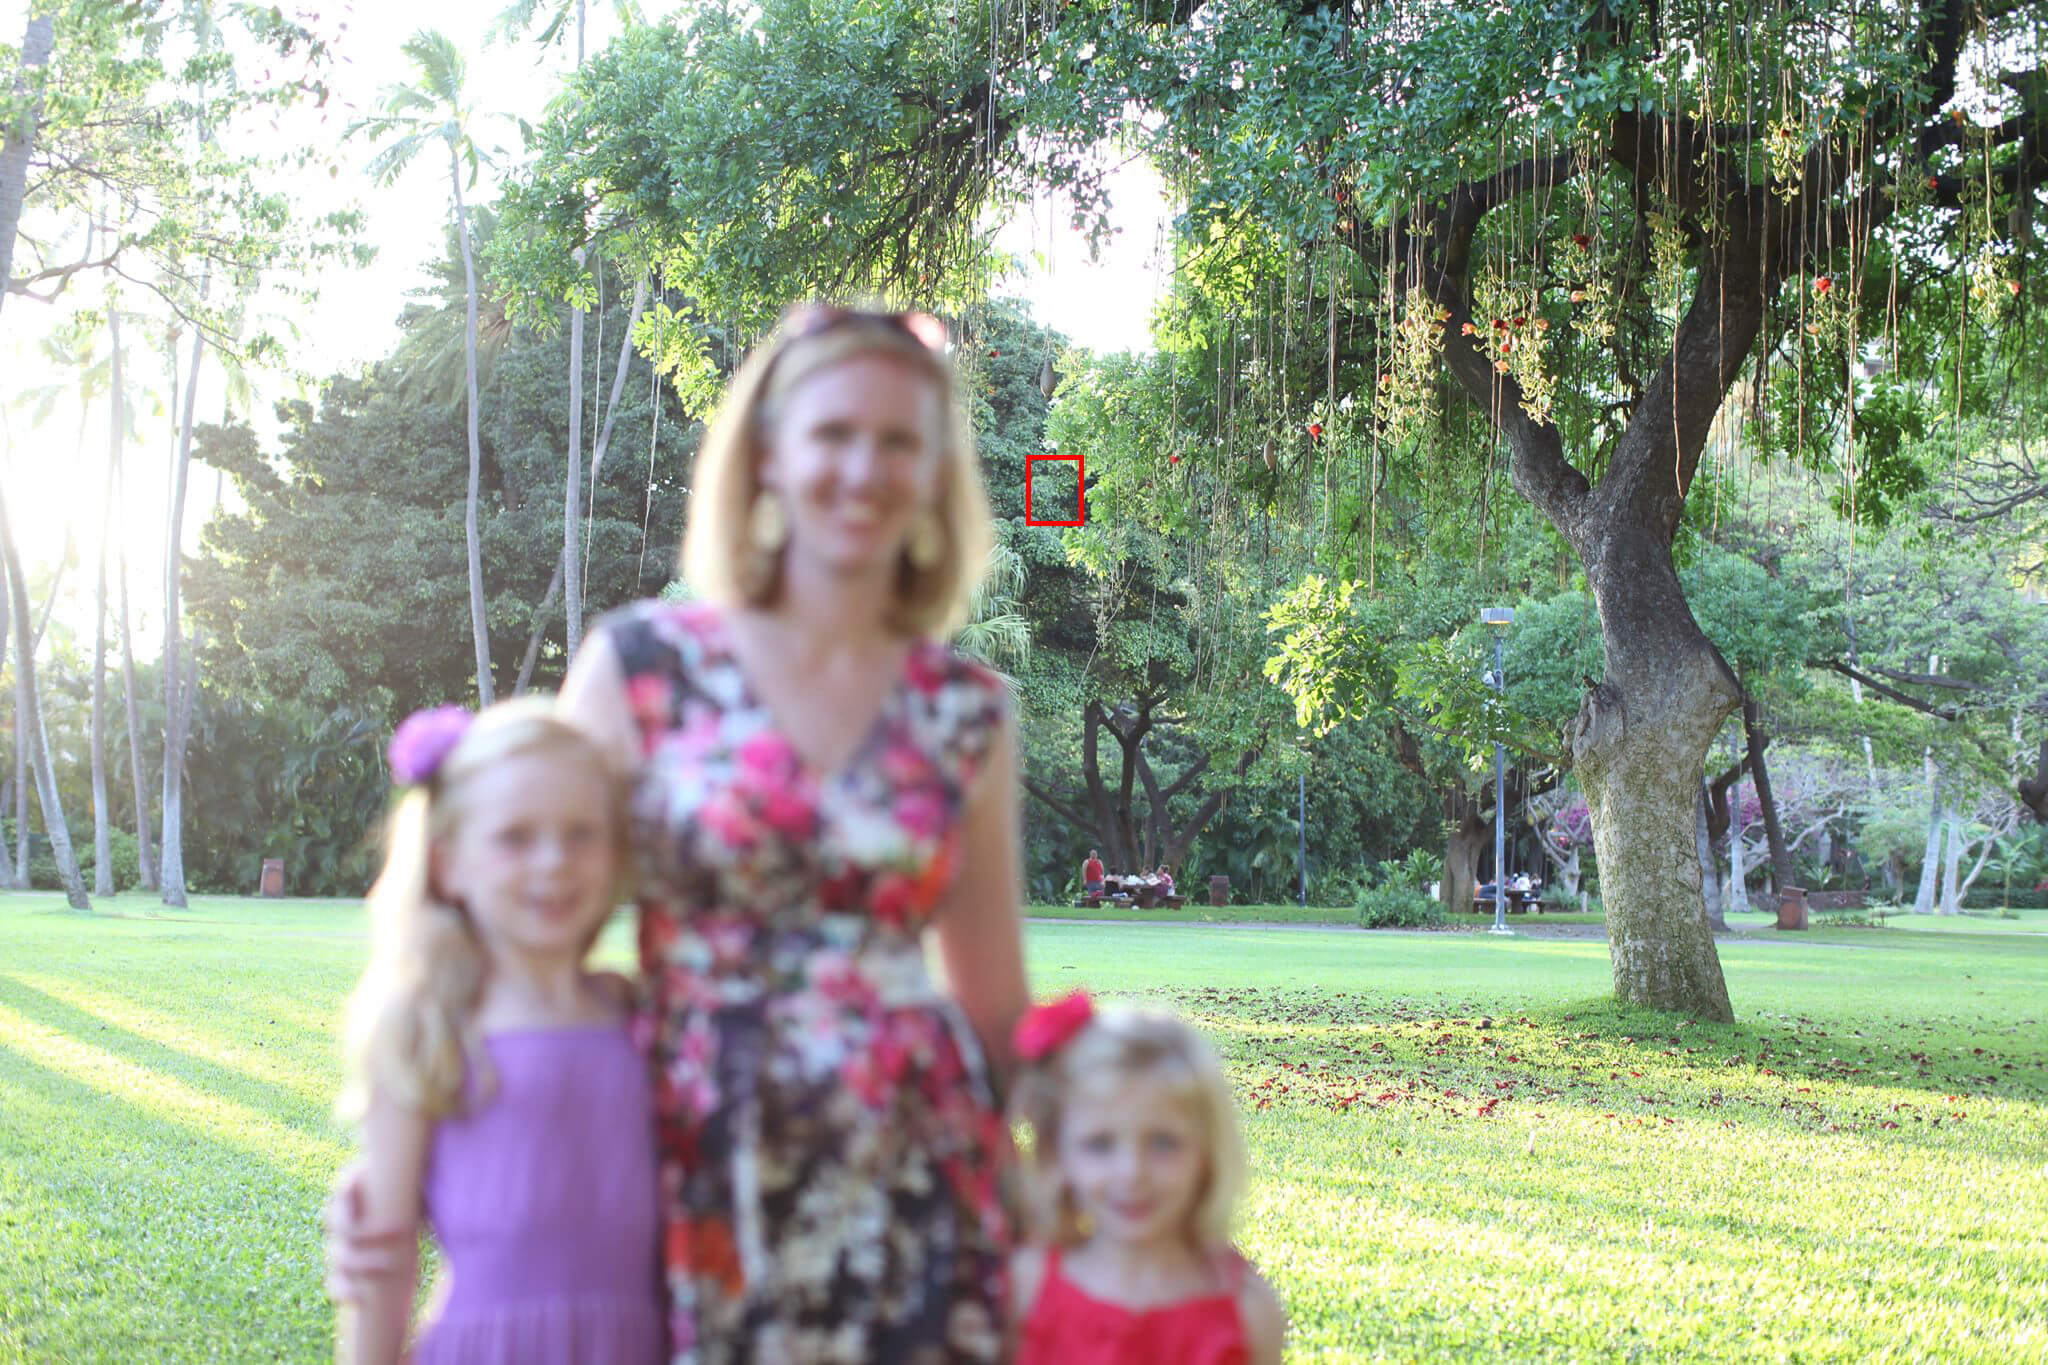
Another reason you could miss focus is because your aperture is so shallow that you don’t have a deep enough plane of acceptable focus to capture what you want.
Many of our students buy the nifty fifty and love using it on f/1.8 for the fantastic background blur. But the depth of field can be too shallow with not enough area of acceptable focus to capture all of the subject. In this case your aperture needs to be closed down a little (high f stop).
Related: Why the Nifty Fifty Should be Your Next Lens
4. High ISO
ISO is one of the three elements of the exposure triangle, and it is a measure of the camera’s sensitivity to light.
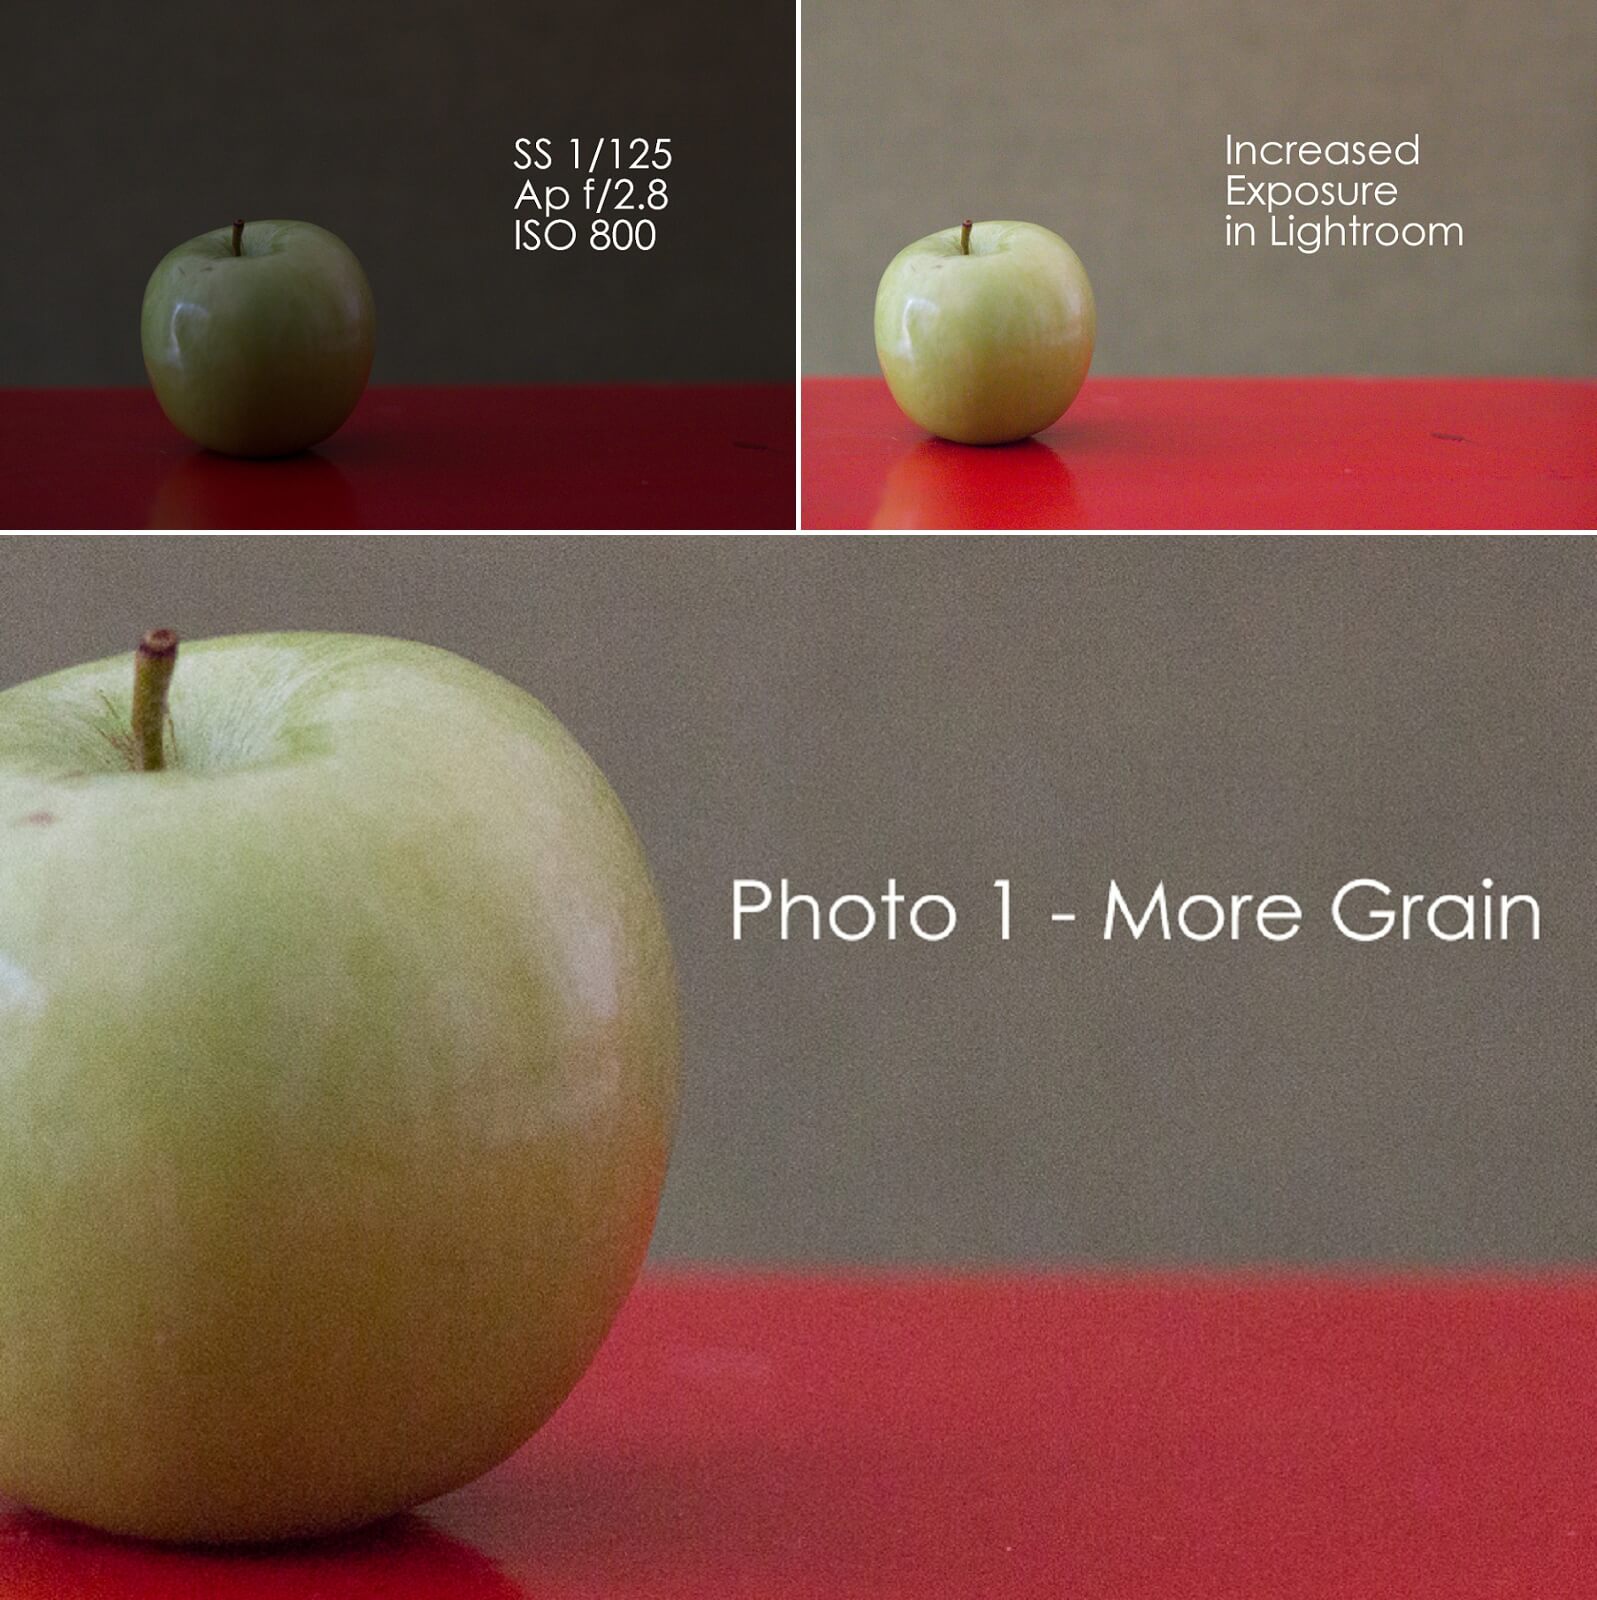
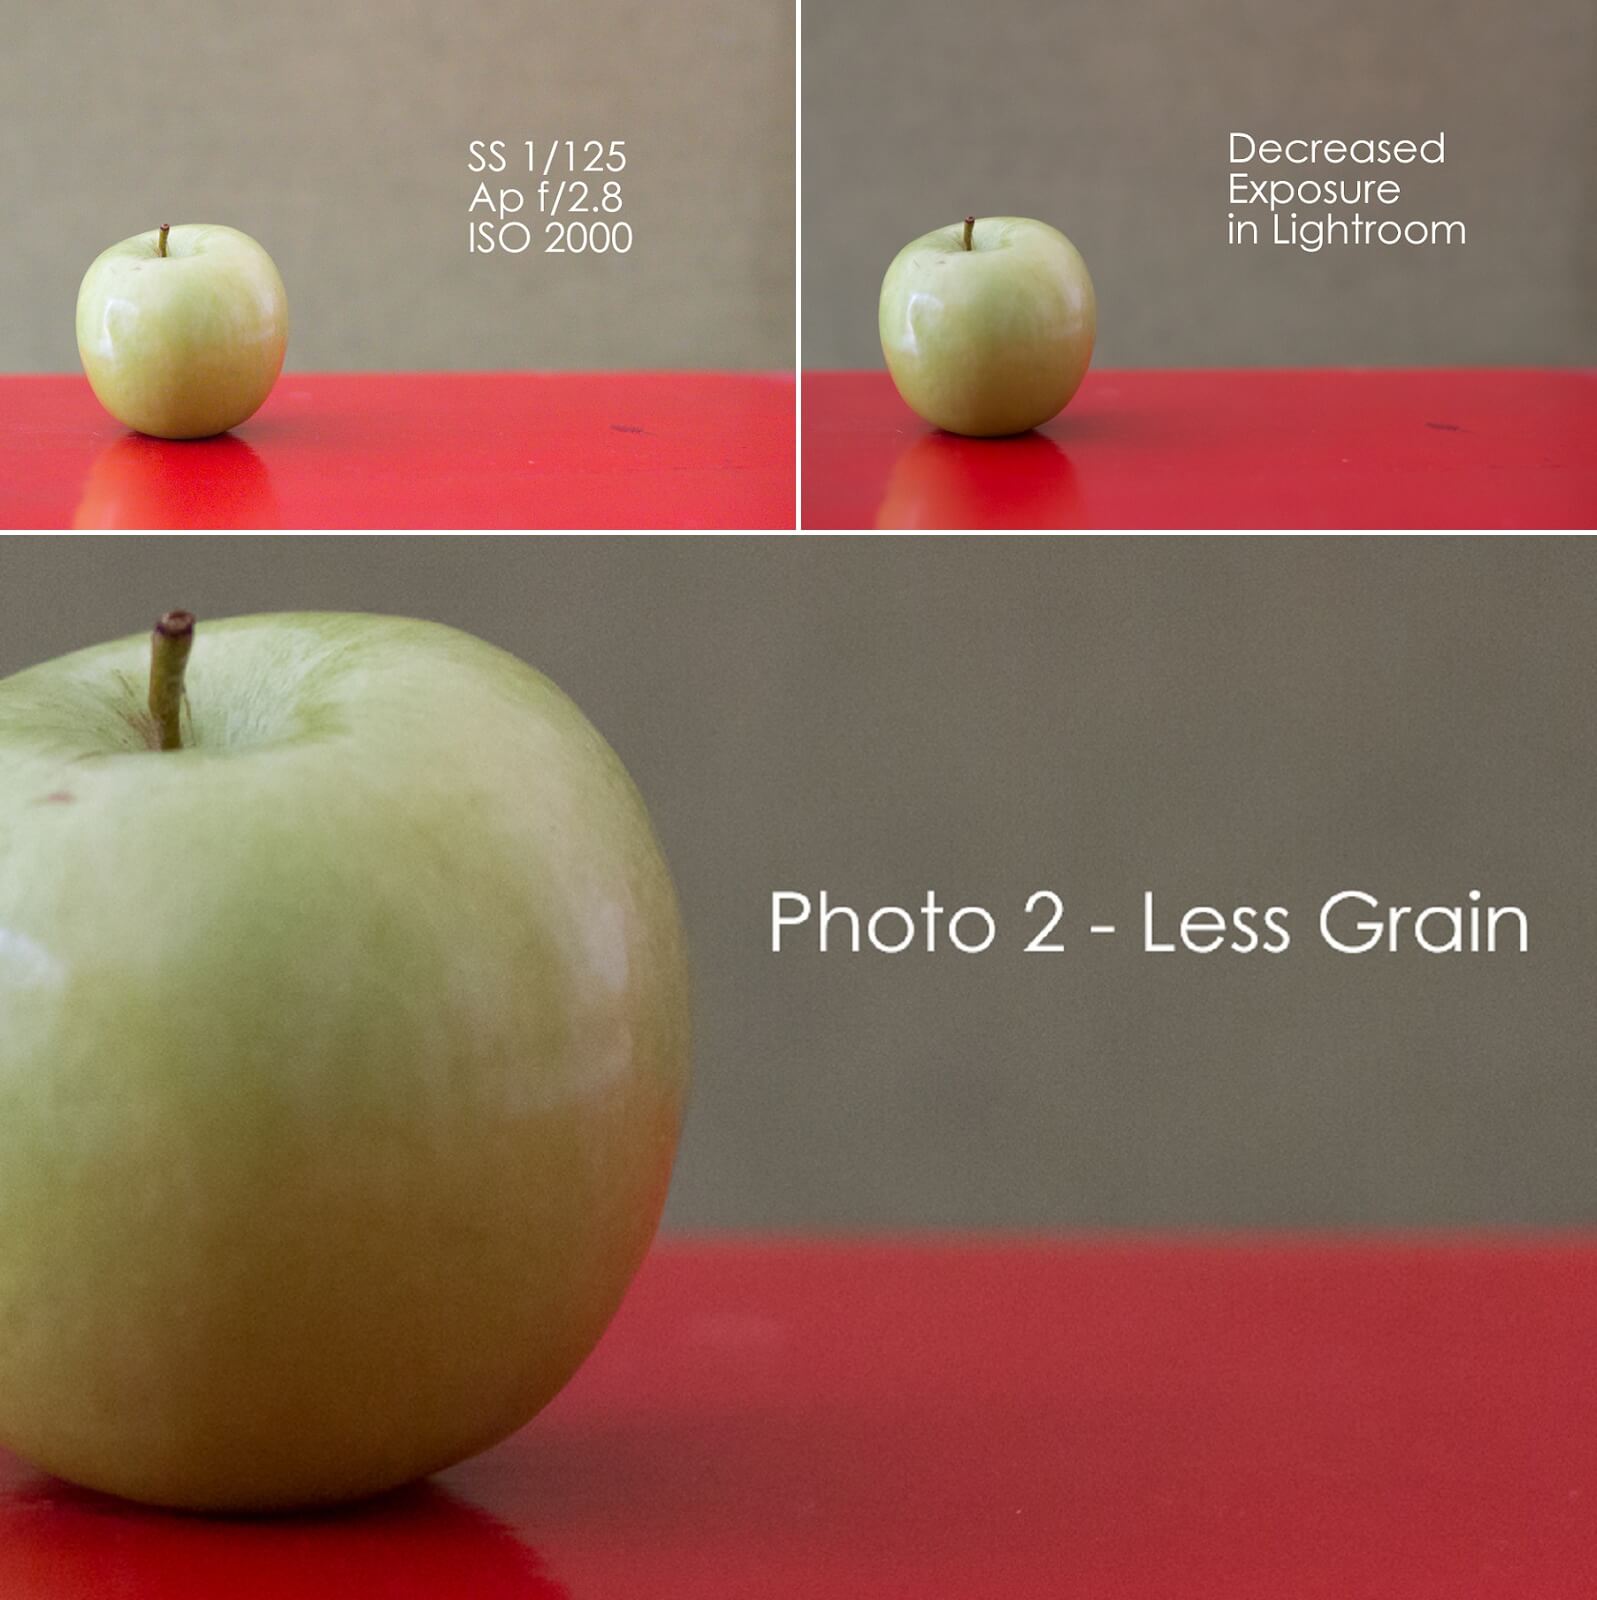
Some older model or entry level model cameras don’t handle high ISO settings very well, and it varies from model to model. Over time most people become accustomed to how high they can push their ISO with their camera before the image is seriously adversely affected. And when that happens the images end up overly grainy, and it affects the dynamic range (meaning you have less detail in your colours). Whilst this issue isn’t technically an out of focus shot, at a glance it can look like it’s out of focus.
If there is no other way to bring light into your camera except to use an ISO that’s a little beyond your camera’s ability to cope with, try overexposing your shot a little with an even higher ISO setting. Then reduce your exposure in post processing. I know, sounds crazy! But the result will be less grain at that higher ISO once you’ve fixed it up in post. Just be sure not to overexpose to the point you blow the highlights. This is a technique known as exposing to the right, or ETTR. Check out the images below to see the proof, then read this article to learn why it works.
Related: How to Get Better Results in High ISO Shots
5. Camera Shake
This comes back to shutter speed again.
When you’re hand holding our camera, it’s subject to motion blur from camera shake. The motion can be tiny, and comes from the normal and very subtle motion of your hand, coupled with movement caused when you press the shutter. That motion will be recorded as blur if your shutter speed is too slow.
So even if you’re taking a photo of a motionless object, you still need to factor in camera shake when selecting a shutter speed.
How slow you can shoot handheld before capturing camera shake is wholly dependent on how steady of hand you are. I personally, don’t like to shoot with a shutter any slower than around 1/80 but I have known some people who get a sharp image of a motionless object at 1/40.
Experiment until you figure out your own limit.
6. Pixel Peeping
What’s that? You know how when you take a shot, and you review it and you zoom in…and in and in and riiiight in? And it doesn’t look tack sharp?
Well it’s not meant to look sharp, and doing that is called pixel peeping.
If your subject isn’t filling the frame, and you have to zoom in that far to see if it’s sharp, it will look a little soft even if it’s a tack sharp image.
Relax
It’s great to know how to avoid blurry photos, so we can always aim to nail it in that regard. But try to remember that many times the moment you’ve captured is way more important than the technical brilliance of the shot.
Focus on all the things you love about an image, and simply aim to keep practicing and improving your skills!
Learn How to Shoot Confidently in Manual Mode!
Our 8 Week Enthusiast Photography Course is starting again SOON!
I’ll teach you how to use your camera confidently and take photos you LOVE, through step-by-step lessons and detailed critiques. It’s ON SALE NOW, click HERE to learn more and secure your spot.




Hi there,
I was finding that almost all of my pics were just slightly out of focus, even the ones taken on the tripod. It was driving me nuts!
Then, in a flash of light, I realized that I rarely have my eyeglasses on, finding them to be cumbersome. So, off I trotted to get my glasses, and what-do-you-know…my pics were 100% better!!!
Oh, duhhh!
Some great tips, thankyou.
Id love to know more about changing the exposure. I can’t work out how to do it and i want to know how to (if possible on my nikon 3200) change it to a 30 second exposure to capture sparklers moving in a pattern in the dark.