DIY Photography Backdrop Ideas
8 Fun & Easy DIY Photo Backdrop Ideas
Sometimes you just can’t find that perfect combination of good light and an uncluttered background to shoot portraits indoors. When this happens, a photography backdrop is the answer. And, regardless of what you may think, it doesn’t have to be expensive! In fact, creating a DIY photo backdrop or a home photography studio are super easy and affordable ways to step up your portrait game!
To this end, we’ve come up with 8 ideas for DIY photography backdrops that you can easily put together, opening up a new world of unique and fun portraits!
DIY Photo Backdrop Essentials
- In most photoshoot situations, you’d want your background to be nicely blurred to create separation for your subject. In short, you can do this in two ways. You can either put a good distance between your subject and background (at least 1m/3ft) or shoot using a wide aperture, eg. f/2.2 to f/3.5
- Photography backdrops will “sit” differently depending on their textile’s fibres. The key here is to avoid capturing wrinkles and shadows, as these will be distracting.
- If you’re including the floor, make sure your backdrop sits perfectly flush with it. Alternatively, pull it all the way out and sit your subject there so it becomes a seamless backdrop.
- Try not to use highly reflective products or materials unless that’s the look you’re going for.
1. Patterned Bed Sheet
Bed sheets make fantastic DIY photography backgrounds for several reasons:
- They’re an inexpensive product
- Large enough that you can shoot wide or multiple subjects easily
- Come in an endless range of patterns and colours
- They’re light. You can secure any patterned bed sheet by simply draping it over a table as in the set up below.
However, as great as sheets are for making DIY photo backdrops, they get creased, even just from being neatly folded. These creases will show up in photos and can be quite distracting. So I can’t stress this enough…save yourself effort and headaches later on and iron your sheets before using them!
Plain bed sheets are a bit tricky. Unless the background is really blurred and there’s a lot of space between your subject and background, it tends to look…like a bed sheet.
Lighting Tip
I set this shot up by an open shade on my back porch. It’s well lit by soft natural light, wrapping evenly around her face with no spots of harsh light (hot spots). The light was coming at her from behind my right shoulder, resulting in beautiful catchlights in the eyes.
I placed myself at her eye level to ensure a simple composition with good eye contact.
Keep in mind to meter for your subject’s skin, and choose a wide aperture to blur that background pattern properly.
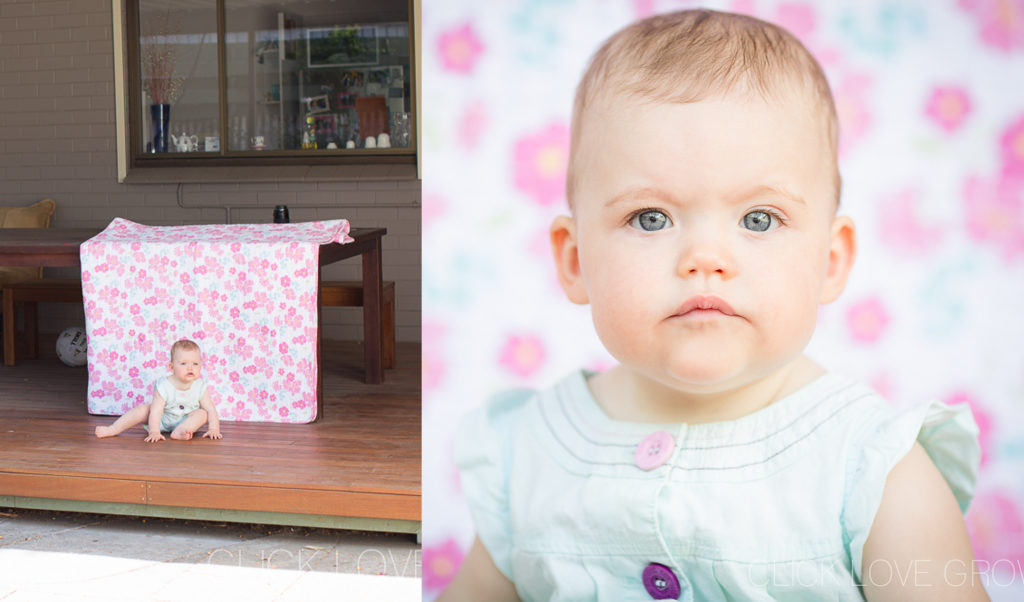
Canon 135mm f/2 lens (on a full frame camera) – this long focal length compresses the background so that the pattern is nicely blurred, ensuring good separation of subject. Settings: Shutter Speed 1/800; Aperture f/2; ISO 200
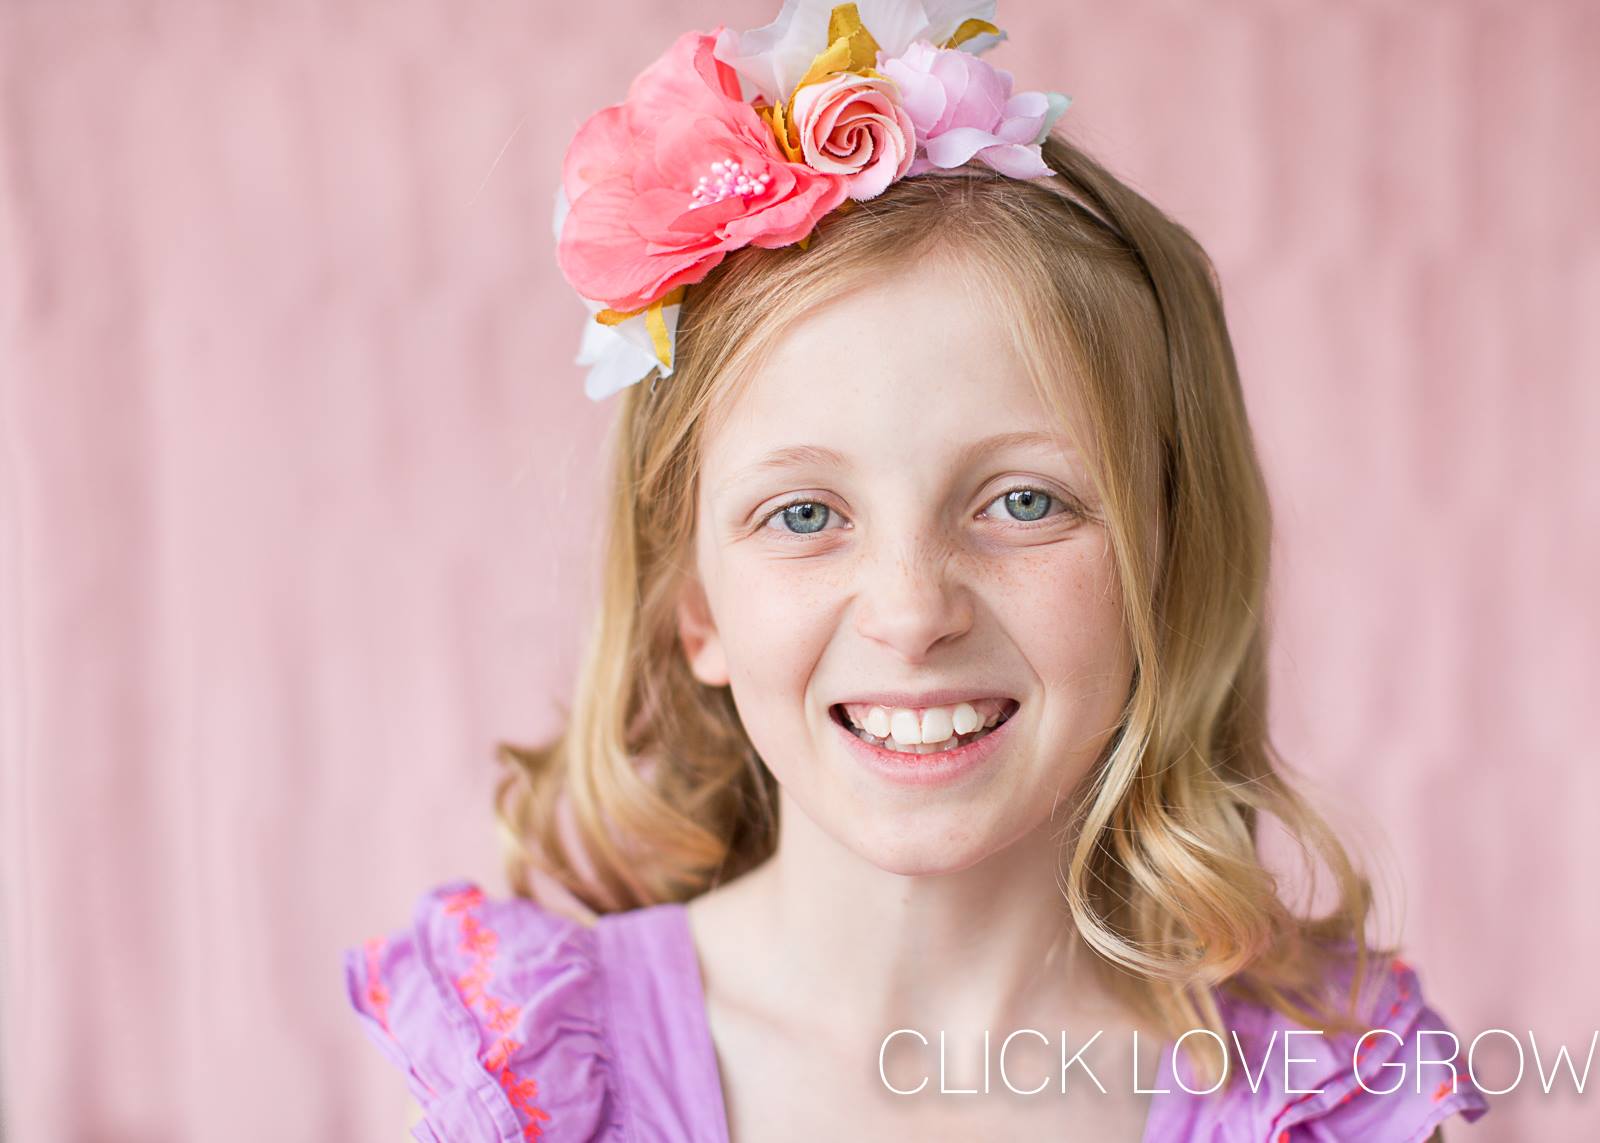
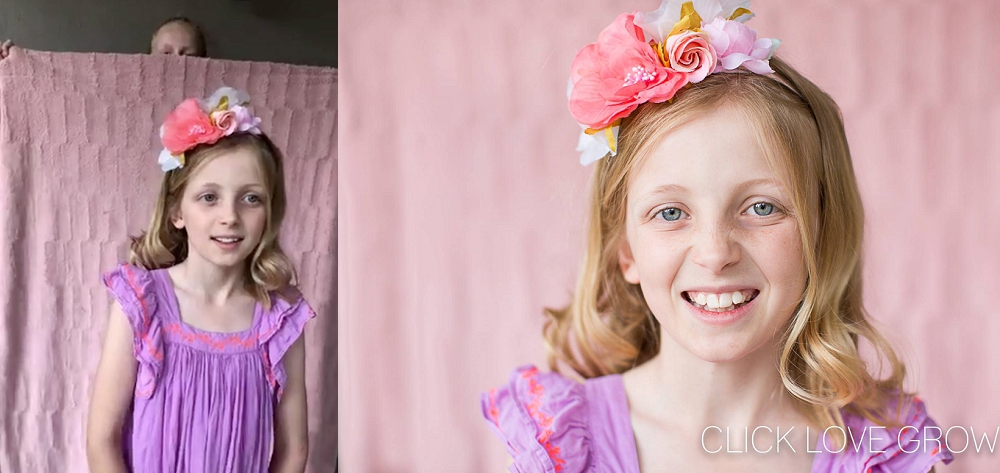
2. Textured Quilt
For plain colors, textured fabrics work better for backgrounds than plain cotton as it tends to highlight every tiny crease and imperfection.
This was shot on my front porch in an open shade that gave me beautiful soft light.
Come behind the scenes with me as I captured this setup using only natural light and DIY backdrops to create a gorgeous light-filled photo studio style.
I also share the camera settings I used, including my thought process behind my choices.
Related: How to Take Studio Portraits at Home
3. Floral Sheeting
The name is a little misleading, as the fabric is not necessarily floral. You can choose either material or paper flowers as well. However, if you’re looking for this gorgeous sparkly effect, this is the term you need to be searching for. I bought this piece from an online party supplies store. It gives the most fabulous bokeh effect!
Related: How to Take Bokeh Photos
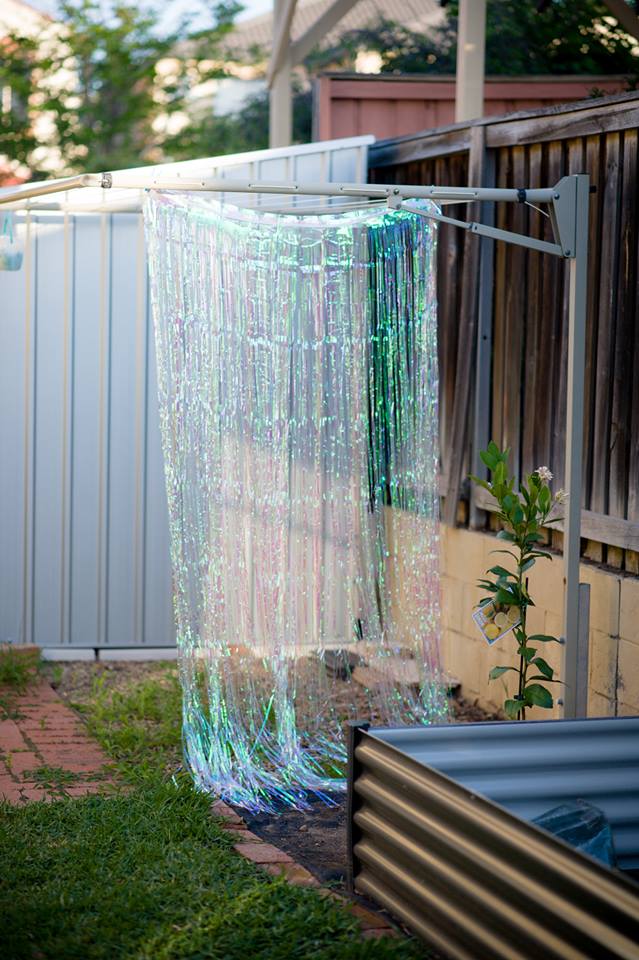
4. Door Curtain
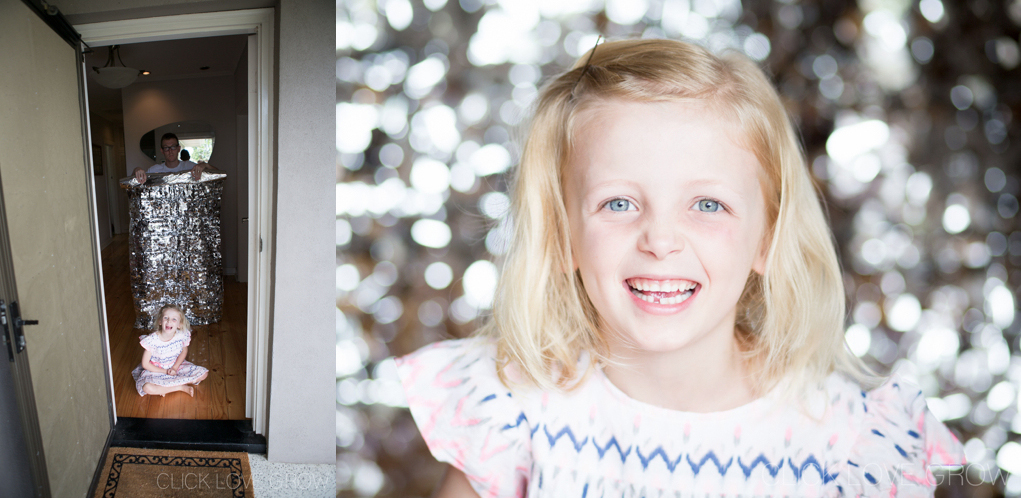
Karen Hayden used a sparkly door curtain to create a beautifully simple, very inexpensive, and effective photography backdrop that really suited her subject.
In the pullback shot, we can see she used her clothes line, which was situated in open shade. She shot with the light-coloured shed in the back to ensure a light background behind the door curtain.
You’ll find a gazillion fun options for door curtains on Pinterest!
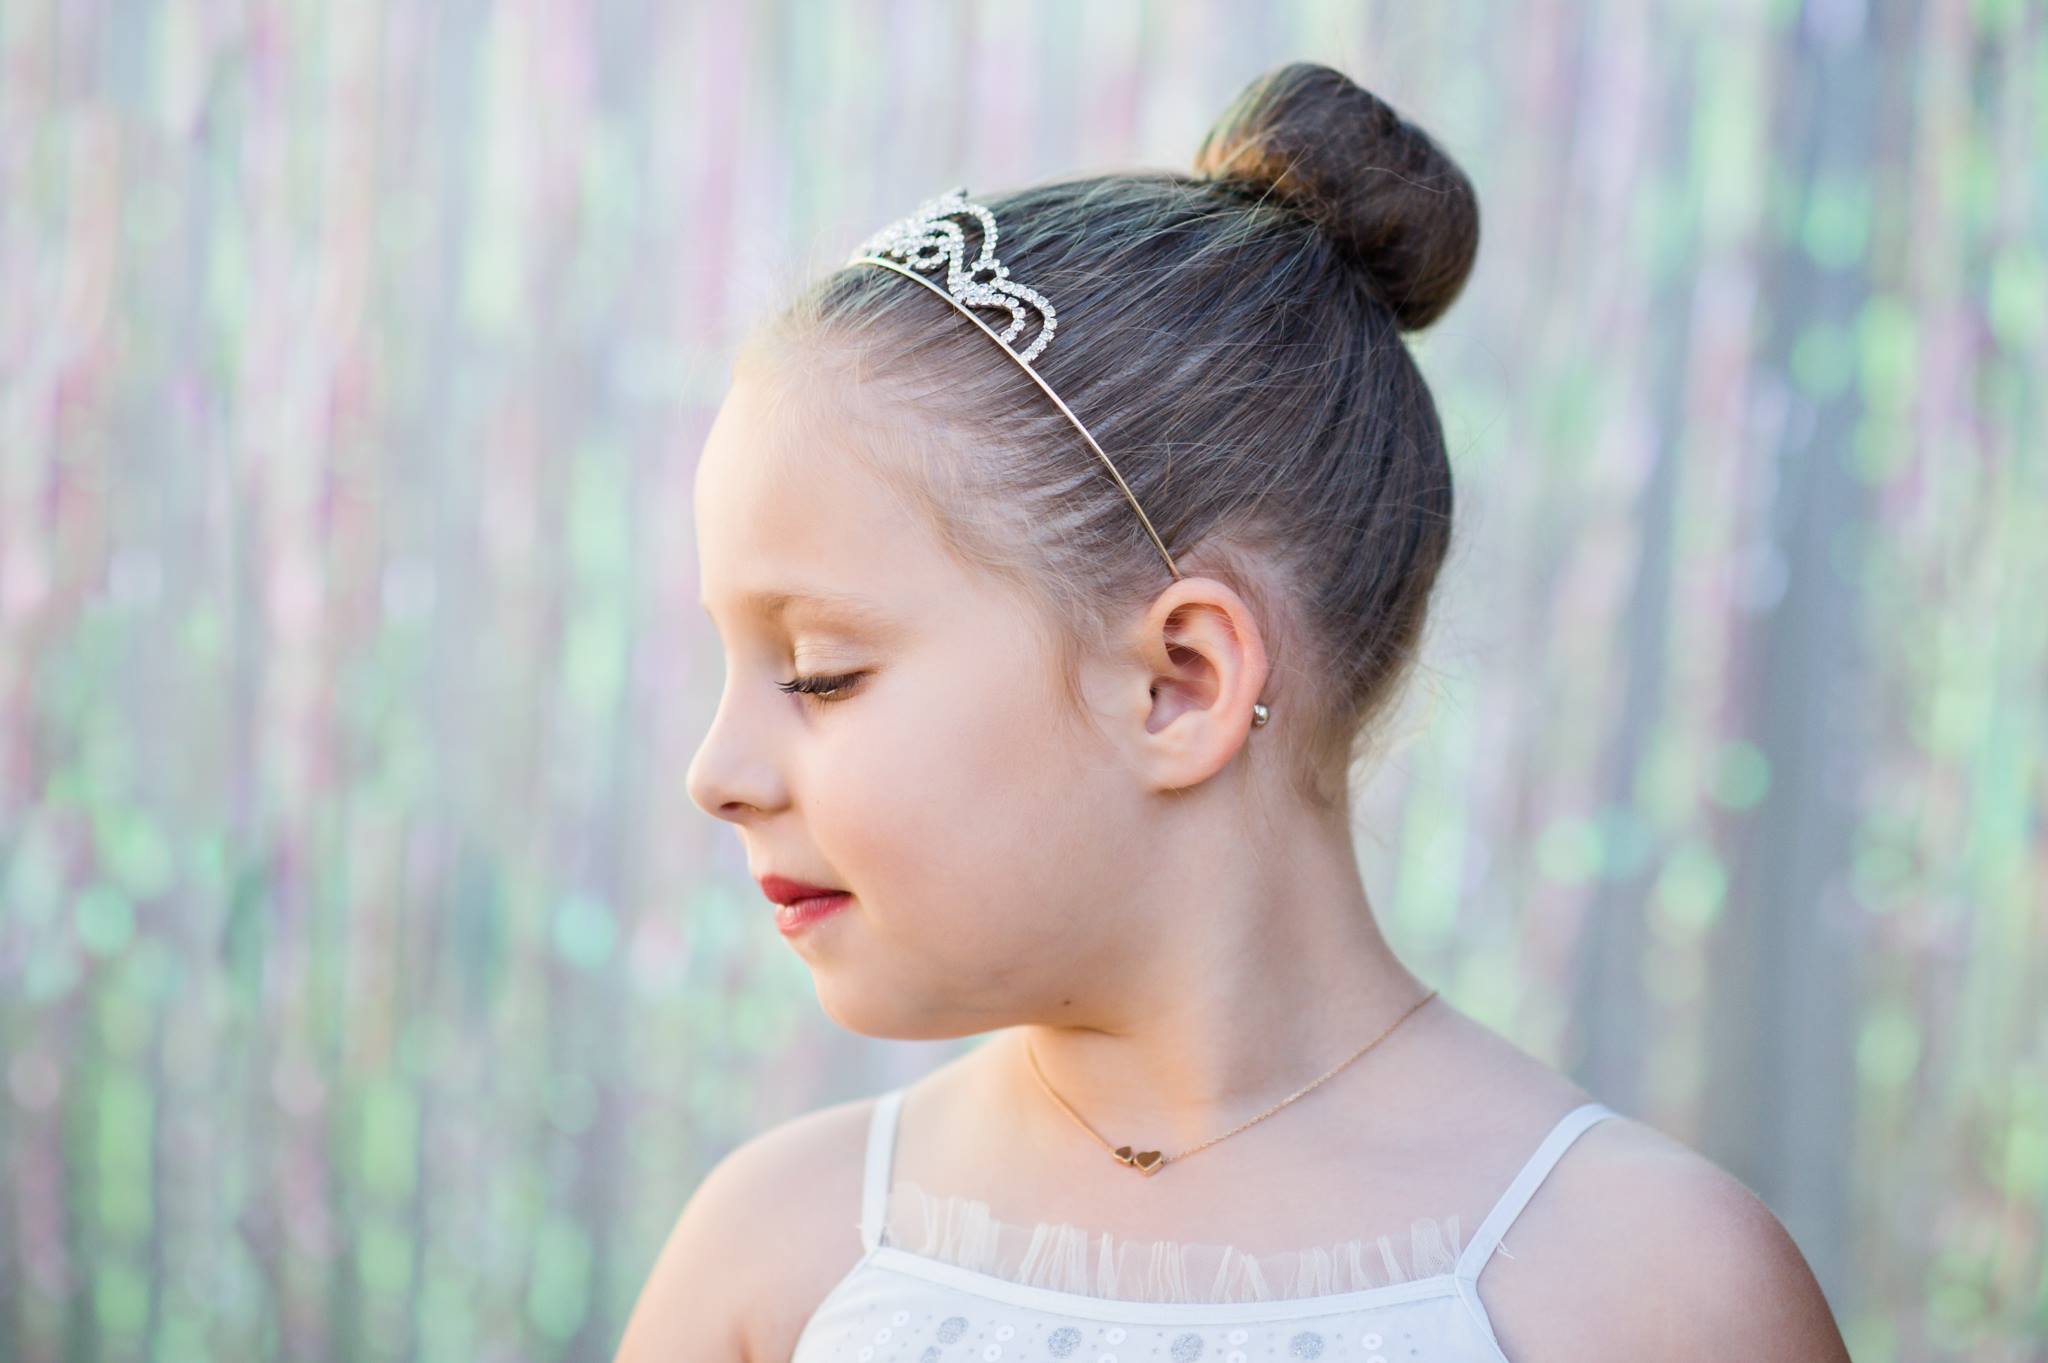
Karen Hayden, Current Advanced Student – tadaa!
5. Vinyl
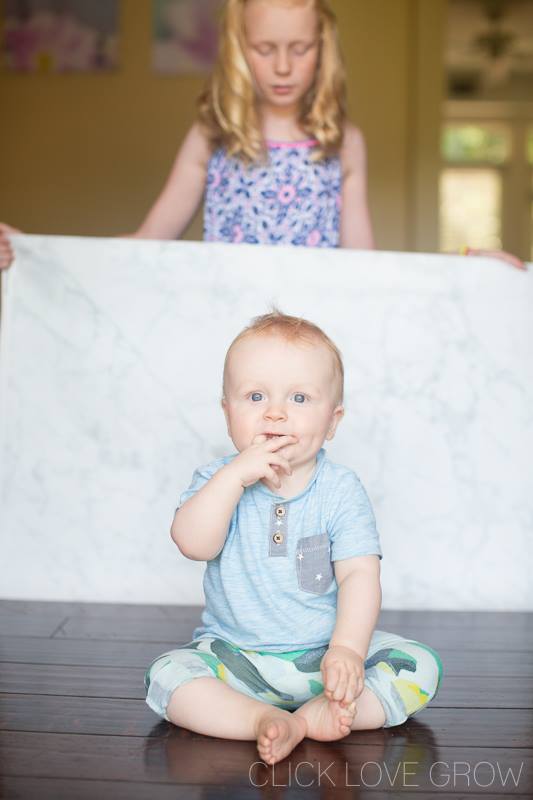
You can buy small pieces of vinyl from fabric stores, hardware stores, Etsy and eBay.
The options are literally endless. You can get simple patterned or plain vinyl for a neutral, unimposing DIY photo backdrop, like the one below.
Through Etsy and eBay, you can also find imitation wood fencing, scratched metal, splattered paint, light bokeh, holiday scenes, and more! I could really go on all day. And, whilst these may not be handmade or found in your cupboard or local hardware store, they can be sourced very inexpensively.
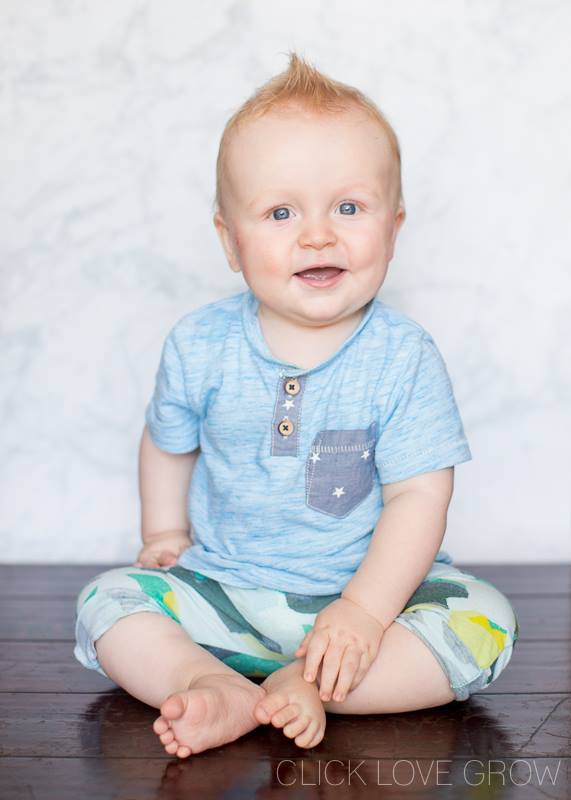
6. Fairy Lights
A twinkle light portrait is especially perfect for holiday photos. And still, there’s no reason why you can’t use fairy lights as a DIY backdrop for any portrait!
To create this setup, you only need an inexpensive set of fairy lights and a plain backdrop, even if it’s just a wall.
We have a fabulous tutorial that shows you step-by-step how to set up for the shot, including the settings you need and pull back shots! You definitely need to be shooting in manual mode for this session as your aperture will control the look of the fairy lights.
Related: Easy Twinkle Light Portrait Tutorial
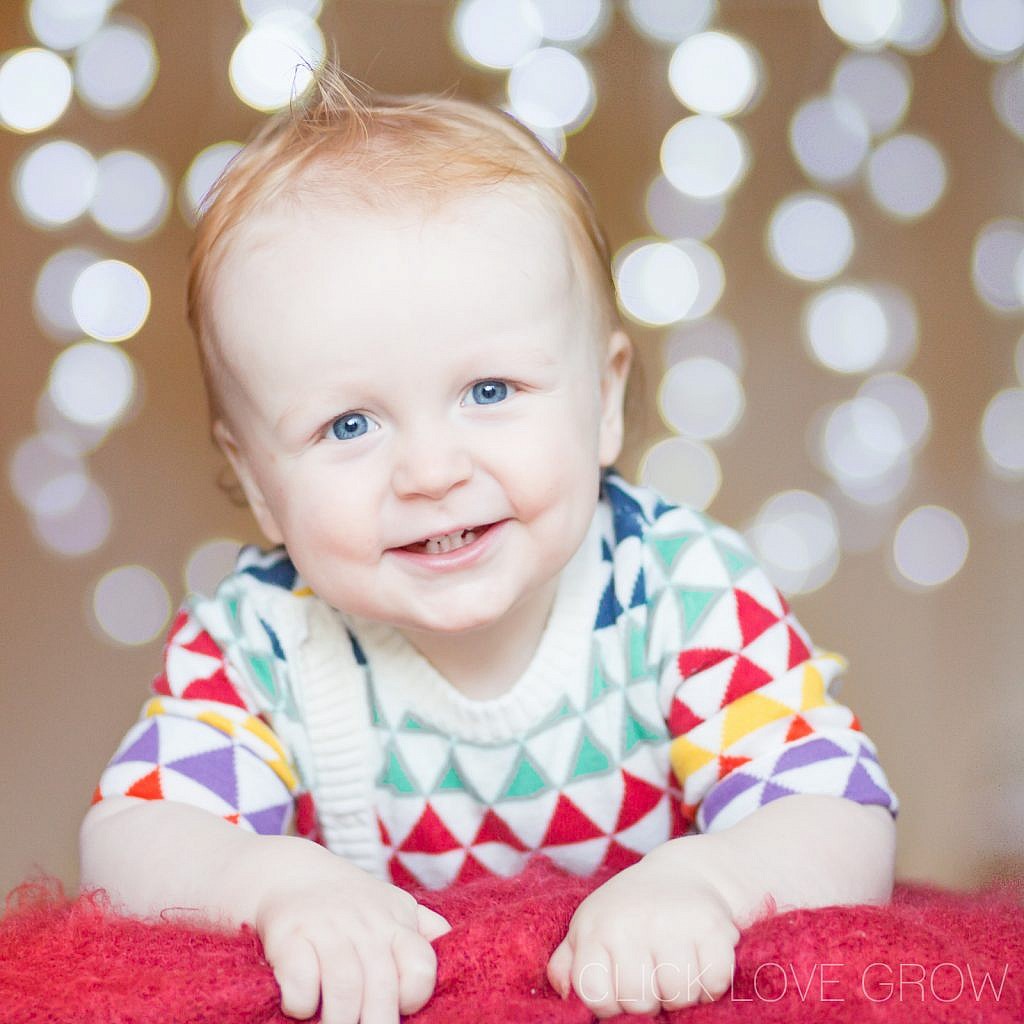
7. Painted Floordrop
Think outside the square! Put some backdrops underneath your subject and shoot down on them. The moment you do this, you open up a magical world of creativity.
This fabulous image was taken by Nell Williams, one of our Advanced Photography Course students. Inspired by some images she found on Pinterest, she created this simple circus-themed paper backdrop using a roll of party table paper and poster paint.
Nell’s top tip for this DIY photo backdrop is to use the paint sparingly as the paper is thin and will tear if you attempt to slap too much on it!
She made the trapeze using a dowel and rope from a hardware store, which added interest and depth to the shot. She also advises the nylon rope she used was very tightly coiled, and heating it with a hairdryer helped to loosen it.
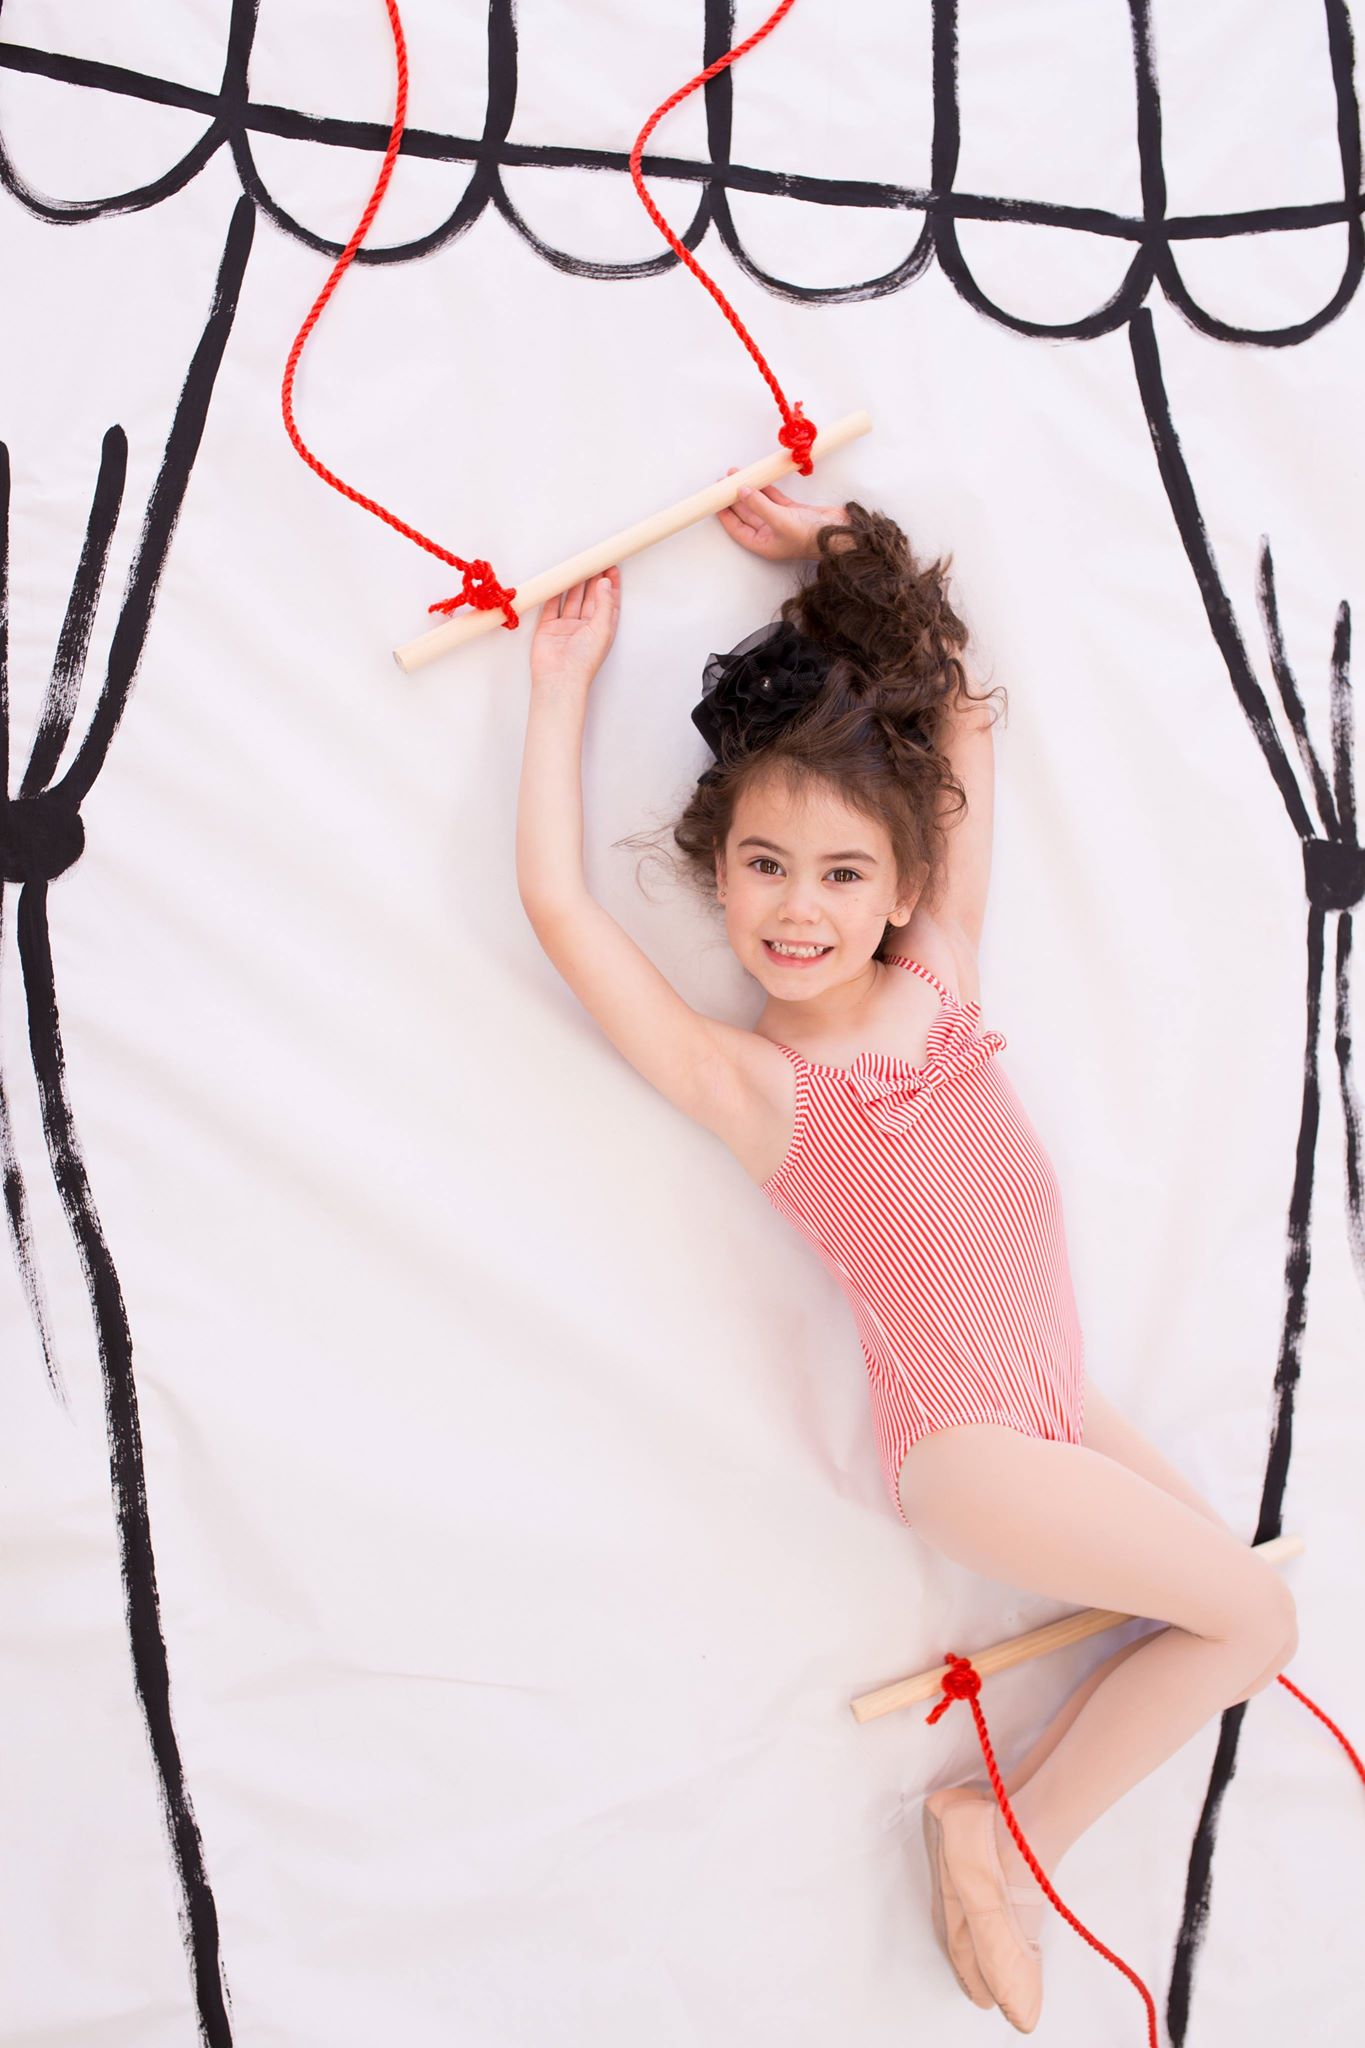
Nell Williams, Current Advanced Student
Who can resist a pullback shot?! This is exactly how Nell set up and took the shot.
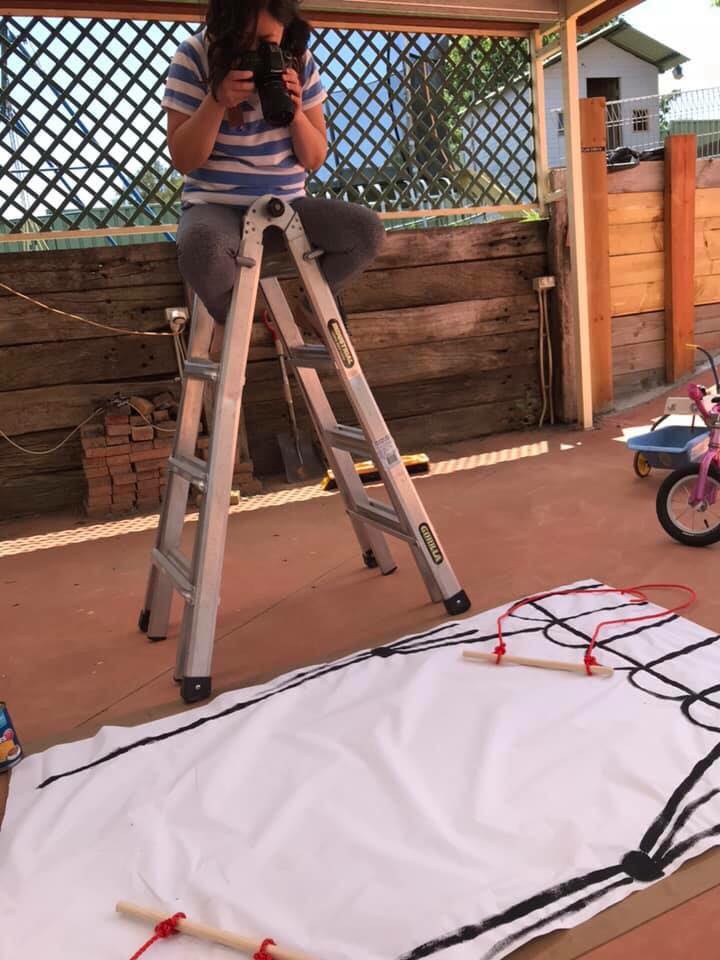
8. Look Down
Even if you’re not inclined to create a floor drop like Nell’s, the list of ready-made items you can use in the same way is almost endless:
- Textured throw
- Patterned quilt
- Sheepskin
- Floorboards
- Chalk floor drops (hello Pinterest!)
- Confetti on white seamless paper
- Floor rug
- Grass
- Sand or gravel. Know these natural surfaces make for a neutral background that blurs beautifully
- Flowers or autumn leaves

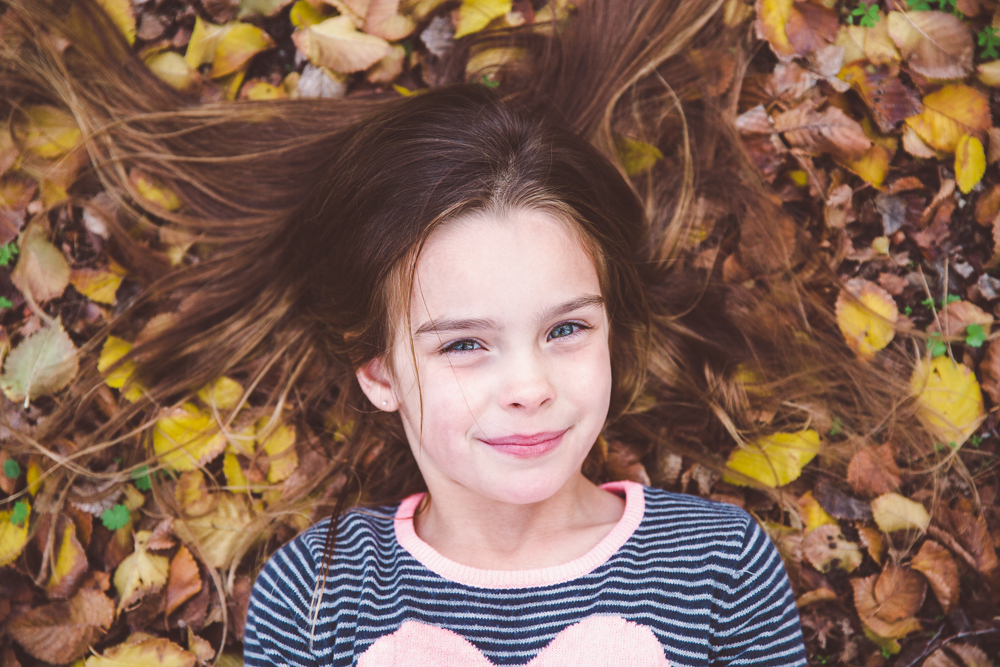
Pam Bradford, Click Love Grow Instructor
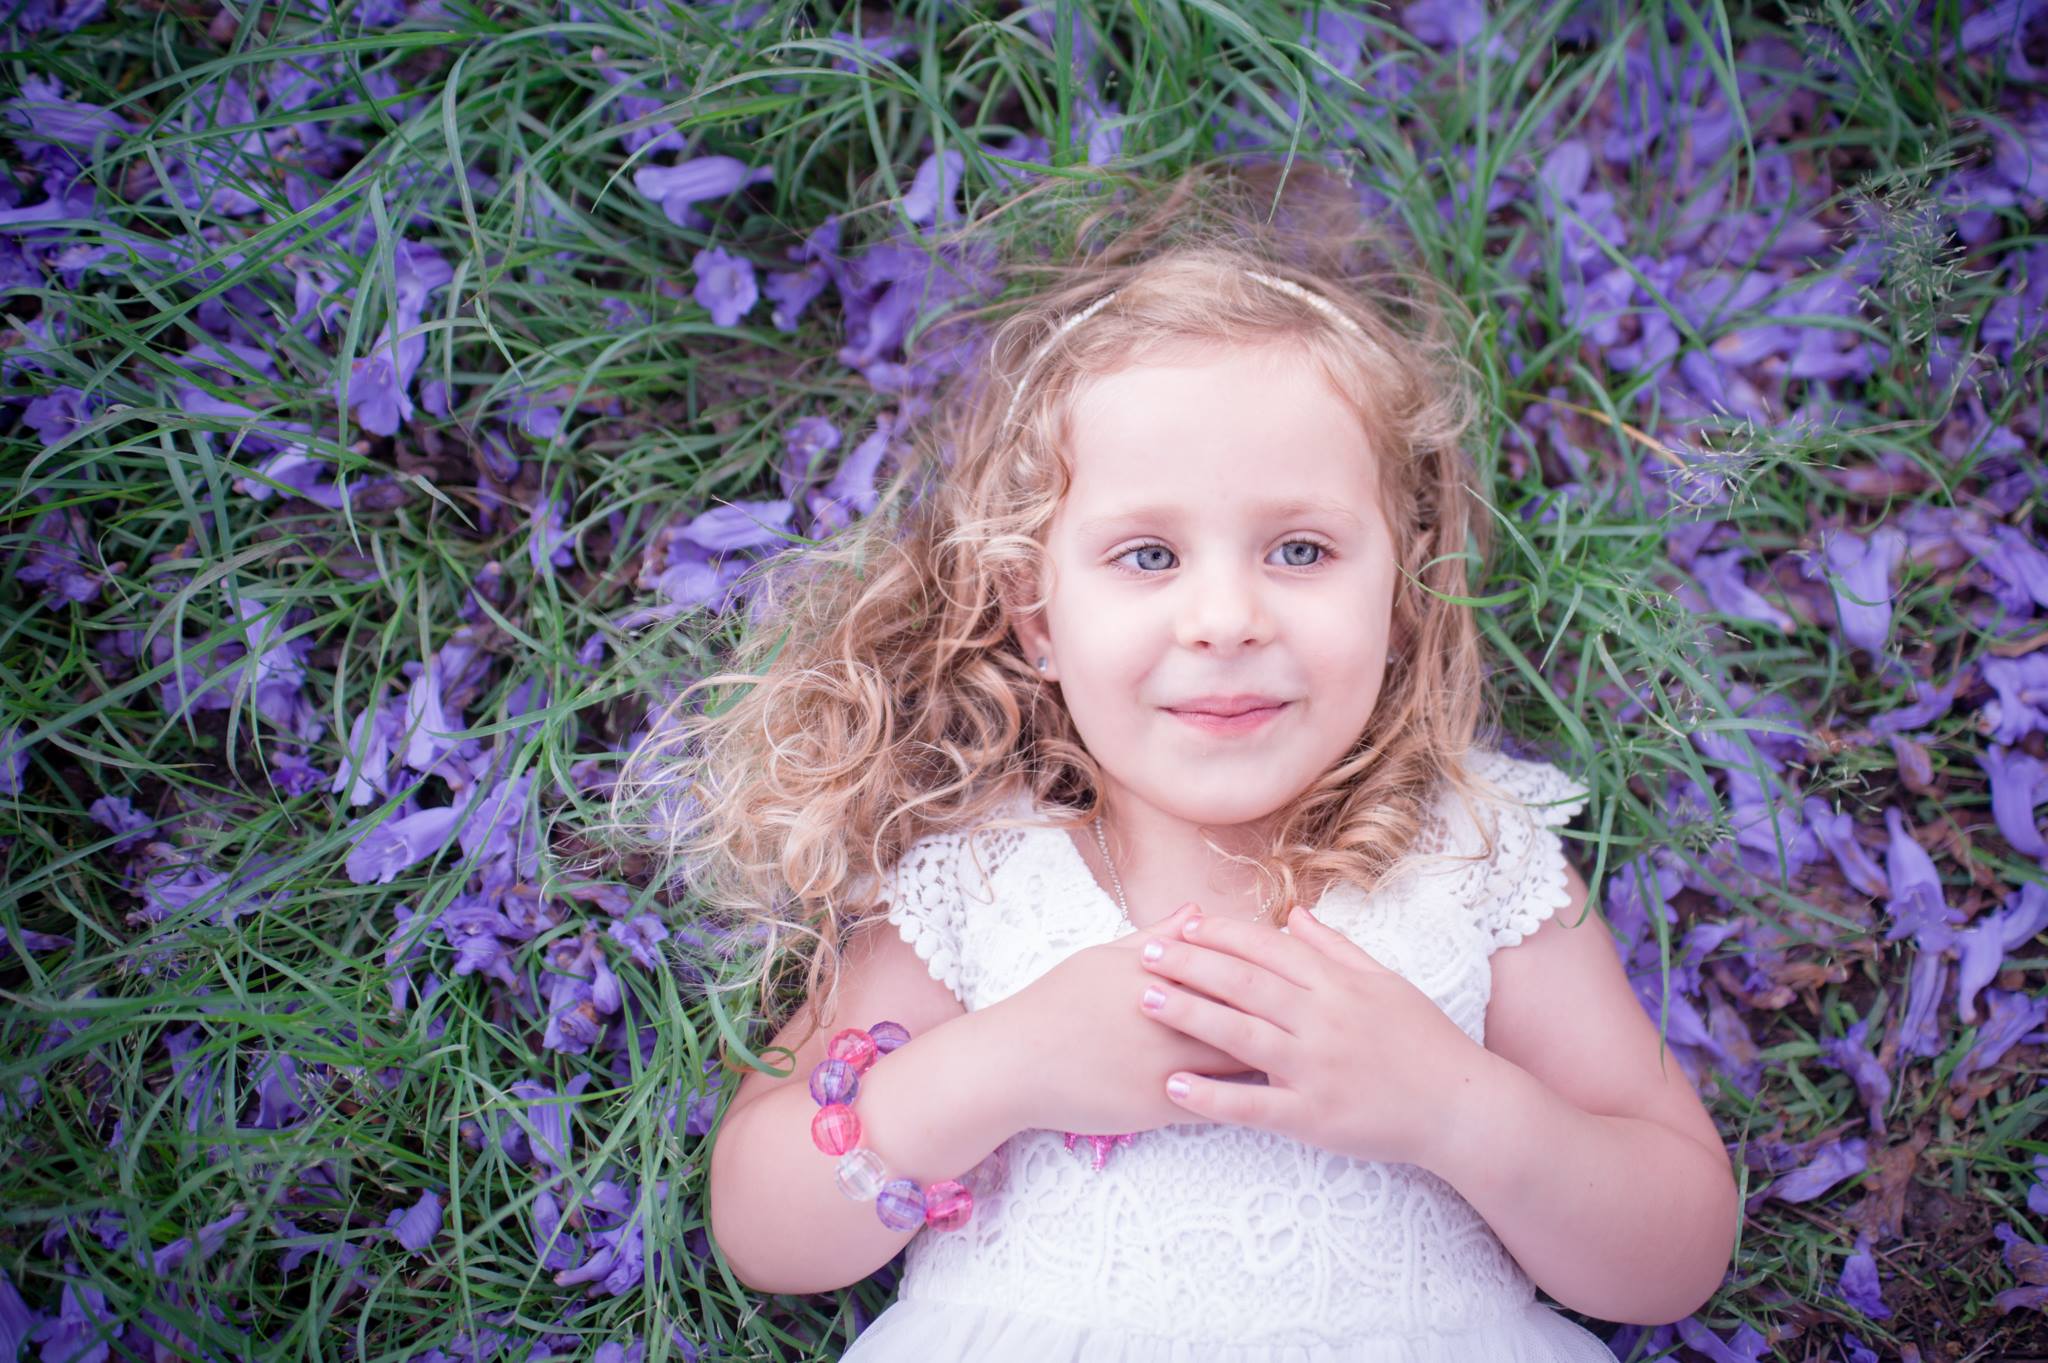
Karen Hayden, Current Advanced Student
DIY Photography Backdrops: Tips For Shooting From Above
When shooting down, you’ll need a wide lens in order to fit your subjects into the frame. This was shot from my standing height using a 24-70mm lens at 24mm.

Alternatively, you may need to stand on a small step or chair to compose the image. This was shot with an 85mm lens standing on a chair.

Important Safety Tip!
When taking photos of children and babies from above, always make sure your camera strap is around your neck. This is because if you accidentally slip with your camera you don’t want it falling onto your subject. A camera and lens combo is heavy equipment and can cause serious injuries if it hits a small child from your standing height.
Have fun creating your DIY photo backdrops! Come show us your photos on Instagram and hashtag #clicklovegrowchallenge
Join my new workshop and learn How to Shoot Pro-Quality Photos With Your DSLR… and it’s totally FREE to join! Register here…
JOIN the Free 5 Day Mini Course
5 Days, 5 Videos Lessons = Photos You'll LOVE!
Learn How to Use Your DIGITAL Camera!
Leave a Reply Cancel reply
PRIVACY POLICY & SITE TERMS AND CONDITONS
CLICK LOVE GROW ™ Pty Ltd - COPYRIGHT 2024 ©
x
Join Now
Enter your info below to join the challenge!
Want a friendly reminder when I go live?
Pop in your number and I’ll shoot you a text.
* We will send text reminders for our live calls during the challenge! Reply ‘STOP’ to end or ‘HELP’ for help.
We promise not to ever share your details with anyone or send you spam! Check our privacy policy and terms of service.
Be the first to comment