Grab the Metering Modes Guide
Grab our free metering guide below to know which modes suit which shooting scenario... all in a handy checklist for when you’re out shooting.
When I first began using my DSLR in manual mode, one of the first things I learned was high ISO causes grain. Therefore, ISO is the enemy. Sound familiar?
I would either avoid shooting inside, or reluctantly pump my ISO. But I’d only push it a little, knowingly creating a slightly underexposed image. I figured I could avoid grain that way, and fix it in processing, to create the light, bright and crisp image I really wanted.
But here’s the thing… this method doesn’t work.
In fact, increasing the exposure of an under exposed image reveals more grain.
However, there is a simple trick that will minimise grain and improve your photos at high ISO settings, and it’s super easy. Read on to free yourself from the fear of ISO and open up all those shadowy corners of your home you’ve been avoiding!
Even though we encourage embracing high ISO, it should always be your last resort. The best way to get light into your camera is through your aperture and shutter speed, so that’s what you should always be trying first.
So when you’re faced with a low light situation, the first step is to push your aperture and shutter speed as far as you can without sacrificing image sharpness or your depth of field. Once that’s done, then turn to your ISO.
You need to be in full manual mode to control all three elements of manual mode. If you’re not quite there yet, read our guide.
Related: Getting Out Of Auto
That’s right, I want you to push your ISO so far that you actually overexpose the image! If you think I’m crazy, this method is a thing and it has a name!
It’s called ETTR which stands for Exposing to the Right.
The term comes from the fact when you over expose, the EV meter will sit slightly to the right of centre.
If you’re not familiar with the EV meter, read our quick tutorial or download our free metering guide which teaches you how to use the camera’s internal light meter to expose every shot.
Related: What is Metering
CLICK HERE to download our guide to metering modes to help you know which mode will help achieve the best exposure for your shot
In an underexposed photo, the camera captures less colour and detail, particularly in the shadow areas compared to highlight areas.
When we try to increase the exposure in processing, the colour data simply isn’t there to recover. In its place, we get grain.
This grain is on top of the grain we might already have in the original, underexposed, straight out of camera photo.
Conversely, if you overexpose a little, you’re allowing the camera to capture as much colour and detail as it is capable of. And that, my friends, means less grain.
Then when you take your overexposed photo into processing and reduce the exposure, you end up with a perfectly exposed photo with less grain than you would have had if you’d shot with a lower ISO.
When we over expose, we want to avoid clipping large highlights areas.
Clipping is the photographic term for areas in a photo that were so overexposed or unexposed that the camera couldn’t capture any detail. As there was no detail captured, there is nothing to be recovered in processing.
When you fix your exposure in processing, a clipped highlight area will simply darken to an ugly grey, without any detail. It’s not a good look, and it can form a distraction in the photo.
So the trick is to overexpose until just before you clip your highlights. The easiest way to do that is to take it just far enough until a small amount of blinkies appear in the highlight areas.
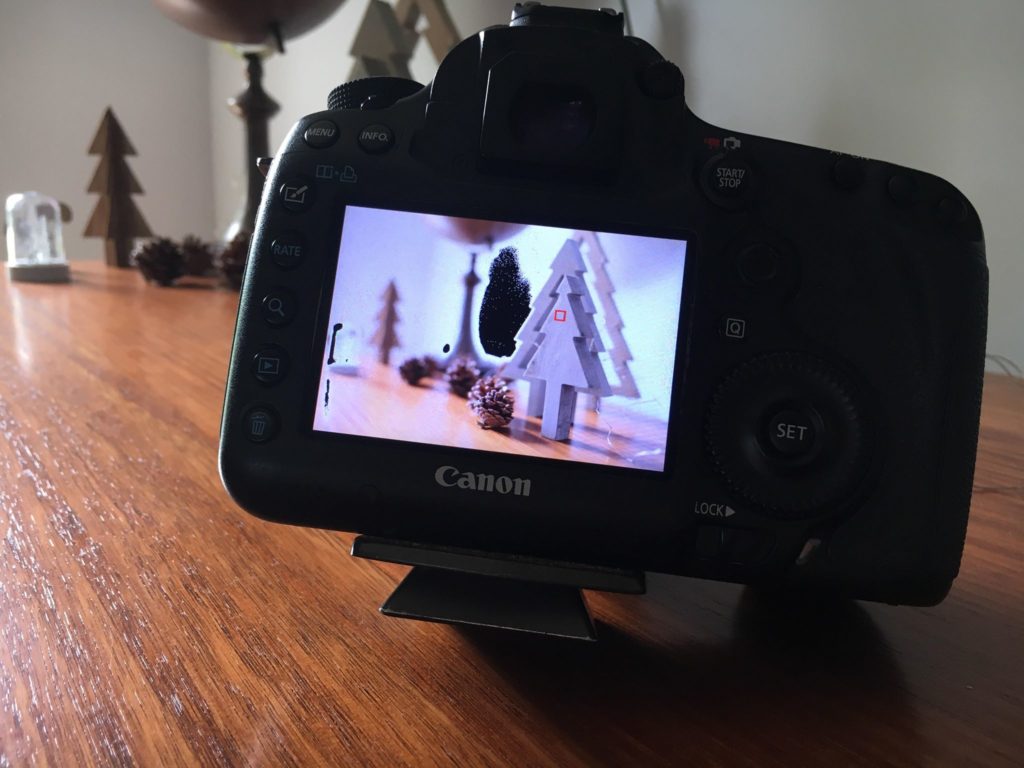
Blinkies are your camera’s clipping warning. On my camera (Canon 5d Mk 3), they appear as blinking black in areas where the highlights are overexposed and losing detail.
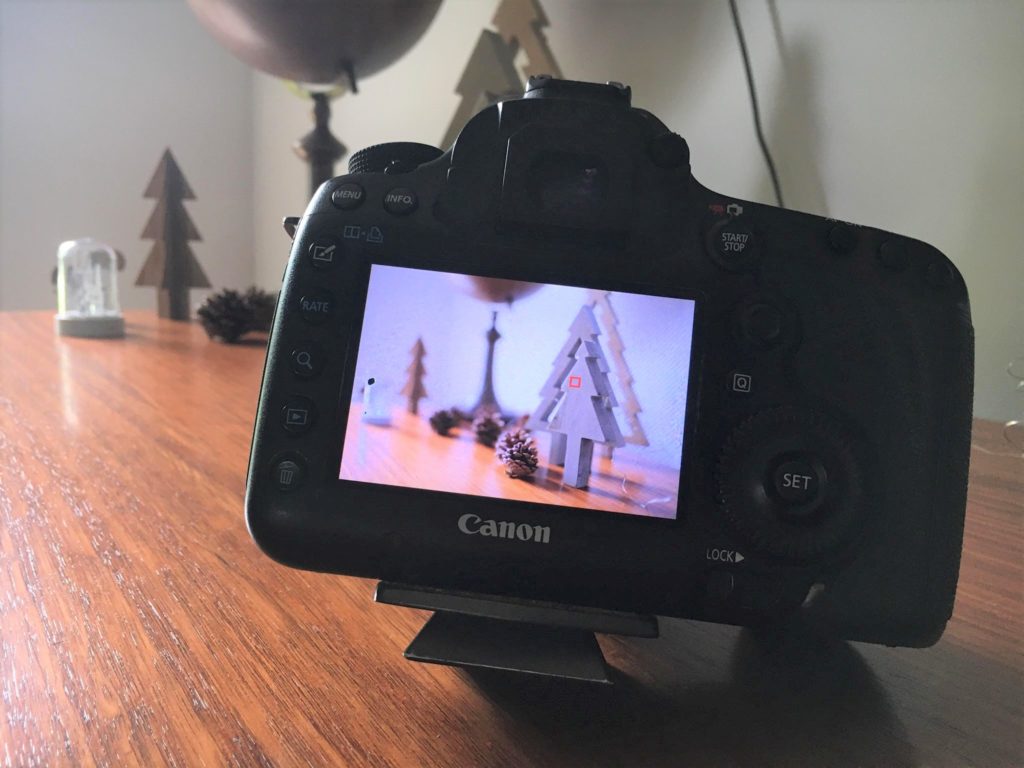
Just a few blinkies are ok, and indicate a slightly overexposed photo.
However, a full blown blinkie like the one in the shot below indicates I would not be able to recover any detail in that area.
If you get blinkies that large, reduce your exposure a little.

For the shot below I reduced my ISO by one third of a stop from 1200 to 1000. The shot is still overexposed, but the blinkies indicate my blown highlights are so minimal that they will not cause a problem in processing.

Try this experiment. I took two shots of the same image:
In Lightroom, I adjusted exposure on both photos to get the same correct exposure for each.
You can clearly see the image shot at ISO 2000 has less grain than the shot taken at ISO 800. It’s also a sharper and crisper image.
I’m often asked what is the highest ISO you can use when taking photos, before the level of grain becomes unacceptable and affects the sharpness and print quality.
Unfortunately, there’s no one size fits all answer. It varies from camera to camera, and the higher end DSLRs will have better ISO handling capabilities than entry level DSLRs.
Reassuringly, as DSLRs continue to evolve, their ability to shoot at high ISO, with excellent image quality, is improving all the time. My first ever DSLR struggled at ISO 400! But this was circa 2006, cameras have come a long way since then (thankfully!).
The best thing to do with your camera is to experiment at the higher end using the ETTR method, and work out for yourself how your camera performs!

ISO 3200 | Aperture f/2.0 | Shutter Speed 1/200 | Gear: Canon 5D Mk3 with Canon 50mm f/1.2L
Even using the ETTR technique, we may have some grain in our images… but that’s not always a bad thing!
For example when I’m shooting sunset sessions at the beach, there’s a magic that often appears as the sun sets below the horizon, my subjects are relaxed, leaning into each other, and basking in that final glow of the sky… if I were hesitant to up my ISO then I’d never capture those final, warm, intimate moments! Might they be a little grainy? Sure… but the moment is definitely worth it!
We hope this tutorial releases you from that frustrating fear of low light and ISO!
Join my new workshop and learn How to Shoot Pro-Quality Photos With Your DSLR… and it’s totally FREE to join! Register here…

CLICK LOVE GROW ™ Pty Ltd - COPYRIGHT 2024 ©
Enter your info below to join the challenge!
Want a friendly reminder when I go live?
Pop in your number and I’ll shoot you a text.
* We will send text reminders for our live calls during the challenge! Reply ‘STOP’ to end or ‘HELP’ for help.
We promise not to ever share your details with anyone or send you spam! Check our privacy policy and terms of service.
Grab the Metering Modes Guide
Grab our free metering guide below to know which modes suit which shooting scenario... all in a handy checklist for when you’re out shooting.
Thank you! Great article! It is my understanding that there is something you can do in Camera also to use a sUper high ISO with very little noise. I have seen the results but do not know the technique. Any chance you might know?
Love your articles. They are so easy to read and understand. Thank you so much for keeping it simple yet giving us very useful information.