The 3 Landscape Photography Mistakes You Might Be Making
Having previously always considered myself a documentary-style photographer, I fell in love with landscape photography during a trip to the magnificent red centre of Australia, the Northern Territory. So now, heading out to the beach or into the bush with my camera is one of my favourite forms of creative self care.
But as with all new things, taking up landscape photography had a definite learning curve. Like most people when they start something new, I made plenty of mistakes. So today, I’m sharing the 3 biggest mistakes I made. Read on so you can avoid doing the same thing and transform your photos!
1. Shooting Too Wide
Let’s start with the biggest rookie error that every new photographer makes.
I remember back when I was new to photography and had just bought the famous ‘nifty fifty’ 50mm f1.8. I was SO excited to be able to open my aperture up wider than the f3.5 my kit lens had allowed. So I started shooting EVERYTHING at f1.8!
Cue a lot of missed focus and unintentional blur!
Eventually, after a lot of trial and error, I came to the realisation that just because my lens was capable of shooting at f1.8, that didn’t mean shooting at f1.8 was always the best choice.
A nice, wide aperture works well for portraits where we want that lovely blurred background. But when it comes to landscape photography, we need a much, much narrower aperture to get sharp focus right through the frame, from front to back.
When I’m shooting landscapes, I usually set my aperture at f11 as a starting point, and then use my shutter speed to balance. This gives me enough depth of field to get both foreground and background elements in sharp focus, as well as sharp focus on all the little details in my image such as leaves, branches etc.
Related: Gear Guide to Getting Started in Landscape Photography
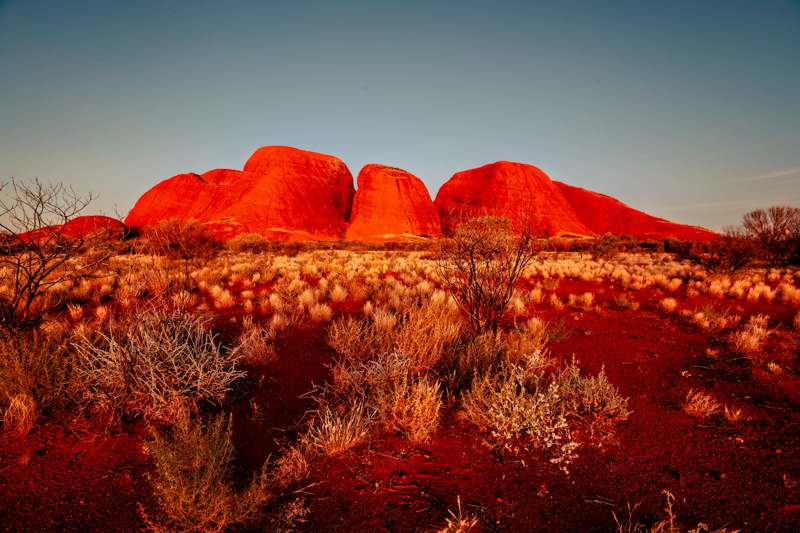
Kata Tjuta, NT – Aperture f11, SS 1/50, ISO 100
If I need to go wider to let more light into my camera because I’ve maxed out ISO and shutter speed options and I don’t have my tripod, I’ll open up to a maximum of f5.6. This means I won’t have focus from front to back so I need to choose a focus point more carefully. In these instance I will focus on the foreground elements in my frame as that is likely to be where my viewer’s eye will be drawn first so it needs to be the sharpest point in the image.
This next image was shot at f5.6 as I wanted to be able to increase my shutter speed a little to capture the movement of the water. I focused on the rocks in the foreground, and as you can see, at that aperture, focus is acceptably sharp through to the back of the rock formations.
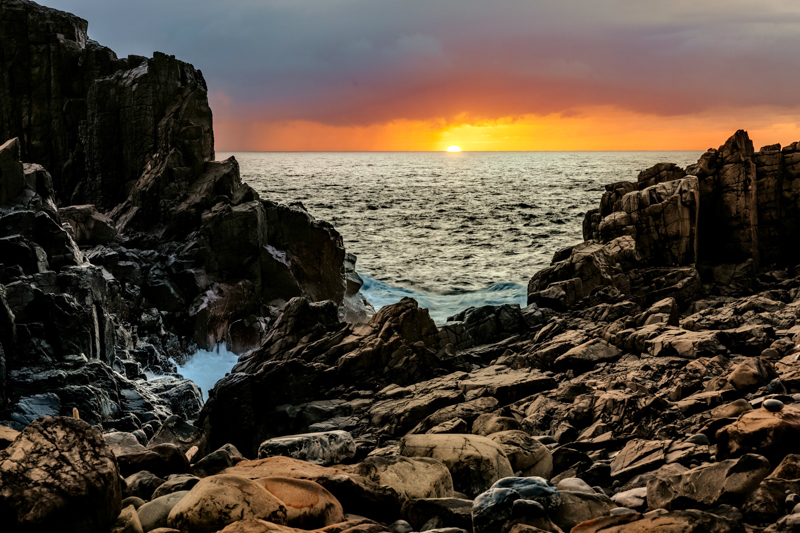
Bombo Quarry, NSW – Aperture f5.6, SS 1/125, ISO 100
2. Skipping The Details
Composition is a critical part of all genres of photography, I think everyone would agree on that. But possibly none more so than landscape photography where your compositional choices can literally make the difference between a holiday snapshot and a wall-worthy piece of art. Anyone can point their camera at a pretty scene, but knowing how to arrange the elements in your frame will take your landscape photos to the next level.
A mistake I often see beginners making is attempting to frame out objects in front of and to the side of the hero subject. This often ends up in images that look flat, lack context, unintentionally cropped or too tight. Sometimes, cropping out those elements looks more jarring than it would have if they’d included it (eg. a fence line in front of a sunset). When you compose in this way, you miss a big opportunity…
Framing and layering are two simple techniques that professional landscape photographers use all the time to create really strong images. When you look at the scene in front of you, instead of just looking at the hero element of the scene, take note of the surrounding details. Think about how you can include them to draw your viewer’s eye to a specific spot in your frame or to create a sense of depth.
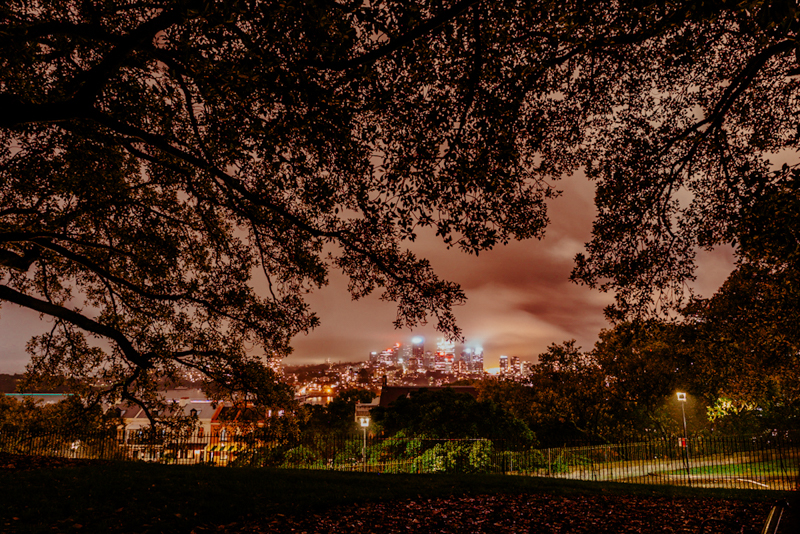
For example, in this image, I’ve used the big Moreton Bay Fig in the foreground to frame the cityscape behind it. The branches all point towards the centre of the frame which draws the viewer’s eye in to those city high rises in the middle.
Related: 5 Tips for Stunning Nightscape Photography
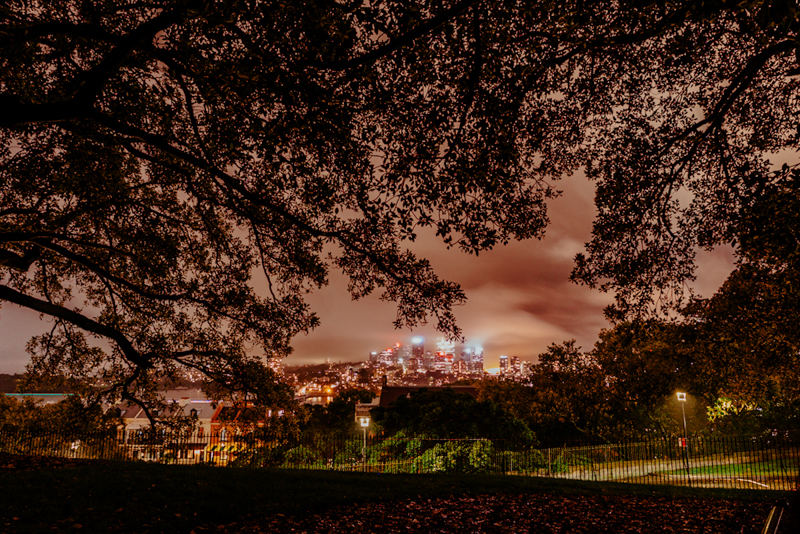
Observatory Hill, NSW – f5.6, SS 30 sec, ISO 400
In this image, I’ve gotten down low to the ground to shoot through the grasses on the edge of the riverbank nearest to me and used them to frame the river and the buildings on the far riverbank behind it.
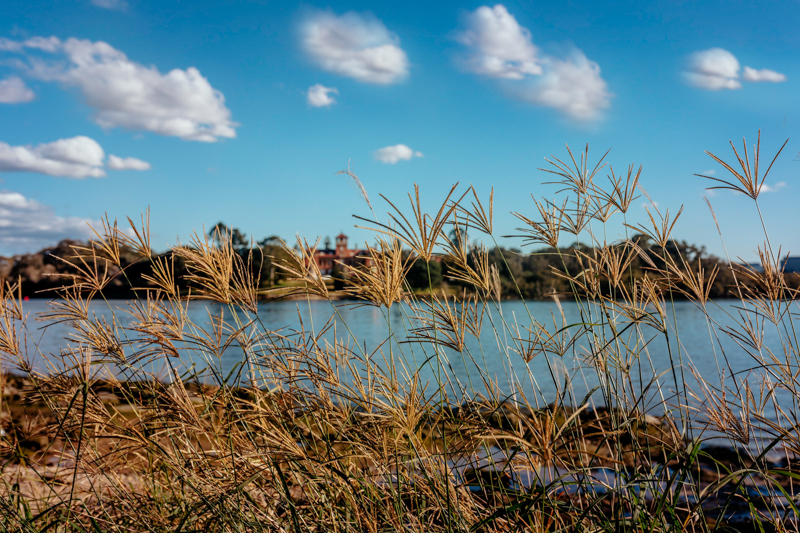
Kissing Point, NSW – f5.6, SS 1/1000, ISO 100
Finally, in this image, the hero of the shot is the magnificent rock formation, Uluru, at the back of the frame, but including the tree and the bird in the foreground creates a sense of scale and gives the image greater depth.
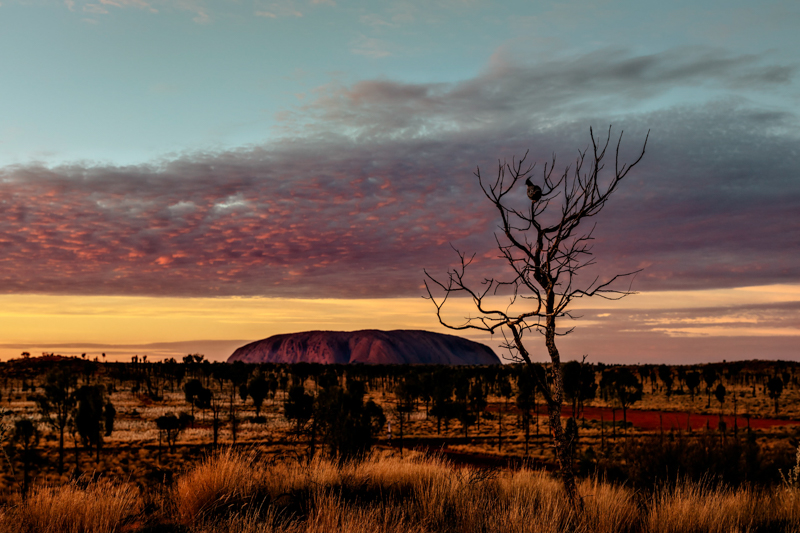
Uluru, NT: f11, SS 5 sec, ISO 100
3. Rushing The Process
If you’re looking for instant gratification or a quick photography fix, then landscape photography probably isn’t the genre for you! In fact, while you might take, say, 100 images in a 30-minute portrait session, on a landscape shoot, you might sit around waiting for 30 minutes without even taking a single shot!
Why? Whether you’re getting up early to catch a sunrise, or staying up late to capture the stars, there’s a lot of planning ahead involved. There’s also a lot of waiting for the perfect light, the perfect moment, the perfect colours in the sky. And if you try to rush the process, you won’t get the stunning landscape photos you’re after.
For example, to capture this next shot, we had to get up at 4.30am and catch a bus to the location, set up our gear in the dark, and then wait for over an hour for the darkness to begin to lift and the colours to pop in the dusky sky.
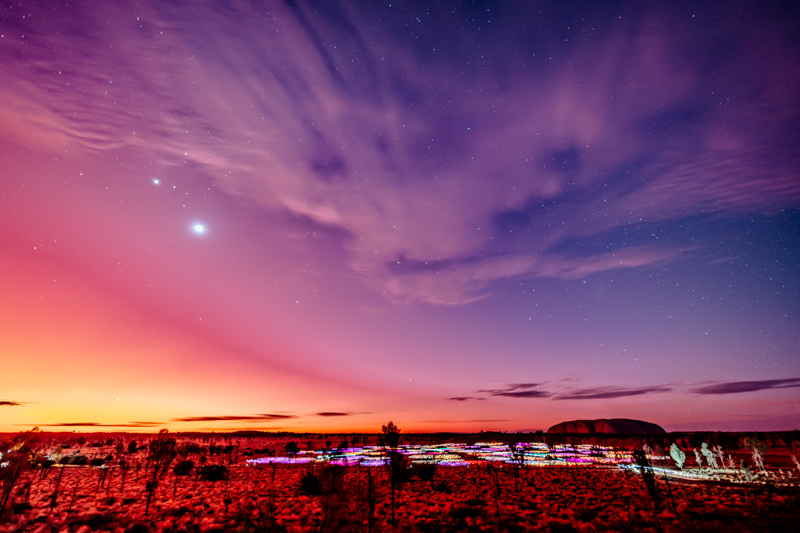
Field of Lights, Uluru, NT – f11, SS 30 sec, ISO 100
While for this one, we had to hike up a gravel trail at midnight using only torchlight in order to reach the perfect spot to capture the Milky Way over the majestic rock, Uluru.
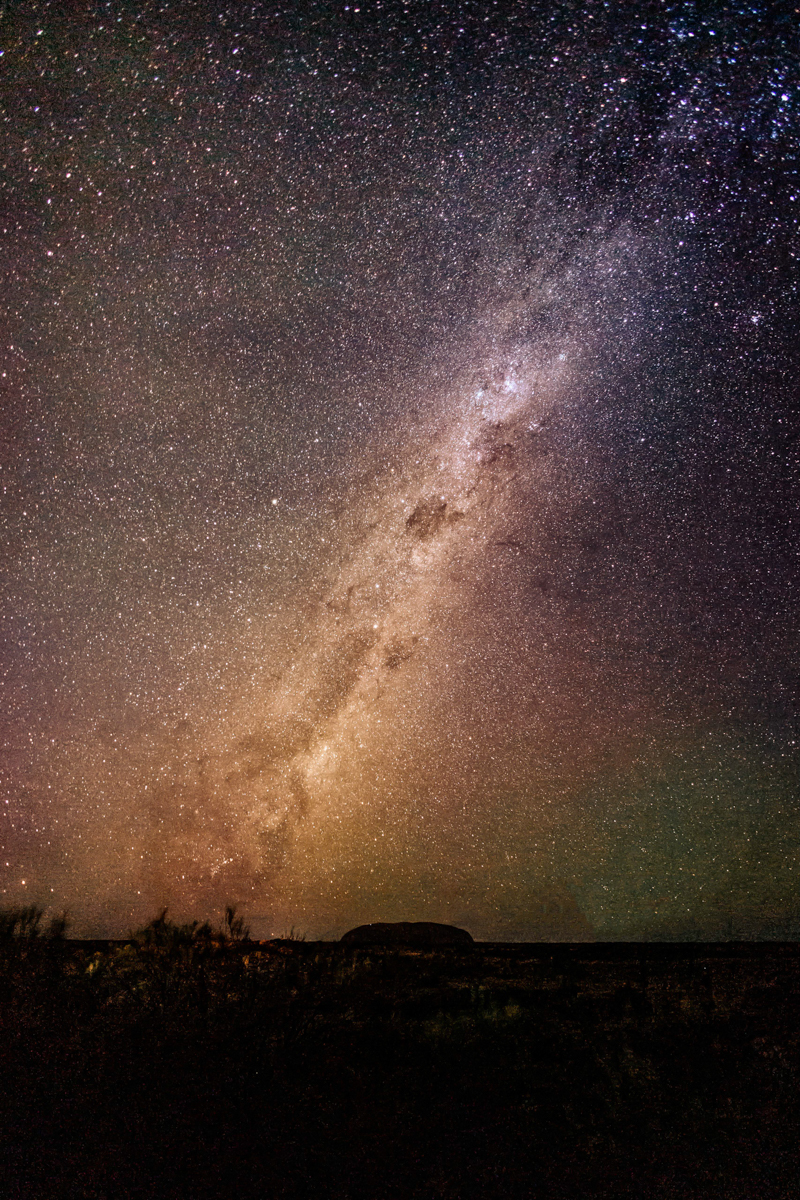
Uluru, NT – f2.8, SS 30 sec, ISO 12800
Lastly, I used an app to predict the sunset time at this next location, which helped me plan to arrive 30 minutes before sunset to set up my gear. Then I had to wait with my finger near the shutter button until the exact moment the sun dipped behind the row of skyscrapers. Whilst golden hour is, as the name suggests, usually around an hour or so, the actual process of the sun setting takes only a couple of minutes – so if you’re not ready and waiting, you’ll miss it!
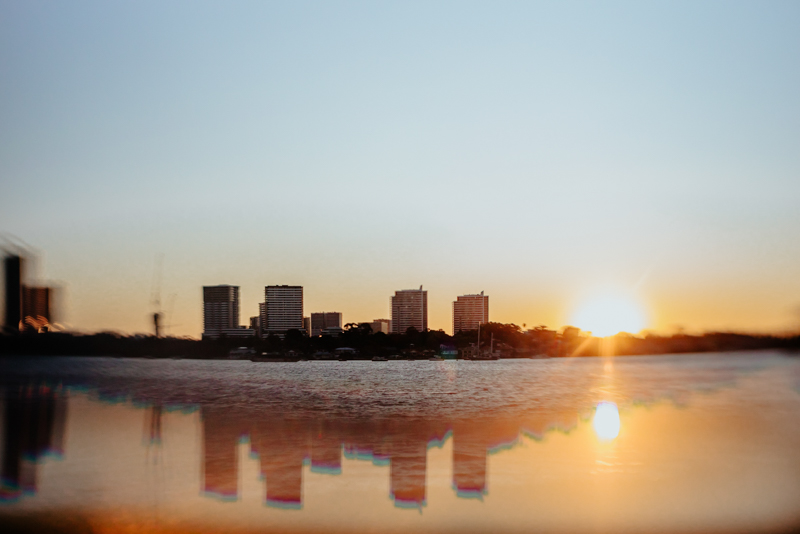
Kissing Point, NSW – f5.6, SS 1/125, ISO 200
A big thank you to Emma Davis for her fantastic landscape photography tips! If you want to see more of her work, you can find her on Instagram.
If you loved these tips and want more, check out our new photography workshop – Landscape & Night Sky Photography.
Leave a Reply Cancel reply
PRIVACY POLICY & SITE TERMS AND CONDITONS
CLICK LOVE GROW ™ Pty Ltd - COPYRIGHT 2024 ©
x
Join Now
Enter your info below to join the challenge!
Want a friendly reminder when I go live?
Pop in your number and I’ll shoot you a text.
* We will send text reminders for our live calls during the challenge! Reply ‘STOP’ to end or ‘HELP’ for help.
We promise not to ever share your details with anyone or send you spam! Check our privacy policy and terms of service.
Be the first to comment