


5 Tips For Stunning Nightscape Photography
Landscape photography is a genre which takes time and patience, and nightscape photography takes even more time and patience! But with the right settings and a keen eye for composition, shooting nightscapes can actually be a fun and rewarding way to spend a couple of hours.
With her camera in hand, Click Love Grow Instructor Emma Davis has recently been exploring the night sights of her adopted home town of Sydney, Australia. She’s put together her top tips for capturing stunning nightscape images into one easy-to-follow guide.
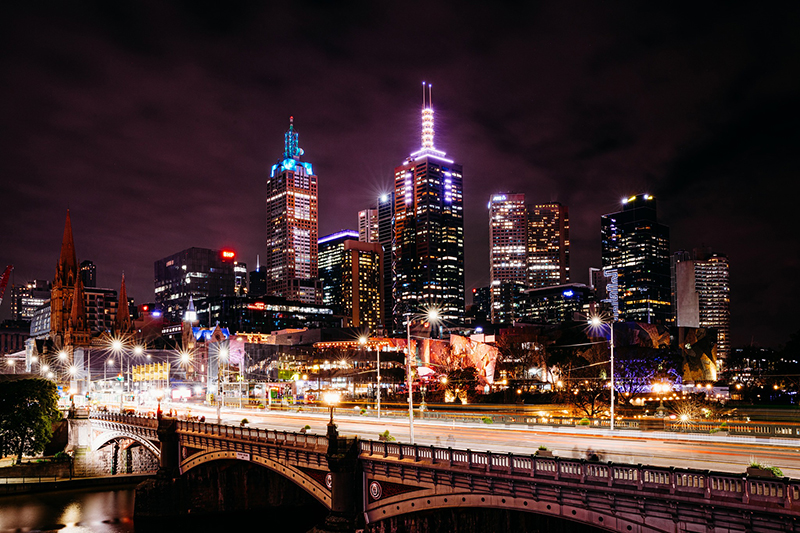
Emma Davis, Click Love Grow Instructor – SS 30 sec, Aperture f/5.6, ISO 500
1. Choose Your Settings
The number one thing to consider when photographing nightscapes is choosing the optimal settings for the conditions you are shooting in. If you start at dusk, you will find the light changes quickly, and as such, you will need to keep checking and adjusting your settings frequently.
I always set my aperture first. In order to capture all the detail and layers in the nightscape, I usually choose a fairly narrow aperture, around f11. I then set my ISO at 100, to keep noise to a minimum.
Then, it’s just a case of setting my shutter speed to balance my exposure. Early in the evening, before it gets dark, I usually start somewhere between 1-2 seconds. Then as darkness falls gradually slowing my shutter to let in more light.
Related: Travel and Landscape Photography Beginners Guide
Emma Davis, Click Love Grow Instructor – SS 1.6 sec, Aperture f/11, ISO 100

Emma Davis, Click Love Grow Instructor – SS 4 sec, Aperture f/11, ISO 100
2. Avoid Unintentional Motion Blur
Because we are shooting with such slow shutter speeds, a tripod is essential. Even with the steadiest hands, once you get slower than around 1/60, you risk camera shake. And when we start getting into longer exposures, even the tiny movement of pressing the shutter button can create unwanted motion blur in our images.
For this reason, it can be helpful to use a remote to activate your shutter, eliminating the need to actually press the shutter button. Even when using a tripod.
Some cameras are wifi/bluetooth enabled and have an accompanying App which allows you to use your smartphone as a trigger. Alternatively, you can buy remote triggers which connect to your phone with a cable, these are relatively inexpensive and available from most camera retailers. Lastly, you could simply use the inbuilt self timer.
Some cameras, like my Canon EOS R, have a touch screen shutter option which allows you to just tap the screen on the back of your camera to engage the shutter. This is my preferred way to activate the shutter when I’m shooting long exposures.
Related: A Guide To Winter Landscape Photography

Emily Lomax, Click Love Grow Grad – SS 1/4, Aperture f/16, ISO 5000
3. Composition is King
Perhaps moreso than any other genre of photography, composition is critical in landscape and nightscape photography. Strong composition is what differentiates between a snapshot and a postcard-worthy piece of art.
The rule of thirds is a great starting point. Ideally, you want to have your horizon line along one of the horizontal thirds lines, usually the bottom one, with the remaining thirds filled with sky.
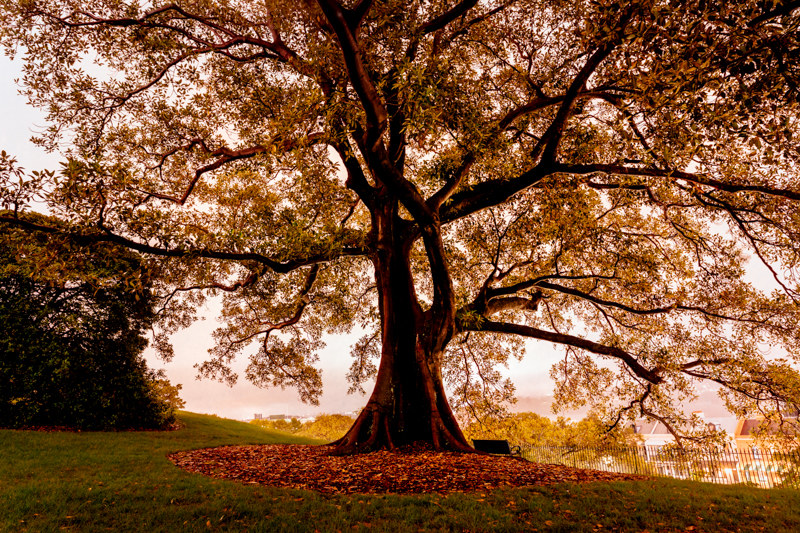
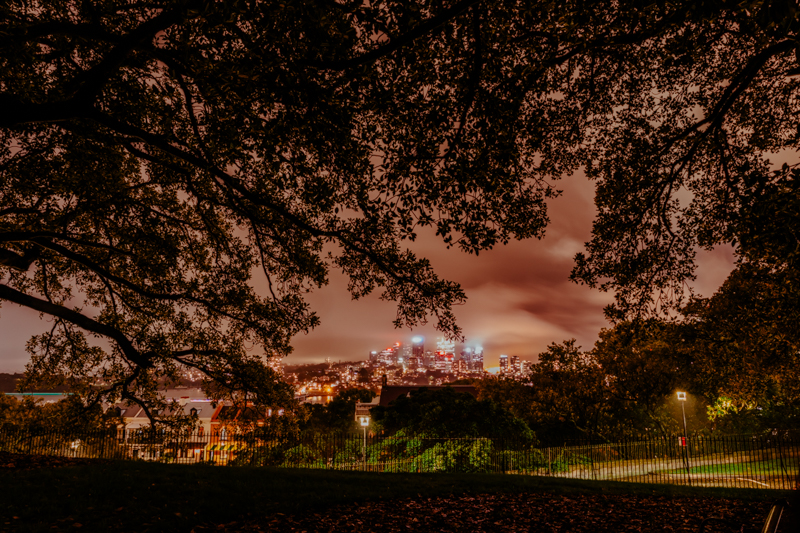
Look for elements you can layer in your image to create depth, and elements you can use as framing. For example, in the below shot, I have the horizon line around the bottom thirds line, with the row of lights and fencing adding additional layers and the branches of the fig tree framing the scene nicely.
Related: Understanding the Rule of Thirds Sunflower Photo Tips
Emma Davis, Click Love Grow Instructor – SS 30 sec, Aperture f/5.6, ISO 500
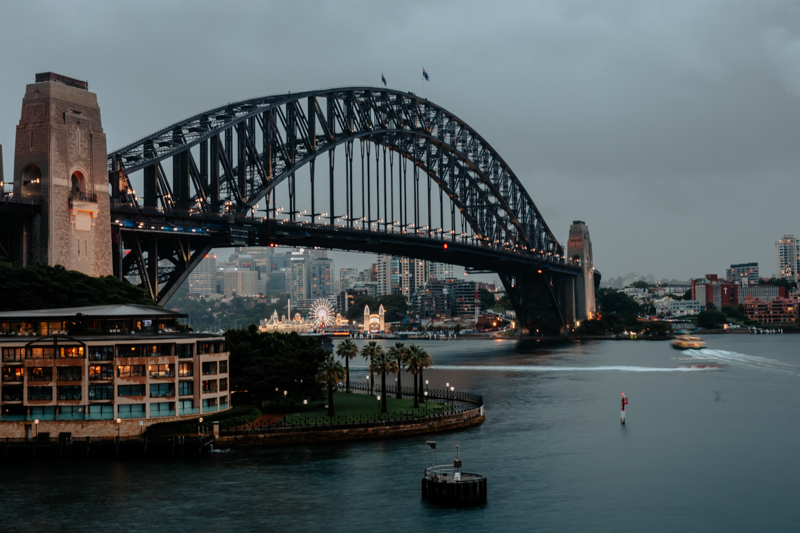
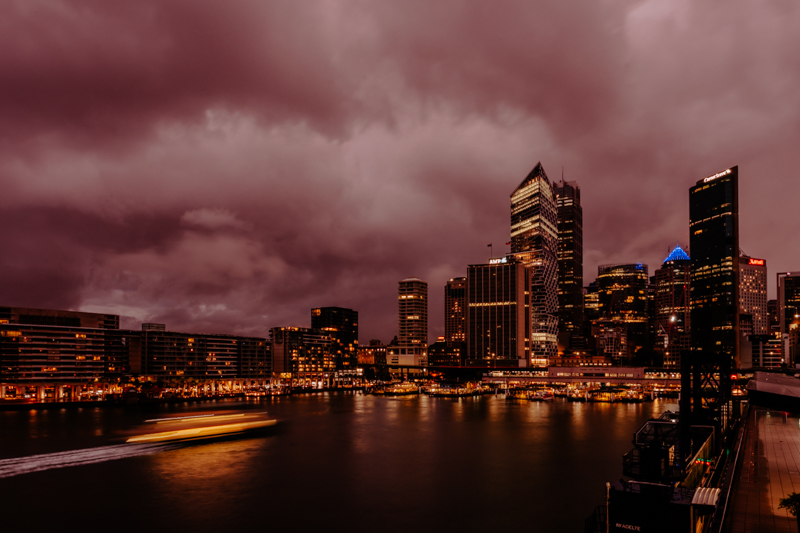
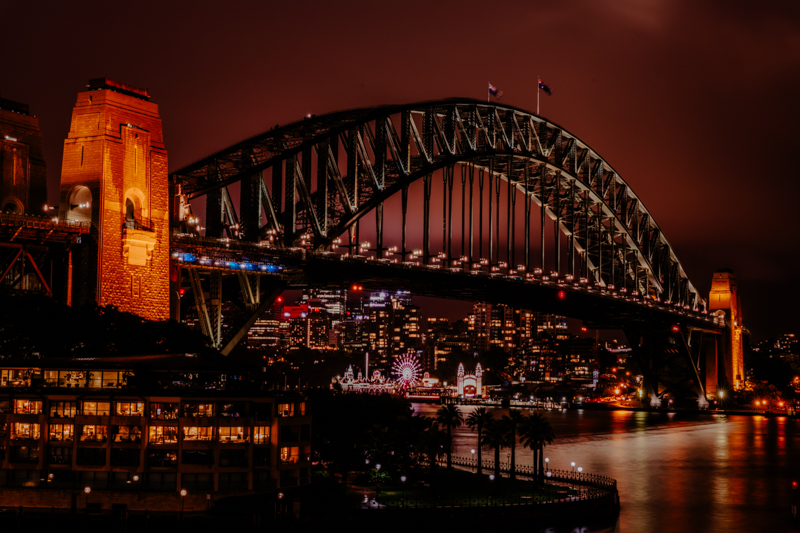
Reflections are also a great compositional tool to leverage when shooting nightscapes, particularly where you have an expanse of water in your shot. In the below image, the reflections of the lights from the high rise buildings on the smooth water creates a sense of balance and adds depth, interest and texture. And again, if we were to divide the frame into thirds horizontally, we can see that the bottom thirds line runs right through the middle of our horizon line, making for a strong composition.
Emma Davis, Click Love Grow Instructor – SS 30 sec, Aperture f/11, ISO 100
In this shot, the simple inclusion of the bike and streetlight in the corner provides an anchor for the scene and a foreground element for depth.
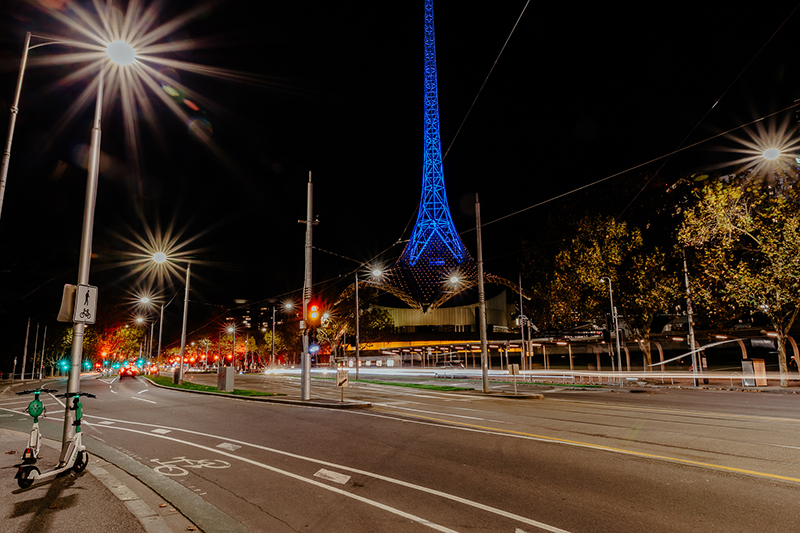
Emily Lomax, Click Love Grow Grad – SS 4 sec, Aperture f/16, ISO 800
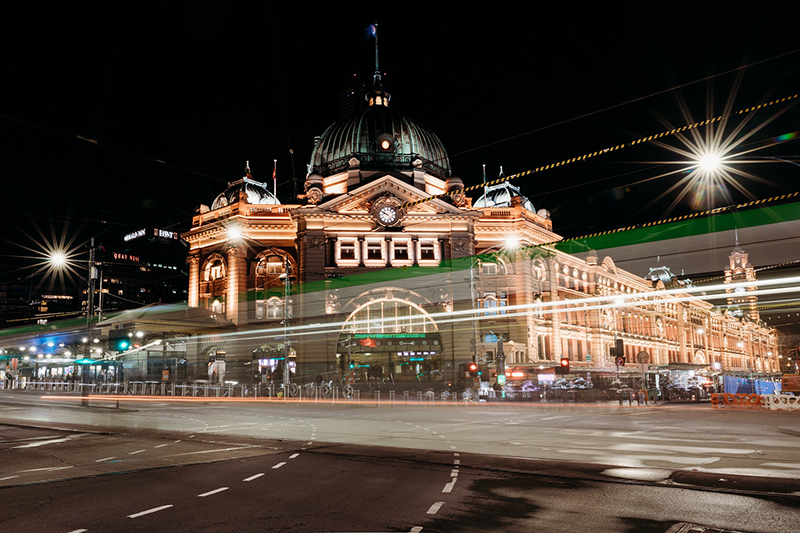
4. Embrace Intentional Blur
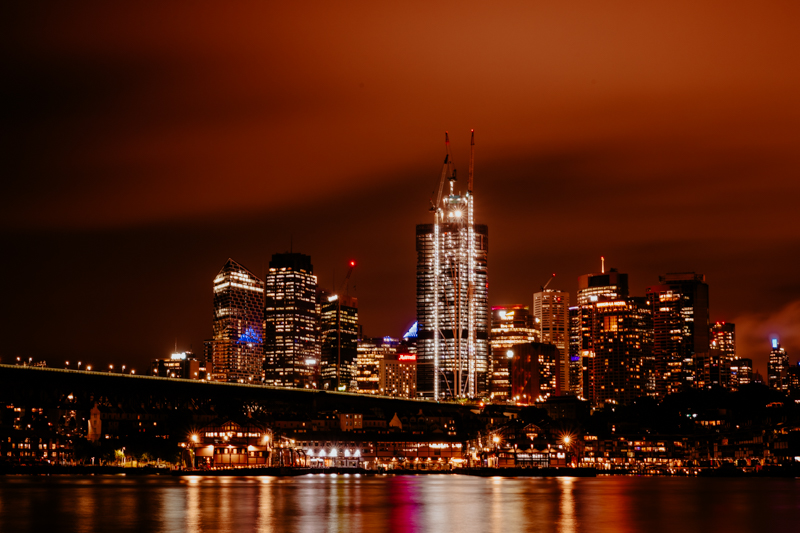
One of the cool effects of shooting with slow shutter speeds is that it renders fast motion as smooth blur. Juxtaposed against the smooth, silky effect that the slow shutter creates with clouds and water, these pops of motion blur create a sense of movement in the frame, adding to the storytelling. For example, in this image, you can see the lights and water trail from the ferry as it moves towards the terminal, while the rest of the frame is frozen in time.
Related: 10 Golden Hour Tips For Beginners
Emma Davis, Click Love Grow Instructor – SS 4 sec, Aperture f/11, ISO 100
In this next image captured by Click Love Grow Grad Kate McKenna, she’s captured the light trails of passing cars, as well as starburst from the street lights which look amazing.
A slow shutter speed is responsible for the light trails, and a narrow aperture renders small light sources – such as street lights – into starbursts.
Kate McKenna, Click Love Grow Grad – SS 30 sec Aperture f/14 ISO 100
In this next shot also captured by Kate, she’s captured only the movement of the pedestrians (and more gorgeous starbursts!). There’s a balance for this kind of shot – if your shutter speed is too slow, the pedestrians will become an unrecognisable blur. If it’s too fast, the blur could look accidental.
Kate McKenna, Click Love Grow Grad – SS 5 sec Aperture f/22 ISO 600
Lastly on the topic of intentional blur, when choosing your shutter speed there’s alway mindful decisions to be made in terms of much blur you want to capture. Add to that, you need to consider the speed of motion of the subject. For those reasons there’s no one size fits all combination of settings. Experimentation is key to learning how to achieve the look you’re after, but this next set of images and their settings will give you some clues about where to start.
The light trails come from vehicles in the intersection, which would be travelling quite slow, and Kate created two completely different effects by changing her shutter speed.

Kate McKenna, Click Love Grow Grad – SS 13 sec Aperture f/22 ISO 100
Kate McKenna, Click Love Grow Grad – SS 8 sec Aperture f/16 ISO 100
5. Experiment With White Balance
No matter what I’m shooting or what the lighting conditions, I almost always have my white balance set to Auto. This allows my camera to select the best white balance settings for the situation. If I need to make any tweaks later in post processing, shooting in RAW gives me the flexibility to do so without too many issues.
When I’m shooting long exposure nightscapes, however, I like to get a little bit creative. The purple and magenta tones in the below images are the result of a technique called ‘white balance bracketing’.
This involves going into my camera settings (on both my Canon EOS R and my Canon 6Dmkii, this is under Menu>Shoot>Tab 4) and choosing the White Balance bracketing tab. This will display a four point graph. You can then manipulate the tones in your image by plotting points on this graph to adjust the white balance.
I love using white balance bracketing to add a little extra pop to my images, especially when I’m working with moody, dramatic skies filled with layers of clouds. And by shooting in RAW, if I get home and decide I hate the tones afterwards, I can always revert back to the ‘correct’ white balance in post processing.
These two images are both taken from the same perspective, but I adjusted the white balance bracketing in between.
Related:
White Balance – What Is It And Why Does It Matter?
Shooting Raw or JPG – Which One and When?
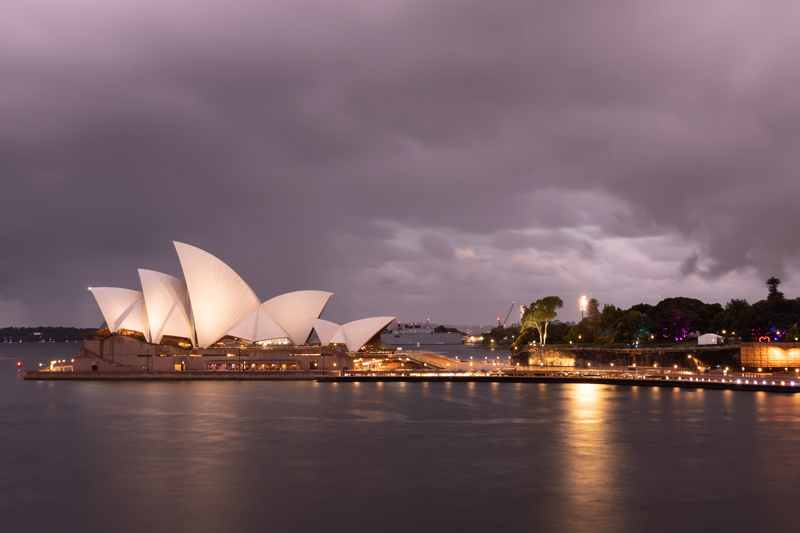
Emma Davis, Click Love Grow Instructor – SS 15 sec, Aperture f/11, ISO 100
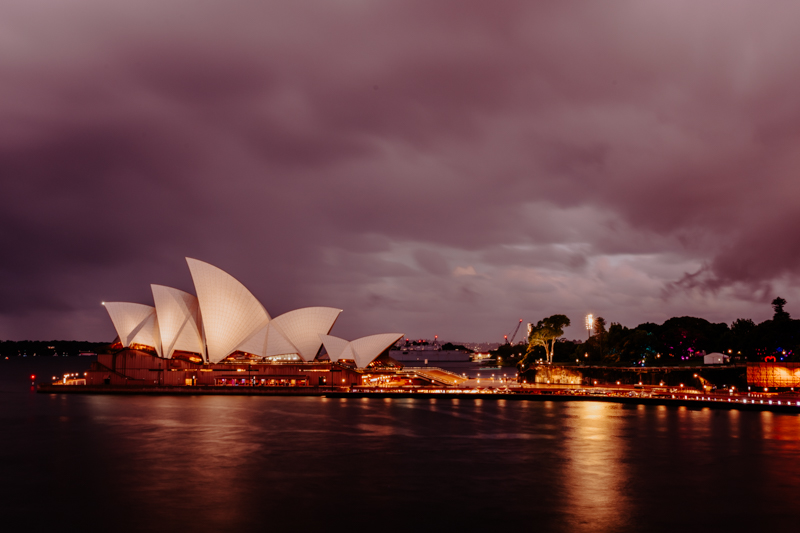
Emma Davis, Click Love Grow Instructor – SS 15 sec, Aperture f/11, ISO 100
As you can see, nightscape photography is definitely a labour of love! But for someone like me, who primarily shoots fast-moving children, it’s almost therapeutic to slow the pace and lean into the process of creating. And the bonus is that I come home with frame-worthy images for my wall!
If you loved these tips and want more, you’ll love our photography workshop – Landscape & Night Sky Photography.

Leave a Reply
PRIVACY POLICY & SITE TERMS AND CONDITONS
CLICK LOVE GROW ™ Pty Ltd - COPYRIGHT 2024 ©
x
Join Now
Enter your info below to join the challenge!
Want a friendly reminder when I go live?
Pop in your number and I’ll shoot you a text.
* We will send text reminders for our live calls during the challenge! Reply ‘STOP’ to end or ‘HELP’ for help.
We promise not to ever share your details with anyone or send you spam! Check our privacy policy and terms of service.
Be the first to comment