17 Tips for Capturing Everyday Moments of Your Kids
Documentary photography is a fly on the wall approach to capturing life, which is perfect for taking photos of our kids in their everyday moments! The result is an authentic story of their childhood that you can put into albums and pass down the generations of your family.
There’s a challenge that comes with capturing those seemingly mundane moments, to make the photos interesting to the viewer. But that’s the fun bit!
So this week we’ve got a gorgeous collection of images, showcasing a variety of every day moments including tips on how to elevate those ordinary moments from snapshots to something special!
Photo Tip #1 – Directional Light
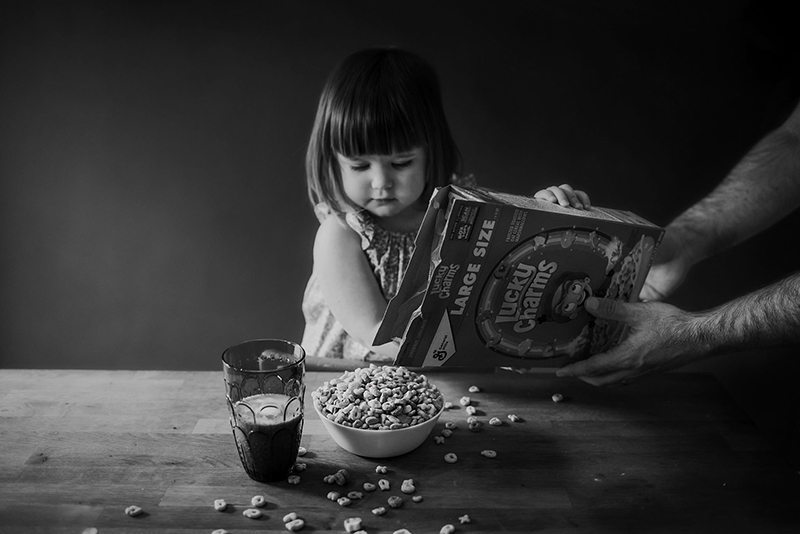
Whenever you can control the activity, set them up in good light, then snap away! Look for soft light which you’ll usually find near windows and doorways, and a good way to tell if you’ve found soft light is it tends to have a gentle graduation between the light and shadows, whereas harder light has very defined lines and it’s quite harsh and bright.
Becca Lord-Lyon, CLG Instructor
Place them at a 45 or 90 degree angle to the light source to create shadows on the opposite side. This will add depth, interest, and a little drama. In this image below, the light source is at camera right, creating shadows on the left side of the image which work to sculpt Becca’s subjects beautifully and almost spotlights them.
Related: Dramatic Natural Light Portraits

Becca Lord-Lyon, CLG Instructor
Photo Tip #2 – Clear the Clutter
Clutter creates chaos in photos and distracts from your subject. Push aside anything that doesn’t need to be in the frame, and you’ll take your photo from snapshot to stunning in one easy move.
Related: Clear the Clutter

Becca Lord-Lyon, CLG Instructor
Photo Tip #3 – Include Foreground Elements
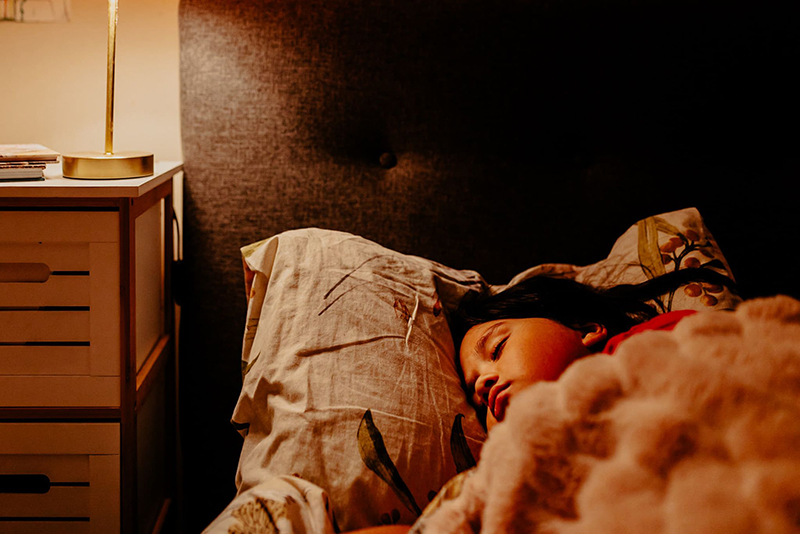
When we’re new to photography we tend to move everything out of the way. And when it comes to clutter, this is a good habit to get into! But when it comes to composition, having a foreground element, middle and background elements help to add depth, especially when it comes to lifestyle and documentary style photography. It adds depth to the scene and can help frame our subject too.
In this shot below, Emma got down low and rather than be tempted to move the blanket so that it was less noticeable, she used it as a foreground element. Not only does it add depth, but the blanket and pillow help to frame her face.
Emma Davis, CLG Instructor
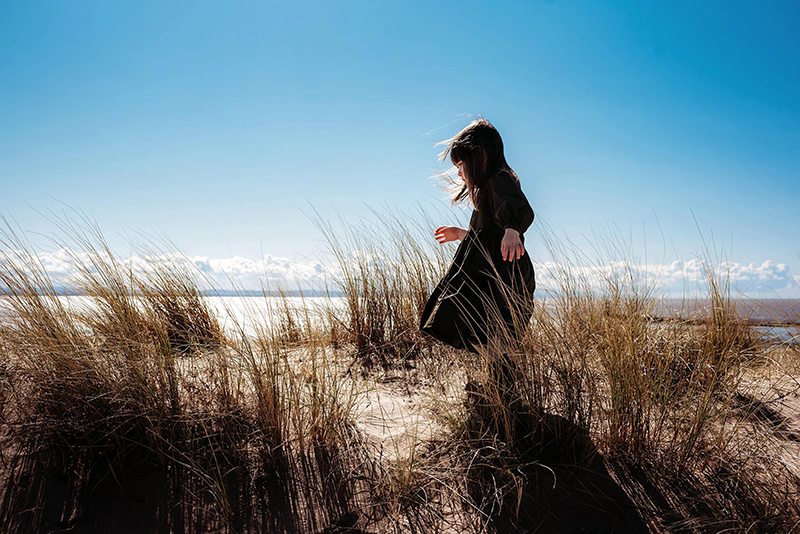
In this next shot, the grasses near the lens work as foreground elements.
Becca Lord-Lyon, CLG Instructor
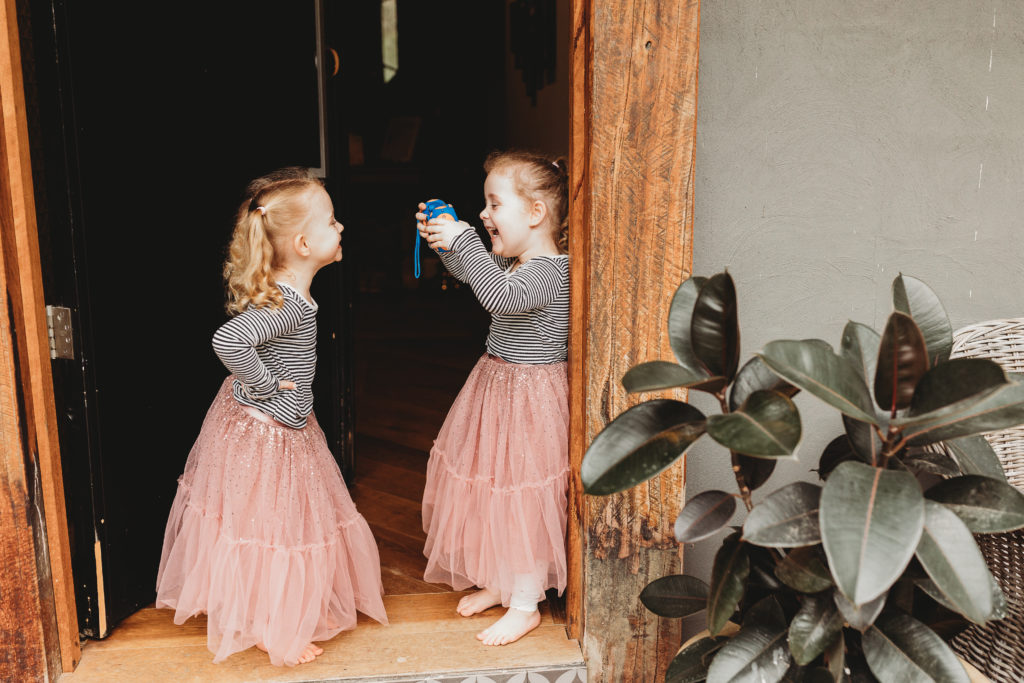
Using plants both indoors and out, at the edge of the frame are a really strong way to create a foreground interest that also adds some texture without becoming a distraction.
Kristen Gurney, Advanced Grad
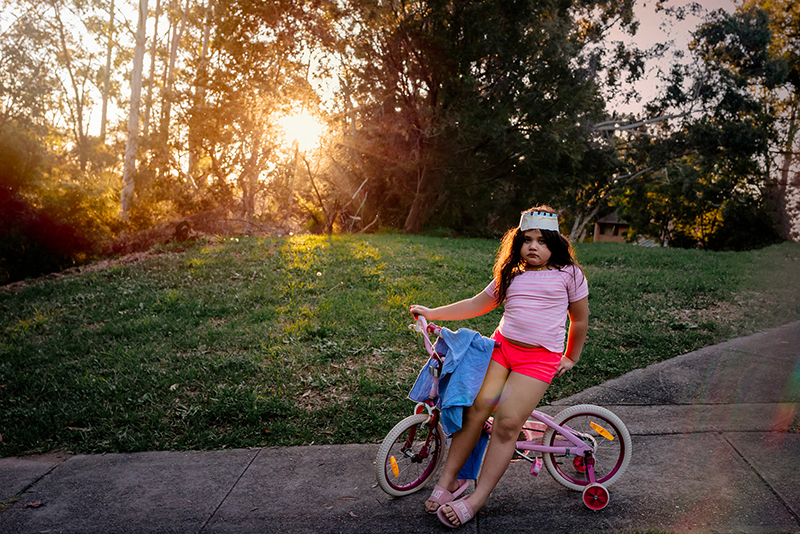
Photo Tip #4 – Golden Hour
Many of us tend to leave our cameras at home when we’re out and about, unless we’re going to a special event or outing. Get into the habit of taking your camera when you head out, and even if you don’t take any photos, better to have taken it with you than miss out on capturing moments of your everyday life.
We love the golden light in this photo! To replicate this look, head out during the 2 hours after sunrise or before sunset, when the sun isn’t yet high overhead. It’s more diffused than at midday, and creates those long shadows which add depth and interest to your photo. As a bonus, the haze which is created when the sun hits your lens straight on, lends it a dreamy feel.
Related: 6 Backlight Photo Ideas to Try
Emma Davis, CLG Instructor
Photo Tip #5 – Bokeh
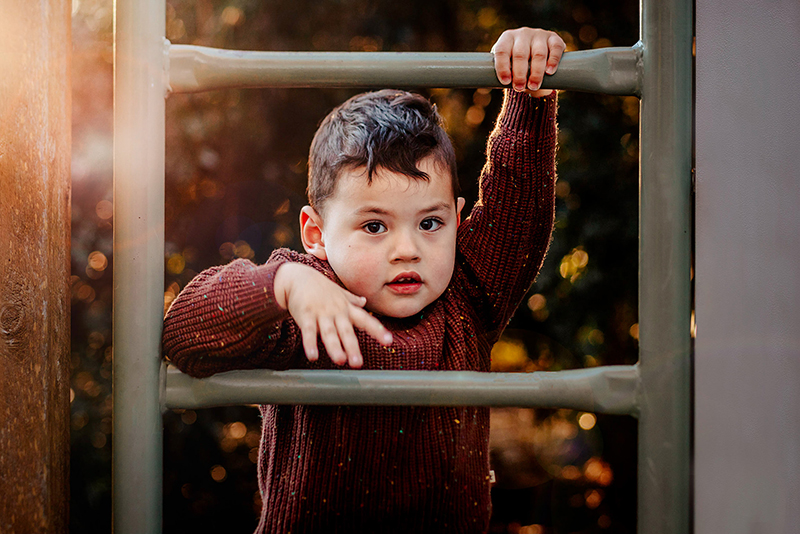
This was shot late in the day when the sun setting behind the trees, and as it peaks through the gaps it creates what we in the photography world refer to as light bokeh. Make the most of it with a long lens and the widest aperture your lens allows. You don’t need a fancy lens to do this either, even if you only have a kit lens you can create this effect.
Related: Get Blurry Backgrounds (Even With a Kit Lens); How To Take Beautiful Bokeh Photos

Dana Whitley, Advanced Grad
Emma Davis, CLG Instructor
Photo Tip #6 – Repetition & Colour
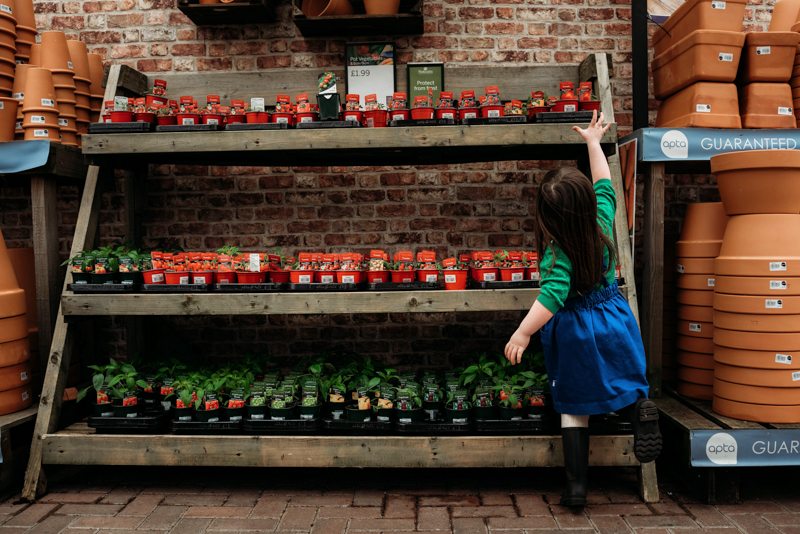
Including repetition and colour in our photos is one of the easiest and most powerful compositional tools at our disposal. And that’s what makes these photos of ordinary, everyday chores such compelling, eye-catching shots.
Related: Using Colour for Beautiful Storytelling Imagery

Emma Davis, CLG Instructor
Becca Lord-Lyon, CLG Instructor
Photo Tip #7 – Negative Space
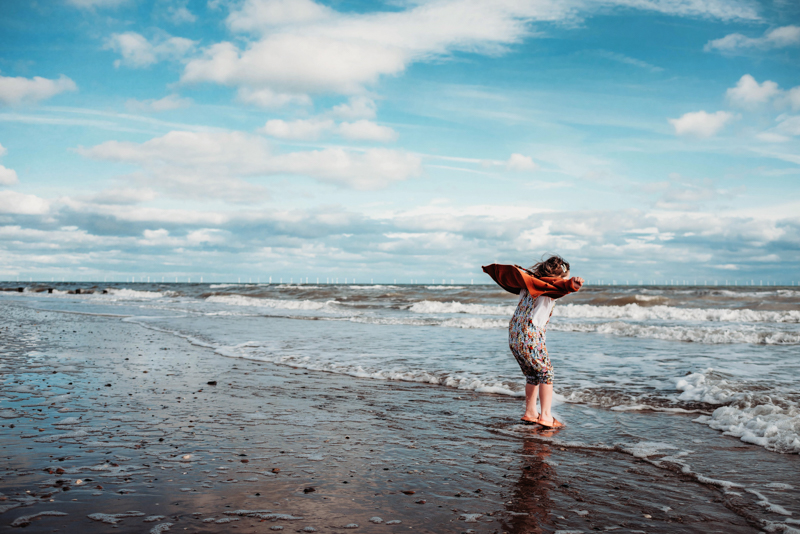
When you have a sky like this, make the most of it! It’s the use of negative space that has elevated this simple scene of a girl on the beach to something very eye catching!
Related: How to Use Negative Space in Photos for Big Impact
Becca Lord-Lyon, CLG Instructor
Photo Tip #8 – Shoot Through Doors
Shoot through doorways to frame your subject and create the sense of intimacy and authenticity of the scene within.
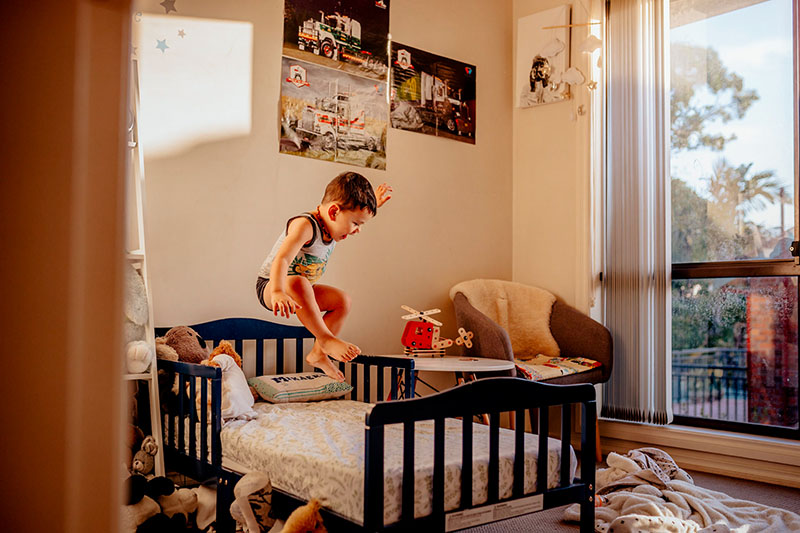
Emma Davis, CLG Instructor
Photo Tip #9 – Shoot Through Windows
Advanced Grad Dana Whitley says she never cleans her windows when she wants to shoot through them because all those smudges not only add texture, they’re a beautiful reminder for her of the little fingers and hands that made them. Awww!

Dana Whitley, Advanced Grad
This is the kind of activity we might instinctively move to shoot outside, from behind him. By simply moving inside and shooting through the window Heidi created a much more interesting photo of her son cleaning the window (and that tongue would have missed any other way!).
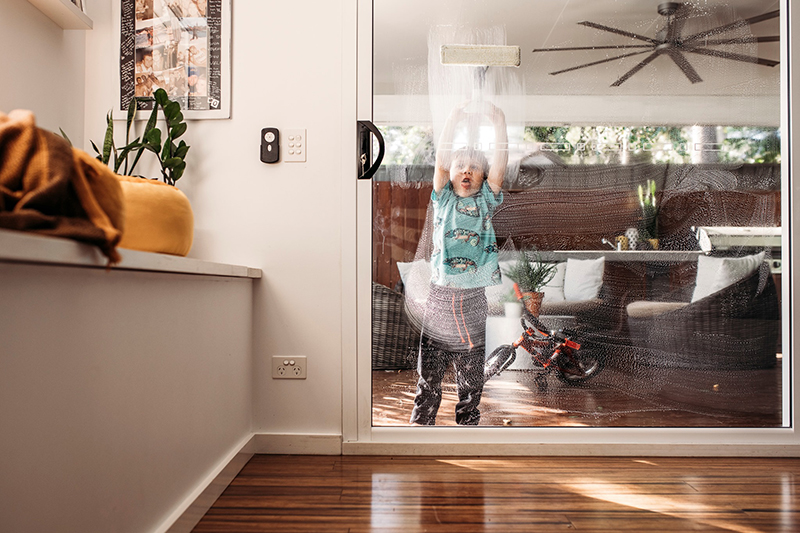
Heidi Talic, Advanced Grad
Photo Tip #10 – Get Down Low
When we’re new to photography we have a bad habit of taking photos of everything from our standing height. Instead, see how much more powerful even the most ordinary everyday moment can look by simply getting down low.
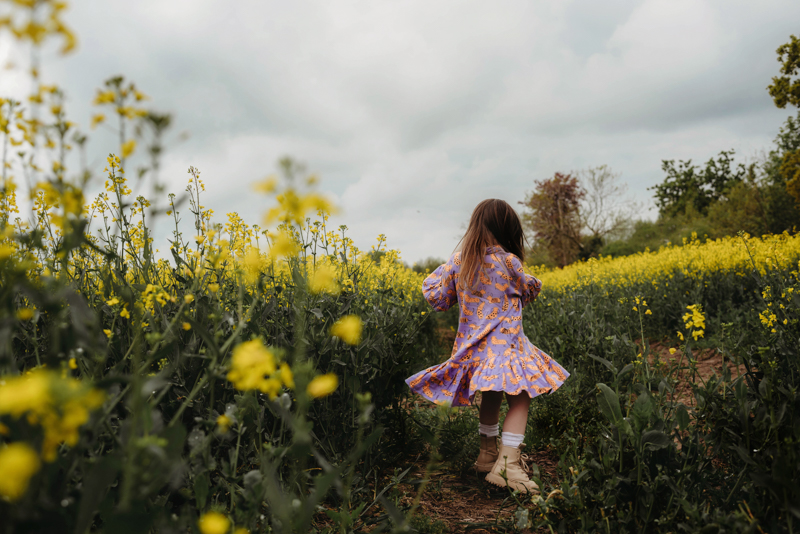
Becca Lord-Lyon, CLG Instructor
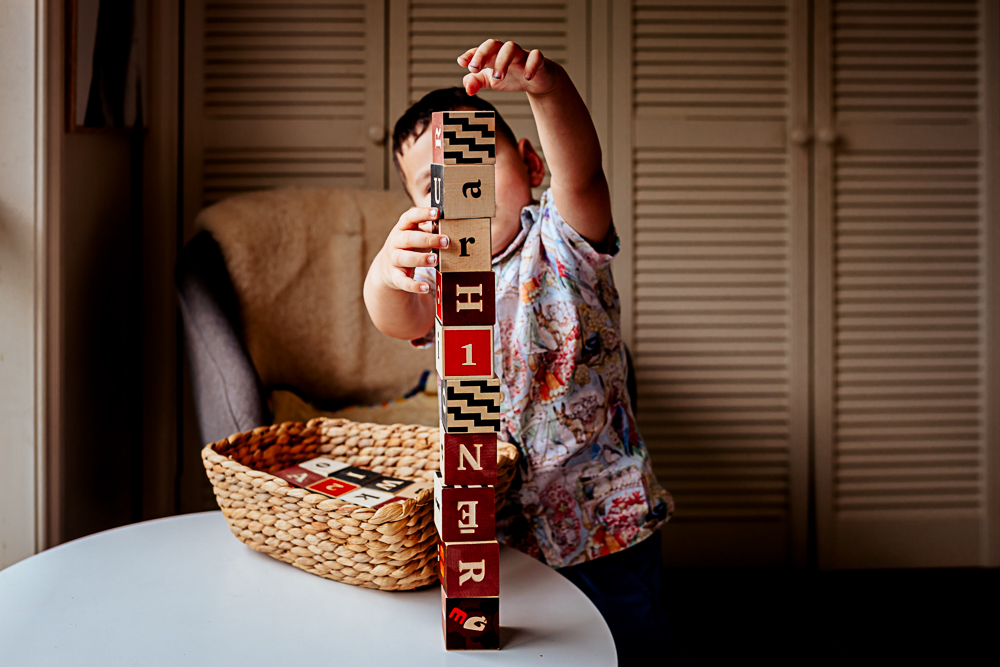
Emma Davis, CLG Instructor
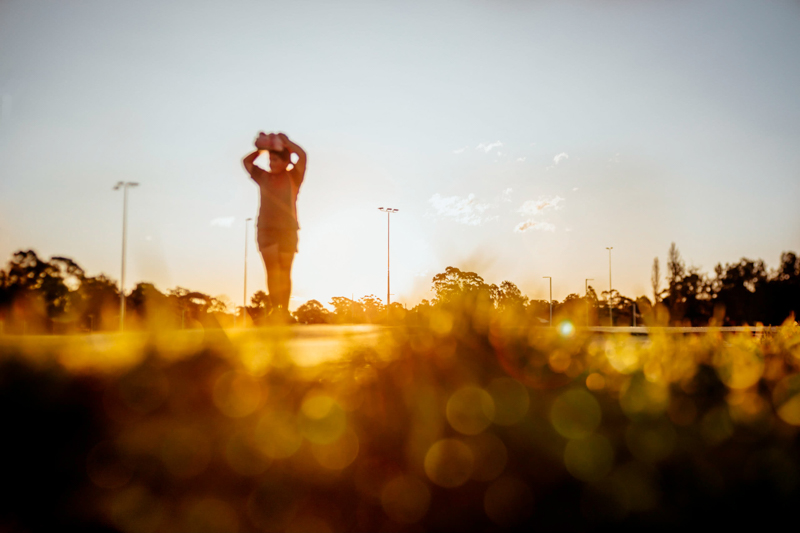
Get down even lower and shoot up at your subject. Also, in this shot below Emma has also shown us another way to shoot through objects in the environment to frame your subject.
Emma Davis, CLG Instructor
Photo Tip #11 – Get Up High
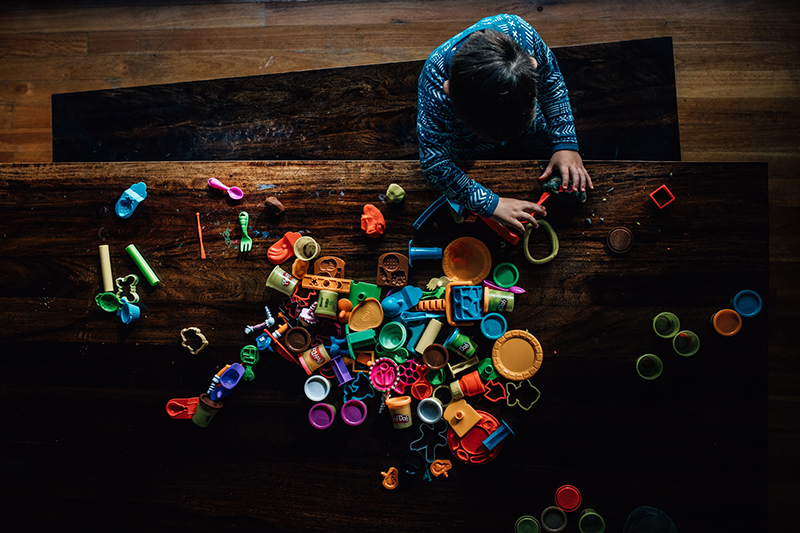
Move around your subject and try lots of different angles and frames. This top down perspective was perfect for this scene. It has showcased the activity perfectly, made the most of all that repetition and colour in the playdo tools, and the texture of the timber made a fantastic, uncluttered backdrop. What’s more, that low light is gorgeous!
Related: Indoor Photography Tips
Kirsty Nealon, Advanced Grad
In this next shot, Emma took her camera out and about with her, but you’ll never guess where they are. Check out the pullback shot below to see how Emma created this powerful shot in a cluttered, busy environment.

Emma Davis, CLG Instructor

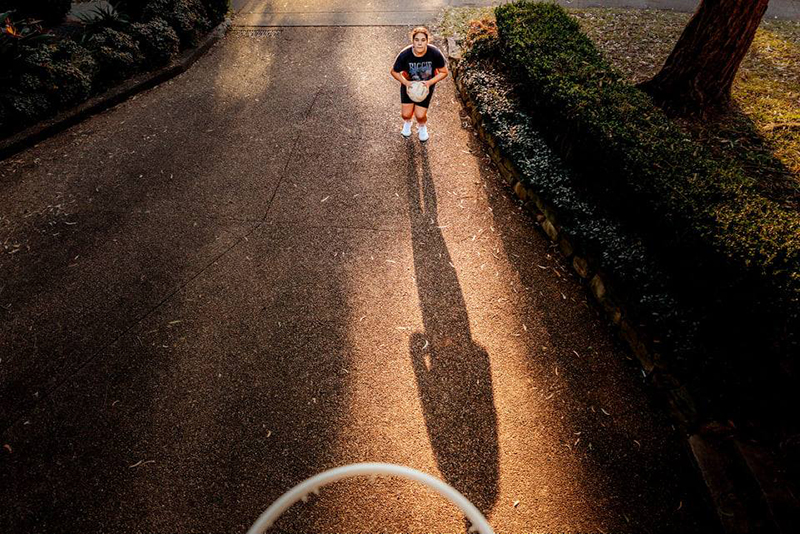
Get up even higher. If possible, move to a second level to shoot the action on the ground.
Emma Davis, CLG Instructor
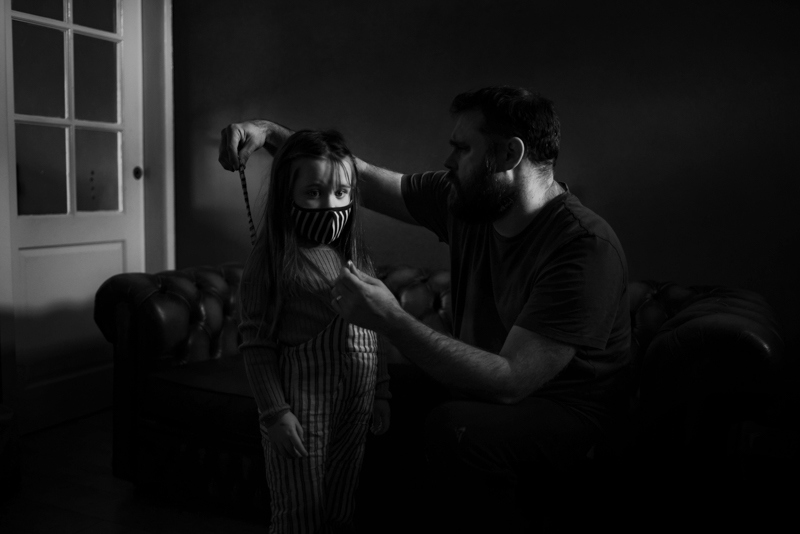
Photo Tip #12 – Emotion
Life isn’t always rosey, and it’s not just the happy or quiet moments that are photo worthy!
Becca Lord-Lyon CLG Instructor
Photo Tip #13 – Perspective
Think about the story you’re telling, and move yourself around your subject to find interesting angles that convey the story elements.

Emma Davis, CLG Instructor

Becca Lord-Lyon, CLG Instructor
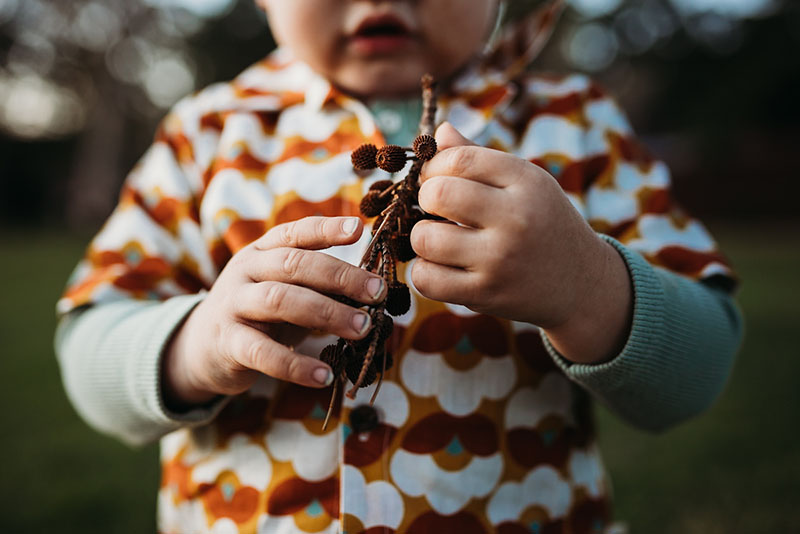
Photo Tip #14 – Isolate Your Subject
Make it clear what the subject is by isolating them. One of the easiest ways to do this is to get in close and use a wide aperture to create a shallow depth of field.
Related: Getting out of Auto
Emma Davis, CLG Instructor
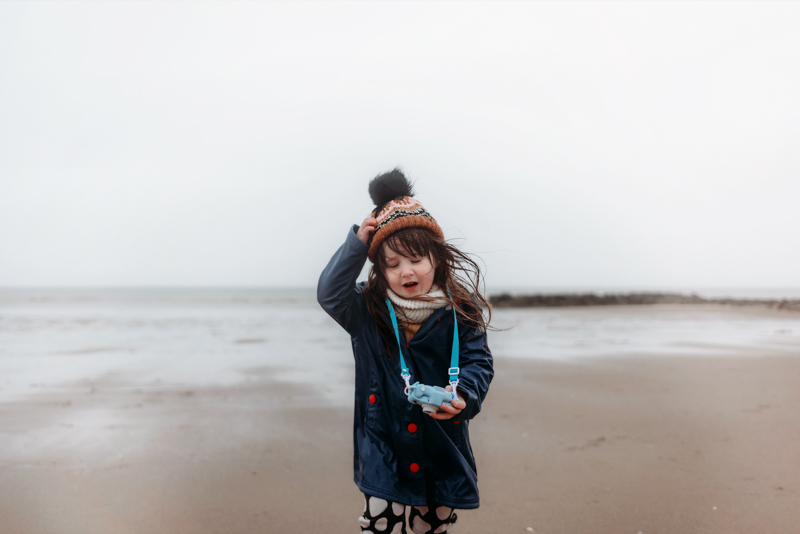
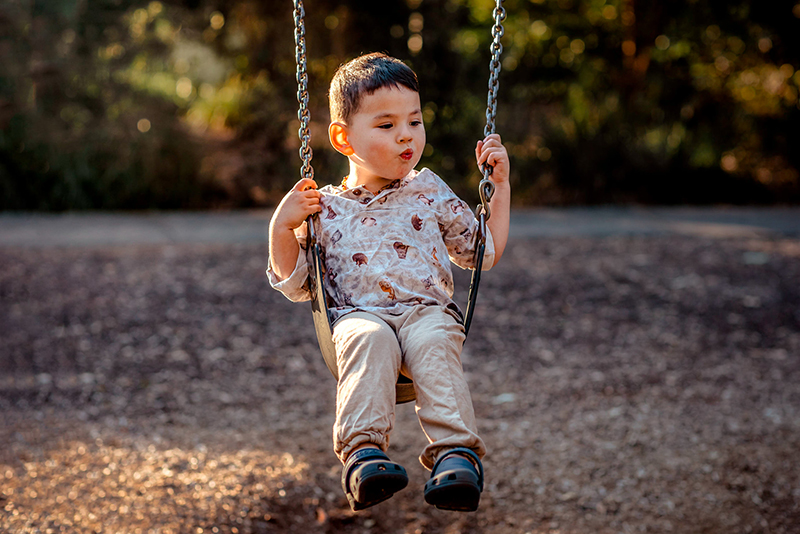
Photo Tip #15 – Freeze Motion
When you’re capturing your kids on the move, avoid unwanted, dreaded blur with a fast shutter speed. For motion like this next shot where she’s just walking you’d need at least 1/400 to get a sharp shot, then balance with your other settings to get a good exposure.
Related: Get Sharp Photos of Kids in Motion
Becca Lord-Lyon, CLG Instructor
For the kind of motion you get when a child is swinging like this one, you’d want at least 1/800 to avoid motion blur. Experiment with your settings, take a test shot at a fast shutter speed then review and zoom in to see if it’s nice and sharp.
Emma Davis, CLG Instructor
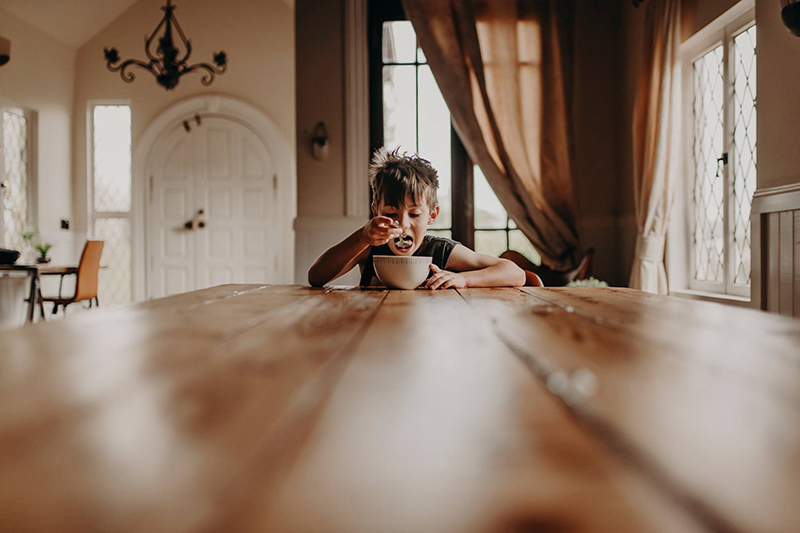
Photo Tip #16 – Use Leading Lines
Look for ways to use leading lines to draw the eye to your subject who might be further away in the scene. Its also an easy way to level up the creative aspect of your compositions to make them more eye-catching.
Heidi Talic, Advanced Grad
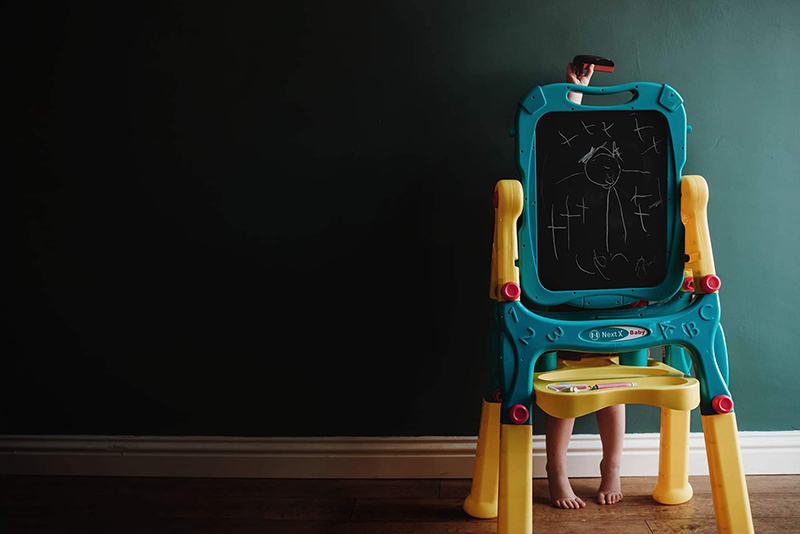
Photo Tip #17 – Sweet Details
Not all our photos of our kid’s childhood has to include their faces. Those sweet little hands and feet, the curls at the nape of their neck, fingers and toes… they all change and grow so much and you’ll be grateful you captured them.
Becca Lord-Lyon, CLG Instructor
I hope you enjoyed our creative and tech tips for taking gorgeous photos of your kid’s everyday moments! If you try any of the ideas, share them on Instagram and tag @clicklovegrow!
Join my new workshop and learn How to Shoot Pro-Quality Photos With Your DSLR… and it’s totally FREE to join! Register here…

Leave a Reply Cancel reply
PRIVACY POLICY & SITE TERMS AND CONDITONS
CLICK LOVE GROW ™ Pty Ltd - COPYRIGHT 2024 ©
x
Join Now
Enter your info below to join the challenge!
Want a friendly reminder when I go live?
Pop in your number and I’ll shoot you a text.
* We will send text reminders for our live calls during the challenge! Reply ‘STOP’ to end or ‘HELP’ for help.
We promise not to ever share your details with anyone or send you spam! Check our privacy policy and terms of service.
Be the first to comment