12 Outside The Box Photoshoot Ideas That Rock!
12 Fun Photo Ideas You Can Try At Home
Creative photoshoot ideas can be found in many places…including around the house!
During the long periods of isolation we went through during the past two years, as we were forced to restrict ourselves in so many ways, keeping an eye on our mental health became essential.
So with that in mind, we created a highlights reel collection of pictures that use fun techniques or cool subject ideas that you can do at home — and in nature too, of course! Read on, grab the tips and go have your own fun photoshoot!
1. Lamplight Silhouette
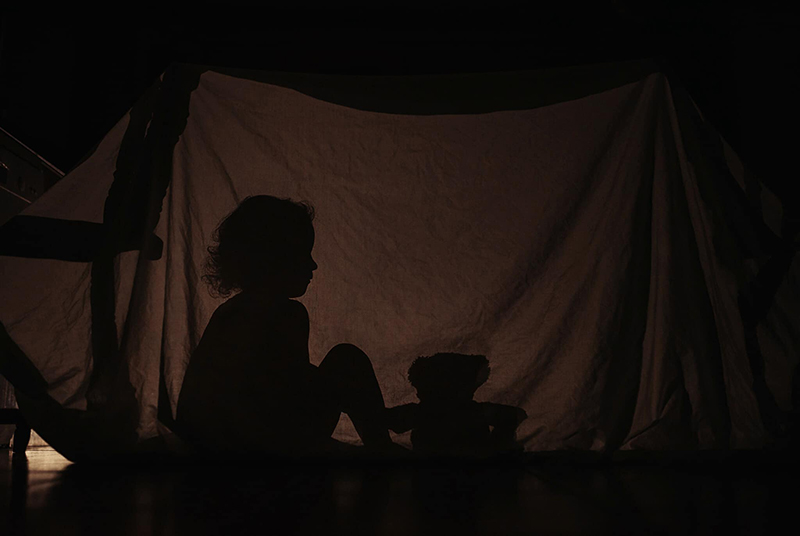
This simple home photoshoot idea popped up in our Grad’s group during one of our challenges, and we fell in love with it. Lisa shared with us her tips for creating this amazing photo session:
- Find a clear, non-cluttered area unless the background is going to be part of your story, i.e., a playroom/bedroom.
- Grab a light coloured sheet and hang it between your subject and yourself.
- Use one single light source — it may be difficult in post-processing to edit a clean, sharp silhouette if you have light coming in from multiple angles.
- Position your subject directly in front of the light source for a really crisp, contrasting silhouette. This also enabled me to capture her facial details and curly hair.
- Have a helper at hand — if my husband wasn’t there, I wouldn’t have been able to get a side profile.
- If you’re including toys, look for shapes that are going to be recognisable in shadow form and position them in a way that best shows their shape. Teddy bears, books, robots, dinosaurs are great.
Settings
Lens: 35mm
Aperture: f/2.0
Shutter Speed: 1/160
ISO: 2500
Lisa O’Doherty, Graduate
2. Intentional Blur
If you’re up for some fun picture ideas, there are two ways to create a shot that uses intentional blur for a creative effect.
- Shutter speed
- Focus
(or both!)
We love this artistic technique because it allows us to let go of the need for razor-sharp focus and shoot freely. This is especially liberating when the subject is our kid in motion!
Shutter Speed Method
We use shutter speed to capture or freeze motion. In doing so, you need to consider motion speed because this affects the final outcome — just as much as the shutter speed.
In this instance, you’re going to capture movement to purposefully create blur, so you need a shutter speed that is too slow to freeze the motion.
Now, as the speed of motion will vary depending on the action, age, and ability of your subject, naturally your shutter speed will change too. So you’ll need to experiment with settings until you get an effect you love.
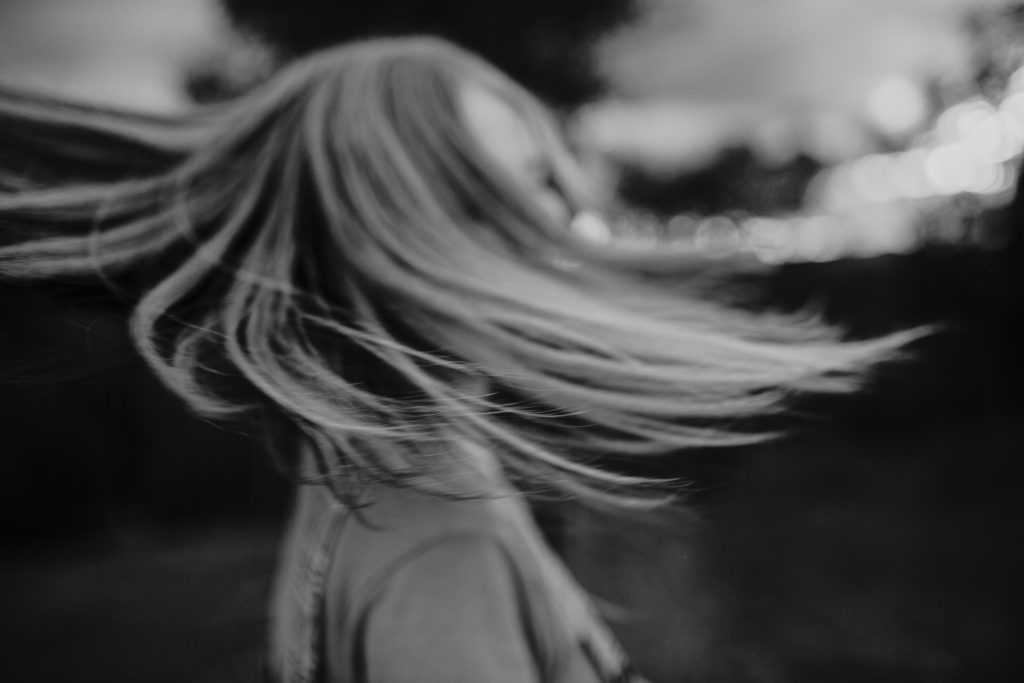
Before you say “action!” switch your camera to continuous focus drive mode and high-speed burst mode, choose a focus point and say action! Then fire off multiple shots of your subject jumping, moving, dancing, spinning, whatever!
Ensure your focus point is over your subject…if it lands on the background which isn’t moving, you’ll have a sharp background — that’s not desirable.
In this shot below, the shutter speed was quite fast at 1/640. However, the subject was spinning very fast. If a much slower shutter speed had been used, she would have been rendered unrecognisable.
Settings
Aperture: f/2
Shutter Speed: 1/640
ISO: 320
Pam Bradford, CLG Instructor
Related: Our Ten Best Photos of Kids in Motion
Focus Method
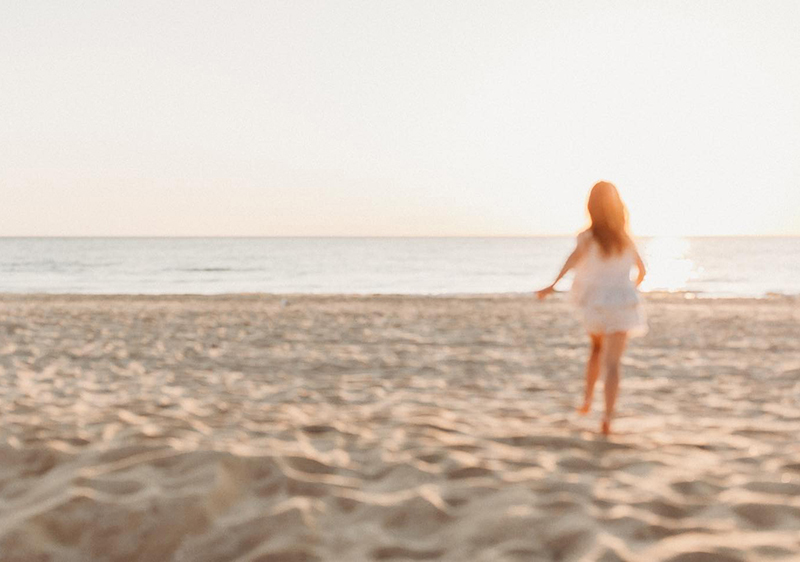
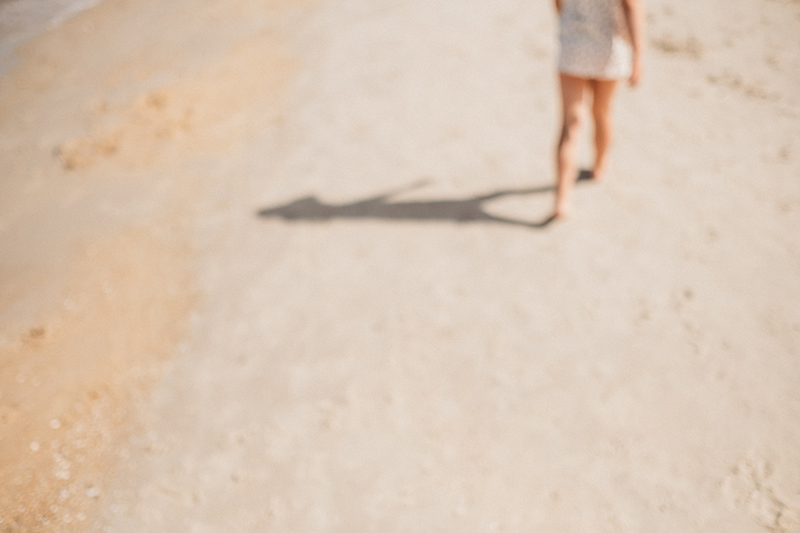
This photoshoot idea is based on creating blur through intentionally avoiding sharp focus, and it creates a beautifully dreamy feel.
Whilst looking through the viewfinder turn the focus ring until they’re blurred. That’s it!
You could also drag your shutter a little if you want to add a little motion blur too…there are no rules! You’re only limited by your own vision!
Merissa Wakefield, CLG Instructor
Merissa Wakefield, CLG Instructor
3. Multiple Exposures
Multiple exposures can also be part of the cool photoshoot ideas you might want to try on your own at home.
Traditionally created by making more than one exposure on a slide or frame of film, multiple exposures are simply the combining of two or more photos to create a single image.
Many digital cameras now include this function, or they can be created in software such as Adobe Photoshop.
Some uses of multiple exposures are composites, creative portrait photography, focus stacking and HDR photography.
This mini-tutorial will show you how to do it easily in Photoshop…even if you’re a beginner!
The first image was created by layering the two images below it. There are many ways to do this in Photoshop, but we think Becca’s method is the easiest. For the purpose of this mini-tutorial, we’ll name the image file of Lenox as Image 1 and the leaf image as Image 2:
- Open your two images in Photoshop — they should already be edited to your satisfaction.
- With image 2 in preview, control C / command C to copy
- Switch to image 1 in preview, control V / command V to paste
- Control T to resize if needed/desired
- Reposition overlay image if needed/desired
- On the layers panel, ensure image 2 is selected; then…
- From the blending modes drop-down menu, select “screen” (in the screencap below, it’s the menu currently in “normal” mode)
- Reduce opacity to a level that suits your image and your desired outcome
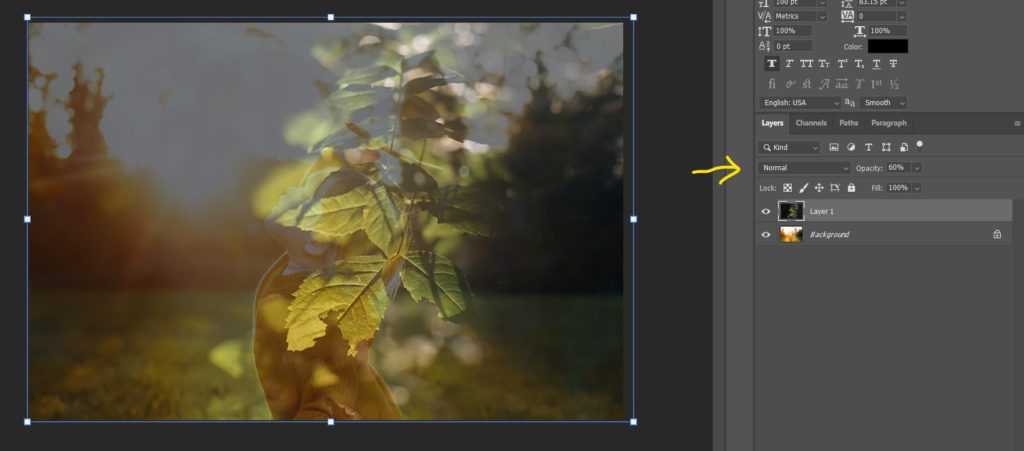
This is one of the most basic methods. If your Photoshop skills are more advanced, you might like to experiment with different blending modes or layer masks, so you can easily erase areas where you don’t want to see the overlay at all.
But for beginners, this is a fabulously easy start! The first image was created using only the method above by layering the second and third images.
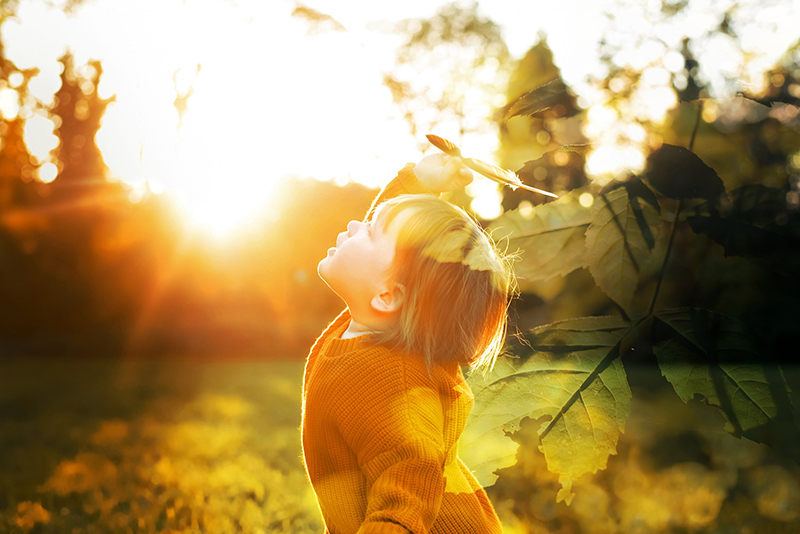
Becca Lord-Lyon, Advanced Graduate
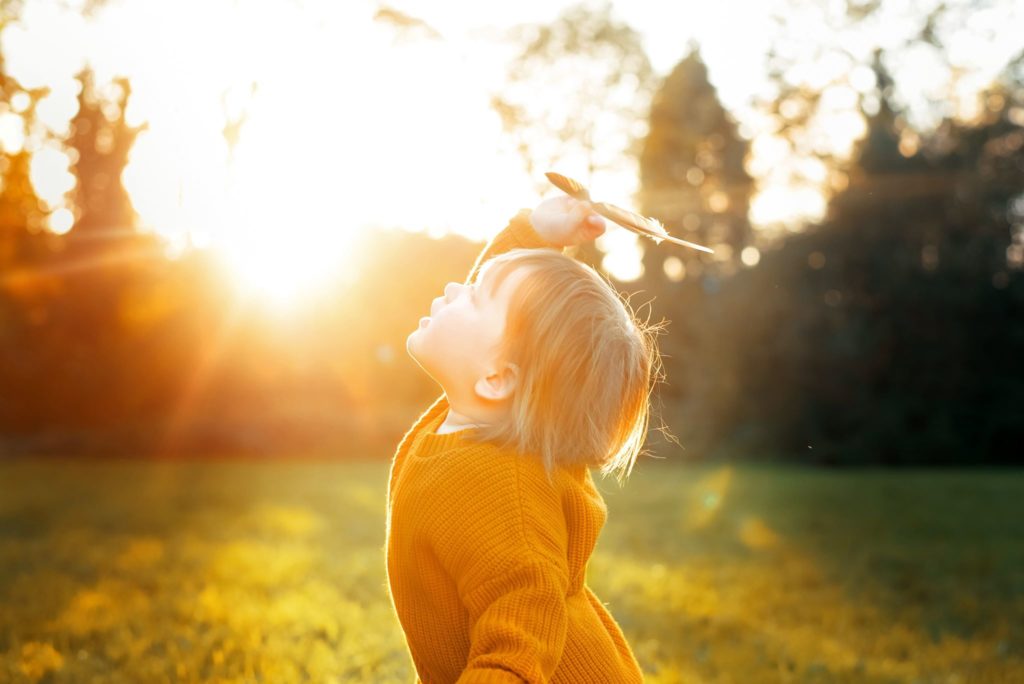
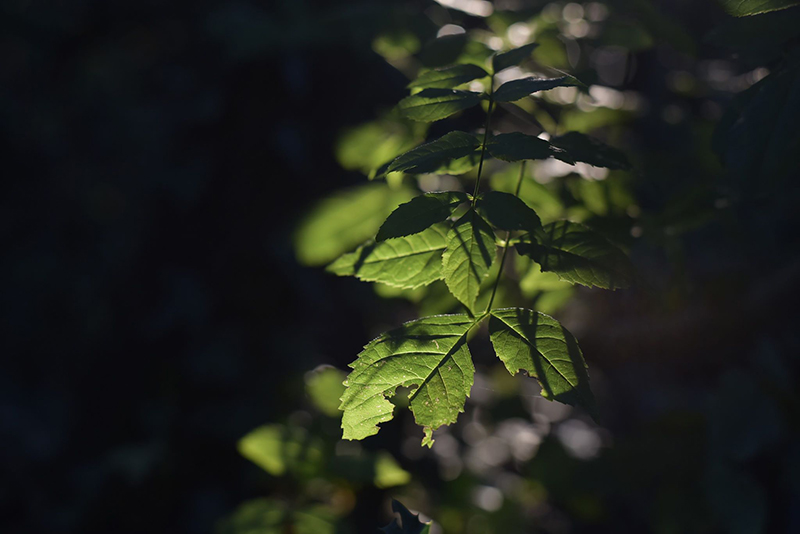
Becca Lord-Lyon, Advanced Graduate
4. Still Life
Still life photography is the art of depicting inanimate subjects. It’s an artistic genre, and often the challenge is to find objects that work together and arrange them in a balanced way that is visually appealing. Try these ideas to get started on your own still life photoshoot:
- Choose objects that have a common thread. Sewing items, cooking, food, floral, a colour…all work
- Use a simple, uncluttered background or a backdrop
- For visual interest, include items of different heights
- If you’re unsure how to lay them out, use the rule of thirds to guide you
- Use soft, directional light
- Aim to create gentle shadows to bring life to the shot and add depth
- Play with your angles, but eye level or slightly higher works best for still life photography
- Still life typically is shot not too close and not too far away
- Use a tripod
- Google still life masters to guide and inspire
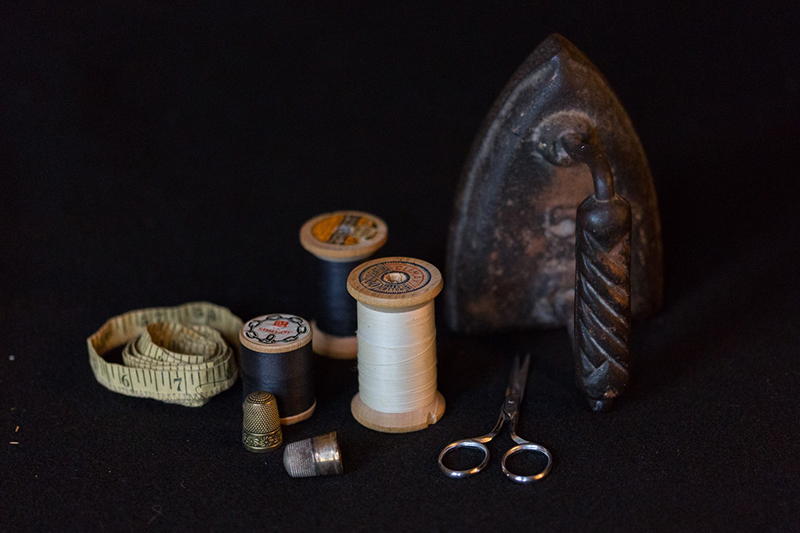 Charlotte Bryant Madison, Advanced Graduate
Related: 6 Ways to Use Complementary Colour for Dramatic Photos
5. Shadow Photography
Looking for the best photoshoot ideas? Head outside early or late in the day and have a play with your shadows!
Look for well defined, hard light shadows to create unexpected low light imagery. The subject doesn’t have to be a person either…any shadow, if well defined and interesting, can be a subject within itself if you pay attention to the surroundings and your composition.
Related: Shadow Photography
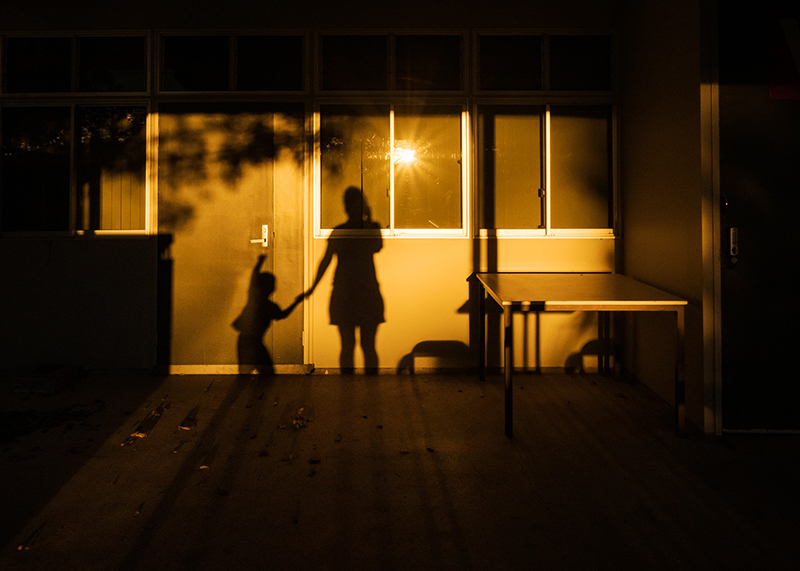
Alice Mariette, CLG Instructor
Related: Low Light Photography Using Pockets Of Light
6. Traditional (But Not!) Portraits
These days we’re all in love with the organic feel of a lifestyle or documentary approach to portraits. They do a great job of depicting our daily lives, conveying personality and character, and including the environment gives us context to tell a story.
But there’s a lot of fun to be had with a simple black backdrop as it forces us to get a little more creative to capture personality, and it can be loads of fun for the kids because, in this instance, we don’t want them to simply sit and smile.
Simple black fleece fabric or throw are great options for a homemade backdrop. Sheets are not so great as they tend to crease easily, which shows up in images. Also, put your subject a good metre away from the backdrop to blur it nicely.
You’re also not limited to black. If you love colour or pattern, go crazy, be my guest! Clash as much as you like!
Then have some fun! We love the impact of the unexpected large expanse of negative space that has given this shot.
Related: Tips for Documentary Kids Photography
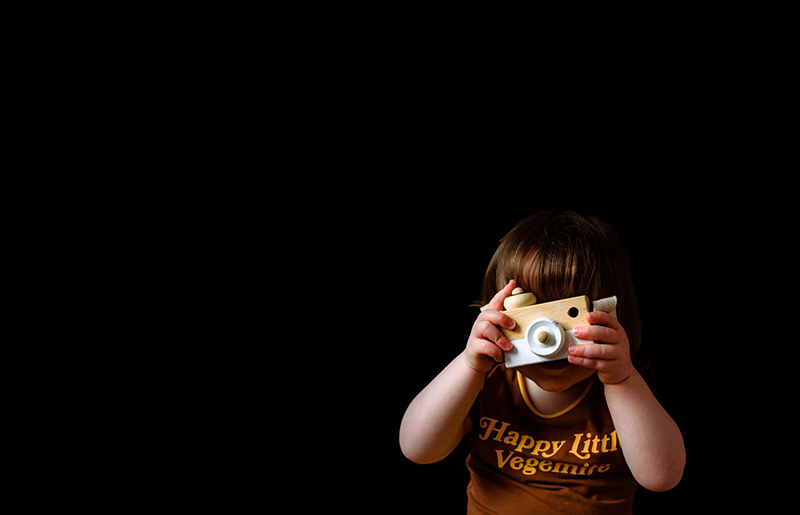
Becca Lord-Lyon, Advanced Graduate
Related: 10 Spectacular Negative Space Photos
7. Sparkler Photos
Add a little sparkle to your portraits and hand them a sparkler. Make sure they’re old enough to hold it safely!!
Related: DIY Sparkler Photos
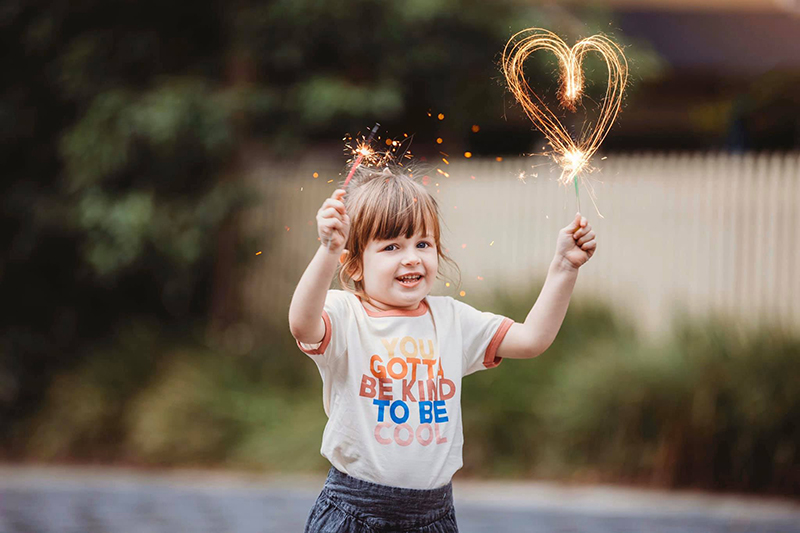
Ames Elizabeth, Advanced Graduate
8. Fairy Light Bokeh
Create a gorgeous fairy light bokeh frame by dangling some white, battery operated fairy lights in front of your lens. Make sure they’re not too close or the highlights will blow out, and you don’t want to scratch your lens!
Tip: If you don’t have any battery operated lights around the house, raid your Christmas deco box for objects that light up. Open it up and remove the small light set-up.
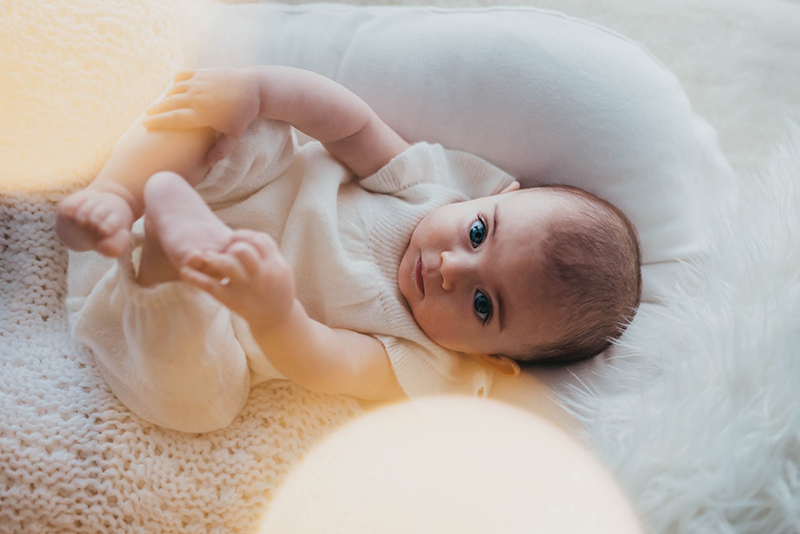
Charlie O’Neill, Advanced Graduate
The first time I tried this experiment, I dangled the lights in front of my lens with one hand whilst trying to control my heavy camera and lens combo in the other. Let’s just say there were a lot of missed shots, sweating and swearing!
Excuse the dodgy phone photo — my camera was clearly required elsewhere!
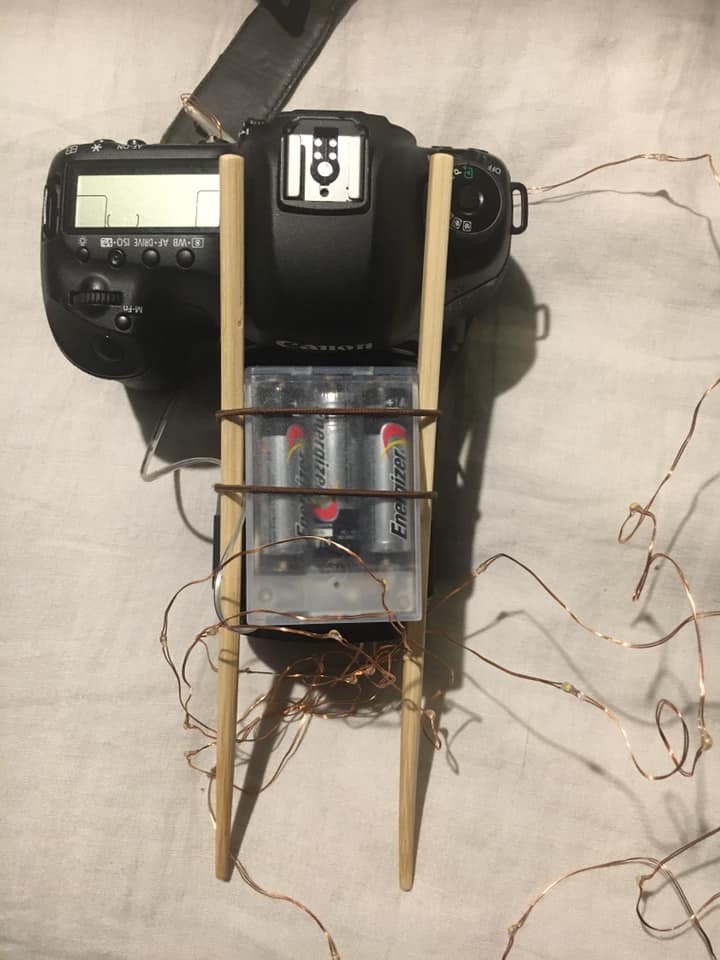
Pam Bradford, CLG Instructor
Related: Fairy Lights Bokeh Photo Tutorial
9. Glitter Photos
Ready for some extra fun photoshoot ideas that will get your kids excited if hanging out at home?
A twist on the popular confetti portrait, the results are sparklier, but they’re also messier! So take this one outdoors or you’ll be cleaning glitter out of the corners of your home for the rest of your life!
But the process is the same as a confetti shot, and we have a handy tutorial we wrote earlier, which walks you through it step-by-step!
Related: DIY Confetti Photos
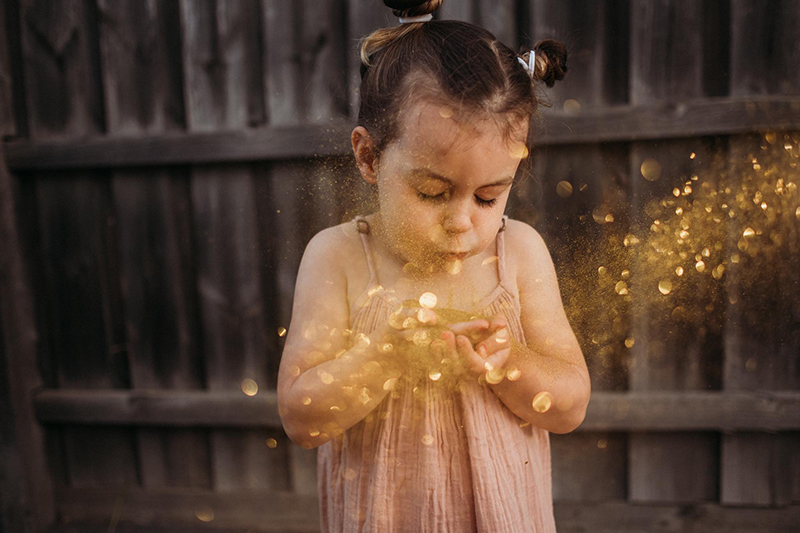
Merissa Wakefield, CLG Instructor
10. Storytelling Collage
This is one the kids will love to be involved in for the fun factor!
Follow Kelly’s easy tips and take your own!
- I shot this in the hallway, with a nearby bedroom light switched on for some soft illumination. You want the fairy lights to pop, but they don’t provide enough radiance on their own for a well-exposed shot. So you’ll need to experiment with the secondary light source — too much light and the fairy lights will be diluted, too little, and the shot will be underexposed.
- Ensure the fairy lights sit at the same height from each direction so that they line up in the photos by tying them to a chair at the side, out of frame.
- Position your subject in the same spot for all three photos.
- For the two side photos, position the chair on one side with fairy lights tied at the desired height, and take your shot. Then reposition the chair to the other side, and turn it around the position of the lights.
Settings
I wanted a fast shutter speed because you know how kids like to wiggle! Then I used my ISO and aperture to get the desired exposure.
Aperture: f/2.2
Shutter Speed: 1/200
ISO 1000

Kelly Richardson, Advanced Graduate
11. Shoot Through
For this shot, Megan popped the clear glass out of a pair of glasses, held it in front of her lens, and shot through it. She also slowed her shutter speed to capture the motion of her son dancing.
Shutter Speed
Megan slowed her shutter speed for this shot and captured some motion of her son dancing. We suggest that for that speed of movement, begin with a shutter speed of around 1/30 and experiment.
Focus
Your lens will probably have trouble focussing through the extra layer of glass and will hunt, which is frustrating! If this happens, switch to manual focus and capture some intentional blur instead.
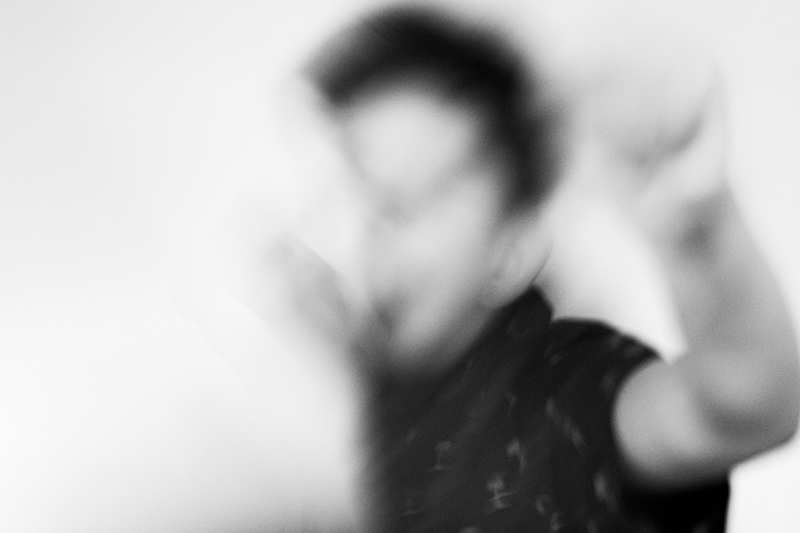
Megan O’Donnell, Advanced Graduate
12. Stacking Shot
This photoshoot idea is an oldie but a goodie, and it’s easier than you’d think!
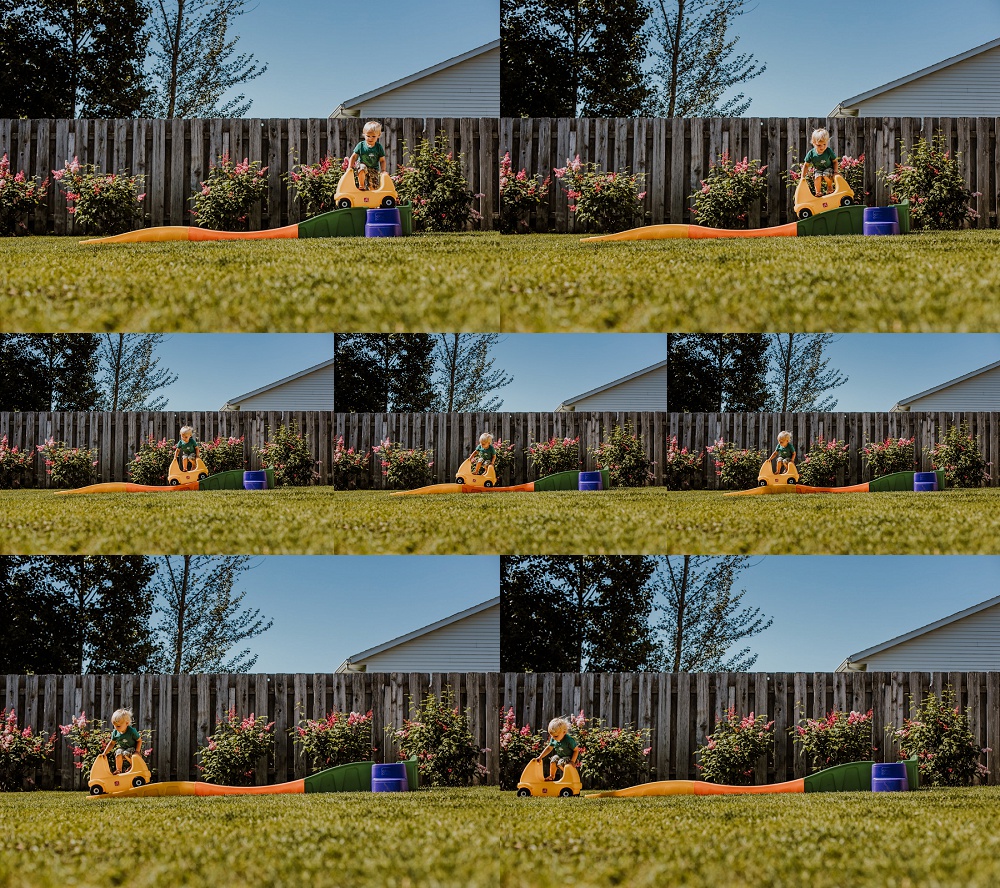
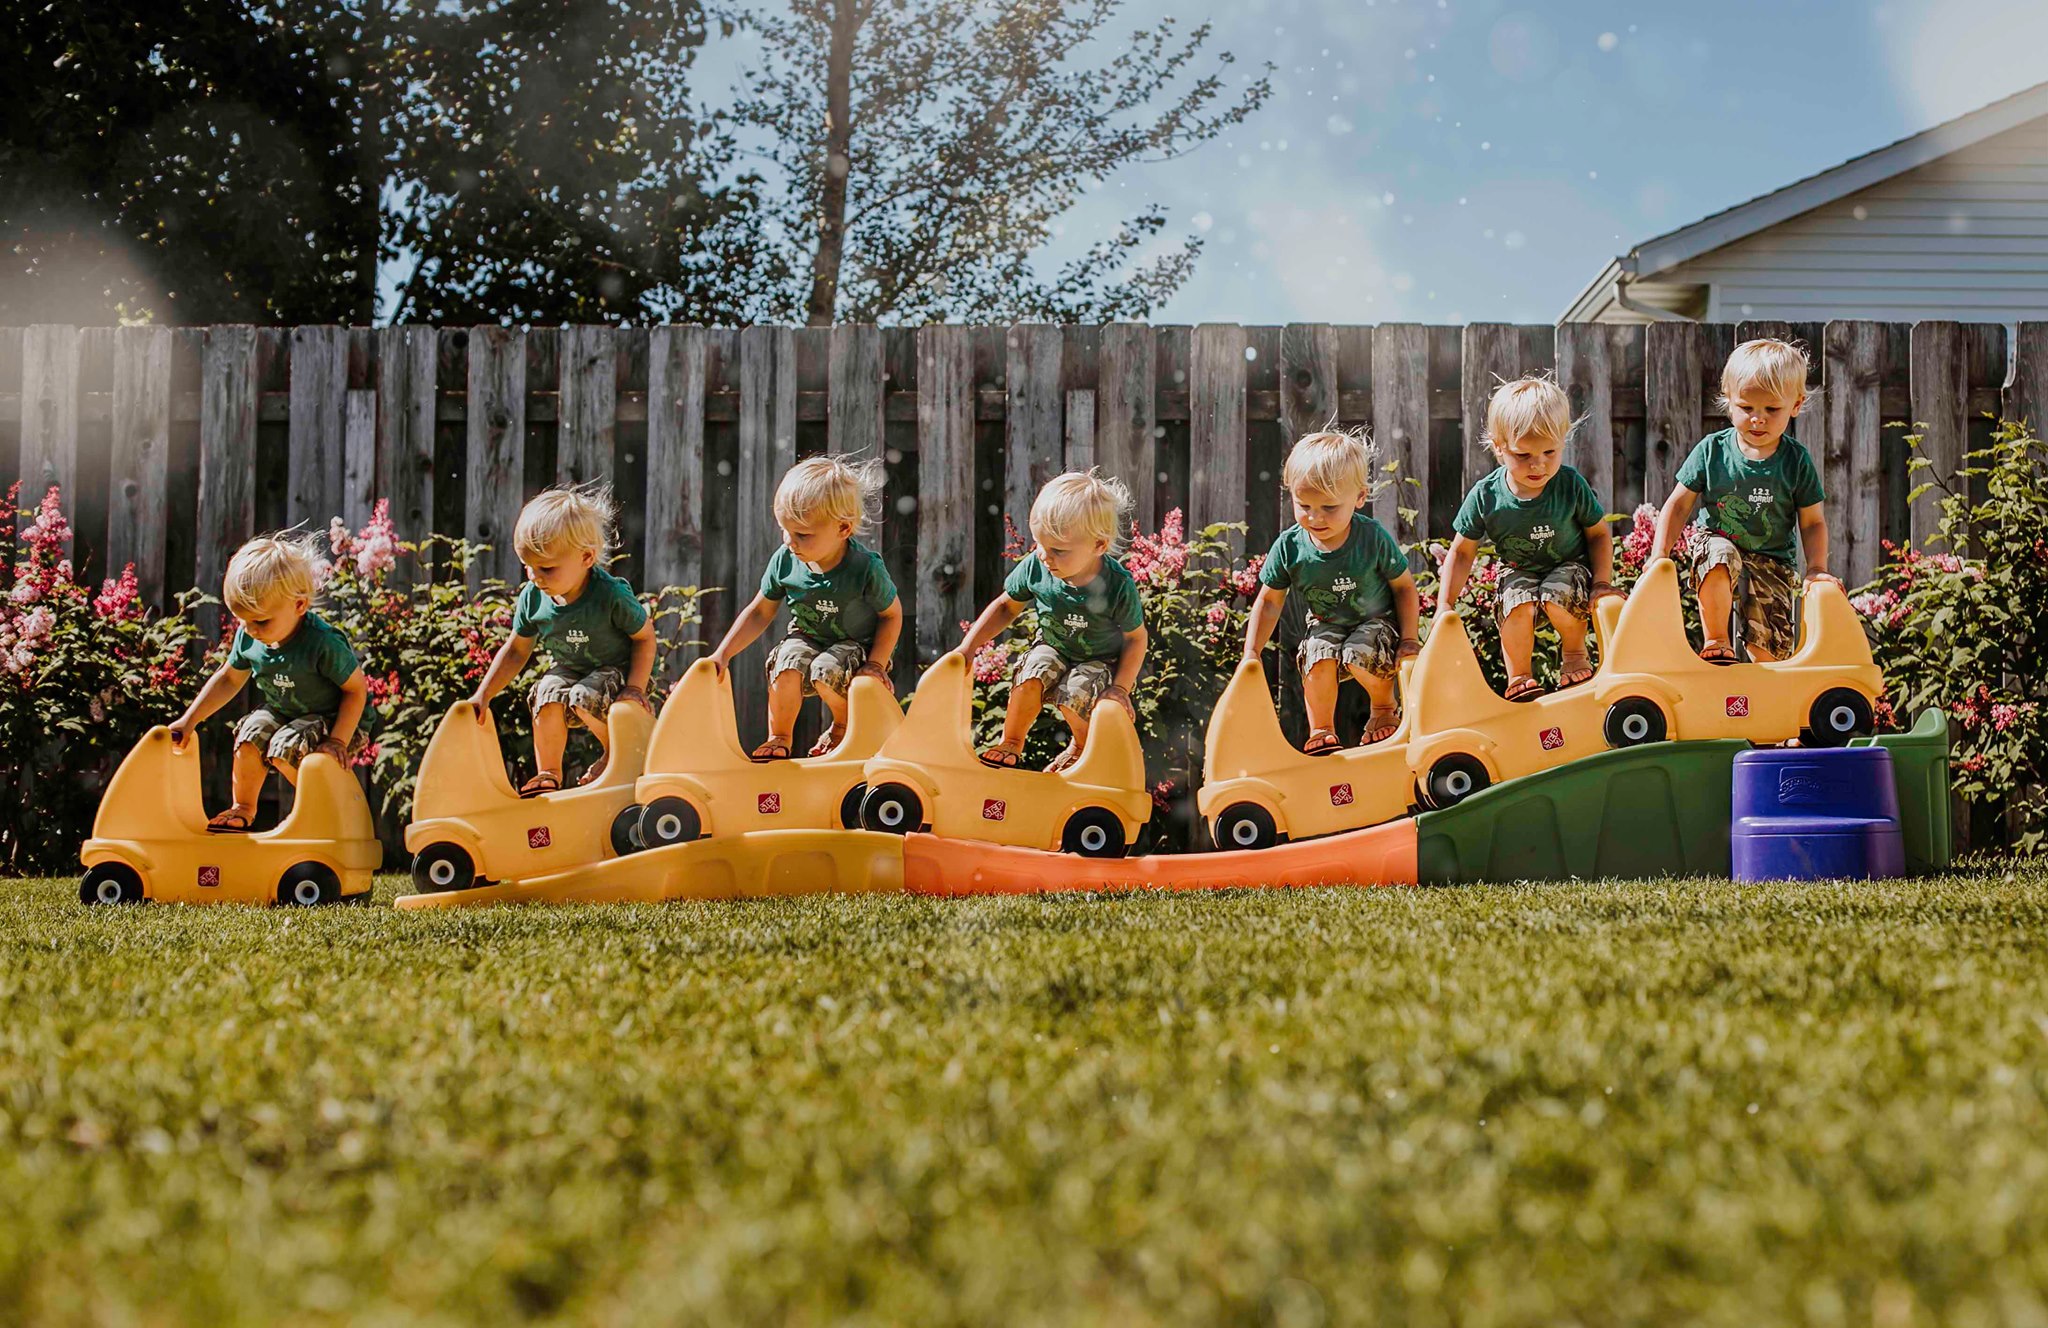
Kellee took a series of fun pictures of her son riding his little roller coaster, then stacked them together to create this fabulous shot!
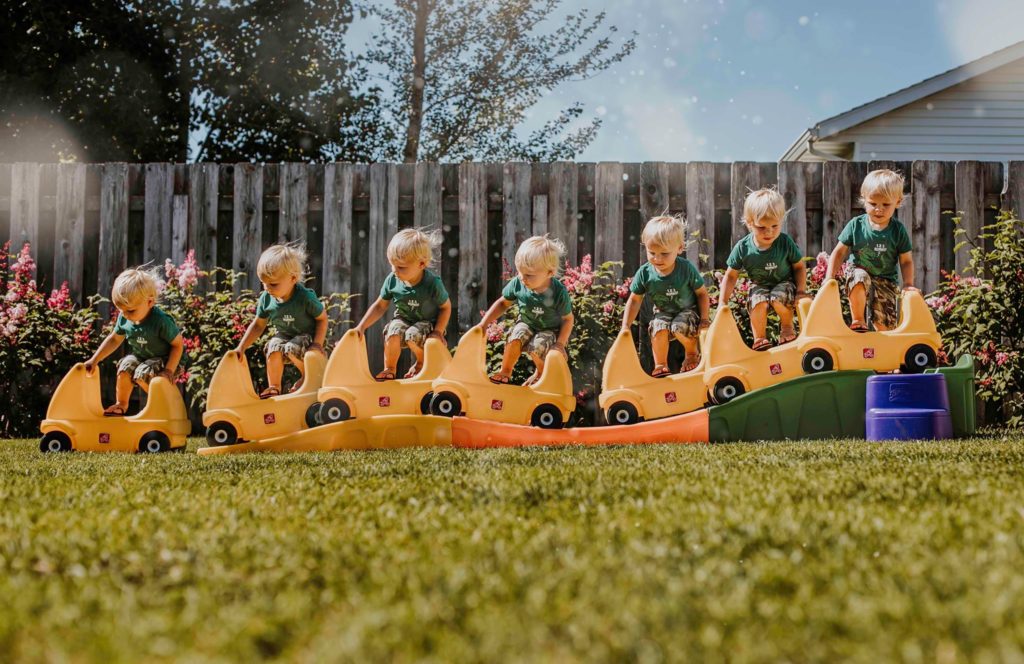
Kellee Kromarek Hann, Graduate
How To Shoot And Stack Your Creative Shots Using Lightroom & Photoshop
- Figure out what type of action shot you want to plan out.
- Use a tripod or stable surface to keep your camera in the same position to capture the images. Refrain from moving your camera to follow the subject.
- Set your camera gear to your continuous shooting mode and ensure your shutter speed is high enough to freeze the action.
- Before the action begins, focus on your subject then set your lens to manual focus mode to lock focus.
- Edit your series of images just the same, ensuring matching exposures, white balance and tint.
- If editing in Lightroom, select all the images you want to include.
- Choose “Edit In” and then “open as layers in PS.”
- In Photoshop, once all the images have been imported, select all images.
- Edit > Auto-align all layers. This may take a few minutes.
- You may need to use content-aware to fill in empty pixels in your base image.
- Click off all your layers except your base layer.
- Click on the next layer and adjust the opacity to 50% so you can see how it’s lining up. Adjust the image placement as needed.
- Put your opacity back to 100%. Click alt and add a layer mask, which should be black.
- Using a soft brush, brush away just the part of your subject. Repeat this step on every layer.
- Save image in .jpg format.
And these are the images that came together to create the final masterpiece!!
Related: Creative Editing: How to Use Photoshop Overlays
Ready to start taking photos you love, NOW? Our next Enthusiast Photography Course is starting again SOON!! Register today, put yourself in our hands, and let us do the rest!
Leave a Reply Cancel reply
PRIVACY POLICY & SITE TERMS AND CONDITONS
CLICK LOVE GROW ™ Pty Ltd - COPYRIGHT 2024 ©
x
Join Now
Enter your info below to join the challenge!
Want a friendly reminder when I go live?
Pop in your number and I’ll shoot you a text.
* We will send text reminders for our live calls during the challenge! Reply ‘STOP’ to end or ‘HELP’ for help.
We promise not to ever share your details with anyone or send you spam! Check our privacy policy and terms of service.
Be the first to comment