3 Easy Stunning Black & White Photo Edits!
Black And White Edits: Tips & Tutorials
We all love deliciously rich and textured black & white images. When done right, black and white edits are dramatic, timeless, suit virtually any genre of photography, and can make our subject really pop from the background!
But something I see a lot are black & white images that are muddy, flat, and grey. They’re the result of converting an image simply by hitting the grey scale or black & white button in your preferred processing program. But all this does is remove the colours, and there’s more to a black and white photo editing than just a lack of colour.
So I’m going to show you 3 very simple edits to convert color images into stunning black and whites, in Lightroom and Photoshop.
Black And White Photography Essentials
There’s so much more to black and white photography than a lack of colour! Beautiful black & white shots will have depth and drama, and you can create them by ensuring they have some or all of the following elements:
- A broad range of tones from white to black
- Contrast but not so much that detail is lost in the highlights and shadows, so texture and other detail areas such as eyes will still be visible and clear
- Texture
- Depth
This is my before photo, which is SOOC (straight out of camera). I’m going to edit it as both a raw and jpg in photoshop, and a raw file in Lightroom
Not sure what raw and jpg means? Check out this article.
Related: RAW vs JPG

1. Lightroom – RAW
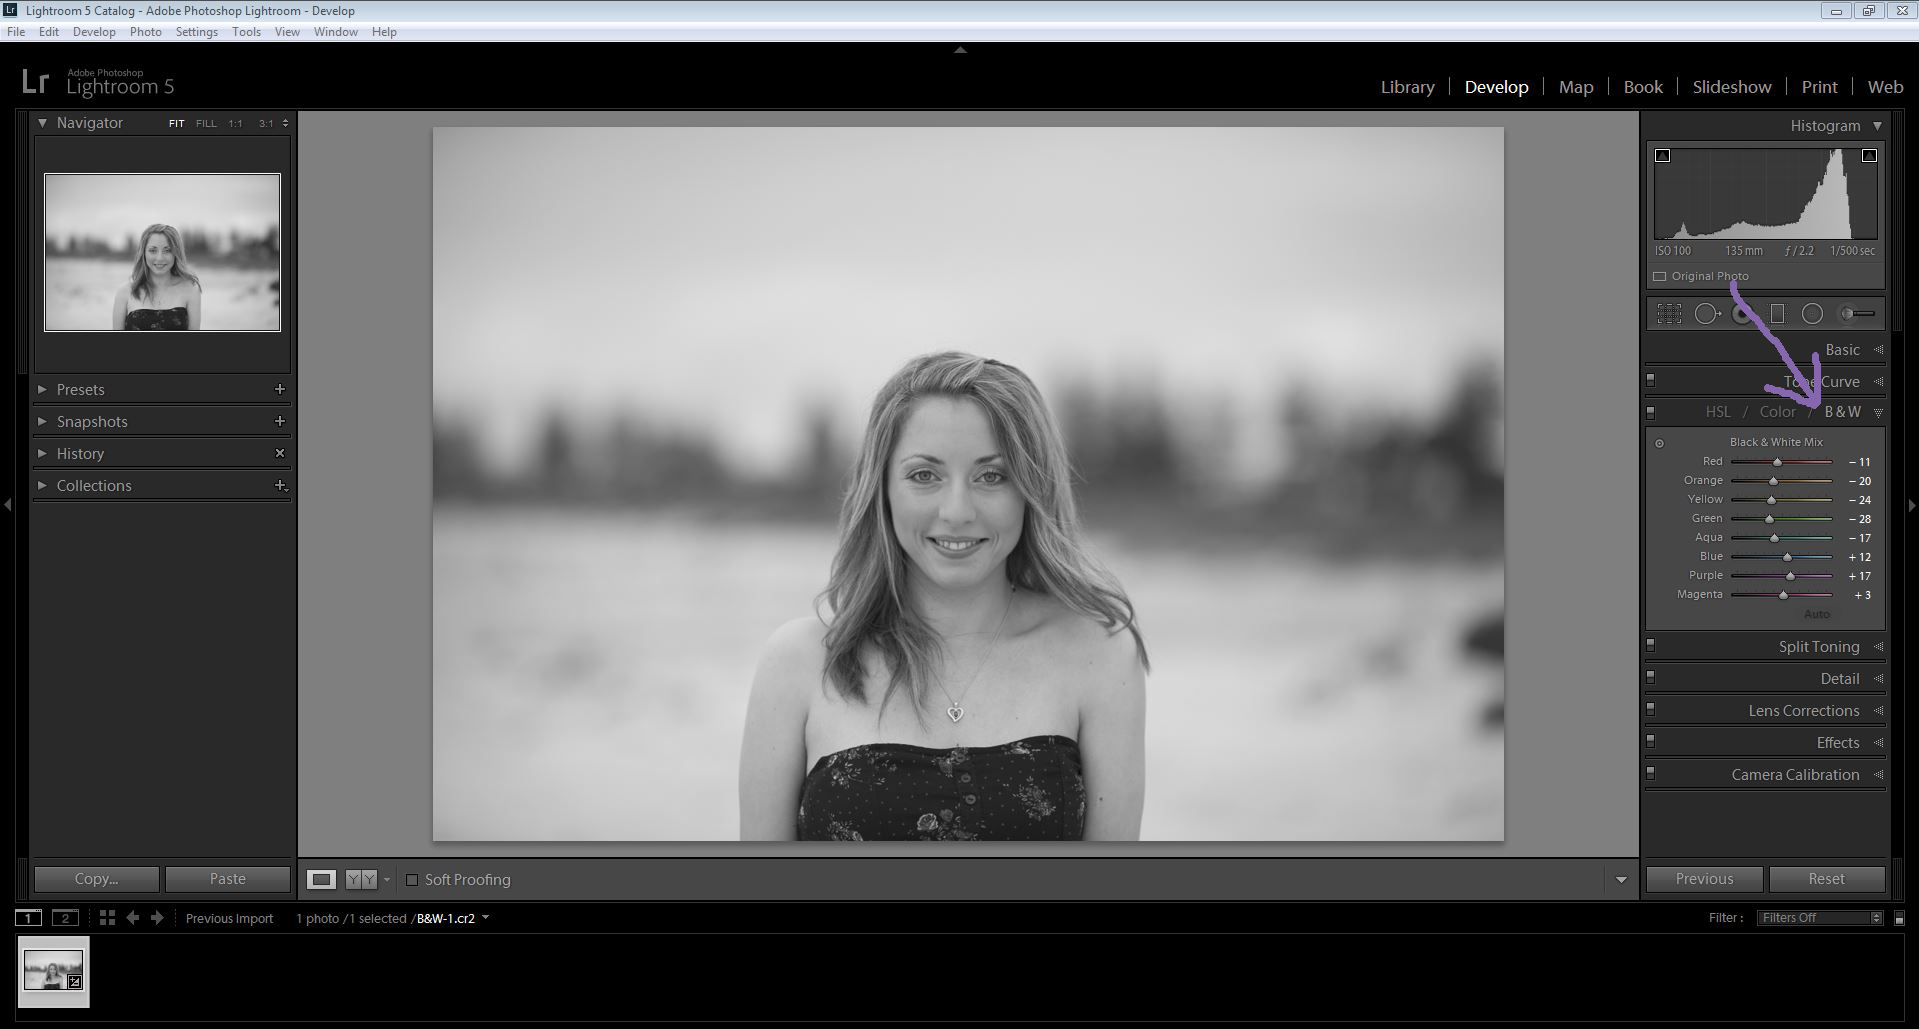
1. For edits, go to the Develop Module, open the HSL / Colour / Black and White panel, click on B&W
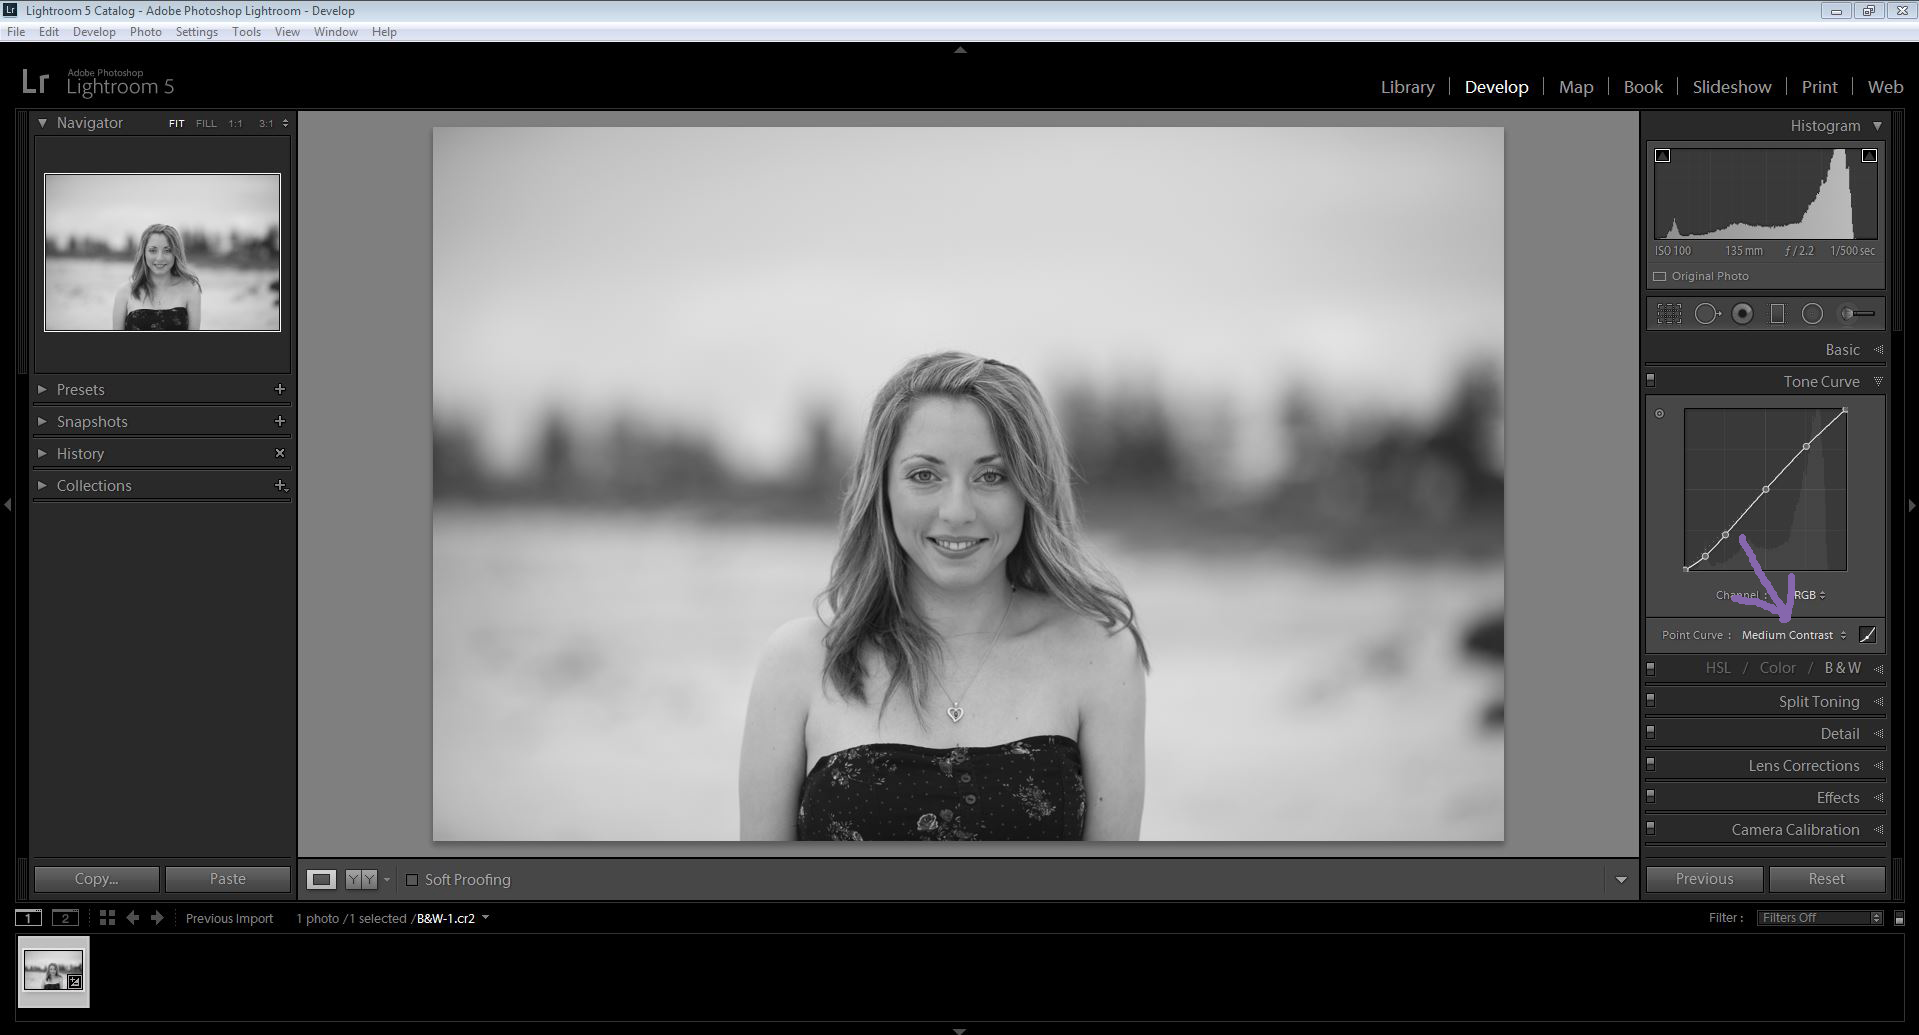
2. Open the Tone Curve panel and change the Point Curve to Medium Contrast. Then look at the image. Are the highlights bright enough? Are the whites white? Are the shadow areas black enough? Does it have punch?
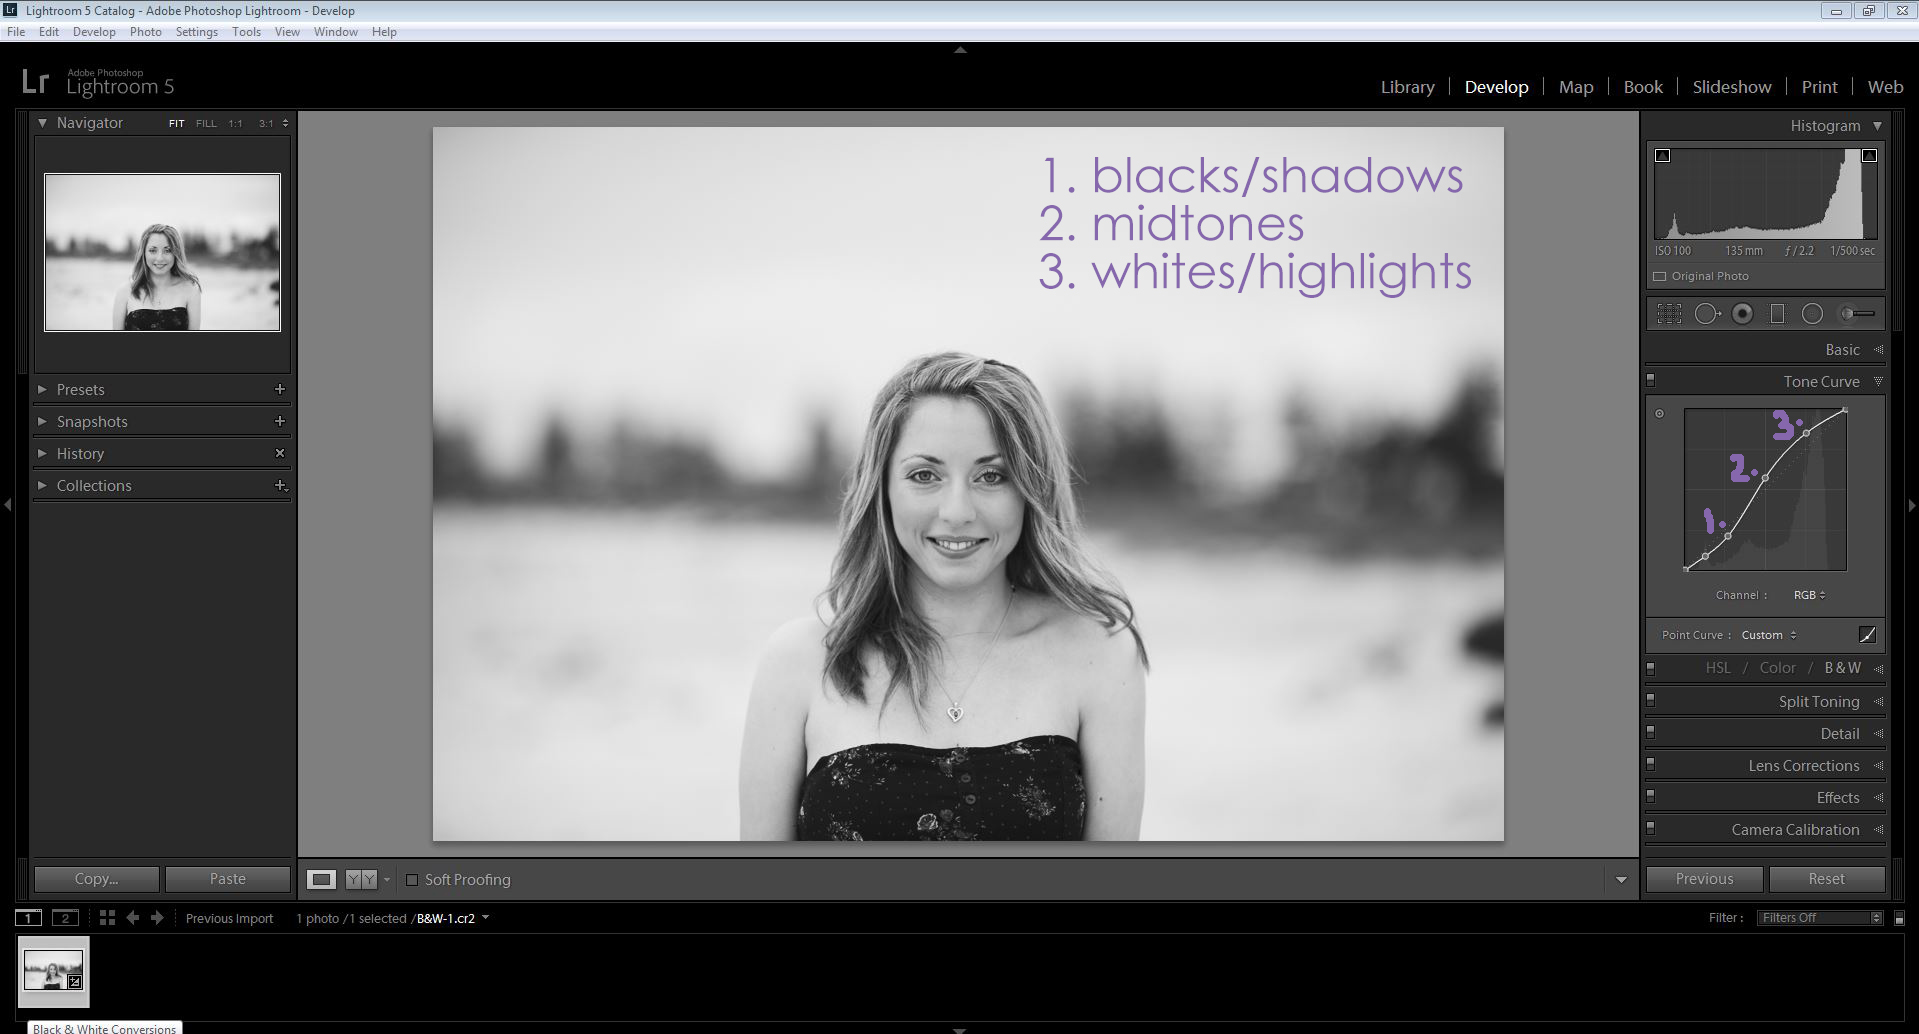
3. In this case of black and white edits, the answer was no. The whites and the midtones of her skin were grey, the shadow areas behind her weren’t dark enough, and overall it was flat and lacked punch. So I grabbed the point on the curve that represents the whites/highlights and pulled it up until they were bright but not losing detail. I did the same with the midtones point, and dragged the shadows point down until the shadows behind her had some punch but again, not so far as to lose detail. I returned the blacks point to where it was, as her dress didn’t need any adjustment and I didn’t want to lose detail by darkening it further.
4. You’re done! Export your photo!
After

2. Photoshop – RAW
1. First step to making black and white photo edits in Photoshop is to open up your raw image. If you have a version of Photoshop that supports Adobe Camera Raw, it should automatically open the image in the raw converter. In the Basic Panel, reduce the Saturation slider to -100.
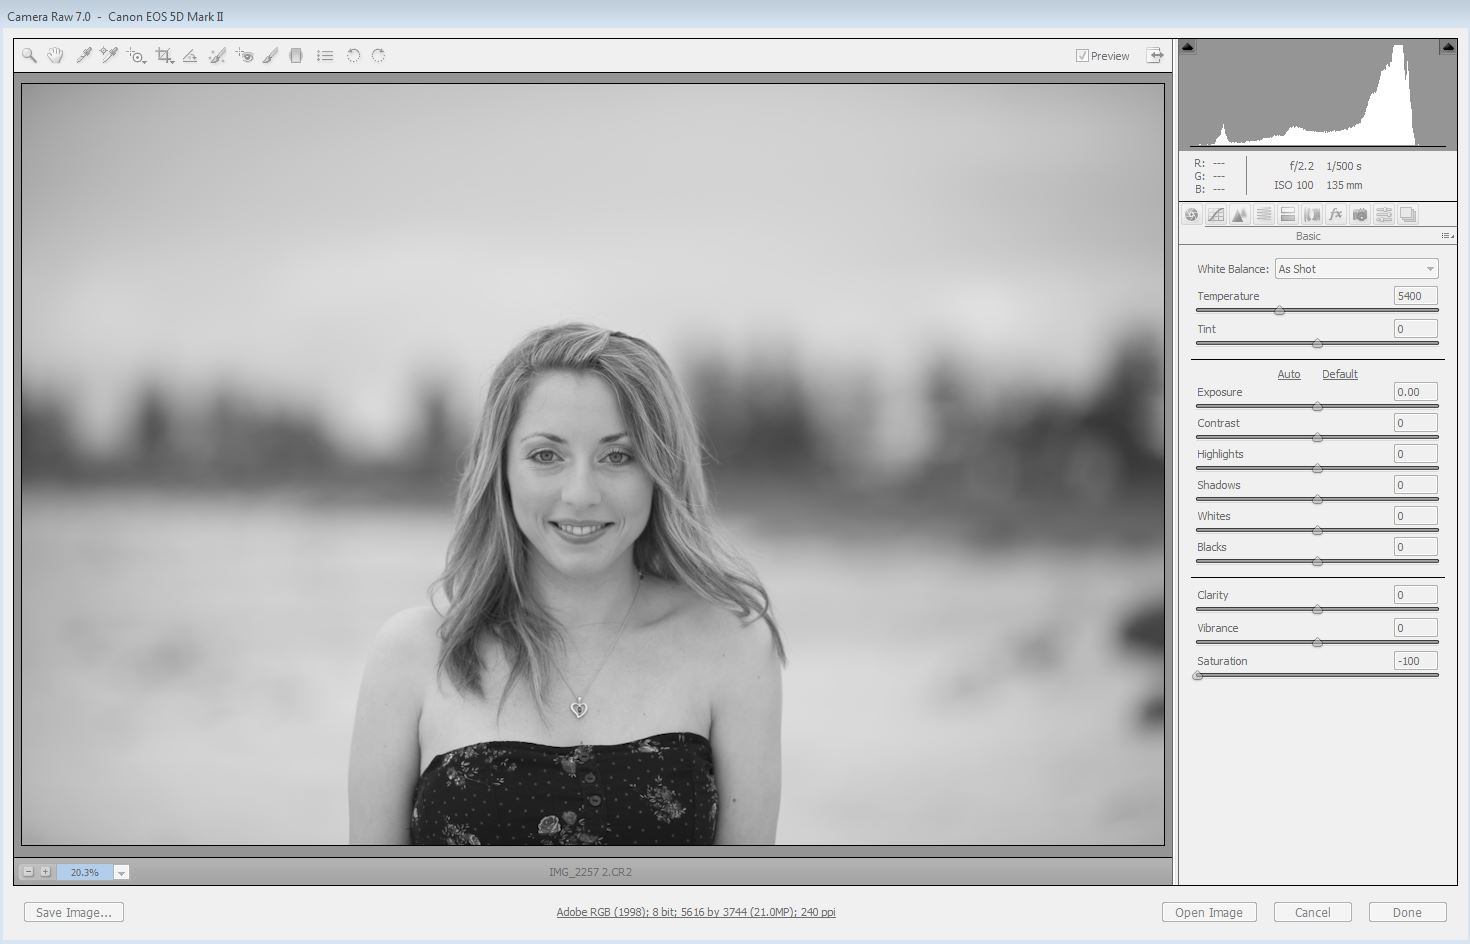
2. Open the Tone Curve Panel, click on the Point tab, change the Point Curve from Linear to Medium Contrast.
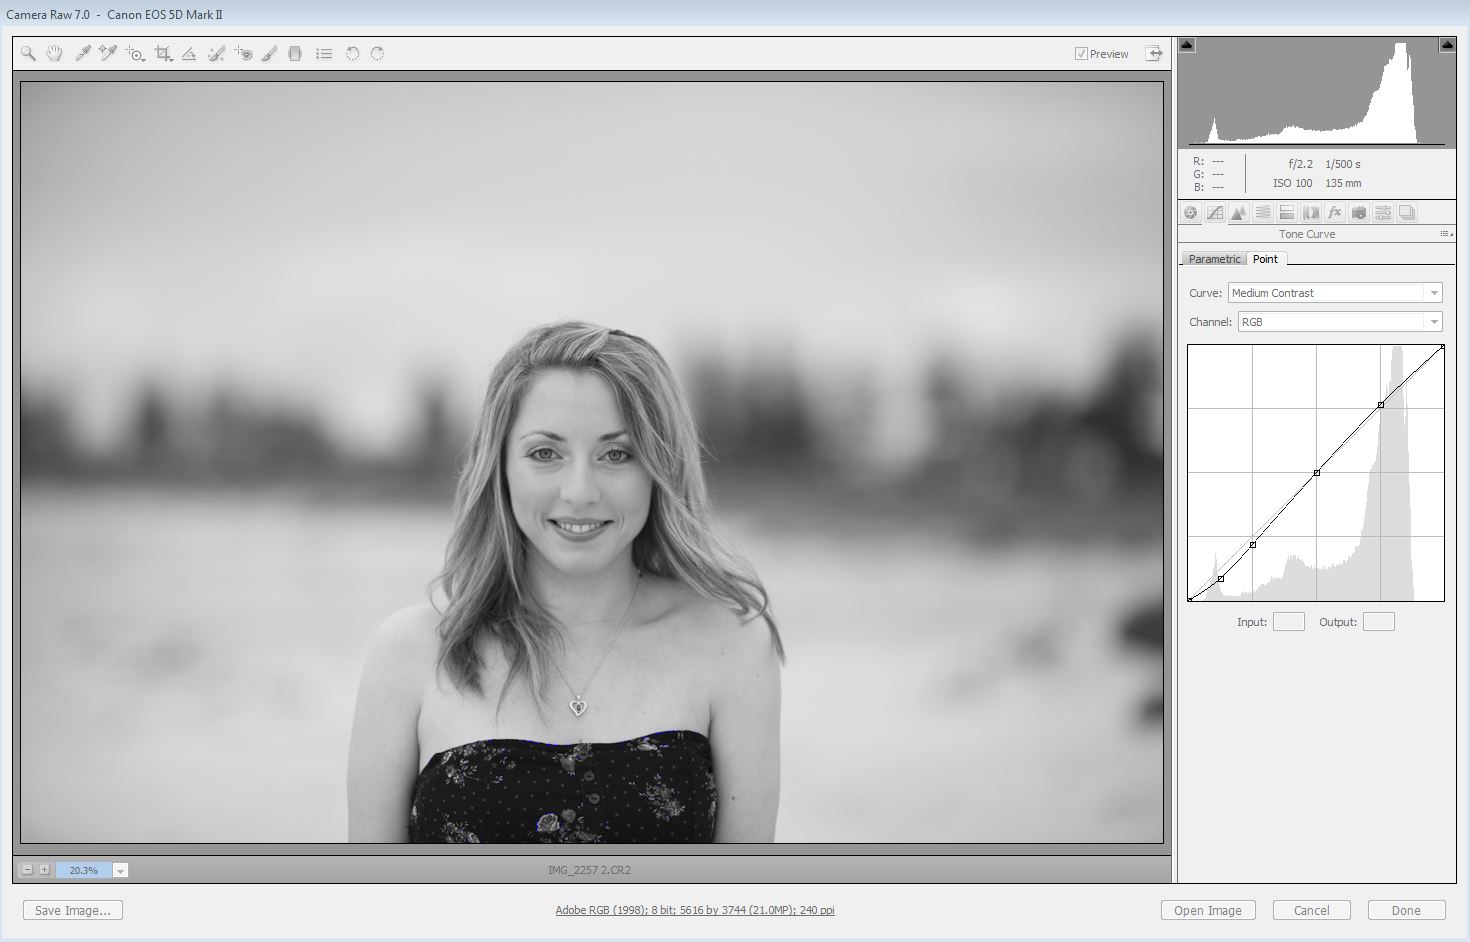
3. At this point, as with the Lightroom conversion, look at the image and ask yourself does it need any adjustment? If yes, as we did in the Lightroom tutorial above, just grab the point on the curve that corresponds with each tone and adjust accordingly.
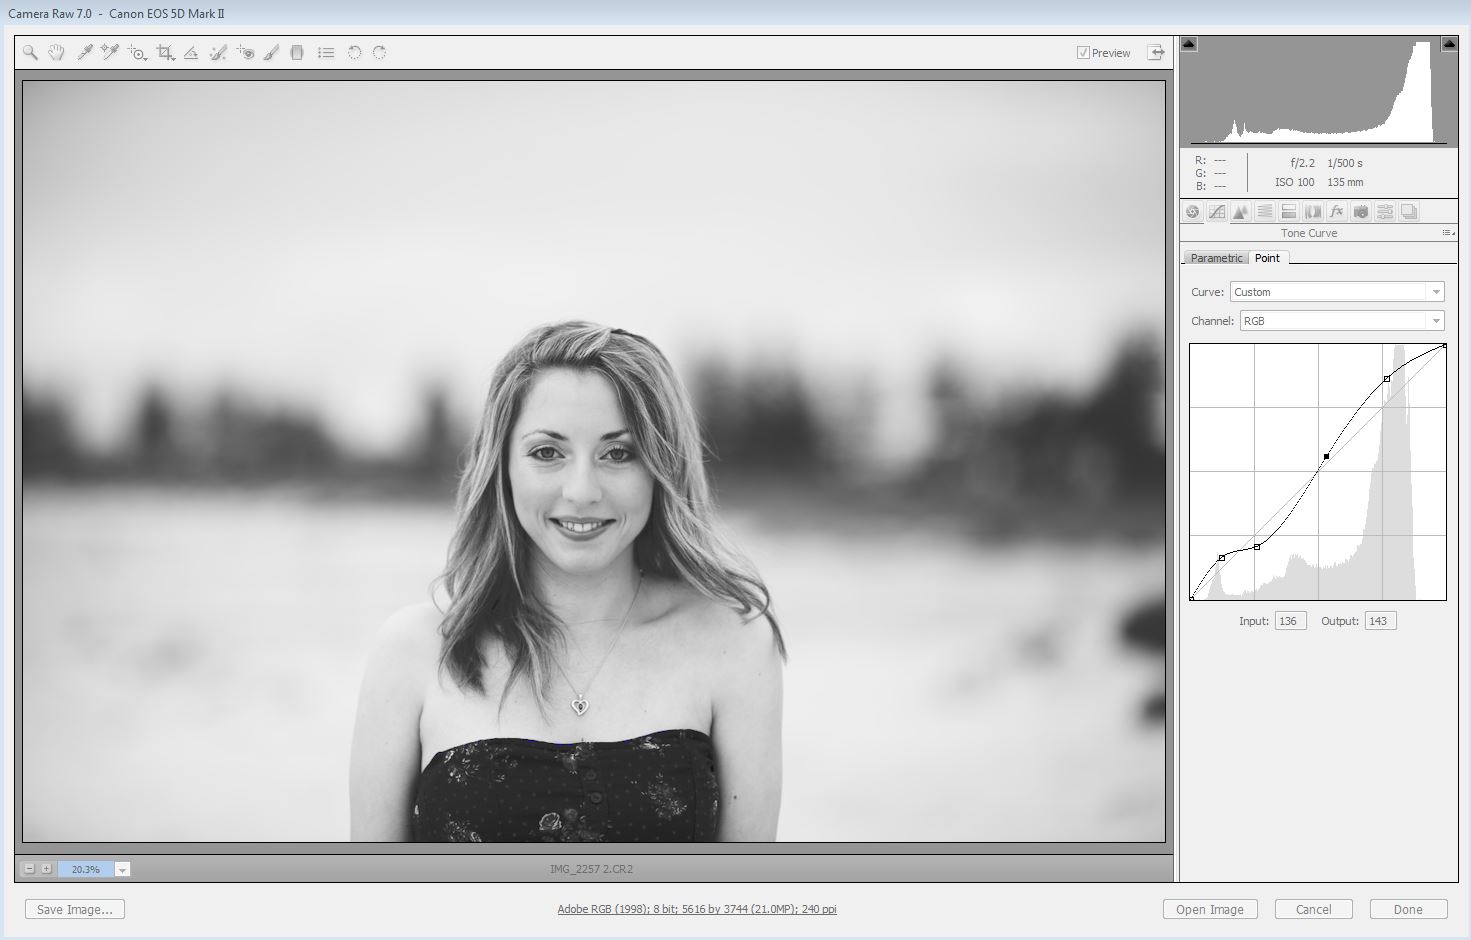
4. Finito! Save Image!
After
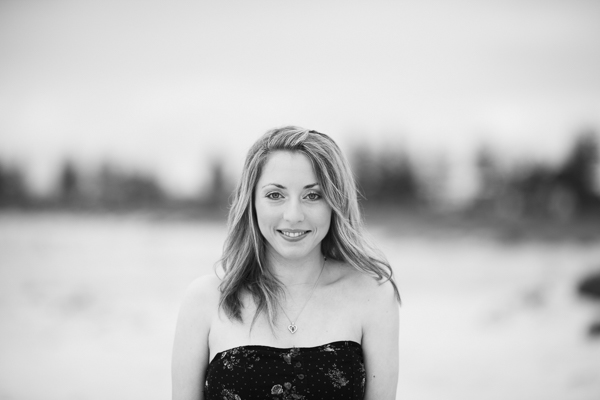
3. Photoshop – JPG
1. For making edits to a JPG file, with your JPG image open in Photoshop, click on Image – Adjustments – Black and White.
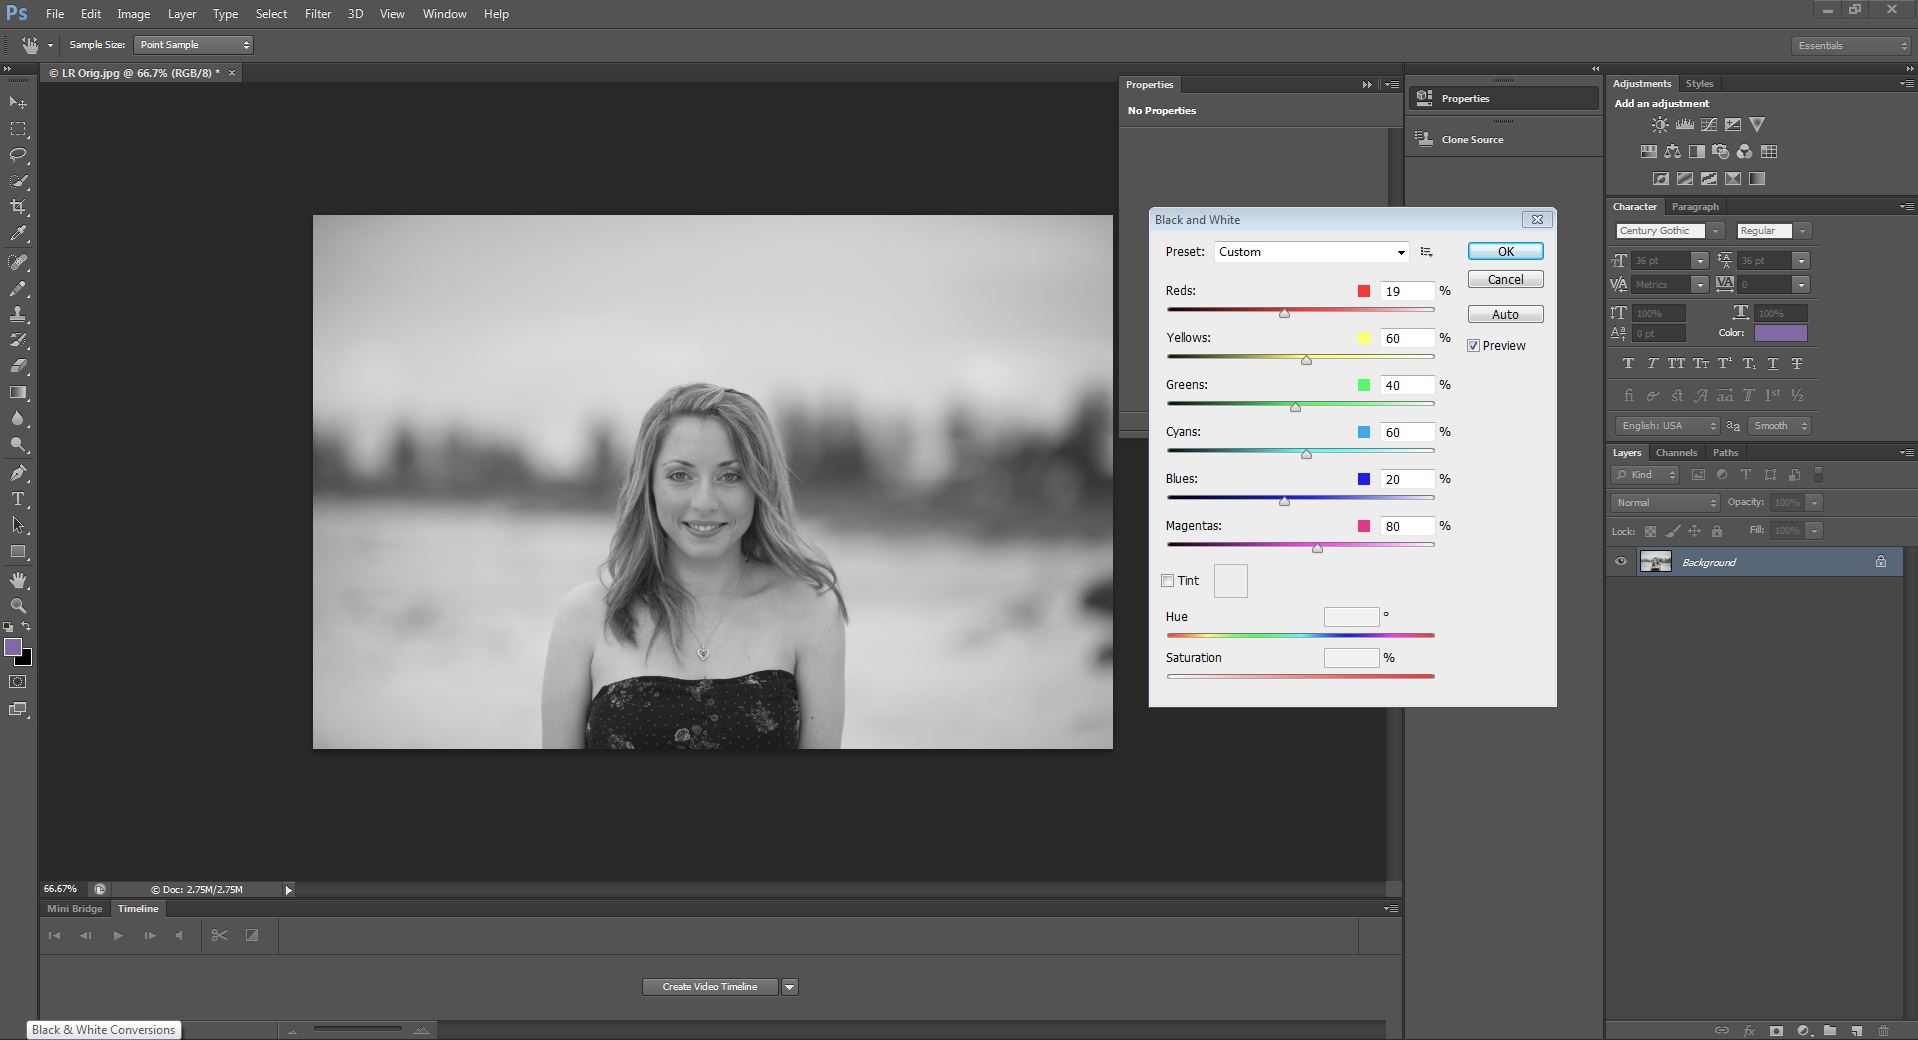
In portraits, when doing black and white photo editing, I like to bring the red back a little if it’s needed by adjusting the red slider. A good rule of thumb is to check if the lips look too light, the red needs to be increased, and vice versa if the lips look too dark. But don’t take it so far that the skin either looks mottled or loses life. Press OK.
2. Layer – New Adjustment Layer – Curves – OK. Change the preset to Medium Contrast.
3. If adjustments are needed, as with the previous conversions, grab the point on the curve that corresponds with each tone and adjust accordingly without losing detail in the highlight or shadow areas.
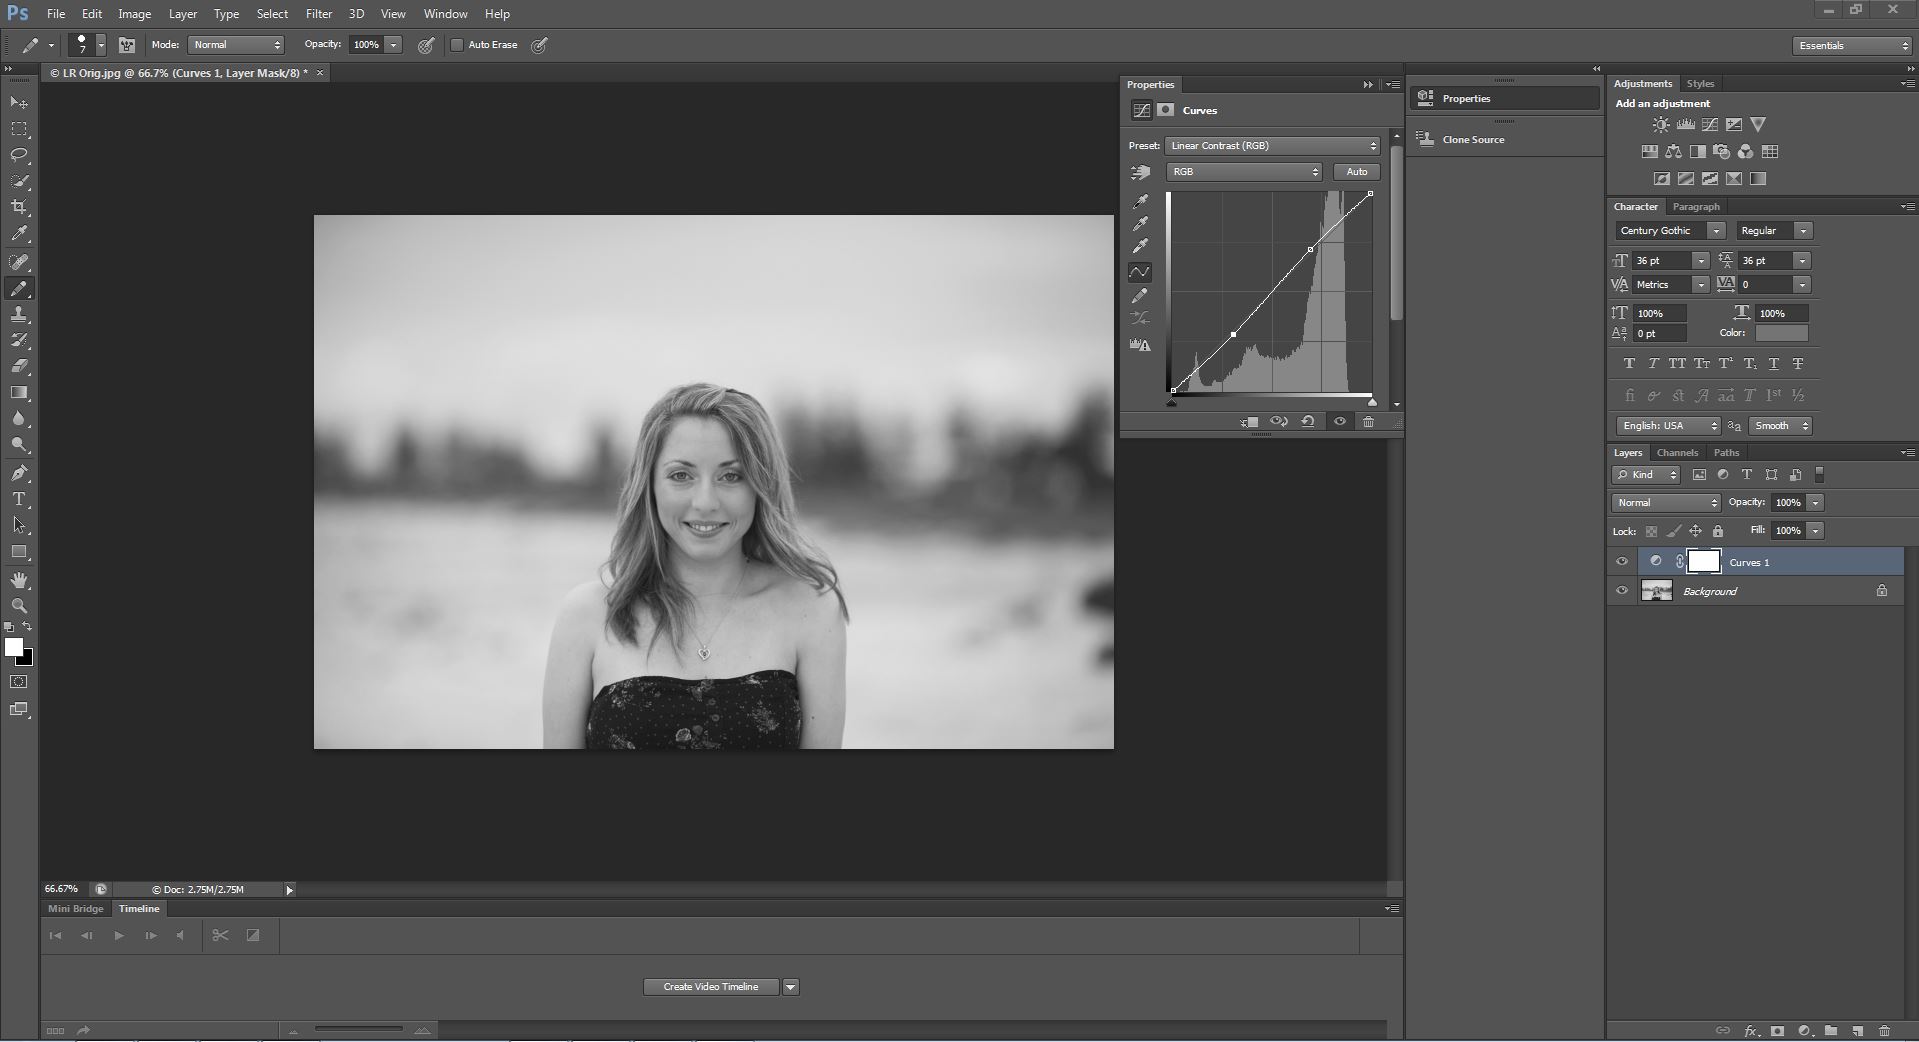
4. You’re done! File – Save.
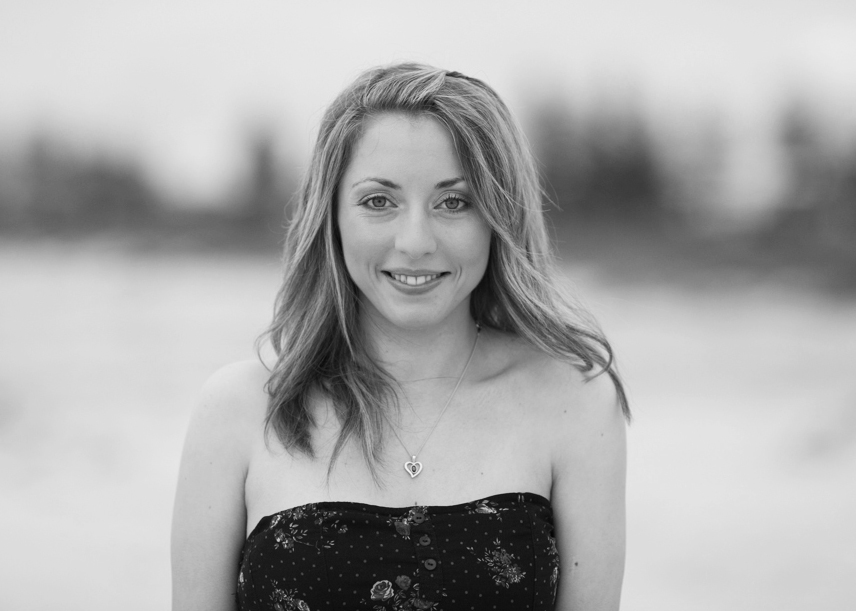
After
How can you tell when highlight or shadow detail is lost?
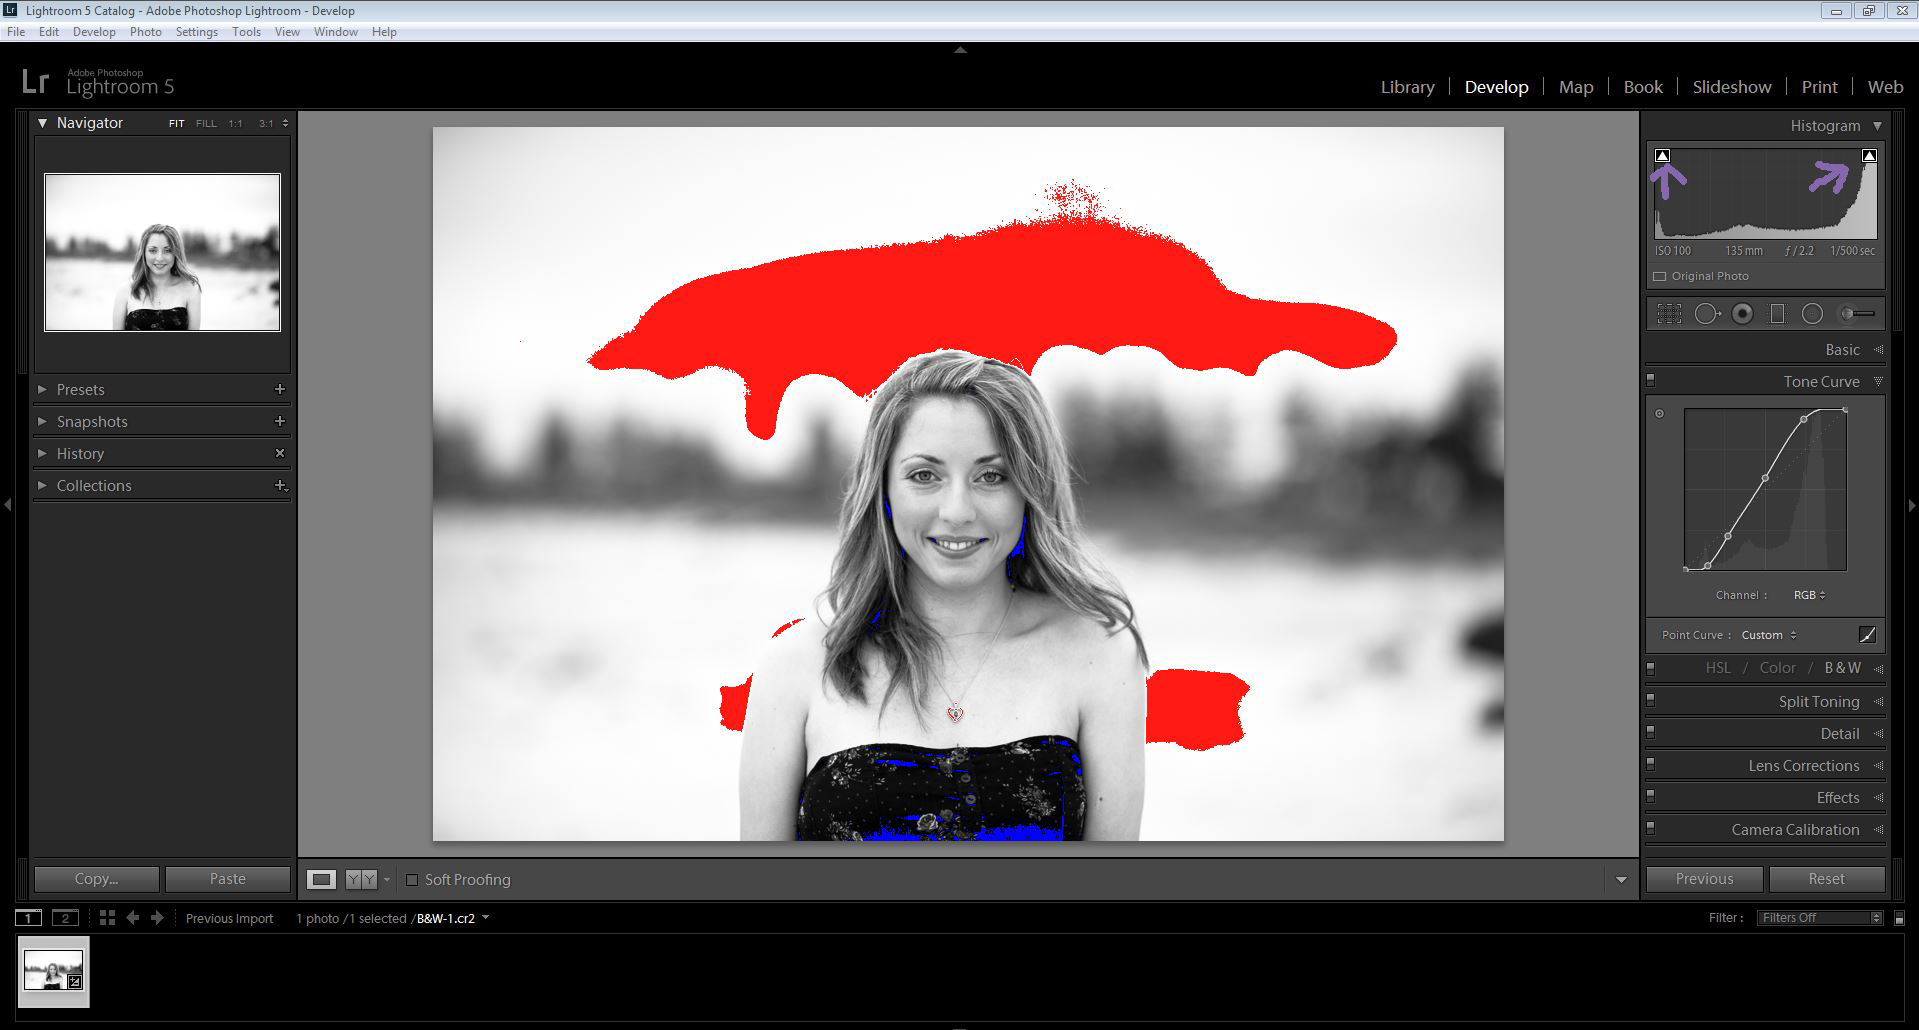
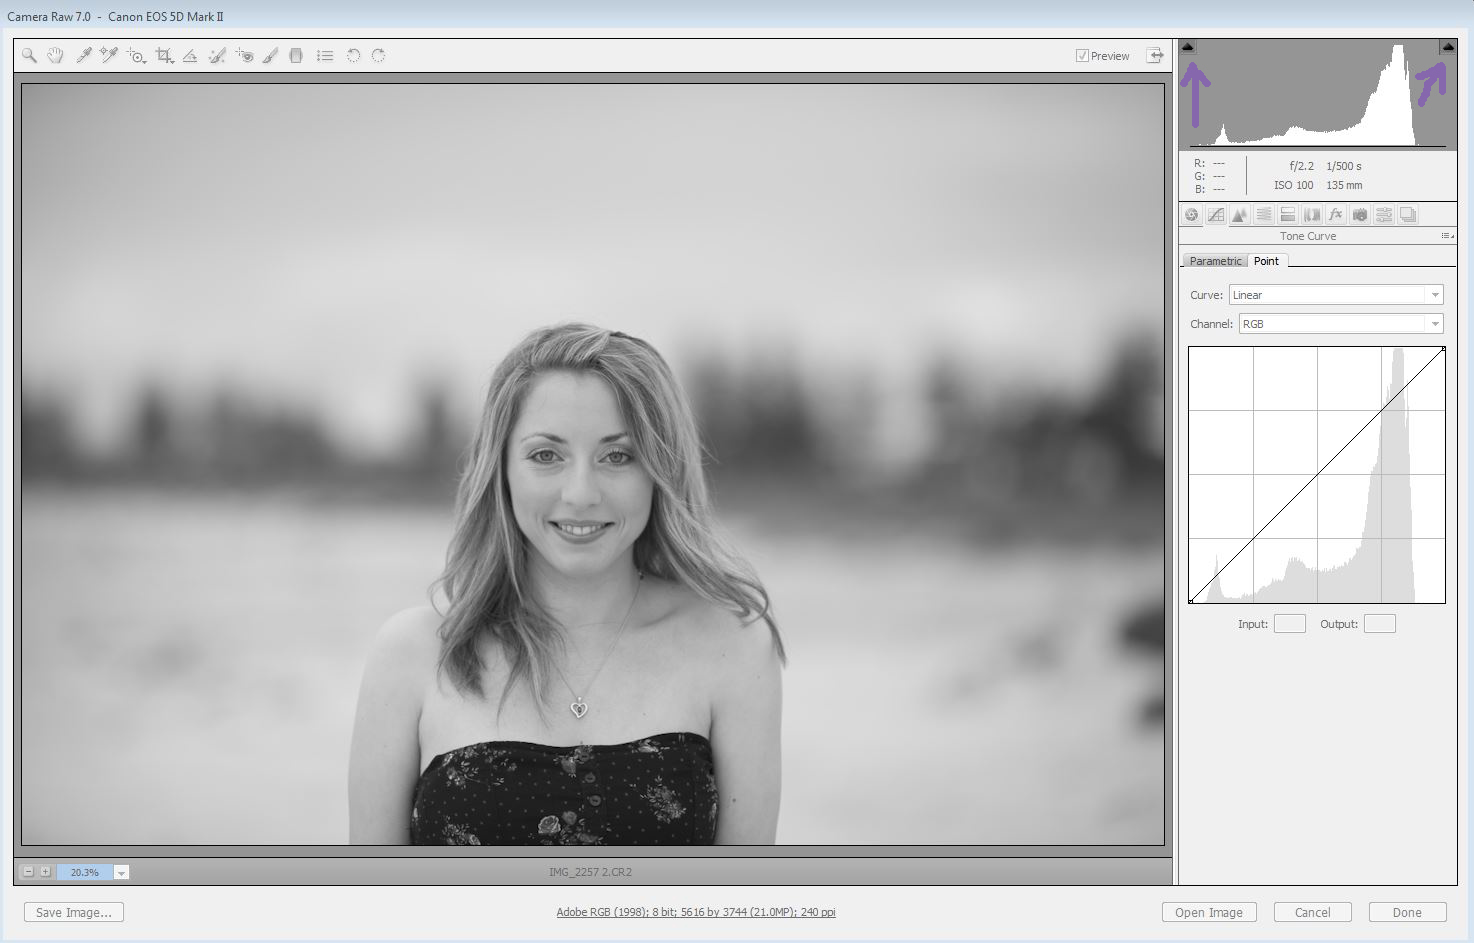
If the function is available in your chosen photo editor program, turn on the highlights and shadows warning buttons. When highlight detail is lost, the area will be painted red. When detail is lost in the shadows, the area will be painted blue. That’s when you’ve gone too far and you need to adjust that tone curve in the appropriate area.
Lightroom highlights/shadow warning buttons
Click the small triangles where the purple arrows are to bring the warnings on and switch them off.
Adobe Camera Raw highlights/shadows warning buttons
See the purple arrows and click the small triangles to put the warnings on.
I hope these black and white editing tips listed above will prove helpful. Now go play and have fun!
JOIN the Free 5 Day Mini Course
5 Days, 5 Videos Lessons = Photos You'll LOVE!
Learn How to Use Your DIGITAL Camera!

Leave a Reply Cancel reply
PRIVACY POLICY & SITE TERMS AND CONDITONS
CLICK LOVE GROW ™ Pty Ltd - COPYRIGHT 2024 ©
x
Join Now
Enter your info below to join the challenge!
Want a friendly reminder when I go live?
Pop in your number and I’ll shoot you a text.
* We will send text reminders for our live calls during the challenge! Reply ‘STOP’ to end or ‘HELP’ for help.
We promise not to ever share your details with anyone or send you spam! Check our privacy policy and terms of service.
Do u have more tips for lightroom users, im struggling to find my way around it
[…] 4 easy ways to stunning black and white photos, Click. Love. Grow. […]