


Kids Photography – Secrets To Taking The Best Bubble Pictures
Click Love Grow Advanced Grad and mentor Emma Davis shows us today how to take beautiful bubble pictures of kids running around, playing, and enjoying some bubbly time!
Tips For Awesome Bubble Photography
I love to take pictures of my kids at the park — which is just as well given how much time we spend there! But sometimes my kids’ photography feels a bit the same old, same old, and my toddler loves bubbles. So every now and then, we mix things up a little with some bubble play!
What You Need To Shoot Bubble Pictures
Bubble wands are fun, but for maximum fun — and frames filled with bubbles — a bubble machine is definitely the way forward! We picked up ours at Kmart for around $10, but you can also get them relatively cheaply on Amazon.
For the best pictures of bubbles, you’ll also need plenty of foam and bubble mix! There are tons of recipes available online.
My fave is this one because it’s super simple and I always have the ingredients available on hand (although hubby does occasionally ask why we seem to go through so much dishwashing liquid!) Plus, it makes consistent, reliable bubbles.
Don’t forget to store it in a bottle with a childproof cap!
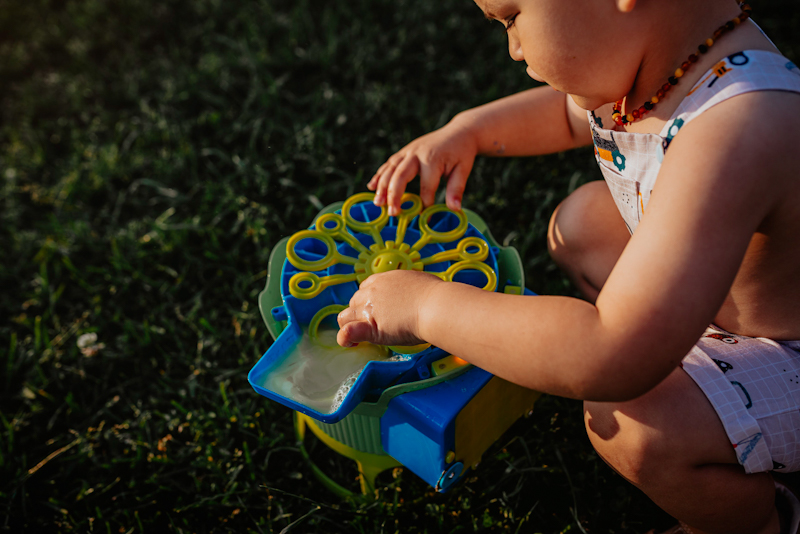
My little ‘helper’ setting up the bubble machine.
Finding The Perfect Spot For Your Bubble Photography
There are a few things to consider when choosing the perfect location for your bubble pictures.
To start with, of course, you need more space than your average kids’ photography session! Lots of playing ground for your little one to chase all those glorious bubbles! We don’t have a backyard, but we are lucky enough to have several beautiful parks in our local area that make a lovely backdrop for images.
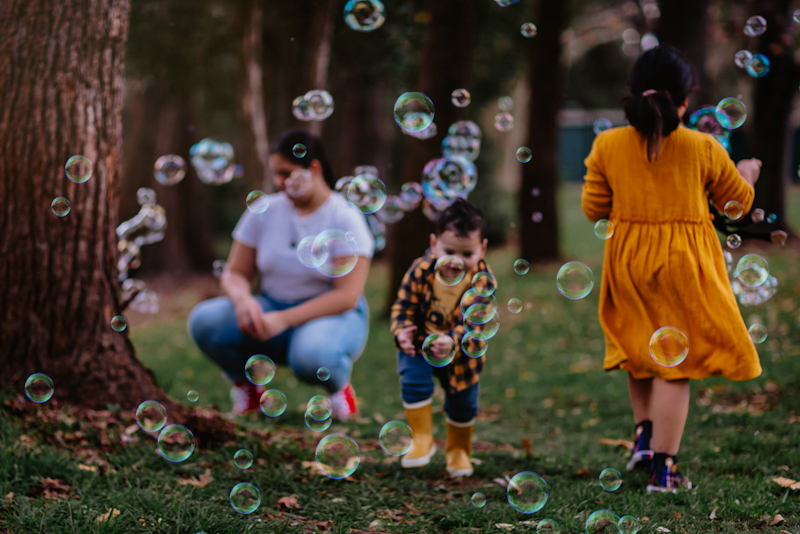
You need to make sure you have enough space for your little one to run around because those bubbles will go EVERYWHERE! I like to look for a nice, open space with a few trees or shrubs for framing. Trees also come in handy for hiding the bubble machine!
Related: Perfect Playground Photos
This little grove of trees at our local park provides lovely framing with lots of space to run!
Another fave park spot — you’d never know this was right next to a busy playground!
Setting The Scene
Bubbles are an activity that works best when there’s not too much wind. Otherwise, the bubbles will disperse too quickly. You’ll need a flat spot to stand the bubble machine on, ideally either behind a tree or just out of frame, so it’s hidden. It’s much easier to hide it in camera than to clone it out of every single photo in Photoshop later!
The bubble machine is a bit of a distraction, so I’ve placed it where I can easily frame it out once he starts chasing the bubbles.
The bubble machine is hiding behind the big tree here, I used the roots to stabilise it so excited little hands didn’t knock it over.
Capturing The Best Pictures Of Bubbles!
Your little ones will no doubt be racing around trying to catch bubbles, so you’re going to need a fast shutter speed for this activity!
Related: Capturing Kids in Motion
Think about different angles and perspectives you can use to tell the whole story. Get up close and capture the joy on those little faces, then take a step back to capture the entire scene.
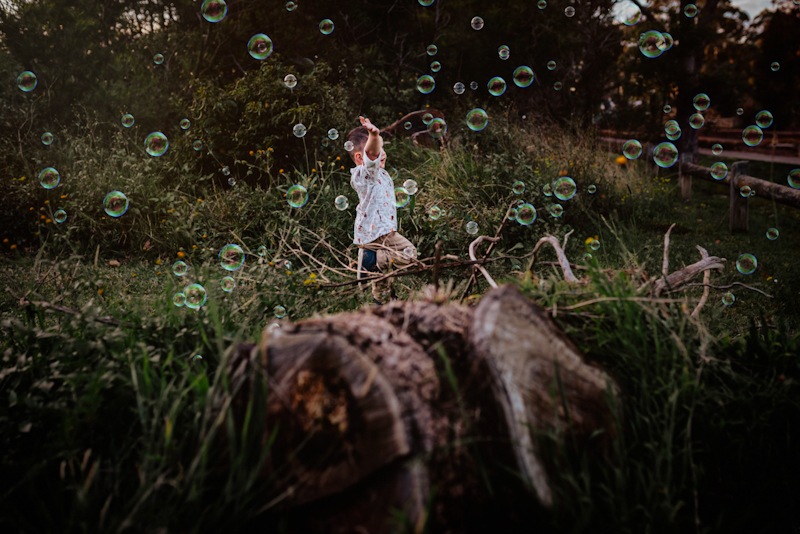
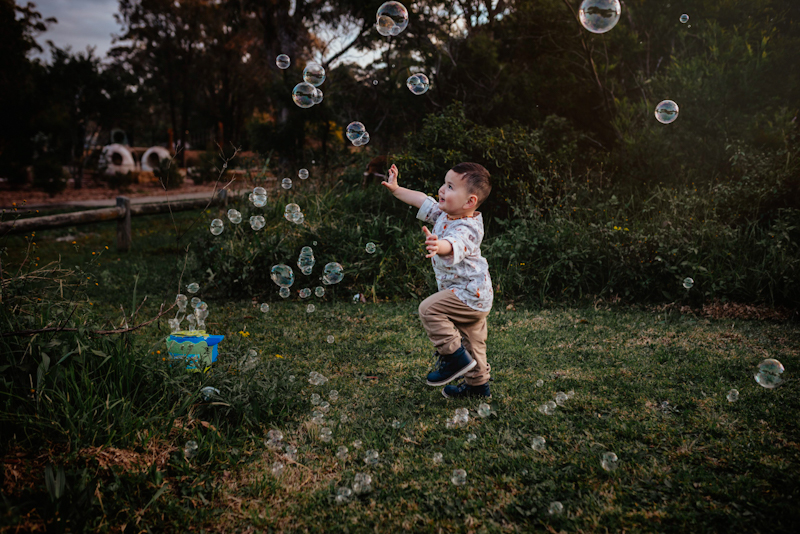
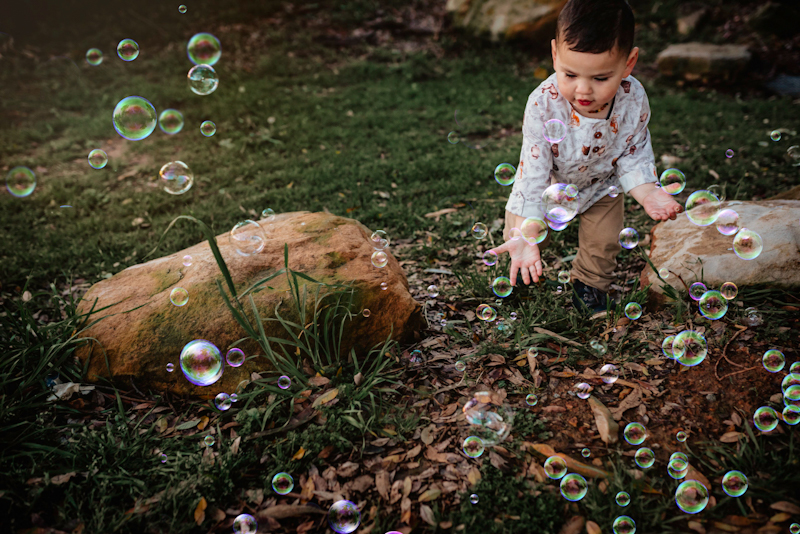
By choosing a wide aperture here and placing my focal point on my toddler, the blurred log in the foreground and long grass in the background provide layers to strengthen my composition.
Look for elements in the environment around you to use for layering and framing, and consider which angles to use to frame out any background clutter.
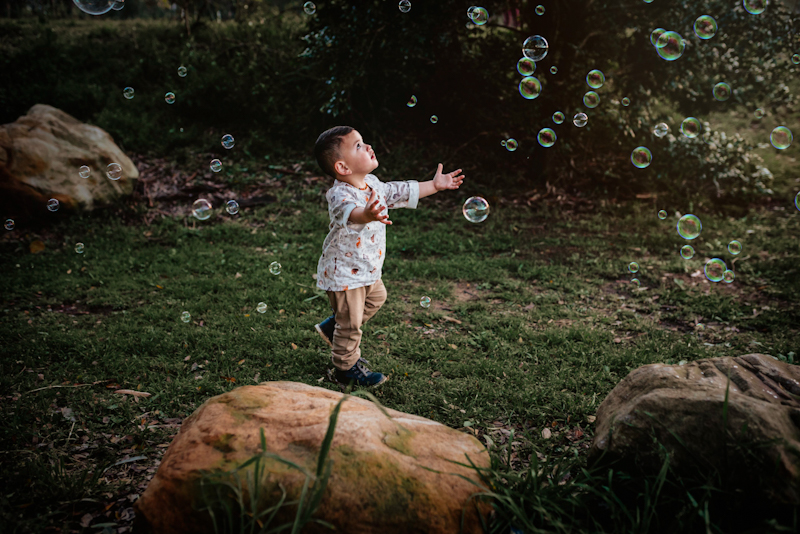
The rocks add layering, and he’s running through the frame chasing those bubbles!
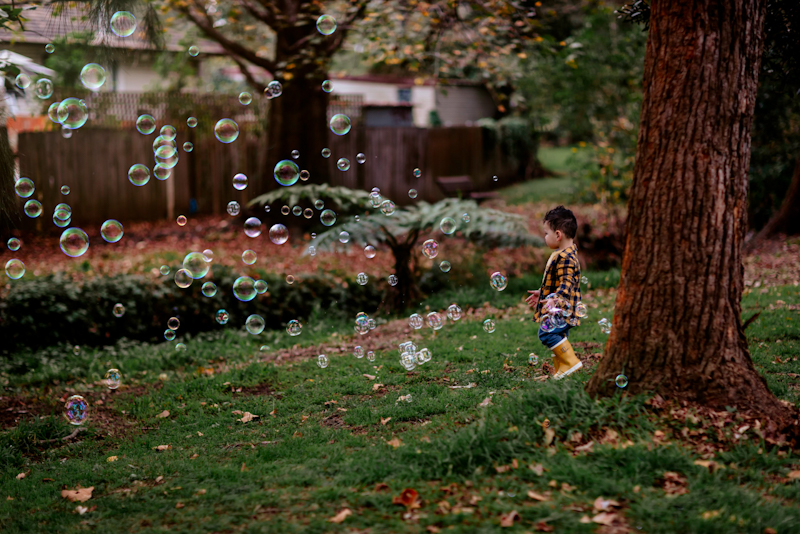
I love the sense of scale here — how small my little guy and the bubbles look against the trees.
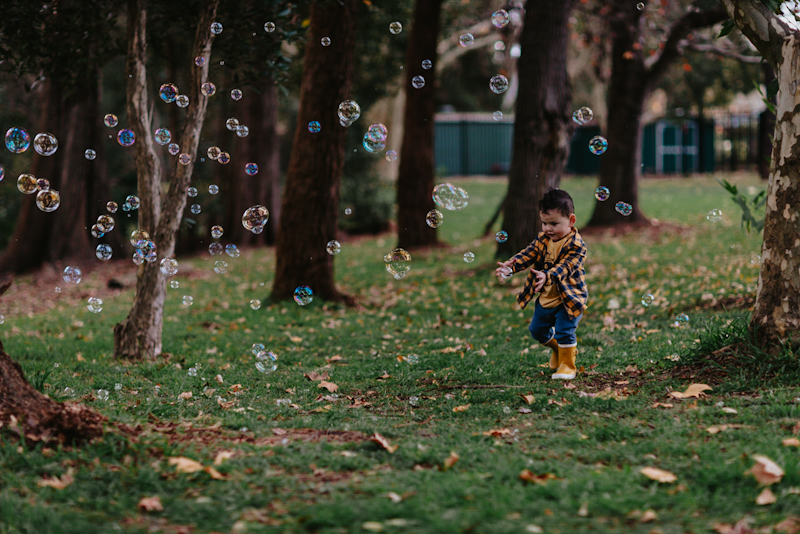
Use the environment to convey a sense of scale.
Related: 12 Tips for Photographing Toddlers
Editing To Add Magic
So what if your final shots don’t quite have enough bubbles to fill the frame the way you envisioned they’d look? Well, then it’s time to get creative in Photoshop!
I have a few different bubble overlays I like to experiment with, and Etsy has some good quality but relatively inexpensive ones. All Things Precious and MixPixBox are two of my favourite sellers for overlays, textures, and backgrounds.
The trick when using a bubble overlay is to make it look realistic. You want to accentuate what’s already there without overdoing it. Make sure the bubbles you add in your pictures are a similar colour, size and opacity to the bubbles that are already there. Also, make sure they’re moving in the same direction so they look natural. And don’t go overboard! Most bubble overlays are a full frame of bubbles, but you can use a layer mask to choose where you want the bubbles to appear.
If you’re new to Photoshop, or the idea of using textures, backgrounds and overlays freaks you out a little bit, I’m mentoring CLG’s next Creative Workshop — Discovering Photoshop. I’ll be teaching you how to use these fantastic tools to add an extra level of magic to your bubble pictures and not only.
Check out the workshop details at the end of this post!
Related: A Fun Portrait Project With a Toddler
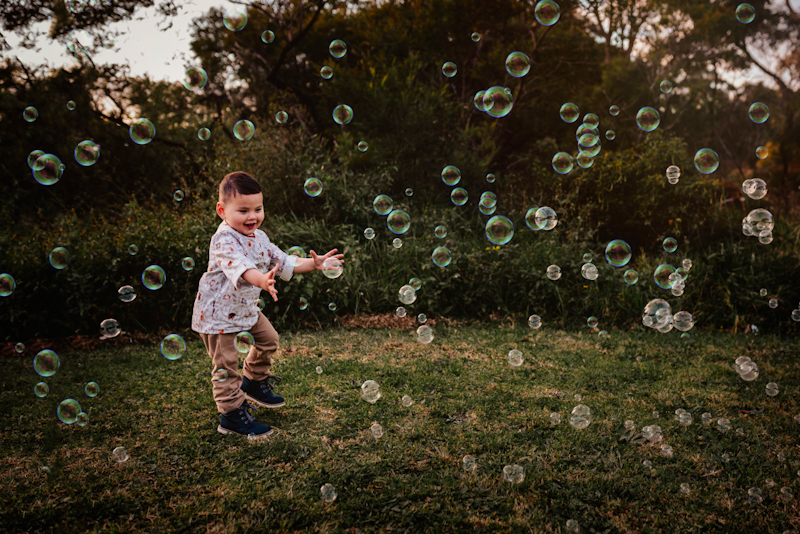
 Would you believe there were only two measly bubbles in this original shot?!
This shot was a bit meh straight out of the camera, but the extra bubbles make it more fun. The original bubbles were drifting from the bubble machine behind the tree, so I used a layer mask to shape the bubble overlay — so the added bubbles flowed in the same direction.
Related: 7 Ways to Capture Your Kids Outdoors This Summer
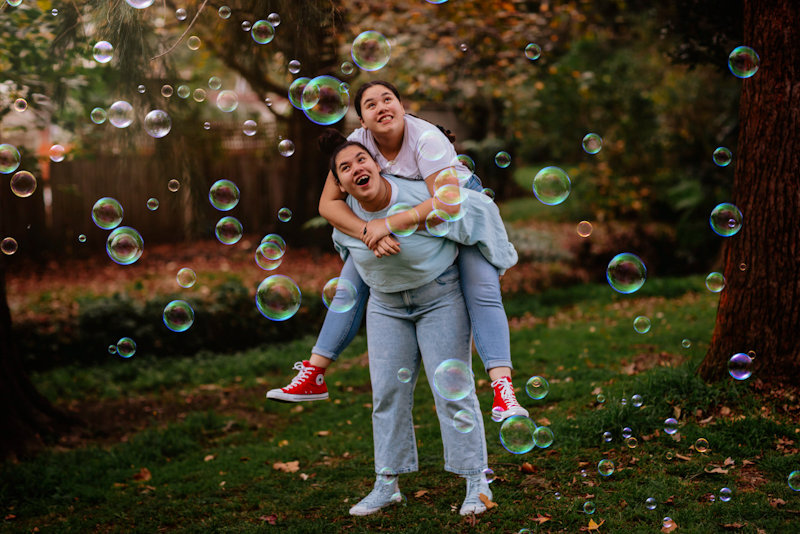
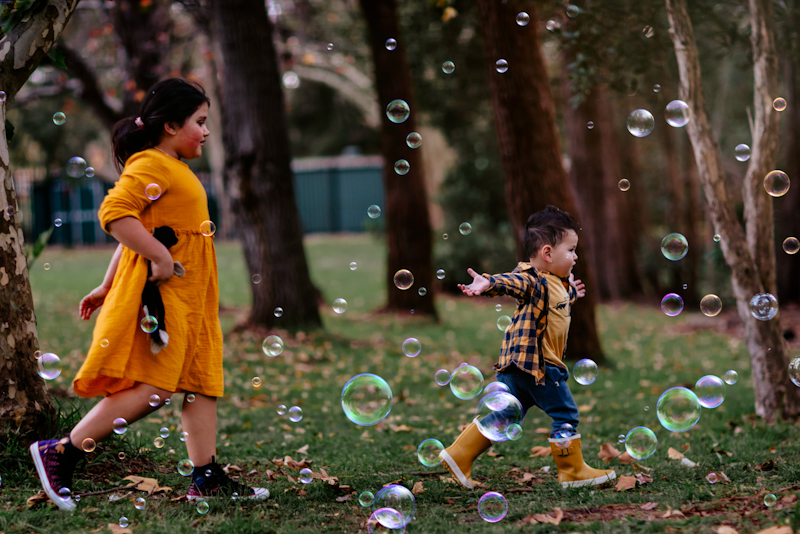
Okay, okay, I know I said keep it low key, but these two were having almost as much fun with the bubbles as their little brother so when they asked for more bubbles when I was editing, I gave them more bubbles!
Emma Davis is a CLG Advanced Grad with a background in journalism and photography, a Kiwi expat based in Sydney, and mum to six gorgeous muses who indulge her love of hunting and capturing light.
Join this amazing workshop and learn The 3 Secrets to Pro Quality Photos of Your Kids + Family…and it’s totally FREE to join! Register here…

Leave a Reply
PRIVACY POLICY & SITE TERMS AND CONDITONS
CLICK LOVE GROW ™ Pty Ltd - COPYRIGHT 2024 ©
x
Join Now
Enter your info below to join the challenge!
Want a friendly reminder when I go live?
Pop in your number and I’ll shoot you a text.
* We will send text reminders for our live calls during the challenge! Reply ‘STOP’ to end or ‘HELP’ for help.
We promise not to ever share your details with anyone or send you spam! Check our privacy policy and terms of service.
Be the first to comment