Sunflower Photography – 8 Tips For Stunning Pictures!
Sunflower photography instantly inspires you to grab your camera, find your closest field and take pictures. And it’s no surprise because sunflowers are associated with warmth, positivity, joy and summer. In fact, they’re considered to be one of the happiest flowers around!
Becca Lord-Lyon is a CLG instructor and award-winning photographer based in England. She captures her daughter Lenox’s childhood in stunning imagery and is well known for her dynamic use of colour and powerful compositions.
And given that love of bold colour, it’s no wonder sunflower fields are one of her favourite locations.
So, of course, we turned to Becca when we wanted to share a tutorial to help you shoot your own sunflower photography session!
How To Find Sunflower Fields
Sunflowers are grown all over the world! If you’re lucky enough to live near a sunflower field, you will hopefully have the chance to visit during summer.
In the UK they are normally open in August for around 2-3 weeks. In the US, sunflowers are typically found in August, but in some warmer parts of the country, they can bloom any time from spring to fall. In Australia or New Zealand, the best time for sunflower fields is mid to late summer, from January to March. Google your part of the world to find out where and when the best sunflower fields can be found!
A little known fact is that sunflower fields are generally privately owned and often charge an entrance fee. Also, you might need to book before going.
One day I came across an advert for a small farm opening one of their fields for a Sunflower maze. But there was a catch — it was only open for two weekends, you had to book four weeks in advance, and it was selling fast! So I took a risk, picked a date, and hoped for a little bit of sunshine. With a British Summer, you never know what you’ll get!
My Approach
My photography style is a mix of lifestyle and documentary. I often direct my daughter where to play based on the light, and I choose her outfits beforehand. But the interactions are more in the moment rather than posed.
My style evolved mostly because my daughter has always done what she wants, not what I pictured in my mind, so my style evolved around her.
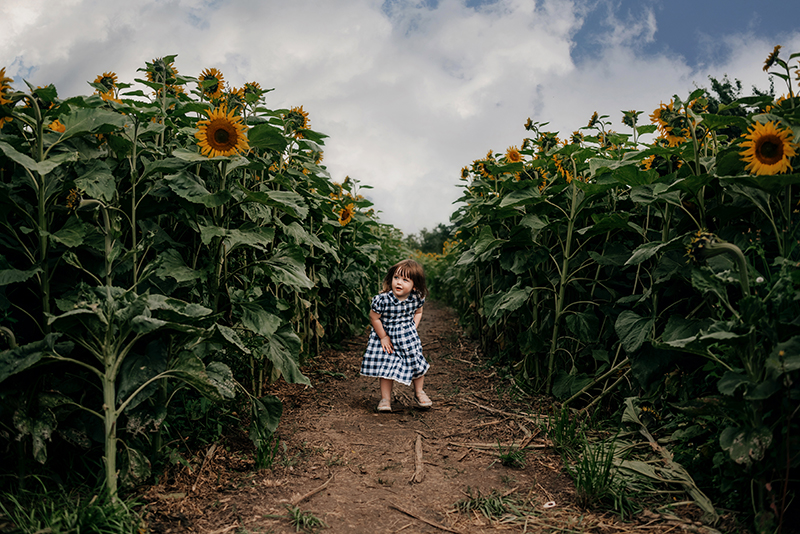
When we arrived, the sun was out, and there were big, fluffy, white clouds in the sky. I had chosen a blue and white check dress to stand out amongst the dark greens and bright yellows. As my husband was with us, I was able to run ahead to position myself and wait for her to come around the corners.
Read on to grab my top 8 tips and ideas for shooting a sunflower photography session!
Related: Lifestyle vs. Documentary vs. Portrait Photography (What’s The Difference?)
1. The Best Lens For Sunflower Photography
I use my 35mm as it’s such a versatile focal length. It allows me to capture both detail and wider shots that make the most of the locations, all at the same focal range.
If your camera is a crop sensor model, 24mm is equivalent to 35mm. Most entry-level cameras are crop sensors, but if you’re unsure, Google your camera model. Also, if you don’t have a 35mm prime lens, but you have a kit zoom lens, you should have 24 or 35mm available to you on the zoom.
Related: What Lens Should I Use?
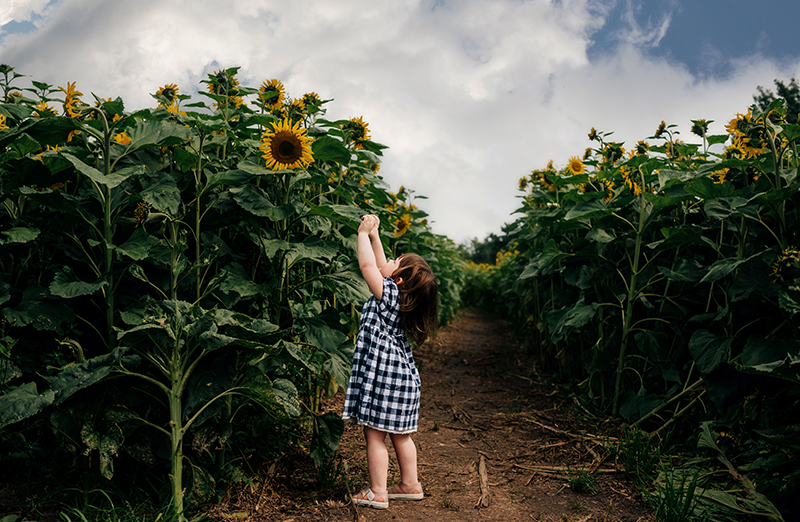
A wide-angle lens such as 24-35mm enables you to get in close to your subject AND include the environment at the same time.
2. Include Colours That Pop!
Colour will make the difference between nice photos and WOW photos! And for that reason, including bold colour in my photos is one of my top compositional tools, which I incorporate through my daughter’s clothing! So, when planning a photo session with her, I usually prepare ahead.
If you find styling challenging, use complementary colours. They are an easy way to create eye-catching photos.
Complementary colours are opposite on a colour wheel, which you can easily find through a Google search. The complementary colour to yellow is purple. But, if like me, you don’t have purple items, primary colours of red or blue will work with yellow.
I tend to avoid green — the other of the three primary colours — as it can easily get lost in the background of a sunflower field.
For this session, I picked a red top for Lenox because I knew it would really pop from the frame.
Related: How to Use Complementary Colour for Dramatic Photos
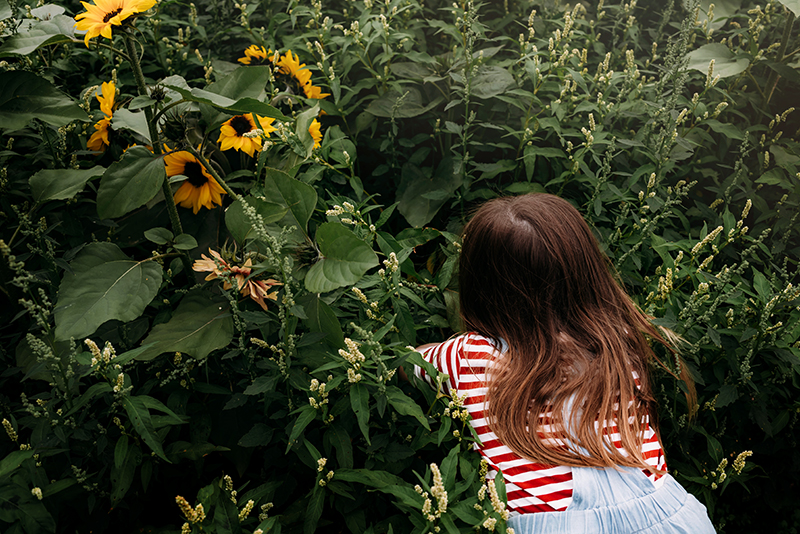
A classic black and white pattern will work too — e.g. spots or stripes — as it adds interest without distracting.
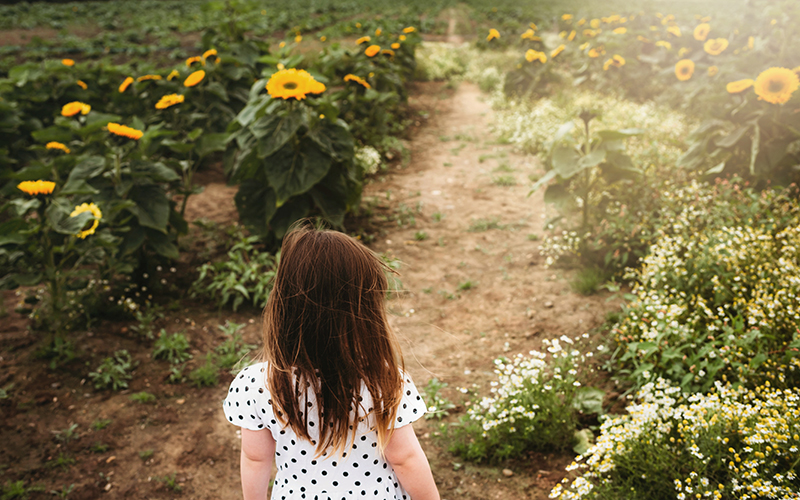
Keep it simple — stick with solid colours or classic patterns which add interest without distracting.
3. Camera Settings
Shoot with a narrow aperture to capture some detail in the surroundings. I like to shoot at around f/5.6 to f/8. I also prefer to use a fast shutter speed to freeze the fast movements of my daughter as she plays.
As long as it’s not too overcast, you should be able to shoot with a narrow aperture and a fast shutter speed and still get a good exposure.
On this day, I let my daughter run around the small path that looped back to where I was standing, and the fast shutter speed helped capture her joy.
Related: How to Shoot in Manual Mode
How to Get Sharp Photos of Moving Kids
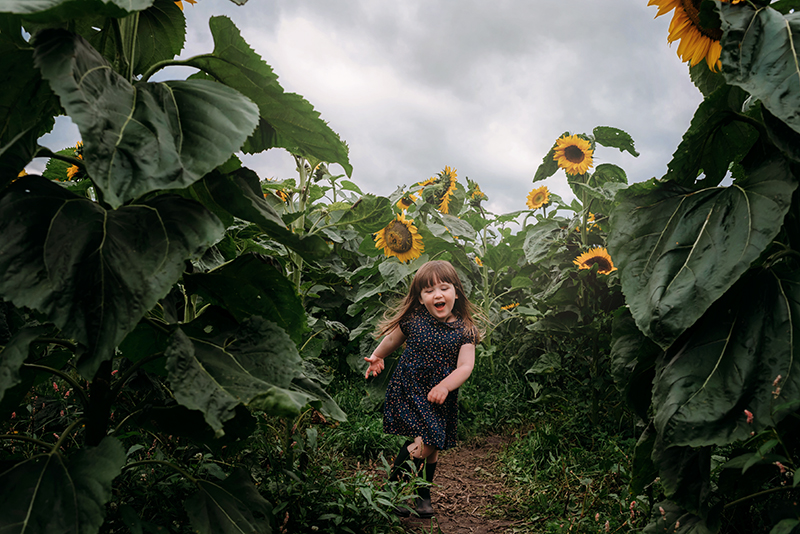
4. Make The Location The Star!
When shooting sunflower photography, the best way to showcase the true scale of a sunflower field is to get down low and use the sky as a backdrop. So when capturing wide pictures, get down low and shoot up a little. Shoot through the rows and leave room for the sky above. Think about the rule of thirds when framing your shots.
Related: Using the Rule of Thirds for Eyecatching Photos
How to Use Negative Space for Really Striking Photos!
Sunflower farms are often very muddy, so bring something to kneel on or wear clothes that you don’t mind getting dirty.
5. Shoot From Different Angles For Variety
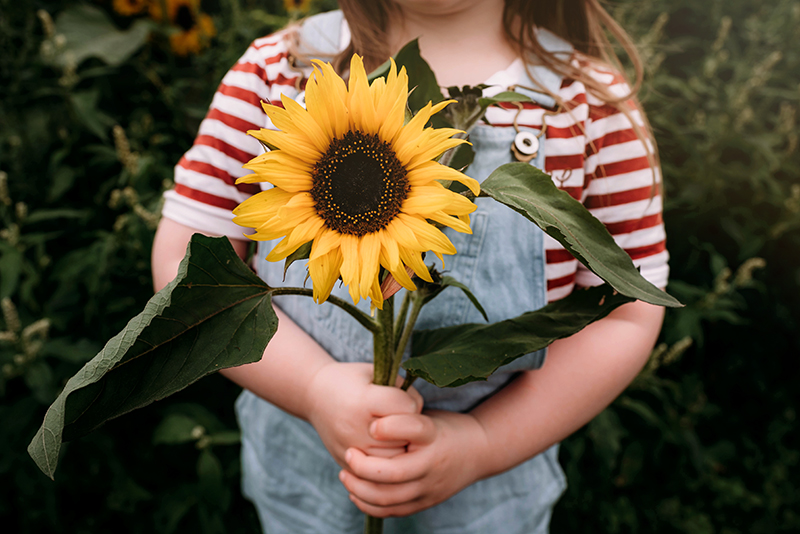
Normally, I get down to her level, shooting towards her and slightly up to use the sky. But, for variation and to capture details, remember to vary your angles.
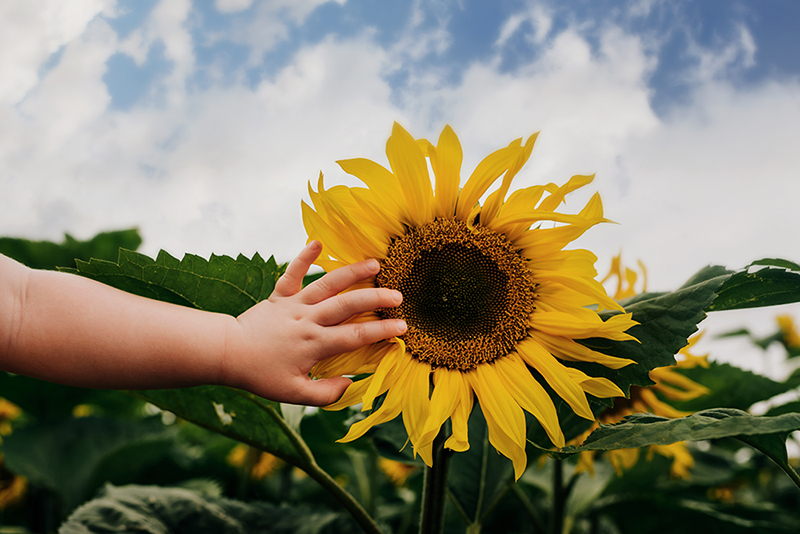
The farm allowed us to choose and cut our own flowers. So I decided to shoot down and crop through her chin while centring the flower and her hands. This is one of my favourite pictures that I have taken of her with the sunflowers.
If you want to take any shots of your subjects sitting on the ground, bring a blanket, so your subject doesn’t have to sit in the mud! Alternatively, if you’re prepared to carry it around, a rustic wooden kitchen chair in a bold colour is a great complement for sunflower photography.
6. Capture The Details
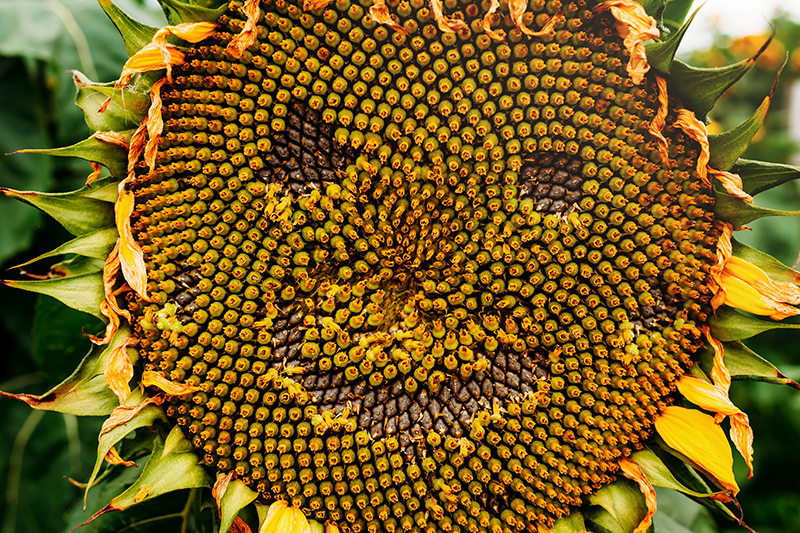
The second-year we visited, the weather hadn’t been the best over the summer. Fields opened late, and the sunflowers were not so tall. So on this day, capturing details became the focus so that it wasn’t a waste of a visit.
For a shot like this, get in close, and widen your aperture to around f/3.5 to add a little depth, without blurring the surroundings too much.
Luckily on this day, the local farmer had been out and created different smiley faces around the field. It was a lot of fun trying to find them, and also gave me something else to photograph to remind me of our day.
7. The Best Time Of Day To Shoot
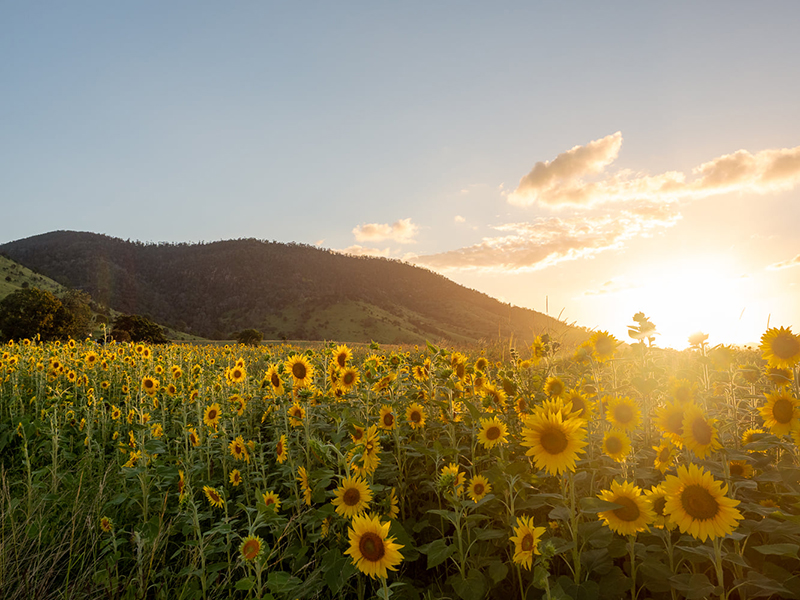
The ideal time to shoot sunflower photography is during the golden hour because it adds a beautiful glow to the location and you can create pictures that gently whisper summer!
Sadly though, as the golden hour can be quite late during the summer months, many sunflower fields would be closed before the golden hour starts.
So if you can’t go during the golden hour, at least try to avoid the middle of the day when the sun is high overhead. Instead, go when the sun is lower in the sky, so you can put it behind your subject and avoid harsh light shadows falling on them.
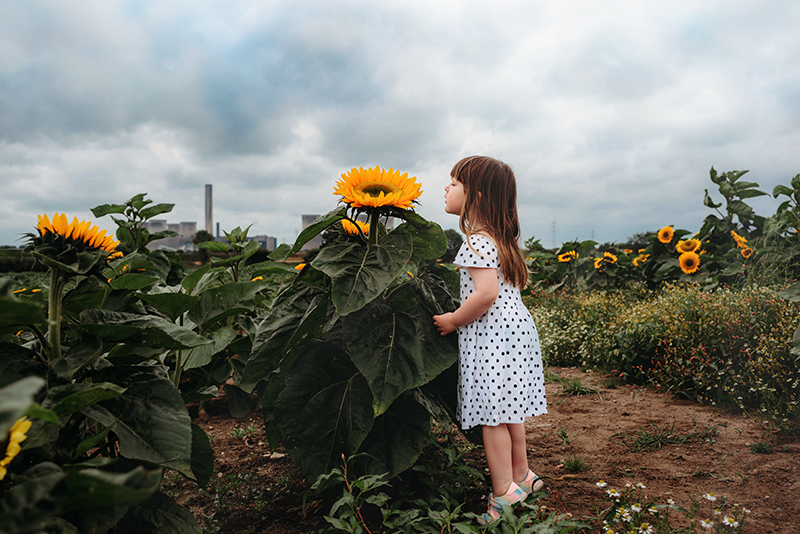
Beautiful blue skies and fluffy clouds are perfect for a sunflower field location. But sadly, we can’t control the weather on the day we book! But that’s ok because you can get the most interesting skies on dark days! Last year we were lucky enough to find two fields very close to home, but about 15 minutes after we arrived the rain came down. The light was pretty dull, but I chose to shoot my images slightly underexposed to capture the fantastic colours in the sky.
Related: Golden Hour Photo Tips for Beginners
8. Enjoy Your Day Out
Sometimes things don’t go to plan! The weather, the height of the sunflowers, a tired or hungry subject can all impact your vision. If your subject doesn’t want to be in your images, let them play and capture the natural moments as they happen.
You can also try some landscape photography…after all, you’re at a stunning location which is a subject in and of itself!
Related: Travel & Landscape Photography Guide for Beginners
Lisa Weller, Advanced Graduate
If it’s early or late in the day when the sun is low in the sky, shoot through and capture the sun’s starburst. You’ll need a narrow aperture of around f/11 to f/16 — the narrower the aperture, the sharper the rays.
Related: Step by Step Tips to Capture a Starburst in Photos
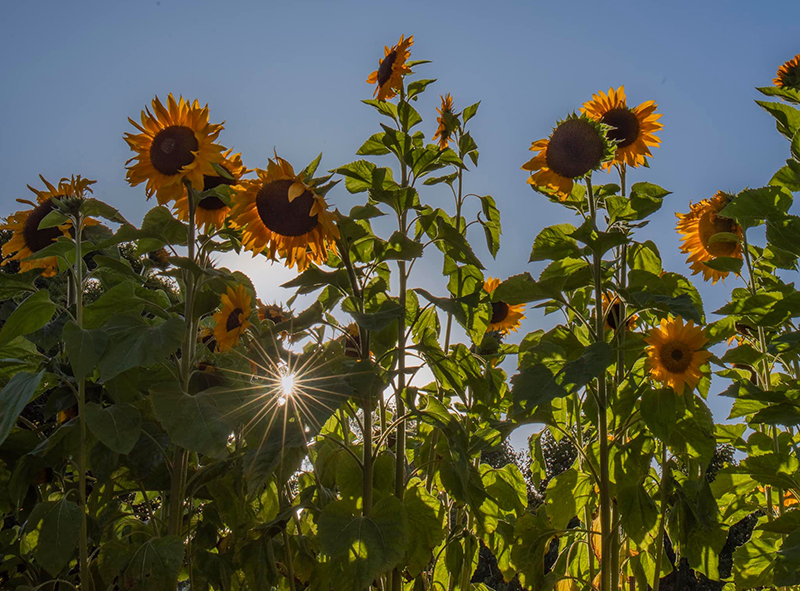
Floss Butterworth, Advanced Graduate
Take the opportunity to try some close-up sunflower shots, or get in even closer with some macro photography — there are always plenty of insects sitting around waiting to be photographed!
Related: Macro Beginners Guide
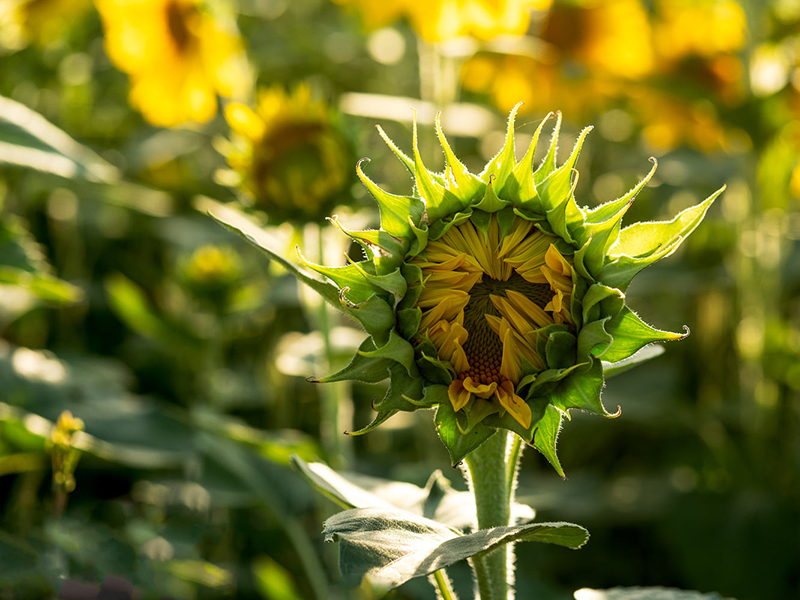
Lisa Weller, Advanced Graduate
Join my new workshop and learn How to Shoot Pro-Quality Photos With Your DSLR… and it’s totally FREE to join! Register here…

PRIVACY POLICY & SITE TERMS AND CONDITONS
CLICK LOVE GROW ™ Pty Ltd - COPYRIGHT 2024 ©
x
Join Now
Enter your info below to join the challenge!
Want a friendly reminder when I go live?
Pop in your number and I’ll shoot you a text.
* We will send text reminders for our live calls during the challenge! Reply ‘STOP’ to end or ‘HELP’ for help.
We promise not to ever share your details with anyone or send you spam! Check our privacy policy and terms of service.
Be the first to comment