8 Surprising Ways to Use Backlight for Creative Photos
A Weekly Highlights Reel of Inspiration!
We all love a beautiful golden backlight photo… the warmth, the golden halos, that dream-like feel… what’s not to love?! But there’s more ways to use backlight than a traditional golden hour portrait, and we’ve seen it used in loads of creative ways in our Grad’s group!
So this week’s highlights reel is a stunning collection of images incorporating all kinds of backlight, and in some instances uses some really fun techniques, that you can try yourself and bring some art to your photos!
Enjoy!
1. Backlit Water
It’s as simple as this… create a stunning effect simply by capturing light bouncing of water spray and droplets. In this shot Becca has exposed for the water, placing her daughter mostly in silhouette. She’s used a slow shutter speed which has captured some motion of the water, and overall her choices have resulted in an incredibly striking shot.
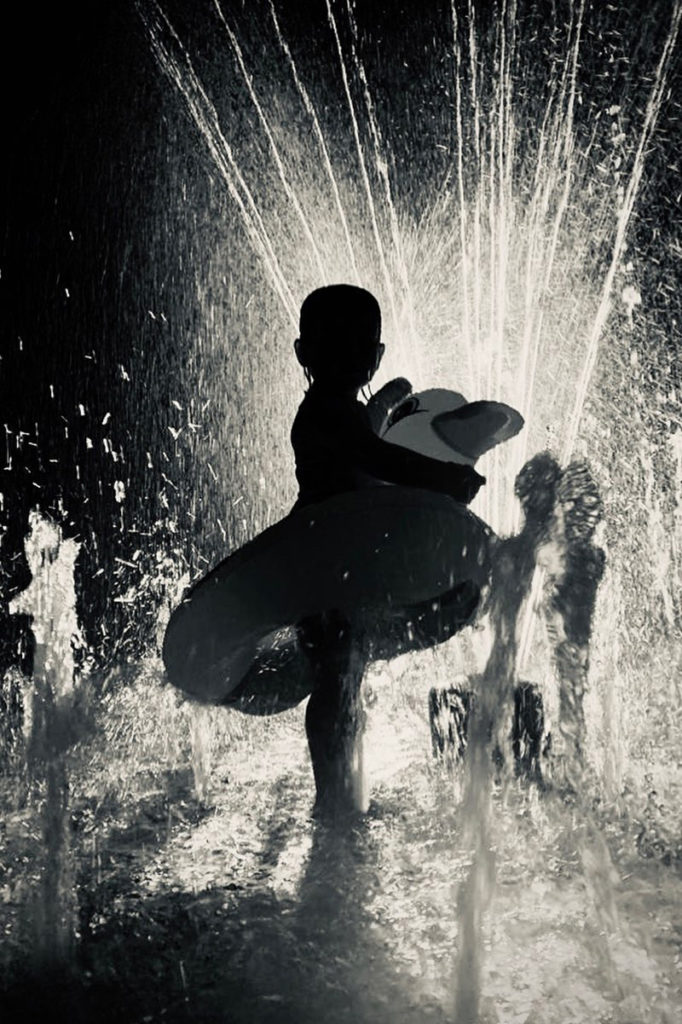
Becca Lord-Lyon, Advanced Graduate
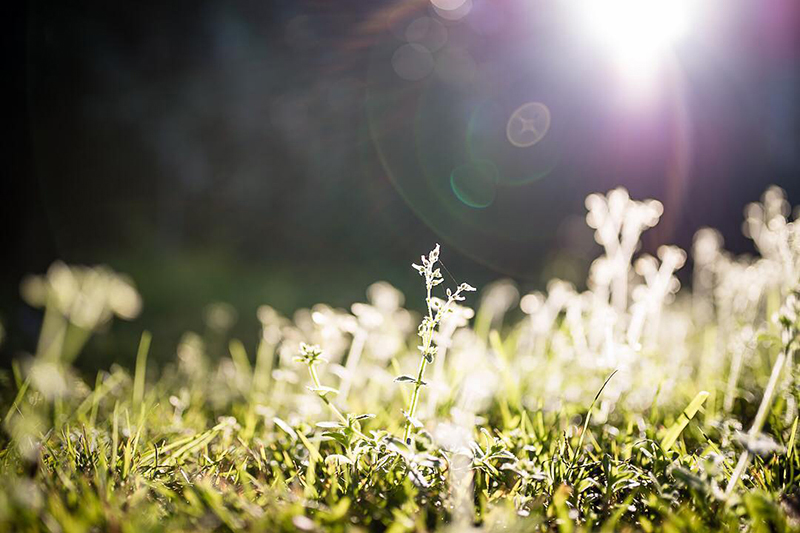
2. Lens Flares
Shoot into the light and when it hits your lens at a certain angle, you’ll get some beautiful lens flares. Adjust yourself or the angle of your lens ever so slightly and watch how the colours, intensity and size of the flare changes. Look for a pattern you like then shoot.
Be mindful of haze which inevitably comes when you’re shooting directly into light that is largely unfiltered. This isn’t necessarily a bad thing as haze can make your shot beautifully dreamy. But it needs to be purposeful. If you are including it, make sure it’s not accidental – if there’s zero clarity around your subject, generally speaking it will look accidental. The exception to this is when the haze is the subject.
To avoid or reduce haze, move yourself so that the light isn’t fully in frame and you can see more clarity in your subject.
Almitra Hill, Advanced Graduate
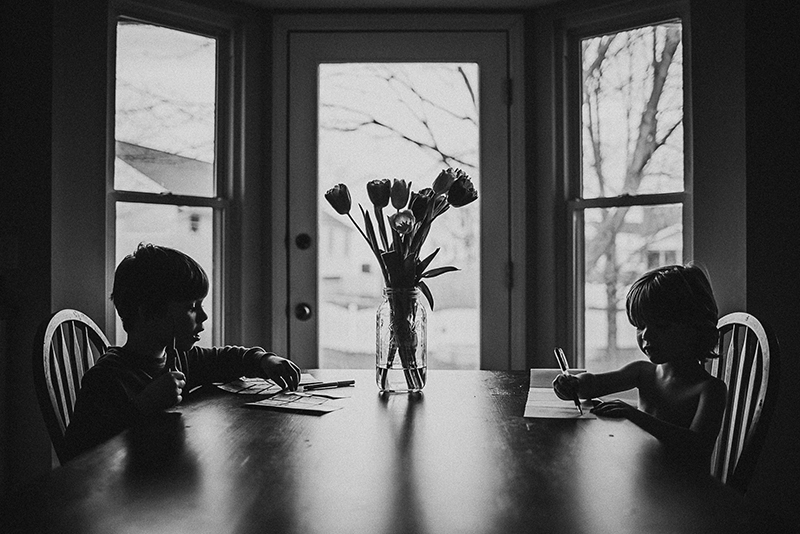
3. Window Backlight
Backlight doesn’t have to be outdoors, golden, on a beach, and created by the sun setting.
Even on a grey winter day, in a dark house, you can use the light you have creatively. I love the symmetry of this shot, and the low key tones created by this soft window light. Expose for the highlights and it will put your subjects in semi silhouette.
Related: Indoor Low Light Photography Tips
Dana Whitley, Advanced Graduate
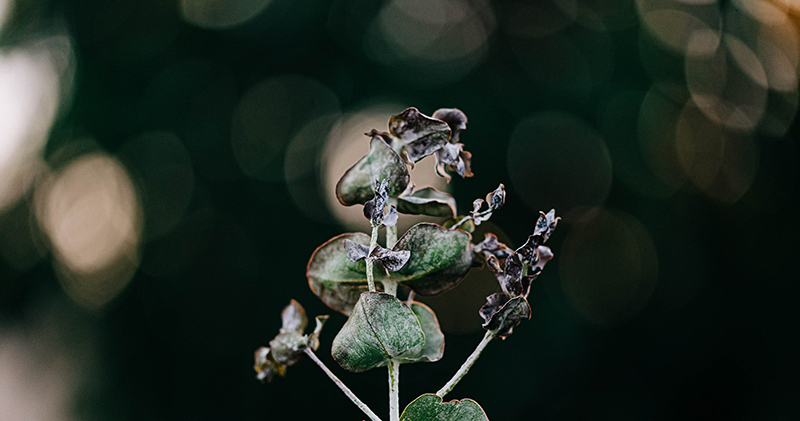
4. Backlight Bokeh
Early or late in the day look for light bouncing off foliage, then use it as a backdrop. Create this gorgeous light bokeh using a wide aperture of say f/2.8 a wide aperture.
If you’ve only got a kit lens and it doesn’t open up to f/2.8, use it at it’s widest aperture. To do this you’ll also need to use your lens at its widest focal length, and this is fine, just zoom with your feet and step in closer. Then put a bigger distance between the subject and backdrop.
Related: How to Get Beautiful Blur with a Kit Lens
Humera Aaqib, Advanced Graduate
5. Ring of Fire
Create this gorgeous effect using a chandelier ring or a 1 inch copper tubing. Place it in front of your lens, not quite near enough to touch the glass (please never do that!).
Shoot into the light, and experiment with the angle and distance of the ring or pipe until the light hits it in a way that gives you an effect you love!
The colour of the light will affect the colour of the flare. Bright middle of the day light will give you a very bright flare. Golden hour light will give you a golden flare. A pink sunset will give you a pink flare. Also, the colour of what you’re capturing can be captured in your flare if you’re up close enough. But all of that just adds to the variety of effects you can create!
Warning: It is a tricky technique, so if you’re struggling, I promise it’s not you! Just keep persevering, when you nail it, it’s worth it!
Tech Tip: You can absolutely do this handheld and in fact I’v eonly ever tried it hand held myself. But you could reduce the frustration a little and really have fun with it if you use a tripod and live view mode.
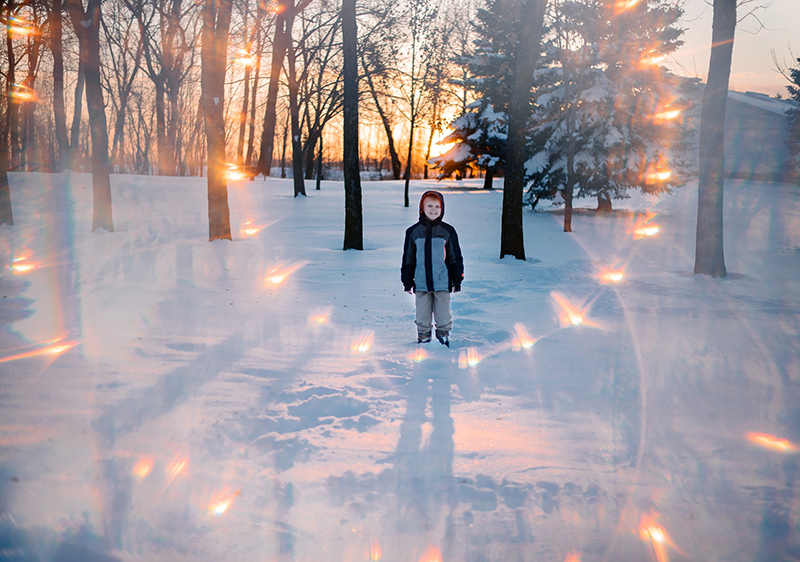
Jennifer L Ness, Advanced Graduate – Chandelier Ring
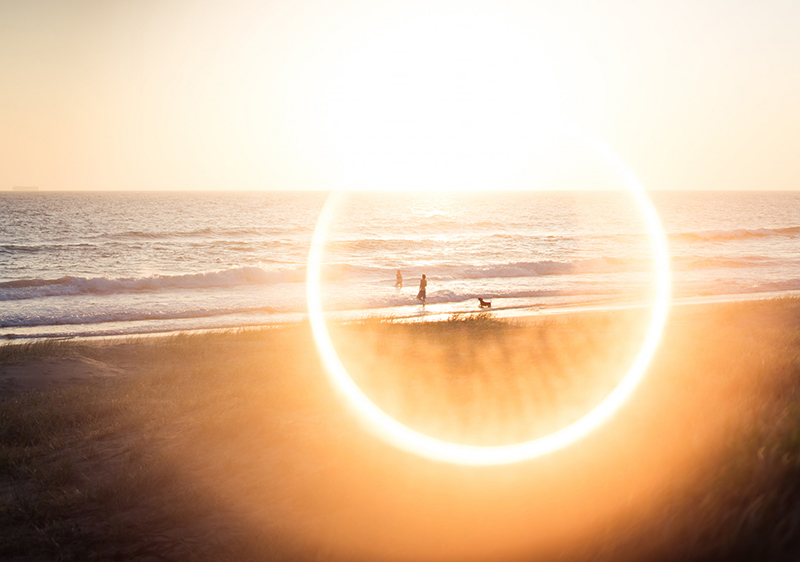
Vicki Cardilini, Advanced Graduate – Copper Tubing
6. Shadow Photography
Also known as hard light photos, this is a really fun way to use the hard light we tend to try and avoid when we’re first starting out in photography.
So, open up your mind to it, embrace it, expand your light horizons and look for interesting shadows created by hard light and make art with it!
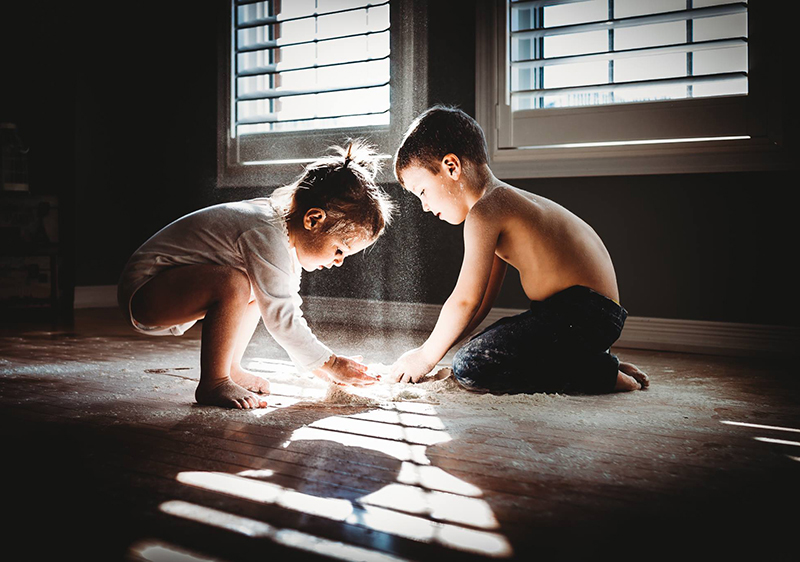
Kailey Nagymarosi, Advanced Graduate
In this shot Dana took matters into her own hands, and created fun hard light shadows by sticking paper hearts to her front door. Genius!
Related: Try Shadow Photography
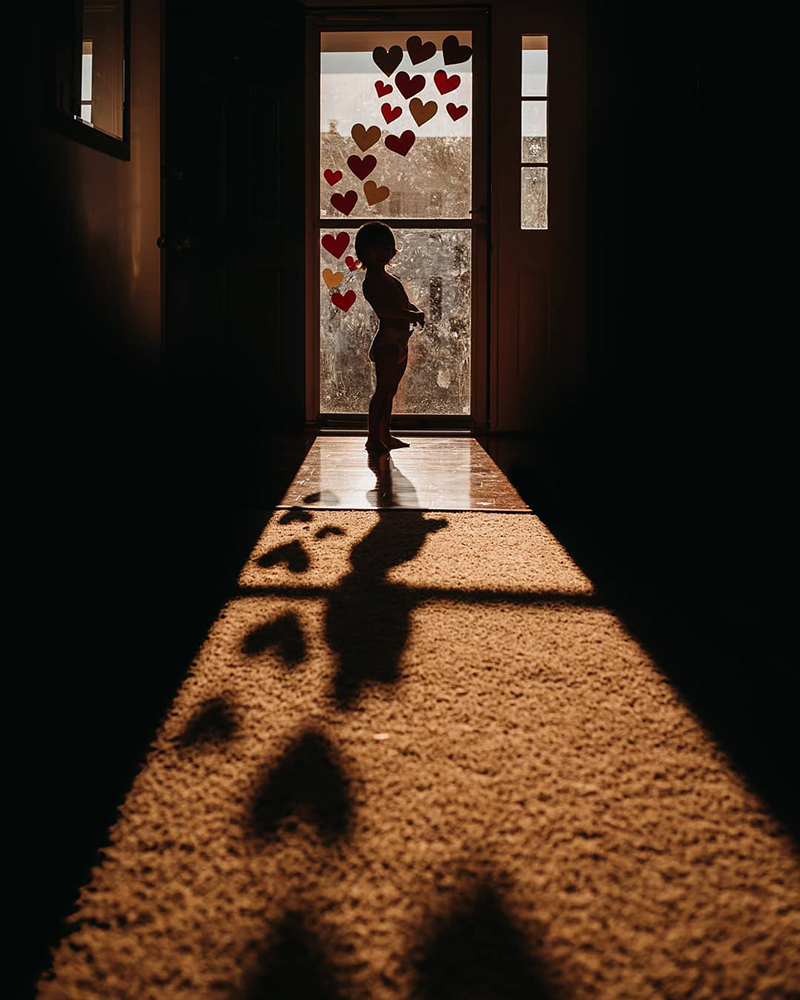
Dana Whitley, Advanced Graduate
7. Fairy Light Bokeh
Create your own backlight bokeh by stringing some fairy lights behind your subject, a good distance (at least a couple of metres) then using a wide aperture of at least f/2.8, create this gorgeous effect.
If your lens doesn’t open up to f/2.8, use it at its widest aperture and compensate by putting even more distance between your subject and the background.
Related: Fairy Lights Photo Tutorial

Lisa O’Doherty, Graduate
8. Intentional Blur
In the golden hour, position yourself so the sun is out of the frame and creating a halo around your subject. Then flick your lens into manual focus and intentionally blur your subject. Hey presto, a beautifully artistic shot that appears to come straight out of a dream.
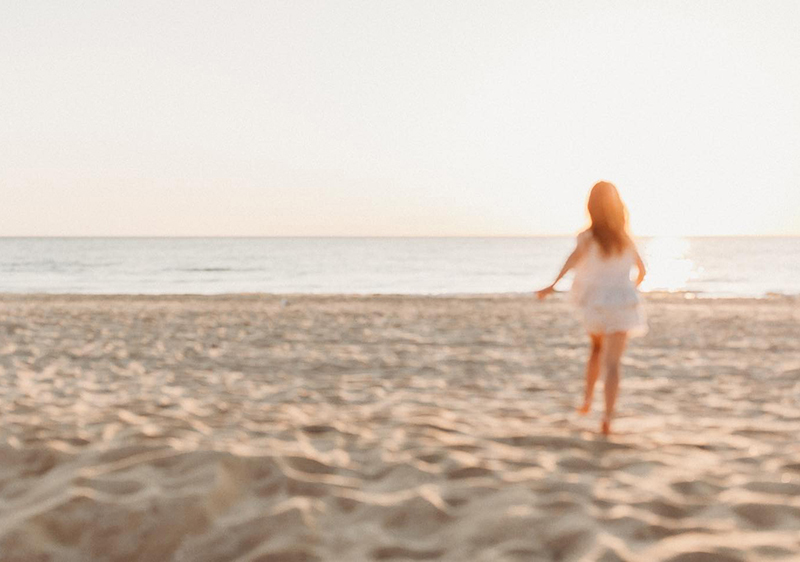
Merissa Wakefield, CLG Instructor
Free Photography Workshop
Join my new workshop and learn How to Shoot Pro-Quality Photos With Your DSLR… and it’s totally FREE to join! Register here…

Leave a Reply Cancel reply
PRIVACY POLICY & SITE TERMS AND CONDITONS
CLICK LOVE GROW ™ Pty Ltd - COPYRIGHT 2024 ©
x
Join Now
Enter your info below to join the challenge!
Want a friendly reminder when I go live?
Pop in your number and I’ll shoot you a text.
* We will send text reminders for our live calls during the challenge! Reply ‘STOP’ to end or ‘HELP’ for help.
We promise not to ever share your details with anyone or send you spam! Check our privacy policy and terms of service.
Be the first to comment