How To Take Magazine Worthy Food Photography At Home
Ever wondered how those beautiful food photos in magazines and cook books are shot? Maybe you’ve envisaged a full team of chefs and stylists, lights and studio equipment. But the great news is, you don’t need any of that!
Naomi Sherman graduated from our Enthusiast Photography Course back in 2014, and followed up immediately with our Advanced Photography Course. Fast forward to 2020 and she’s gone on to a hugely successful full time career as Naomi Sherman Food Creative, an international award winning food photographer. She’s also a cook book author, stylist, recipe developer and blogger (wowsers!) who started out shooting on her dining room table pushed up next to a window!
Naomi generously agreed to share her secrets on how she takes her beautifully delectable food photos, so that we could create this practical and in depth step-by-step guide. It’s all set around a simple home studio that uses natural light and home-made backdrops, so you can easily re-create the same set up and start learning how to take your own beautiful, magazine worthy food photos!
From Beginner to Working Professional
I’ve always had an interest in photography but had expected that I would do landscape work, which I still do as a hobby.
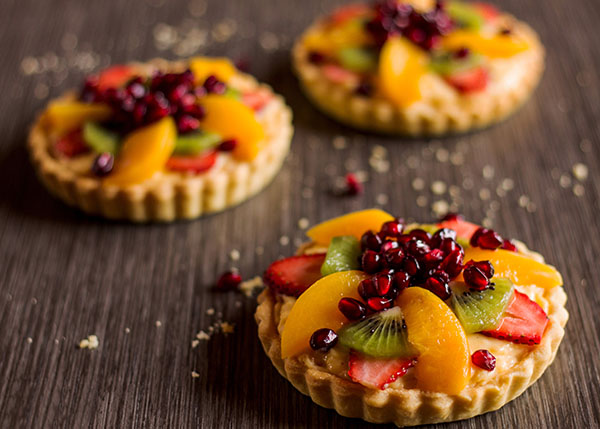
However, during the Click Love Grow Advanced Photography Course, I cooked a couple of fruit tarts for the assignment about backgrounds.

Love Found
I LOVED THIS PHOTO! (Boy, does it feel like I’ve come a long way!). It combined my love of cooking, my love of cookbook photos and my love of photography. I started photographing more and more food, learning as much as I could.
Published and Award Winning Photographer (We Knew Her When!)
Eventually, I gained the attention of a couple of major food bloggers who contracted me to do recipe development, recipe testing and/or social media and publicity shoots for them. I now work full time as a food photographer and stylist and am very slowly writing my own cookbook.
I’ve been published in magazines and books, featured on websites around the world and received international awards.
I have just rebranded, which included a whole new website and the launch of a set of custom Lightroom presets which I’m very excited about!
A Typical Brief
Burnt Butter Pecan Ice Cream Shoot
Client: Keto Diet App
For this client, I develop, cook and shoot a number of recipes per month as one of the featured writers on her blog. The brief for this shoot was typical of a food photography brief, and read as follows:
- Step by step photos of the dish being cooked (ratio 4:3)
- A featured blog thumbnail photo (ratio 4:3)
- An Instagram image (ratio 1:1)
- A Pinterest image (ratio 4:6) with negative space to overlay text.
1. Step by Step Styling
This client allows me full reign to style images my way, but she particularly likes my darker style shots. I also make sure to take a shot or two for my own files and to post on social media (ratio 8:10).
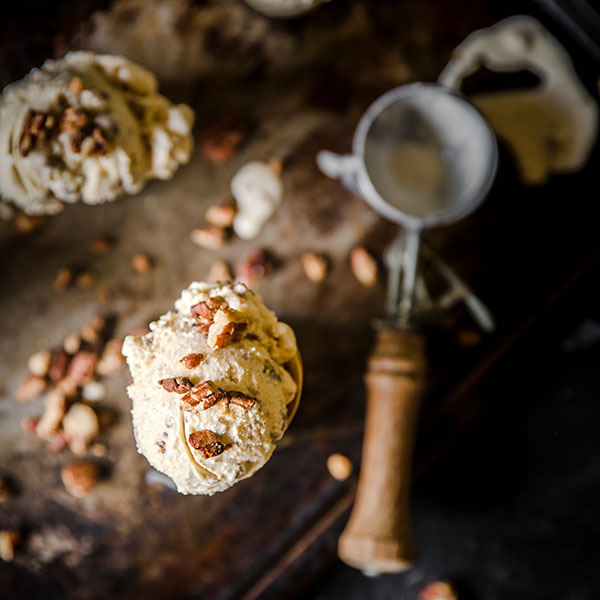
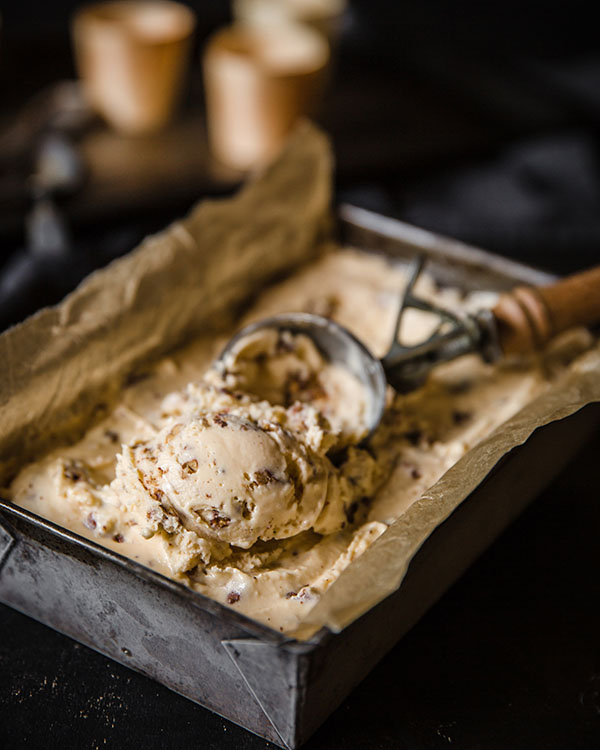
For this shoot, first I thought about how the ice cream would look (creamy and golden with flecks of brown), and what container I would present it in (mottled and dark grey vintage cake pan), and those elements led me to decide I wanted warm and natural colours and tones.
This gives me the springboard to work out other props and details such as the dark background, a patterned old baking tray which has a beautiful brown, black and grey surface, and the additional props such as linen, spoons and a vintage ice cream scoop. I avoid using too many different colours and tones, and I try to keep my props relevant to the subject and image.
I then decide what kind of backdrop I want – light or dark? I have light painted walls which sometimes looks great set off against the dark background.

However in this case I loved the way the black backdrop made the items really pop. To create a dark backdrop I simply place sheets of thick cardboard behind the subject.

2. My Natural Light Home Studio
My studio lives in a dedicated area of my house which also comprises a bathroom and office. However I didn’t always have this purpose designed area. When I started out, I worked off my dining room table!
Light
My home studio has a large window on one wall and I love to use this to create natural directional light. I have studio lights but I much prefer using natural light as it’s more conducive to my preferred style, which makes the most of deep shadows and light.
I have a couple of storage trolleys with castors that I set up my shots on, and this enables me to wheel my set up around to get the best light and the best angle. I set my props and accessories up, rearranging them until I have a rough idea of how I want my shot to look.

The day that I shot these photos was a bit overcast and as such the light was dull. On days like this you need to bounce some light back into those shadows, and in that regard one of my most used tools is a cheap reflector that I bought online. In the second image, which was taken with side light and no reflector, you can see that there are very deep shadows on the right.
You can also use the reflector for times when you want a brighter shot without the stark look of studio lighting. Pop it to one side, take a shot and see what you think.

As you can see it throws light back on to your subject without lighting up the entire scene.

3. Unique Food Photography Challenges
Food is a subject that can’t talk back, can’t run away, and can’t refuse to smile! Yaay! But capturing food from creation to final product does present unique challenges that have to be considered in advance.
The Recipe
In this instance, the recipe needed to set overnight so naturally that dictated the shoot stretched over two days. Day one was very overcast and day two was brighter, but I needed to ensure the light was consistent across all images. I worked around this by moving my trolley further away from the window on Day two to replicate the lighting from the previous day.
Plan Ahead
Day one was spent photographing the step by step shots, and so it was important to have elements set up and ready to go to enable me to shoot as soon as I completed each step. Also, this was shot during a heatwave, so I needed to have every shot worked out in my head in advance in order that I could work super fast before the ice cream melted too much!


4. Developing Your Style
Copying the style of other photographers is fine in the early days, as it gives you valuable experience. But consider the shots you’re trying to emulate and why by asking yourself these questions:
- Do you love the tones and colours?
- How do you feel about the particular way the photographer styled their shot?
- Is dark and moody lighting your preference (hand up!) or do you lean towards lighter styles?
- Are the photos that catch your eye taken using studio lights or natural light?
These questions will help you develop your very own signature style. Once you have an idea of that, start looking around for props that support your style.

Sourcing Props
Thrift shops and garage sales are a perfect place to look for inexpensive cutlery, crockery etc. Keep your eye out for anything that aligns with the style you prefer to photograph.
Choosing Props
Think about your props. Don’t put a pine cone and a watch in the background, just because the tones, colours or texture match your theme. You want to ensure the eye is drawn to your food first and foremost and then use related props to enhance that story without taking over.
Composition
I like to add what is called a human touch… I scatter some crumbs, take a bite out of something, toss some herbs around, let some ice cream melt on the tray. By bringing this little bit of imperfection to the image it seems to make it more desirable.

Take photos from lots of different angles. It gives you a larger number of images to select from and sometimes you get pleasantly surprised. I shoot handheld for this very reason.

The exception to this is when I want to include myself or my hands in the photo, in which case I use my tripod and either the self-timer or a remote trigger.

5. Gear & Settings
My go to equipment is:
- Canon 5d Mark iii
- Canon 24-70mm 2.8 L series lens
- Tamron 90mm 2.8 lens
- Tripod, reflector, remote shutter
I would say 95% of my shots are taken at f/4.5 or wider, with a shutter speed that takes into account the fact I’m almost always shooting handheld.
Related: What Lens Should I Use
6. Editing
I edit in both Lightroom and Photoshop. With the majority of work done in Lightroom.
Shoot in RAW
My top tip would be first and foremost, shoot in raw format to give you the most control (naturally), and learn to edit your own images as opposed to using presets or actions. This can give the images your signature style and take a photo from great to holy cow.
Related: RAW vs. JPG
Lightroom Presets
I recently launched my own set of Lightroom Presets, but firmly believe that you should know and understand hand editing before you start using presets.

Big thank you to Naomi for your generous tips and gorgeous imagery!
Join my new workshop and learn How to Shoot Pro-Quality Photos With Your DSLR… and it’s totally FREE to join! Register here…

PRIVACY POLICY & SITE TERMS AND CONDITONS
CLICK LOVE GROW ™ Pty Ltd - COPYRIGHT 2024 ©
x
Join Now
Enter your info below to join the challenge!
Want a friendly reminder when I go live?
Pop in your number and I’ll shoot you a text.
* We will send text reminders for our live calls during the challenge! Reply ‘STOP’ to end or ‘HELP’ for help.
We promise not to ever share your details with anyone or send you spam! Check our privacy policy and terms of service.
Be the first to comment