Create Hero Shots with Negative Space
Vast areas of negative space is often included in photos mindlessly, the subject gets lost in the frame, and for no good reason. The viewer is left wondering what on earth the photographer was thinking!
So does that mean you should always shoot close up, crop tight? No way! You just need to use negative space with purpose.
So how do you know when and why you should include negative space? Be inspired by these 10 crazy spectacular photos that use negative space brilliantly, and learn when to use it, and why.
As always, all photos taken by our talented Grads. Aren’t they gorgeous?! If you want to learn how to shoot with confidence in any scenario, our Advanced Photography Course is starting soon. Jump on the wait list to get an email when seats open – it’s the easiest way to ensure you get the amazing SALE price and BONUS extras.
Enjoy!
1. Best Lens for Negative Space
To include lots of negative space in your image, you could just step far back. But you could end up losing your subject in the frame. One of the easiest ways to incorporate negative space whilst still giving us a good view of your subject, is to use a wide angle lens. Anything from 18mm to 35mm will allow you to include lots of the environment while still being reasonably close to your subject.
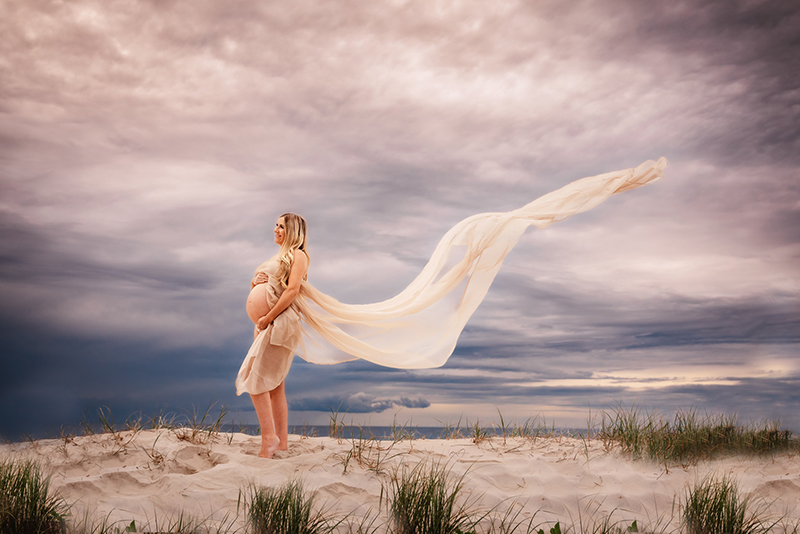
Megan Leete, Click Love Grow Grad
2. Dynamic Urban Backdrops
Stunning backdrops of any sort are always a good reason to use a vast amount of negative space.
In these shots, other than subject, the backdrop is a hero. All that gorgeous texture, the rustic windows, the aged and weathered appearance… it’s too beautiful to exclude by cropping in close.
How do you include so much of the environment without losing this little guy in the frame?
- Use a wide angle lens such as 24mm and step in. If you shot this at say 70mm you’d have to step waaaay back, he’d disappear into the distance, and the perspective would be all wrong.
- Get down low so you’re at his level.
- Use a narrow aperture eg. f/6.3 to get a decent depth of field but focus directly on his face.
Other backdrops that demand loudly to be included in their fullness for their spectacular good looks could be a firey sunset, a vast golden field of wheat, a stormy sky, a gritty, city laneway splashed with fabulous murals, a wall covered in interesting light patterns.
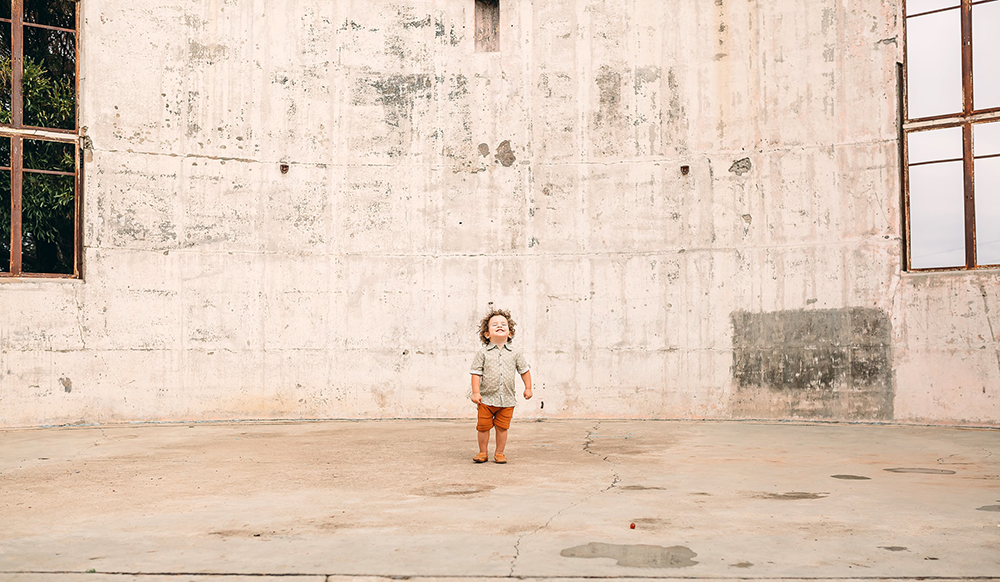
Lauren Green, Click Love Grow Grad
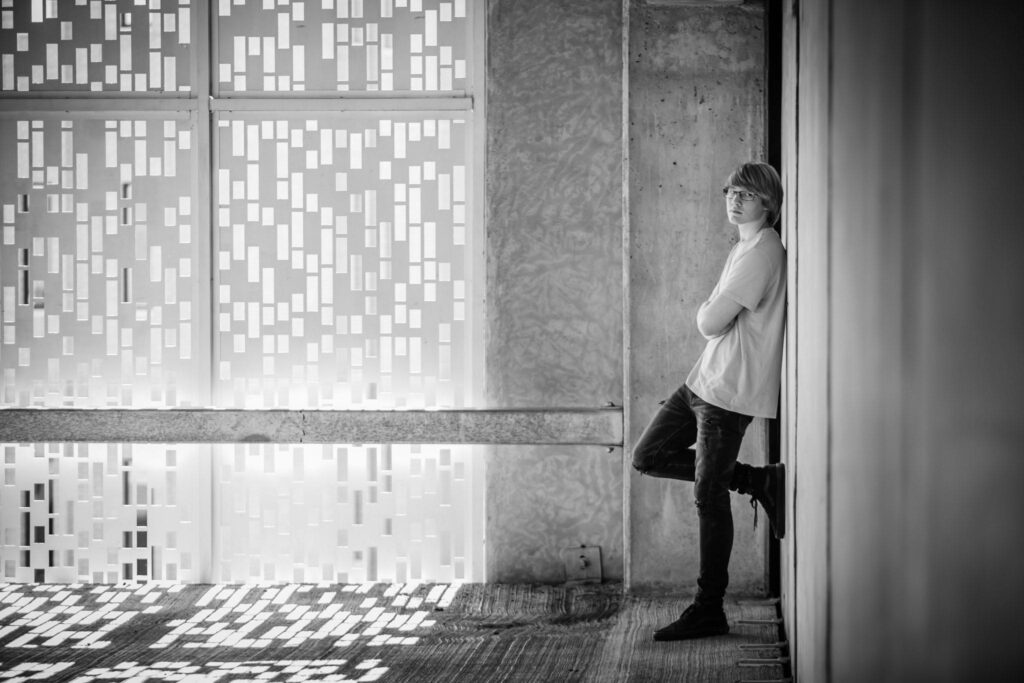
Kellee Kromarek-Haan, Click Love Grow Grad
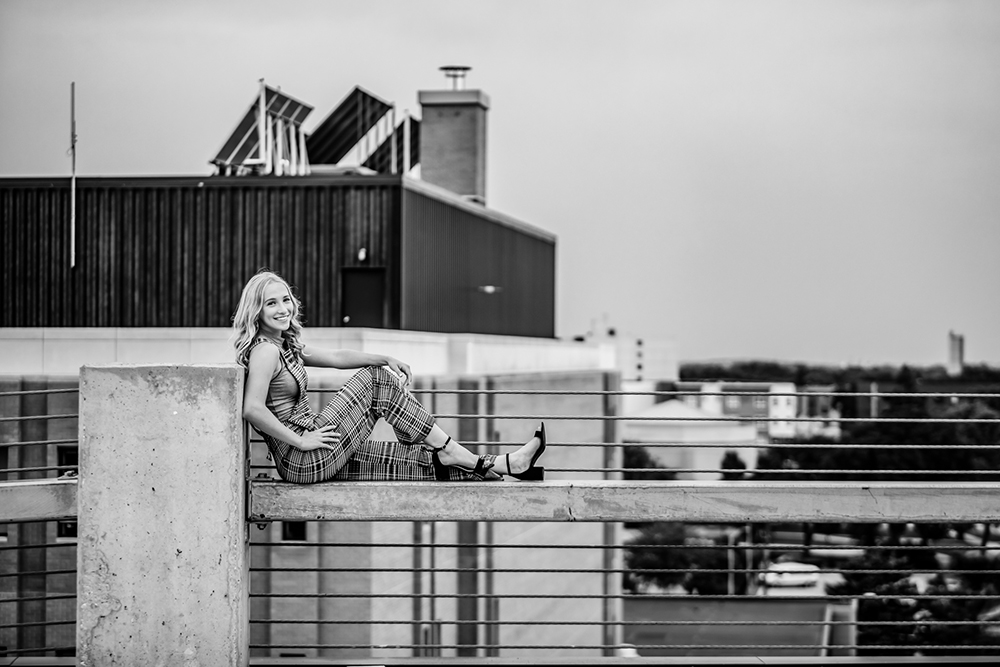
Kellee Kromarek-Haan, Click Love Grow Grad
3. Intimacy
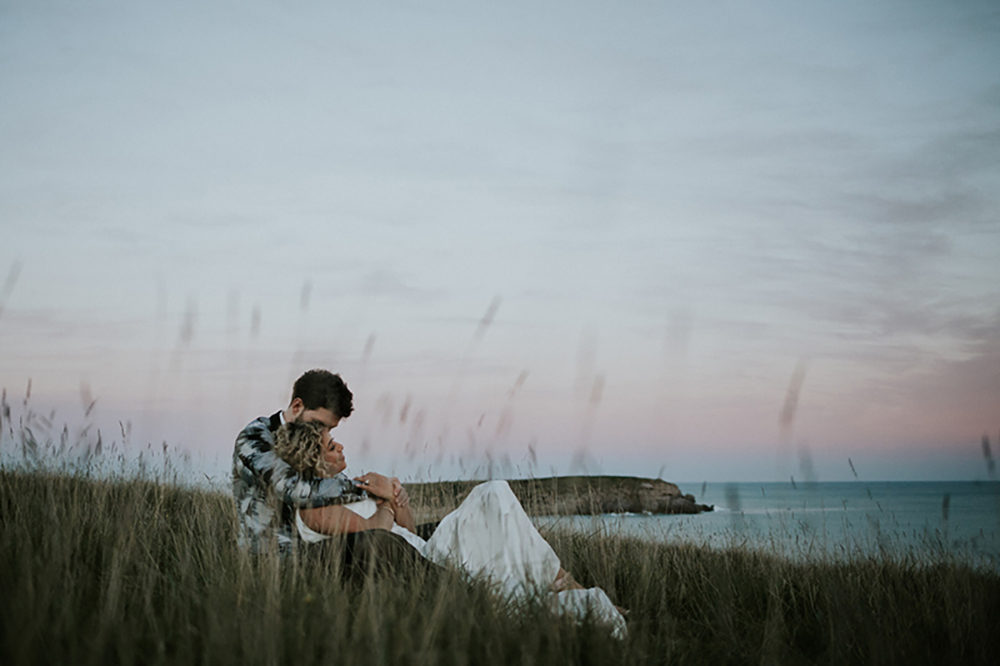
In this shot, Bronwyn stepped back, got down low, shot through the grass and shot wide to convey her own distance and ultimately created a sense of privacy and intimacy. They could be there all alone.
Also: gorgeous sky, gorgeous surroundings, why not.
Related: Capturing Couples, 20 Poses for Natural Photos
Bronwyn Pickering, Click Love Grow Grad
4. Framing
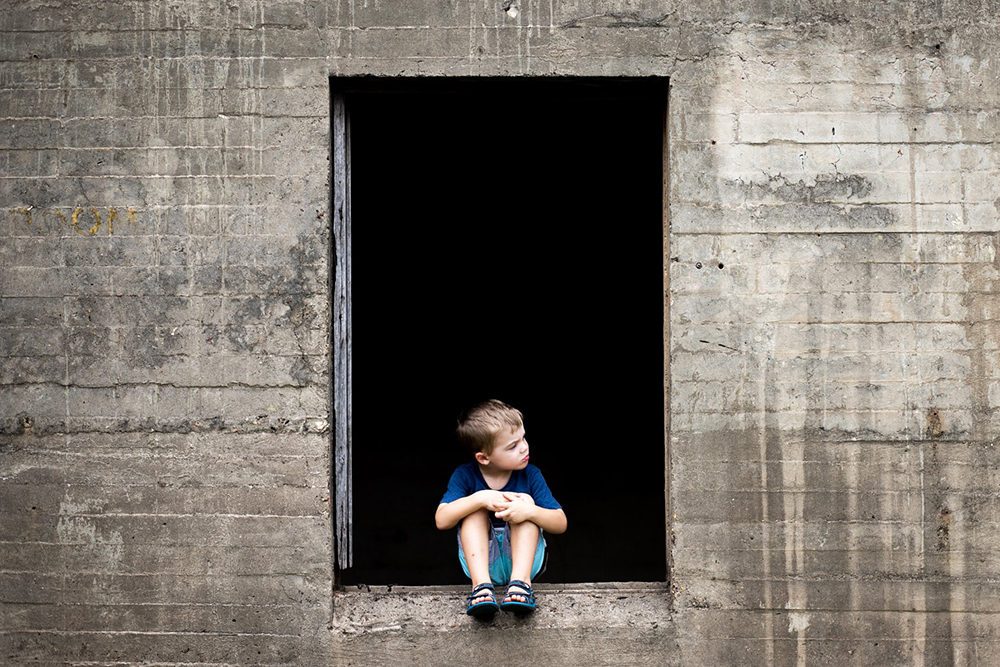
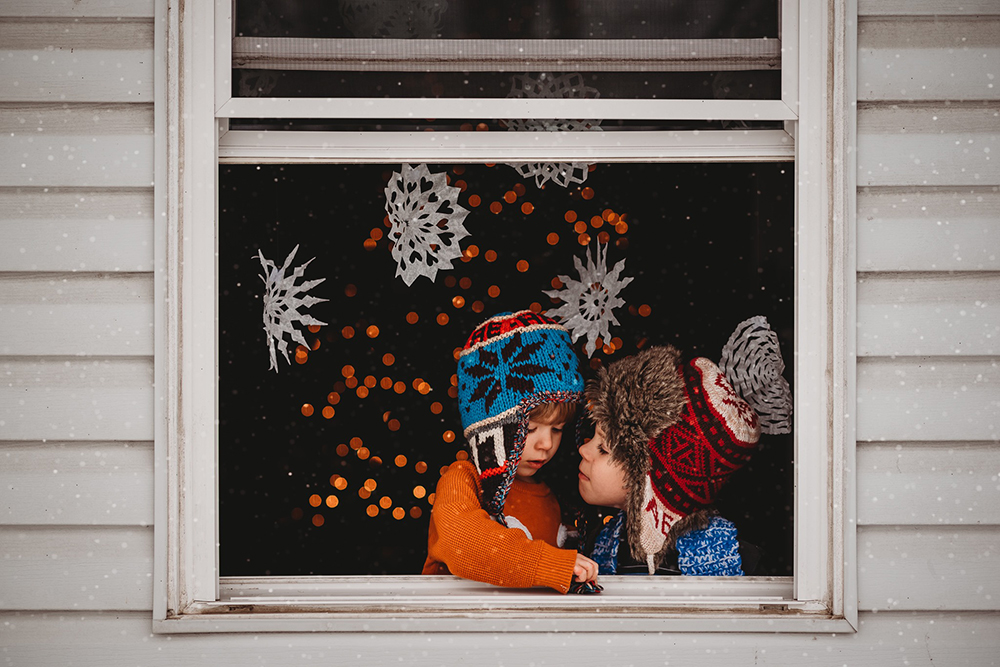
Framing your subject using the environment or architecture is one of our most powerful compositional tools, but in doing so the frame becomes part subject.
So include it properly to make a statement. If this were cropped in a lot closer, the walls around him would become more of a distraction than the beautiful, textured frame that it is. It’s also gone a long way to giving us a good sense of his size.
Clare McKay, Click Love Grow Grad
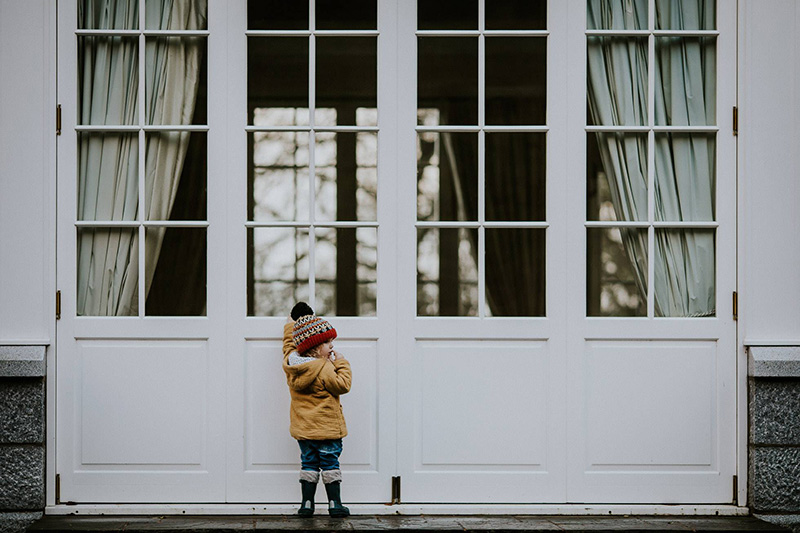
Likewise in this shot – if Morvern had tried to crop close, the windows with all the lines would have cluttered up the shot and worked as a distraction. By including them intentionally, they provide a powerful framd and backdrop.
Morvern Shaw, Click Love Grow Grad
When taking a shot like this, make sure your lines are straight, and you’re not cropping anything that will look accidental.
Dana Whitley, Click Love Grow Grad
5. Dynamic Landscapes
Using negative space is a fantastic way to showcase the environment when taking landscape and travel photos, and for that reason, it’s used a lot, along with a wide angle lens, in landscape and travel photography.
When you have a sky like this, I don’t care who’s in your shot… the sky is your hero. So include as much of it as you can. Let it fill at least half the frame, if not 2/3rds or even more. Some tips when doing this:
- Use a wide angle lens, eg 18-24mm.
- Anchor the sky by including the horizon line and a little of of the environment.
- Ensure balance by including enough of the environment or other subjects to take up at least a quarter of the frame. Any less and their inclusion will feel accidental.
- Ensure you have a straight horizon line!
- Note the bathing boxes on the left in this shot, then the shore line leading the eye into the shot and disappearing before it hits the other side of the frame which would have cut it in half.
- Perfect use of the rule of thirds and leading lines.
Related: Landscape & Travel Photography Beginners Guide
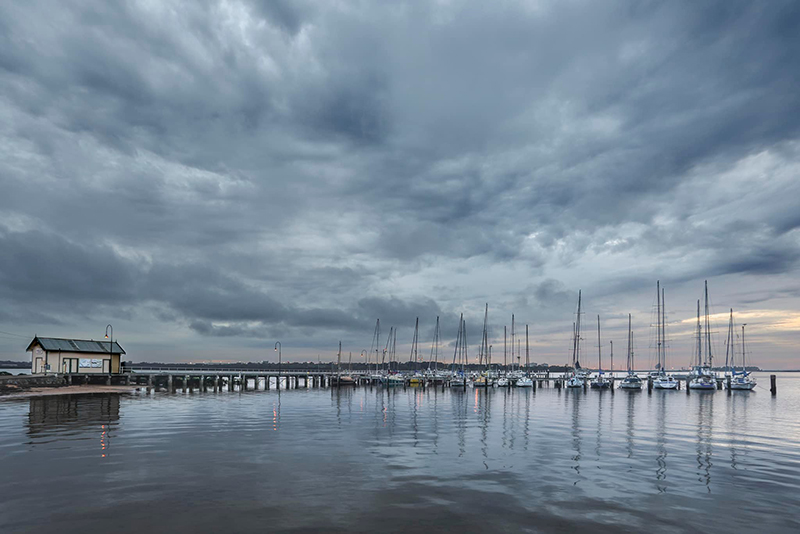
Floss Butterworth, Click Love Grow Grad
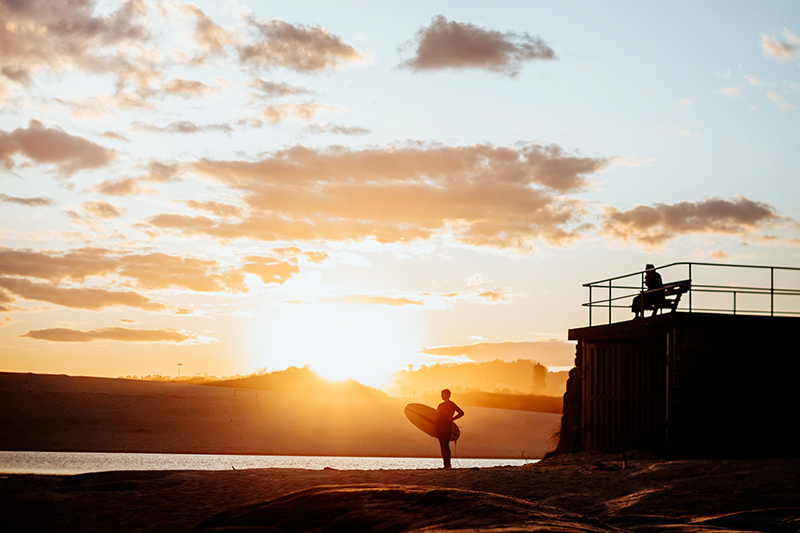
Emma Davis, Click Love Grow Instructor
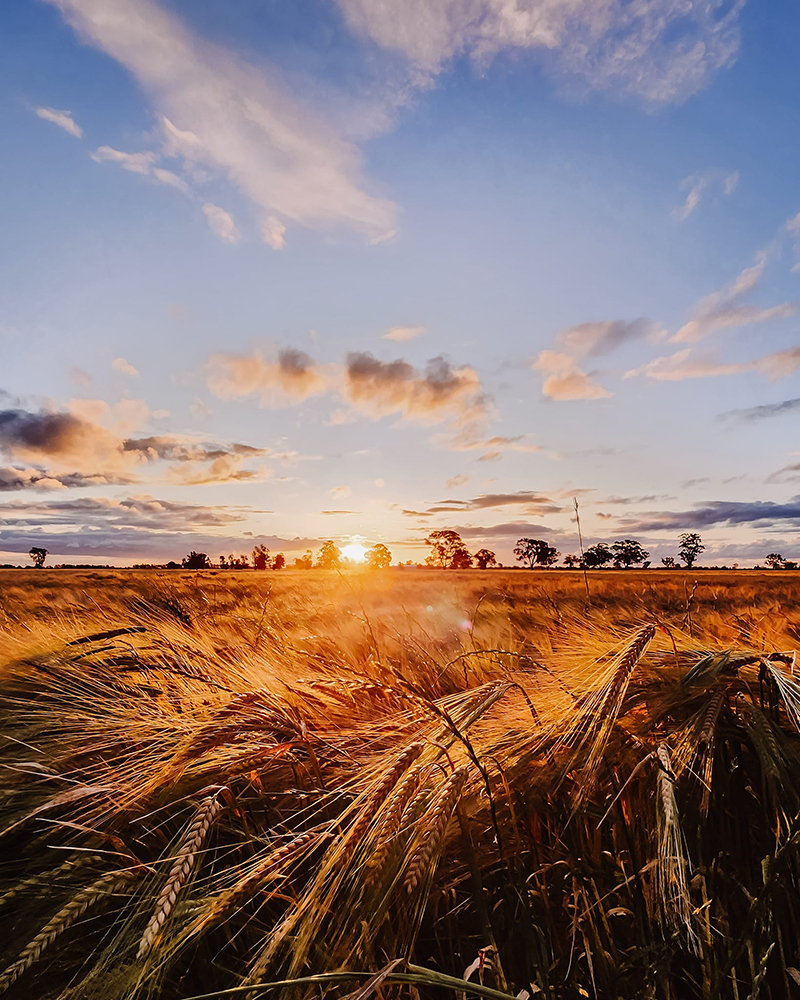
Bec Nave, Click Love Grow Grad
Another shot that includes the sky as hero. Those clouds! Absolutely stunning backdrop for this image.
Related: Get Sharp Photos of Kids in Motion
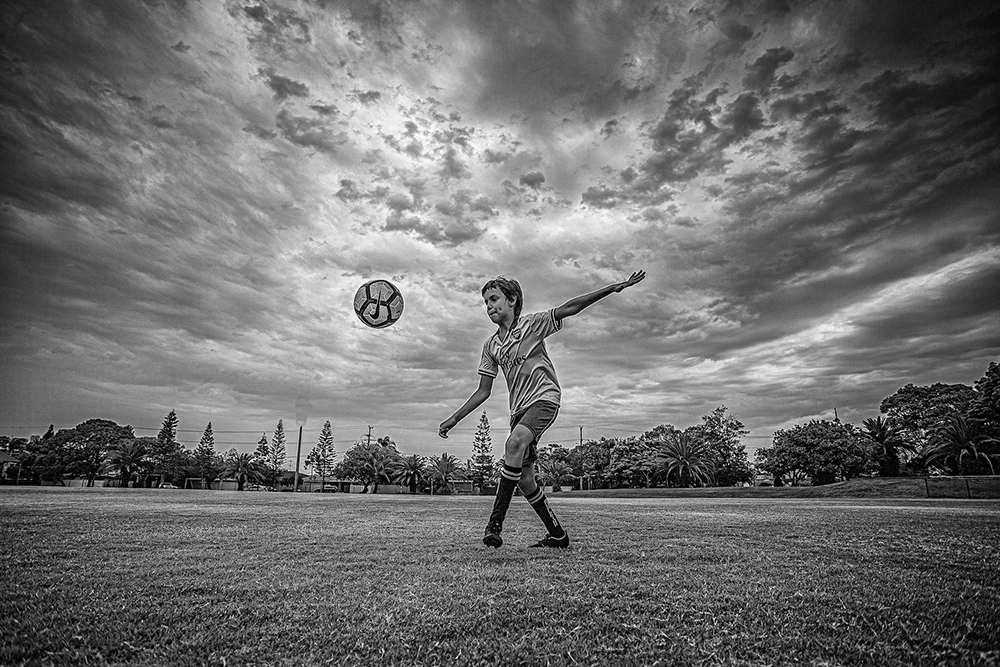
Lenna Castro, Click Love Grow Grad
6. Conveying Size
This one is two-fold. In this shot we see a vast, unspoiled, largely unoccupied space. And its communicated to us in no small way by the inclusion of Heidi’s little guy, who is teeny relative to the environment.
Or you can use it to convey the physical size of your subject… in this shot, for me personally as a parent, it brings out that natural protective urge.
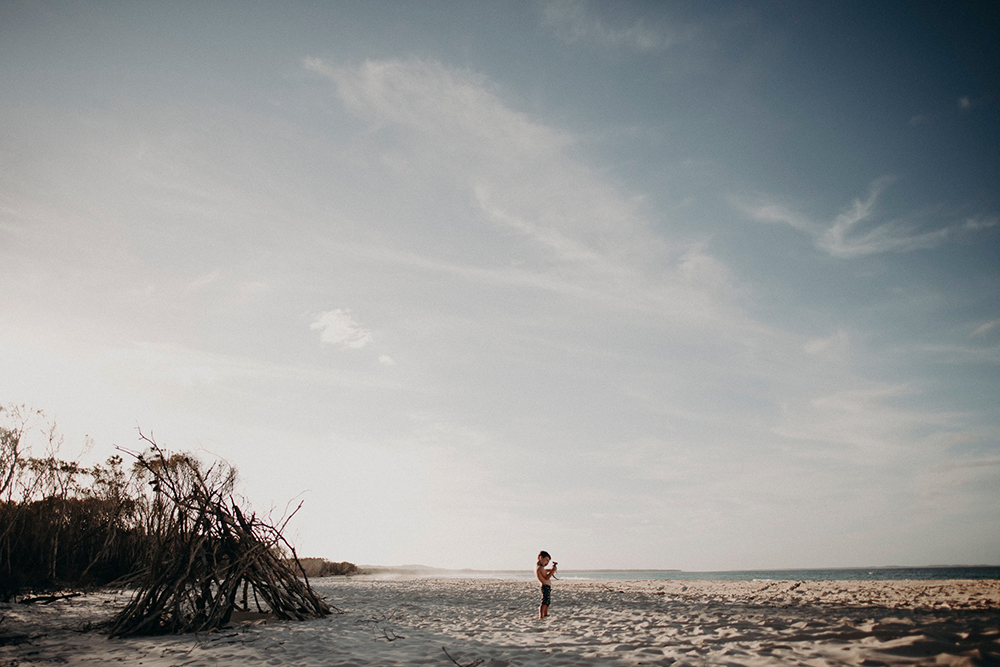
Heidi Talic, Click Love Grow Grad
In this shot, the bare winter trees are a beautiful scene and by framing in a vertical orientation, and placing the kids down on the botton section of the rule of thirds, we get a good sense of the height of the trees, and again the size of this group of siblings and cousins.
If you were to divide the frame into the rule of thirds grid, you’d notice the children reach just over the one third mark – a seemingly small thing but absolutely intentional and provides a balance to the negative space.
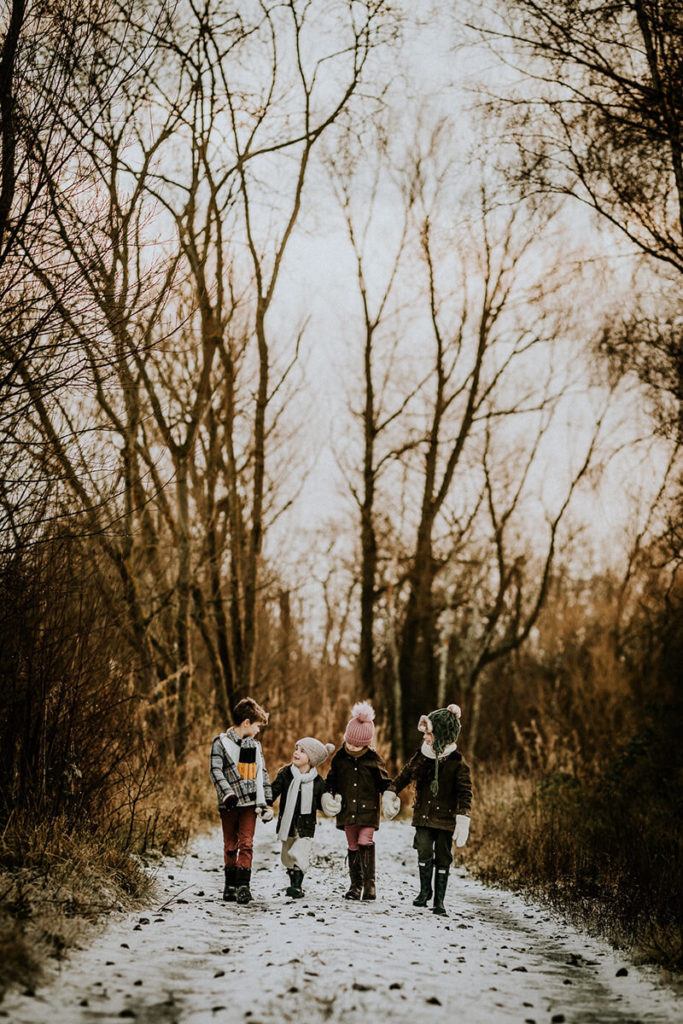
Morvern Shaw, Click Love Grow Grad
Our natural inclination when capturing tiny babies is to get in close, and of course you should! But in stepping back to include the entire bed and the window, we have some context and storytelling elements, AND a sense of her size relative to her parent’s bed. Sigh!
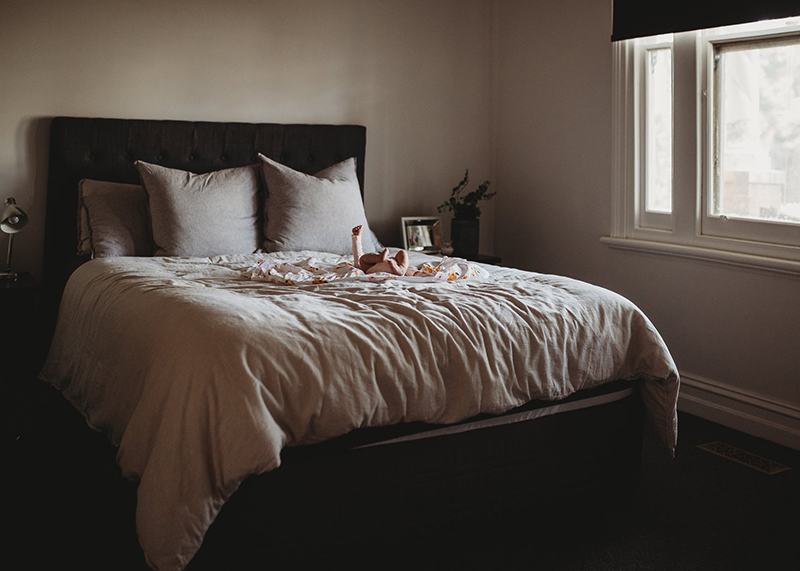
Claire Eastman, Click Love Grow Grad
7. Shadow Patterns
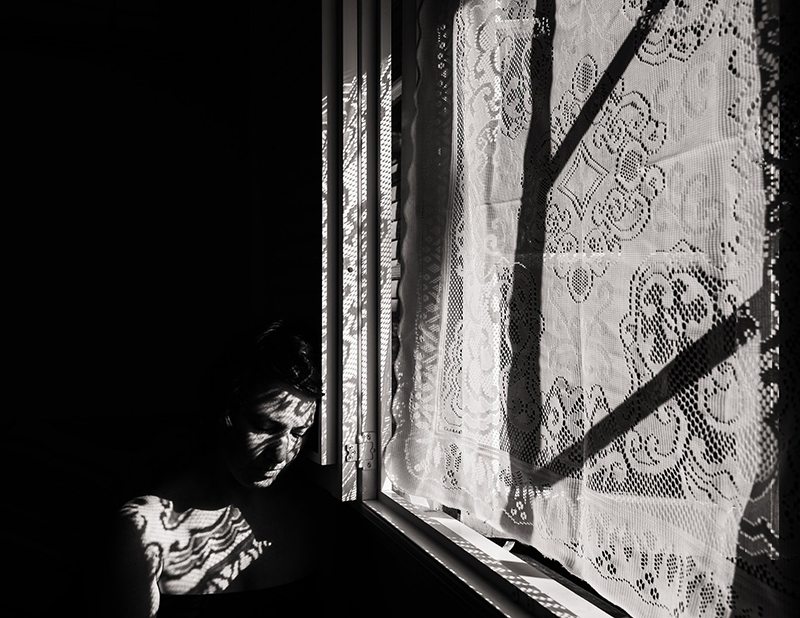
At first glance you might wonder why all the negative space, or the purpose. But notice the framing around the hard light shadows? Linda has spotted her cat sitting in this little pocket of light, obviously loved the play of shadow and light, and wanted to include it.
Note she got down super low so we can really connect with her furry friend.
Look for hard light shadow patterns everywhere and include them as extra interest, or as a subject within themselves.
Once you start seeing, you’ll become addicted! You’ll find them indoors and out early and late in the day when the sun is low in the sky. Head out and look for sharply defined shadow lines created by trees against walls, architecture, play equipment, people.
Expose for the highlights so they don’t blow out, and use an aperture of at least f/3.5 for sharp shadow lines.
Related: Shadow Photography
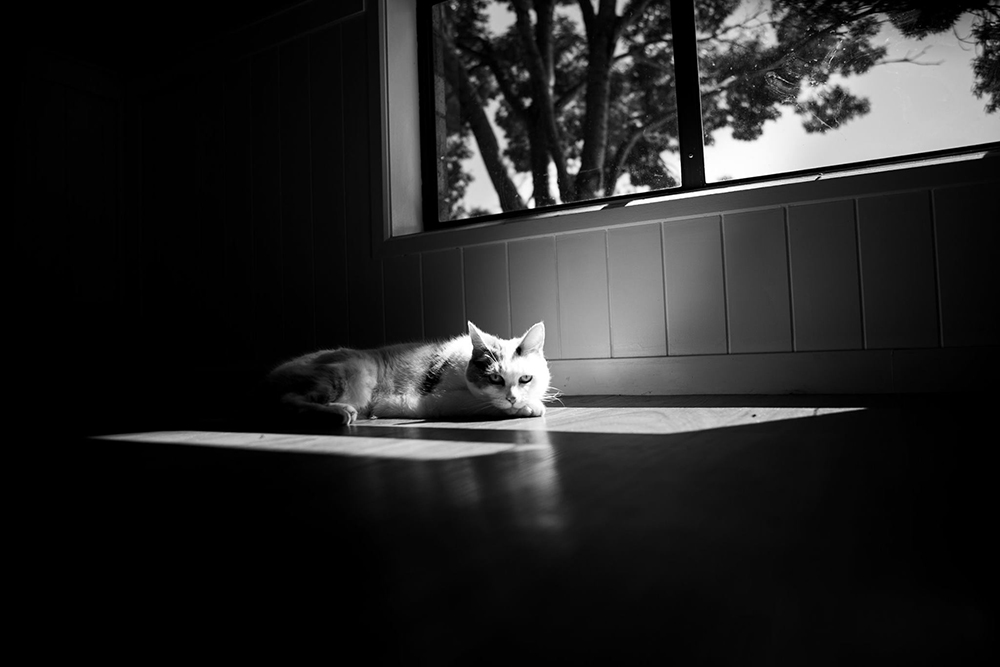
Linda Delnooz, Click Love Grow Grad
Alice Mariette, Click Love Grow Grad
8. Sunset Silhouette
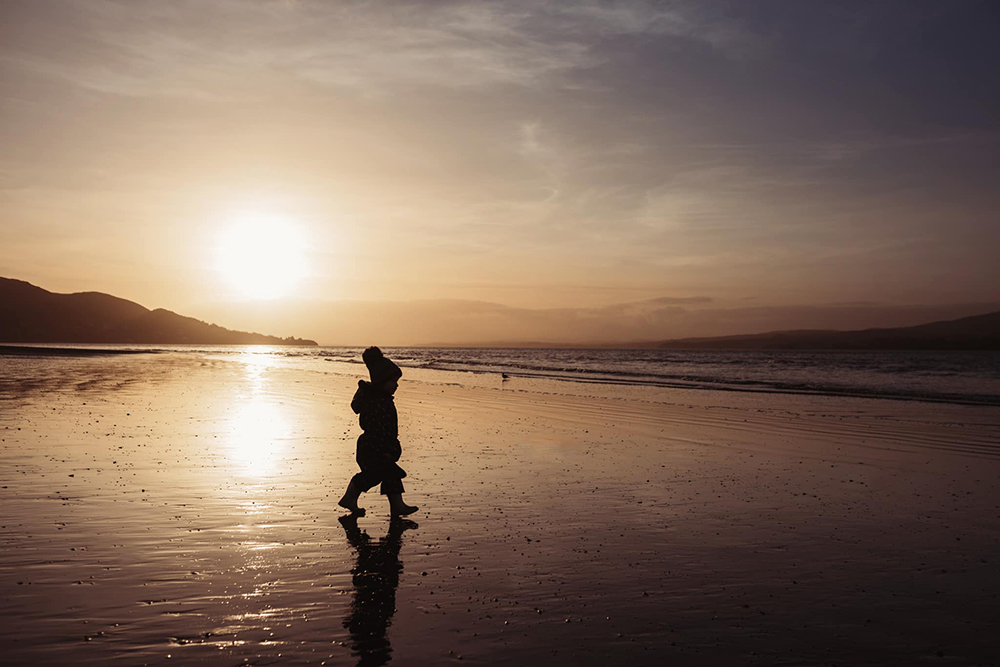
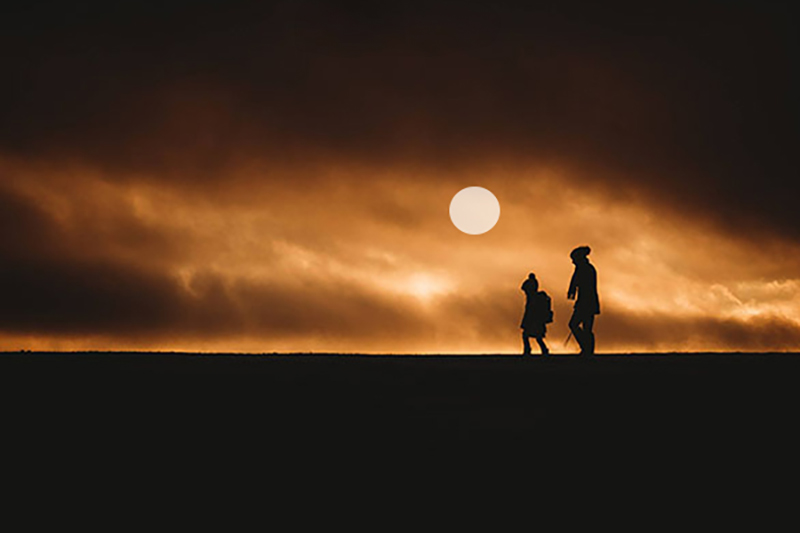
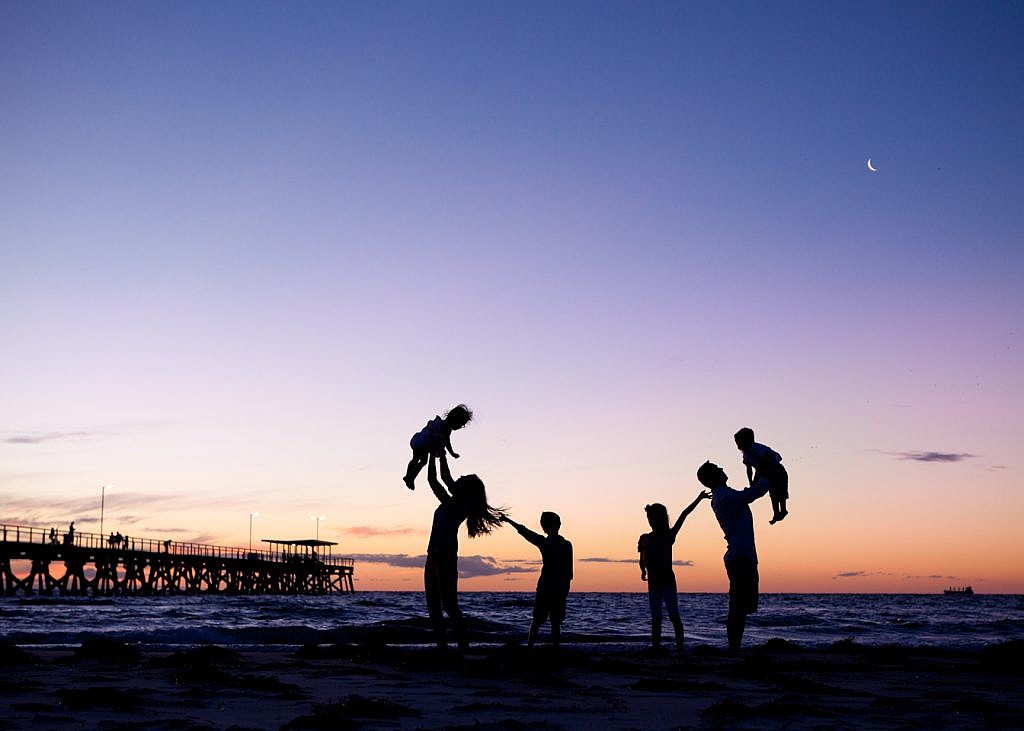
Well it should go without saying you can’t shoot a sunset silhouette without including a vast amount of the sky. All that gorgeous colour, why would you exclude any of it?!
Also, don’t wait for summer. This was shot by Lisa in the dead of an Irish winter!
Related: How to Shoot a Sunset Silhouette
Lisa O’Doherty, Click Love Grow Grad
Morvern Shaw, Click Love Grow Grad
Louise Glendon, Click Love Grow
9. Mindful Framing
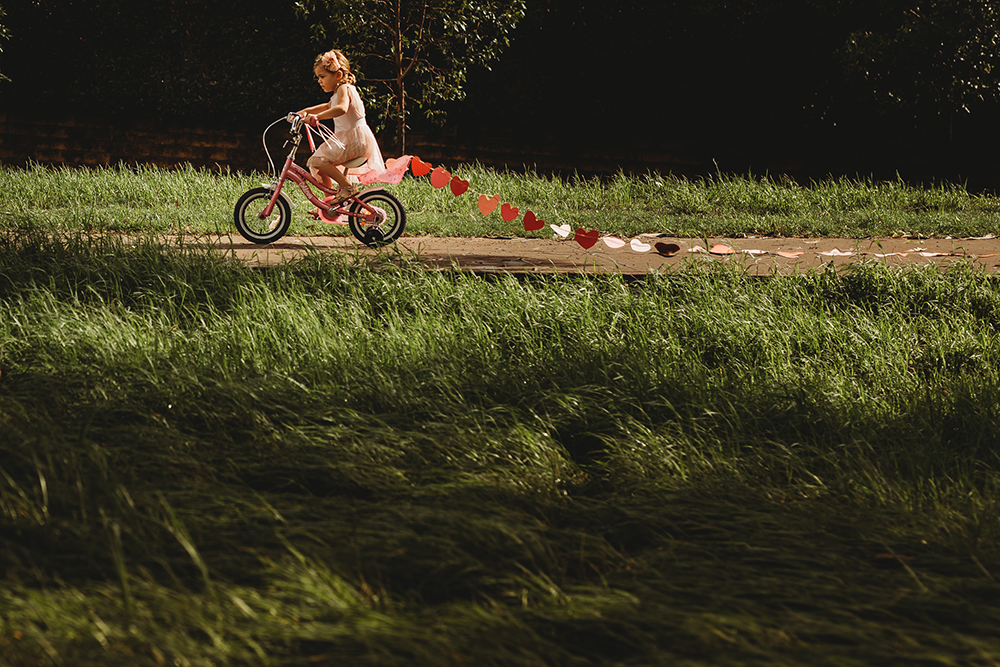
In order for Sue to include both her daughter on the bike and the long trail of hearts, she needed to shoot wide. That in turn was going to give her a lot of negative space at the top, bottom, or both (depending on how she framed) whether she liked it or not. In other words, she had no choice.
So she made the most of it. She got down low, included all of that grass in the foreground and placed her daughter at the top of the frame. She also gave her some space at the left to move into which is really important when we’re capturing subjects on the move.
So the inclusion of that negative space, which was unavoidable, now feels purposeful.
So what if she’d placed her in the middle of the frame, or at the top? Both would have worked, but we think this composition was the most impactful for a few reasons:
- The foreground is a beautiful, uninterrupted expanse of long lush grass.
- The grass appears to be moving in the same direction as her subject, adding to the sense of movement. By contrast the background is punctuated by trees that appear static – not at all unattractive, but not as dynamic as the foreground.
- If she’d placed her in the middle of the frame, the trees would need to be cut off at the very top edge, which would appear accidental.
- By placing her in the top third of the frame, she’s created a larger expanse of negative space which is more striking than cutting it in half. In other words, if you have to include it, make it stand out!
Sue Thorn, Click Love Grow Grad
The next is a storytellng image, not a traditional portrait, so it makes complete sense to include a large part of the ocean and sky for context. Add to that, the combo of blue and green and the backdrop of clouds is very striking.

Emma Davis, Click Love Grow Instructor
10. Room to Move
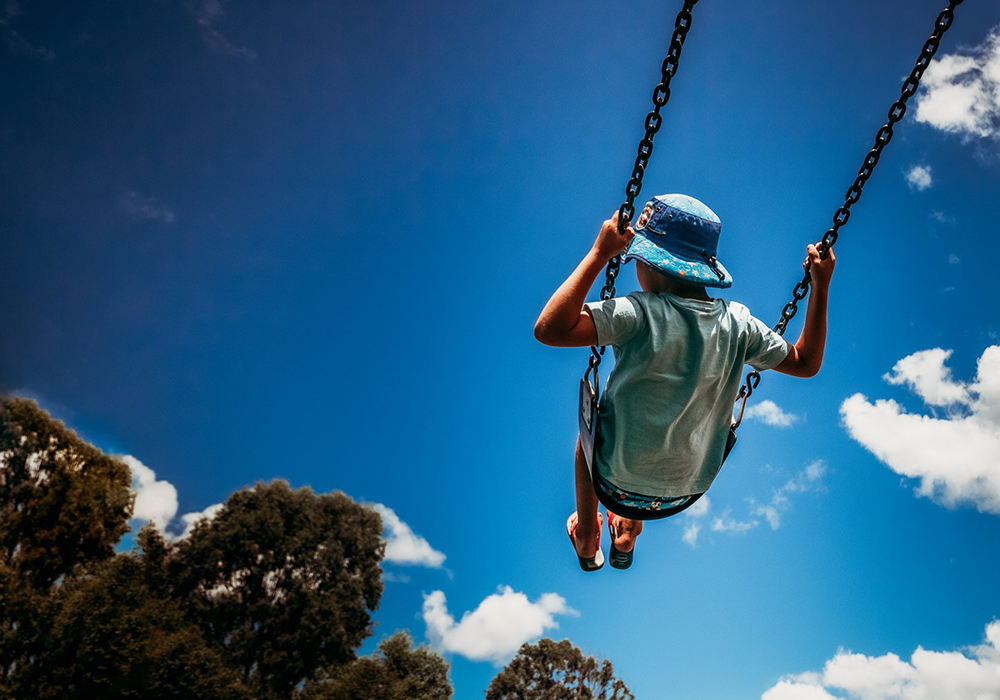
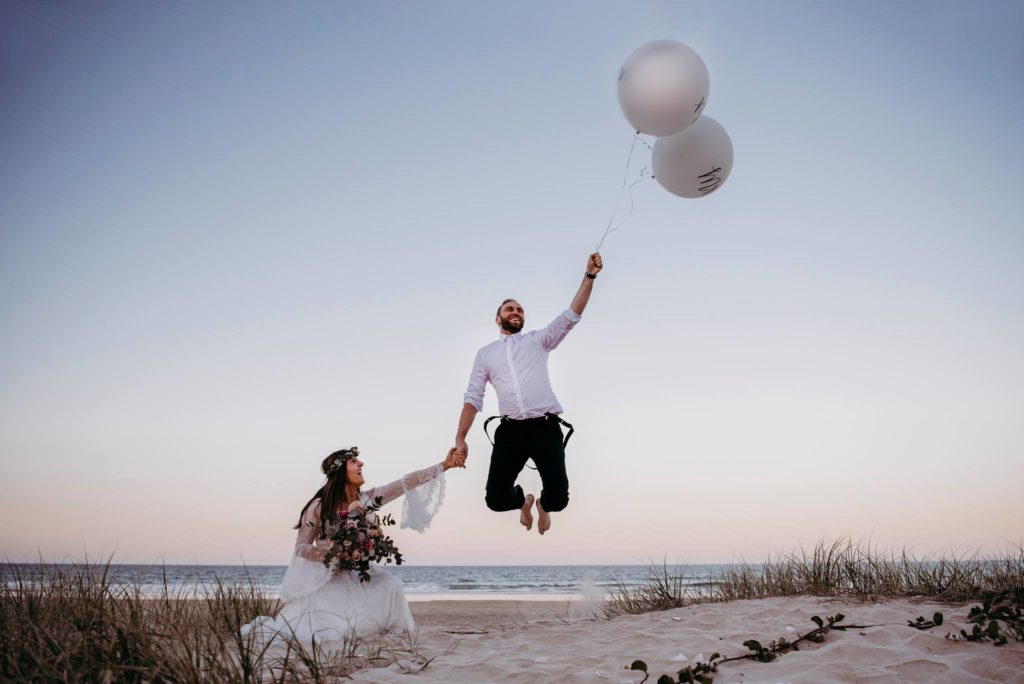
When we photograph action we need to include room in the frame for the suggestion of motion to happen.
The following images achieve that by including loads of negative space using a wide frame, and having the subject moving into the space. In this first shot, by shooting up into the sky, she used the sky as backdrop, enabling her to frame out anything in the environment that would interrupt that negative space.
Kirsty Nealon, Click Love Grow Grad

Kirsty Nealon, Click Love Grow Grad

Heidi Talic, Click Love Grow Grad
In this shot the negative space is above, with the action moving vertically into it.
Heidi Talic, Click Love Grow Grad
I hope you loved these tips and you find them inspiring!
Ready For the Next Steps in Your Photography?
If you’re shooting in manual mode, our Advanced Photography Course is the next step. You will learn to shoot with confidence in any scenario, and push yourself creatively to develop your style through intensive 1:1 critique on your work.
Click HERE to find out more and join the waitlist for our next round coming soon!

Leave a Reply Cancel reply
PRIVACY POLICY & SITE TERMS AND CONDITONS
CLICK LOVE GROW ™ Pty Ltd - COPYRIGHT 2024 ©
x
Join Now
Enter your info below to join the challenge!
Want a friendly reminder when I go live?
Pop in your number and I’ll shoot you a text.
* We will send text reminders for our live calls during the challenge! Reply ‘STOP’ to end or ‘HELP’ for help.
We promise not to ever share your details with anyone or send you spam! Check our privacy policy and terms of service.
Be the first to comment