How To Take Beautiful Easter Pictures of Your Kids
If you celebrate Easter like my family, it’s a special time and a perfect opportunity to capture some beautiful themed Easter pictures of your children.
But we know babies and kids can be hard to light and compose. And unless they’re sleeping, they’re rarely perfectly still so you often end up with dreaded blur.
So today we’ve some super easy styling tips, plus we’re sharing techniques to help you take the stress out of it and capture beautiful easter pictures to celebrate the season!
1. Easy Styling Tips for Themed Easter Pictures
Your special occasion portraits don’t need to be styled with props, but if you want to create gorgeous themed Easter pictures, you don’t need to be a stylist. If you’re not entirely confident in that area, keep it simple.
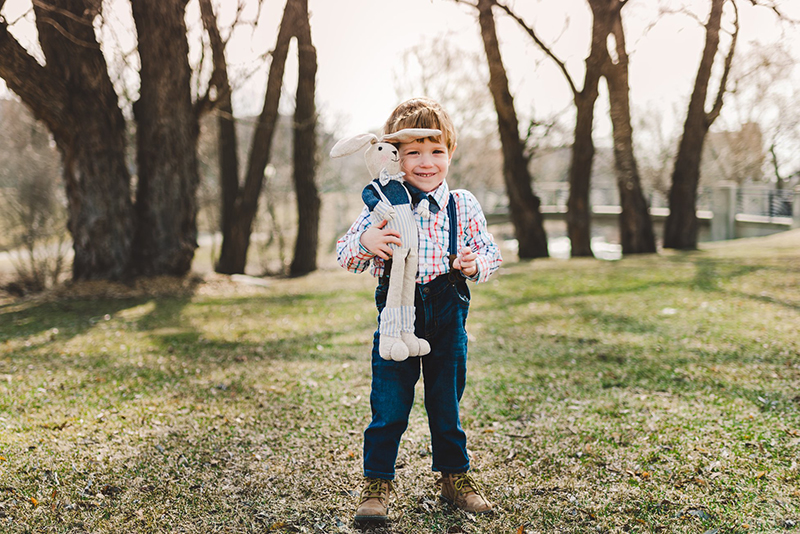
This shot is about as easy as it gets in terms of styling. A bunny softie, matching tones, and easy soft light outdoors results in a beautiful portrait with subtle storytelling power.
Meaghan Marmillod, CLG Advanced Grad
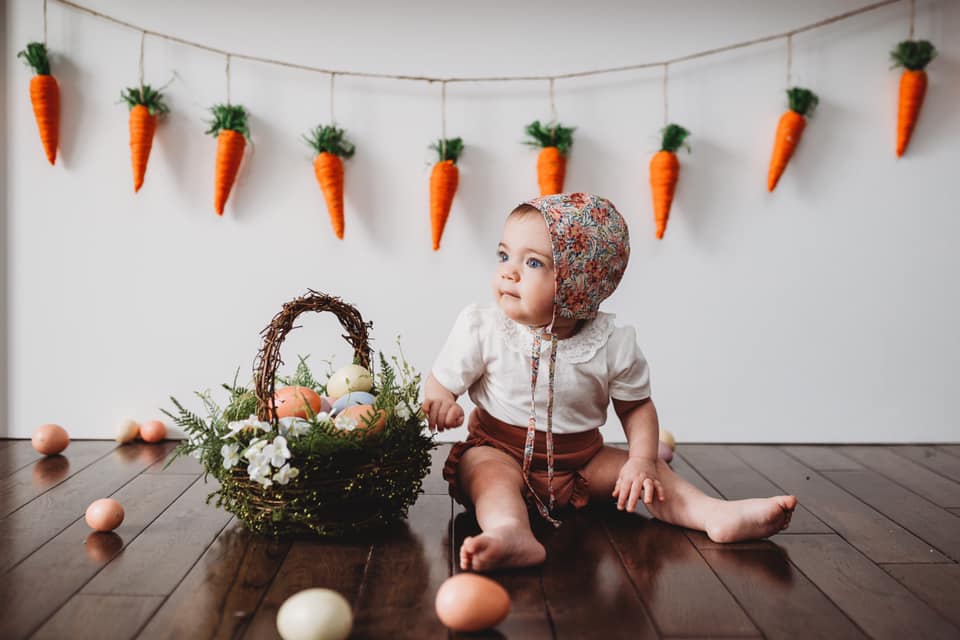
For children and babies that are sitting up, a simple themed garland with a pop of colour is all you need. Also, keep their clothing neutral with block colours or really classic patterns such as spots or florals in muted tones like this image below.
If you feel confident enough to add more elements, this simple basket of greenery and pastel eggs is understated and beautiful, and the wicker adds some gorgeous texture.
Charlie O’Neill, CLG Advanced Grad
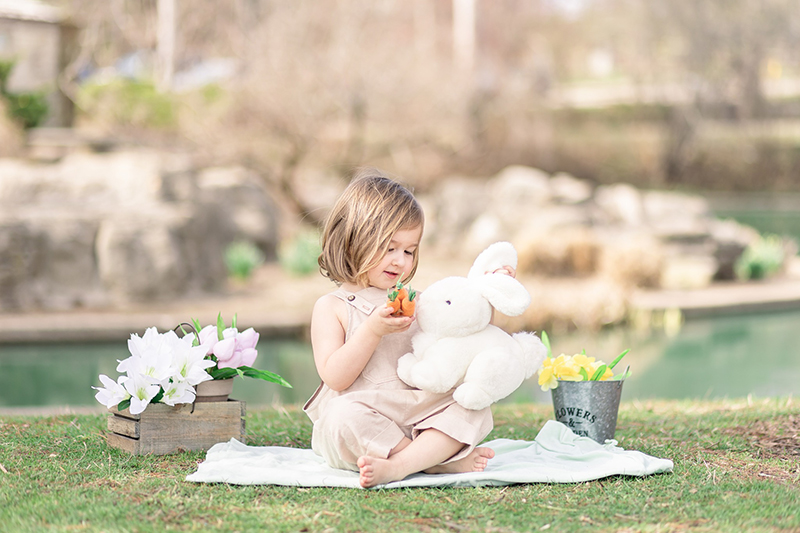
Here’s another idea with just a little styling that won’t overwhelm you in the planning.
Laura Boyd Clark, CLG Community Member
Studio Style
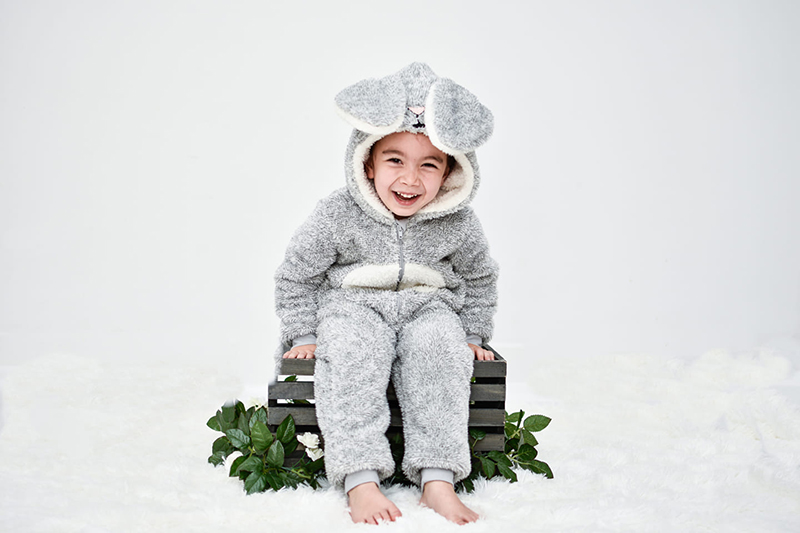
If studio style is your thing, you don’t need a studio to do it. In fact, all you need is a plain wall and completely uncluttered surroundings. If you have simple timber floors these look great against a plain wall. If not, you can add a throw and in this shot below, the texture of the fur throw blends easily with the line where it meets the wall.
Never use bed sheets as backdrops – they’re not heavy enough to hang well and creases show up in photos.
Abby Wallis, CLG Community Member
If you want to level up your styling in your Easter pictures even more but it doesn’t come naturally, try this easy 3-step styling process:
- Choose a colour palette and make all your styling choices around those colours. You can find palettes on Pinterest, or artist sites like Colourhunt.
- Include textured and smooth fabrics and elements for contrast such as linen, hessian, woollen knits, faux fur, natural cotton, etc.
- Start by loosely layering 2-3 fabrics or throws underneath the baby, then scatter other items around until you’re happy with the arrangement.
If in doubt about the final result, remove some of the elements to determine what might not be working.
Related: DIY Cake Smash Session
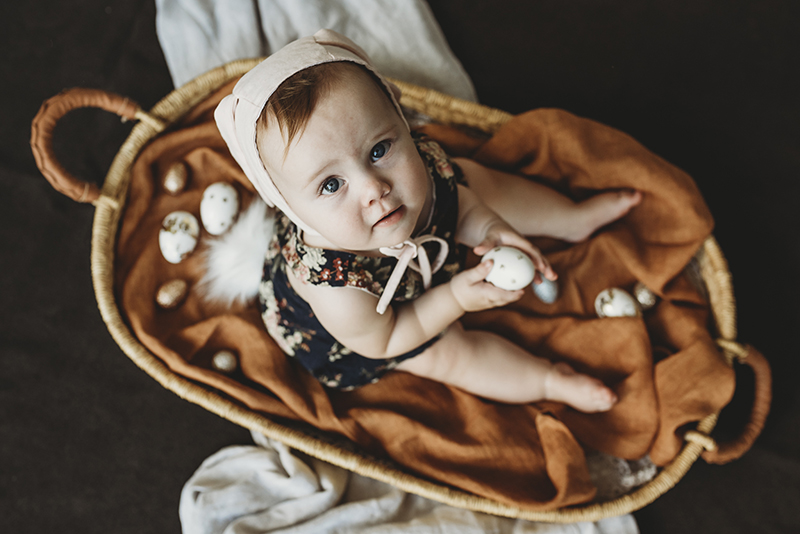
Heidi Talic, CLG Advanced Grad
The inclusion of some natural elements such as branches or flowers are a great way to soften hard lines.
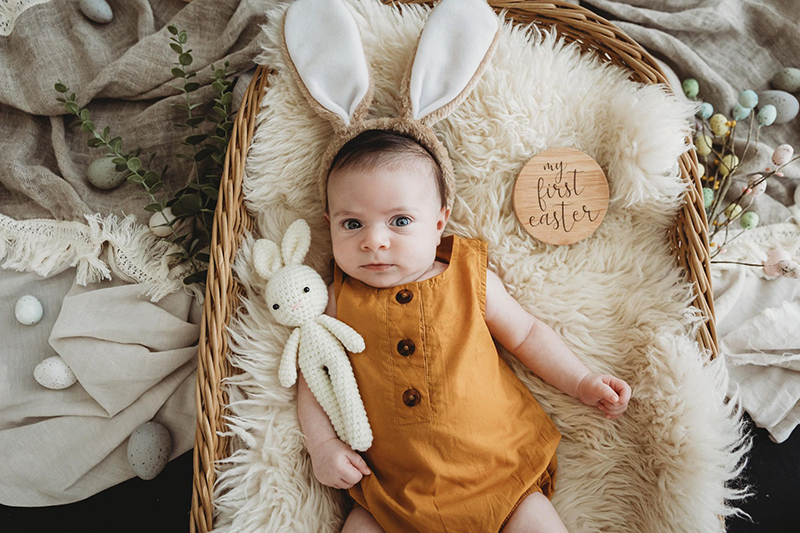
Sue Thorn, CLG Advanced Grad
2. Plan For Success
I won’t sugar coat it… capturing babies and kids is not easy! When I was first learning, it’s fair to say most of the sessions I tried to do with my kids were a complete disaster!
But it doesn’t have to be that hard.
Here’s a few things you can do to make sure you get the shots you want:
Get Ready Before You Bring The Kids In
I can’t stress this enough. Set up everything you want to include, and make sure you’re happy with the way it looks. Take some test shots and get your settings right. Check the light… is it a good spot? Is the angle to the light source going to work? Are all the elements working together? Do you have room on your memory card and is your battery at least half charged?
Then and only then, bring the kids in. If a 3yo has to wait while you do all that, you’ve lost him before you even started.
Keep Expectations Real
Aim for 1 or 2 nice shots and anything more is a bonus. You’re not going to frame and hang dozens of variations, so don’t stress yourself and the kids out trying to get those extra shots that might end up living on your hard drive for all eternity.
Aim For Candid Smiles
This next one is THE best advice I can give for your Easter pictures (every picture in fact) – don’t ask your children to smile for the camera.
Instead, engage them. Play with them. Sing funny songs, be silly. Take the camera away from your face intermittently so they can see you – babies in particular love faces so let them see you in between shots.
In this way you give them something to smile and laugh about and you won’t need to ask them to do it!
Make it about interacting with you, not the camera.
Read this article below – I’ve shared some proven techniques from myself and friends who are seasoned kinder photographer that will get your kids laughing and smiling for the camera naturally, and not running away
Related: 10 Tricks to get Natural Smiles from Kids

Sarah Sinclair, CLG Enthusiast Grad
3. Great Poses for Kids & Babies
When it comes to taking photos of kids and especially babies, a mistake lots of people make is to take the shot at your adult height. It means you’re shooting down on them at an angle which hides their face, obscures their expressions, and captures the top of their head.
Instead, get down and compose your image at eye level and the result will be a much more visually appealing photo.
Related: Get Instantly Better Photos of Kids
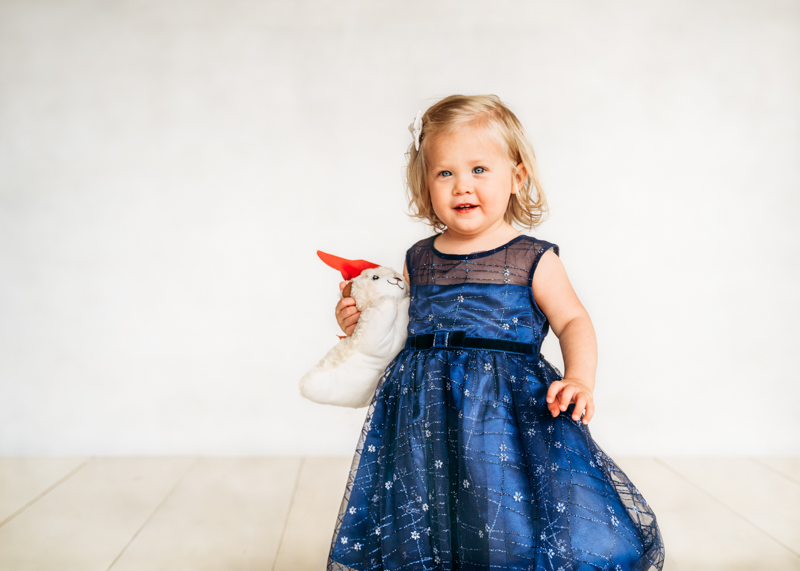
Amanda Marenghi, CLG Enthusiast Grad
That’s not to say you should never capture a baby from above. But if you do, make sure they’re looking up at you.
Related: Photographing Your Baby’s First Milestones
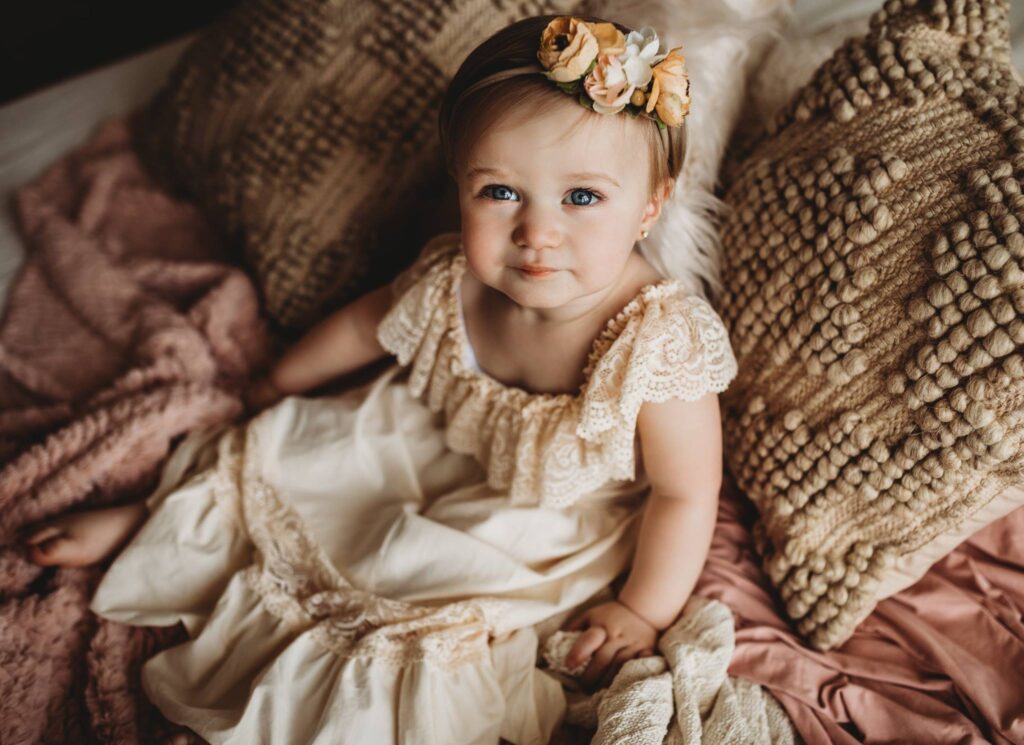
Kecia Killian, CLG Advanced Grad
For newborns and babies who aren’t sitting yet, place them on their back and stand over them and shoot directly down, or at an angle while standing at their feet. Just be careful not to get down so low that you see up their nose.
Give yourself room to get them in the frame so that you don’t cut off any fingers and toes. Use a step stool if you need some extra height.
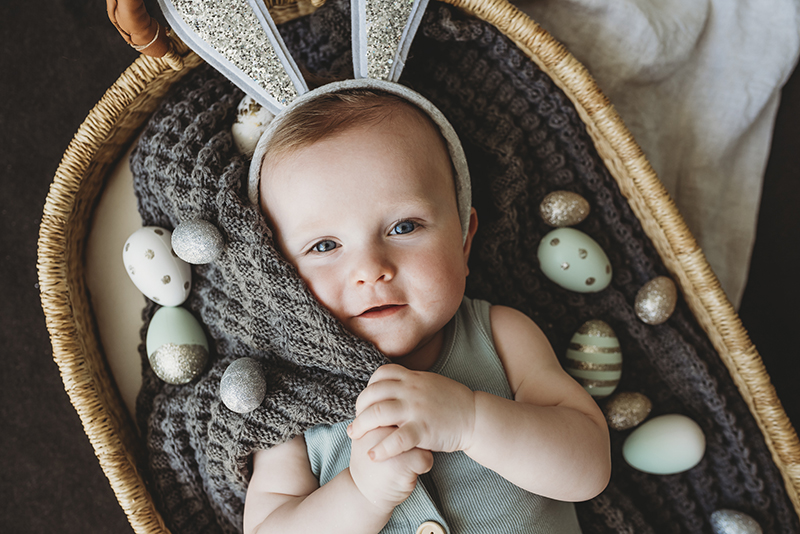
An alternative to the ‘baby on their back pose’ is to roll them over and capture them side on.
You can also take a top down shot of baby in this pose and you’ll get a lovely profile shot of that button nose and luscious lips!
Related: 101 Newborn Photo Ideas

Megan Browne, CLG Instructor
You can capture some great moments with babies that are getting up on their knees or crawling. Get in front of them at eye level… and over them for cute shots like this!
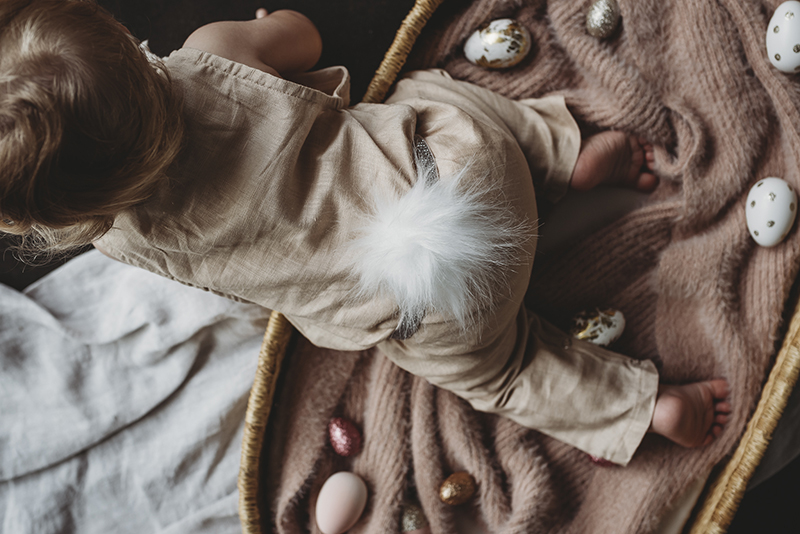
Heidi Talic, CLG Advanced Grad
Posing Multiple Children
When it comes to capturing more than one child together, don’t over complicate the posing.
- If you have a baby that is still quite young, lay your older children down beside the baby with the light coming down from the top of their heads.
- For babies that are sitting, pop them in between the legs of your oldest child, and put younger children or toddlers on the side.
- In combinations where there’s no baby, either lay them down side by side and capture them from above looking down on them, or have them sit side by side, or lay them on their tummies and get down to their level
- Create connection – close any gaps between them without making them look too squashed.
Even if your baby isn’t a newborn and their siblings are not toddlers, check out this blog post below. It has loads of posing ideas, and fantastic tips for creating connection and keeping young kids interested.
Related: Toddler & Newborn Photography Guide
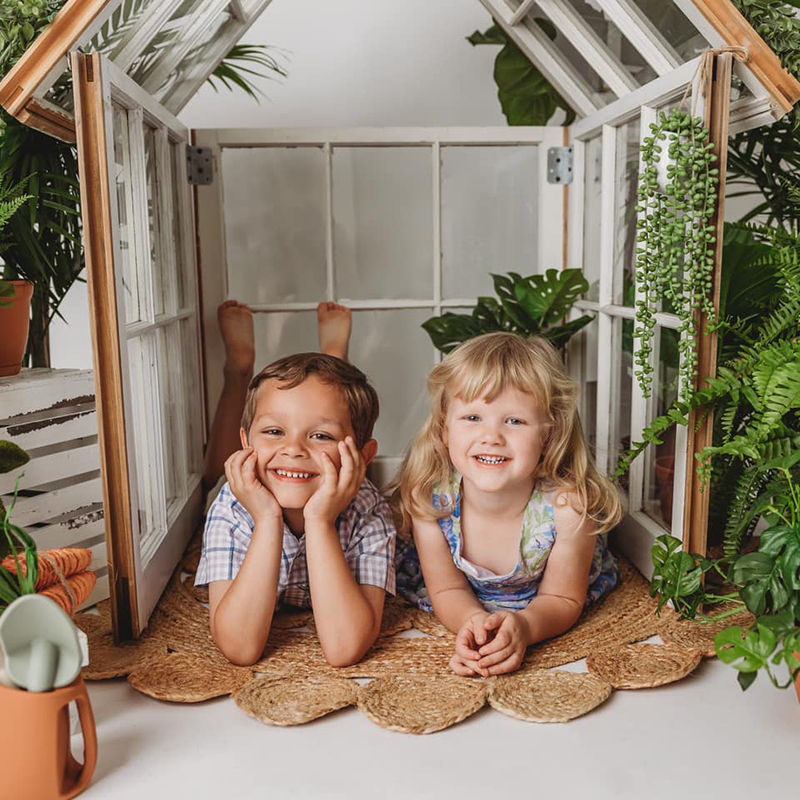
Rebekah Taylor Pittman, CLG Advanced Grad
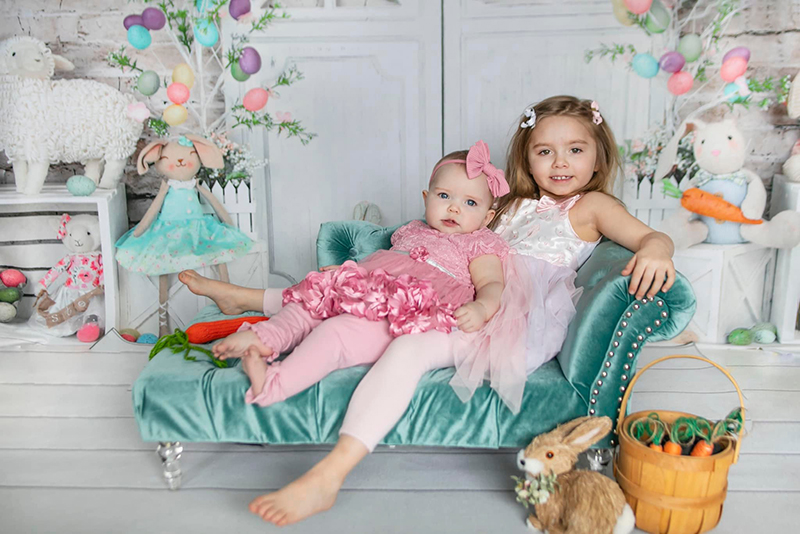
Beth Stoycoff, CLG Community Member
4. The Best (& Easiest!) Light
Ok so by now you might have some great ideas… but if you don’t get the light right, it won’t matter how stellar your styling is.
Light is everything and it will seriously make or break your shot! And one of the easiest way to light portraits is using soft, natural light.
Soft light is the most flattering for portraits, because it scatters gently over the features and doesn’t create harsh shadow lines. You can find it in open shade outdoors, or near windows and doorways.
How To Recognise Soft Light
The graduation between the light and shadow areas will be so subtle it can be hard to define exactly where the light ends and shadow begins. By contrast, harsh light tends to have very defined lines between the light and shadow. It can also be very bright and jarring.
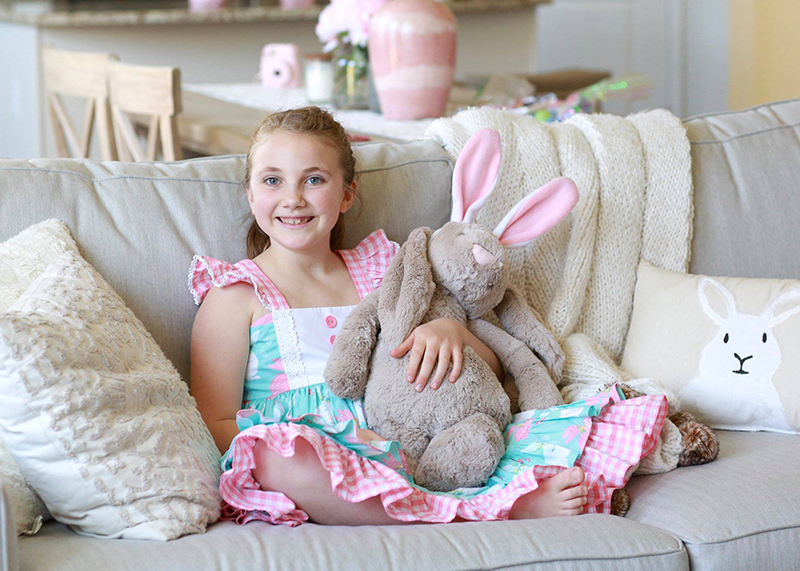
Here’s an example of a beautiful soft light portrait, taken indoors near window light. Notice those beautiful catchlights in her eyes? You want that, it brings the eyes to life and adds an irresistable sparkle!
Related: Finding Soft Light Indoors
Melanie Nebbeling, CLG Advanced Grad
Outdoor Soft Light
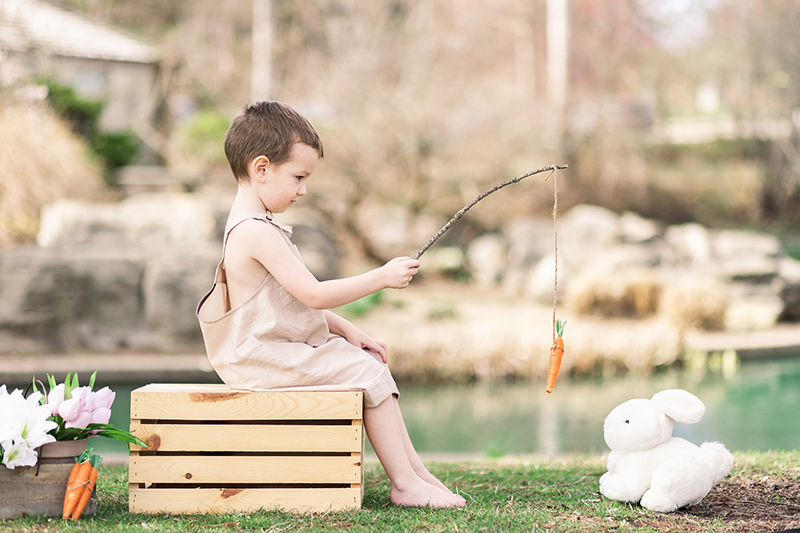
You can find soft light outdoors in open shade, eg. a patio or gazebo, or the shade of a tree. Just make sure the tree isn’t creating dappled light on faces!
You’ll also get soft light on overcast days, as it diffuses the direct sun, or early or late in the day during the golden hour when the sun is low on the horizon.
Related: Golden Hour Photo Tips for Beginners
Laura Boyd Clark, CLG Community Member
How To Position For The Best Look
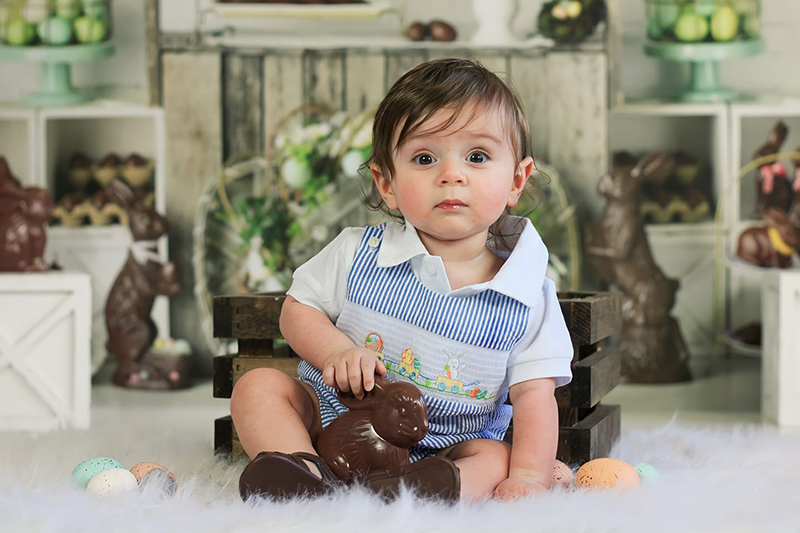
For older kids and babies who are sitting or on their tummy, position them with the light coming at them from the front and slightly to the side (roughly 45 degree angle). This creates some pleasing shadows on the opposite side to the light source.
Beginners to photography often try to avoid any shadows in their photos, but this is a mistake. Gentle shadows are desirable as they add depth and interest, help sculpt your subject’s features, and avoid a flat photo look.
Amie Rigsby, CLG Community Member
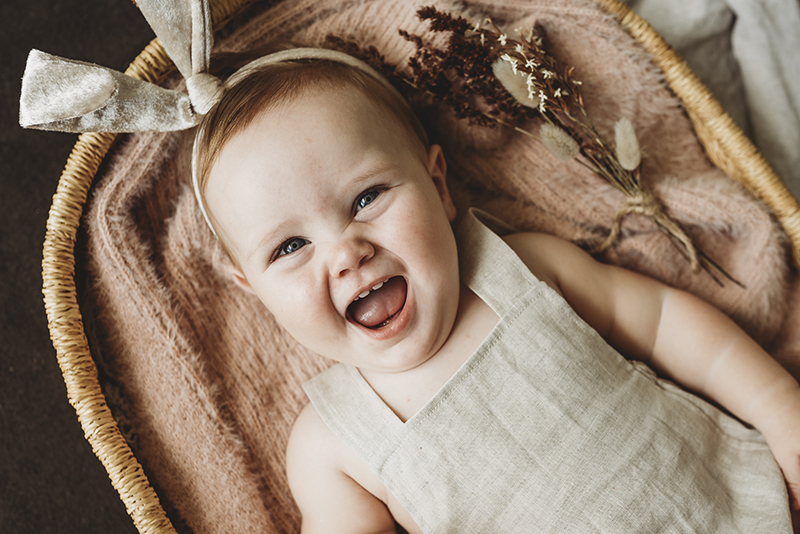
For babies that aren’t sitting up yet, place them on their back and light them from the top down. This means the light should be positioned up near their head so it can wash down.
A mistake I often see beginners making is lighting them from the feet up, which illuminates their nostrils and creates shadows in all the wrong places. Light them top down in soft natural light and you’ll never have this problem!
Heidi Talic, CLG Advanced Grad
If unsure, check for catchlights which are those little dots of lights in their eyes. If you see them, you more than likely got it right!
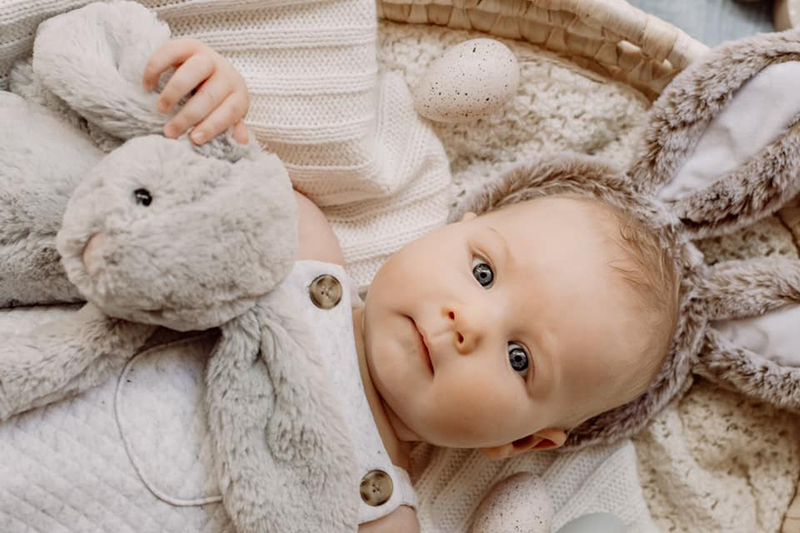
Caitlin Schaepman, CLG Enthusiast Grad
Position them with the light source behind and to the side of their head so you can light them from the “top down”. In this shot below, you can clearly see the light source is top left of frame and moving down. There’s less light around the room so the result is a beautifully dramatic directional light shot.
In the shot above, the baby is positioned and lit in exactly the same way but gets a different look because there’s a lot more ambient light in the room and the shadows are more subtle.
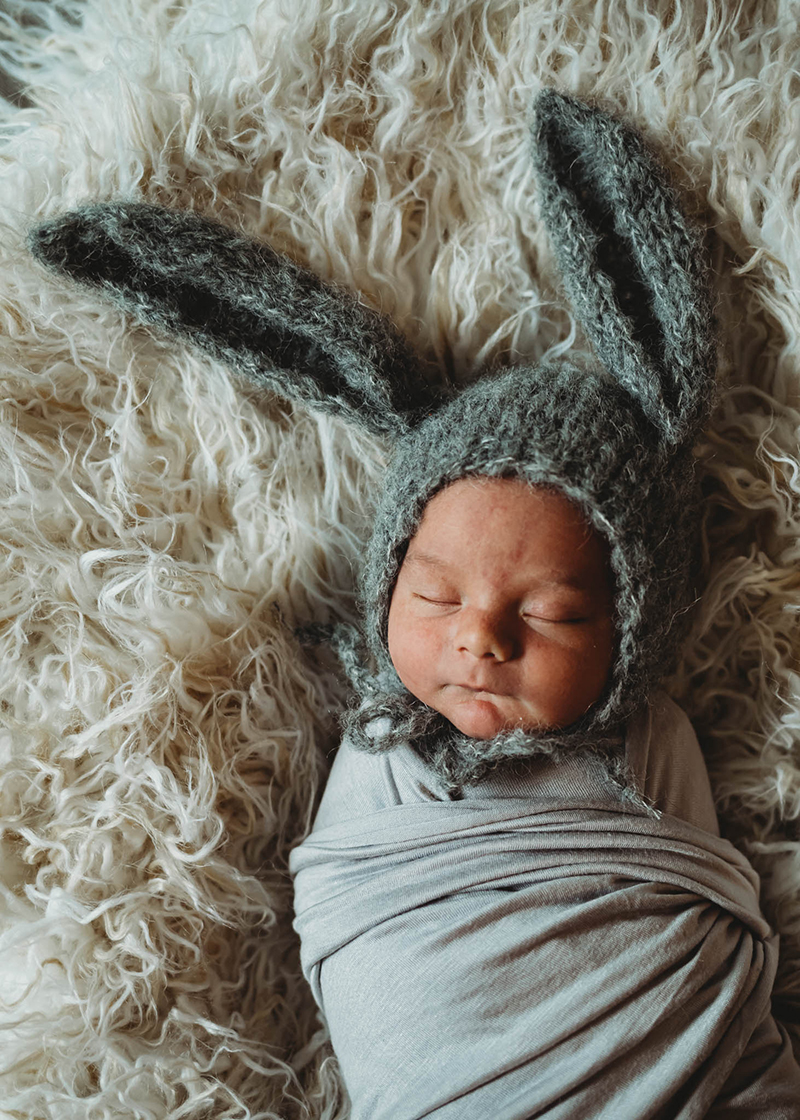
Pam Hart, CLG Advanced Grad
If the room isn’t filled with ambient light in all directions and you’re posing more than one child, place the smallest closest to the light source so that the older child/ren don’t cast them fully in shadow.
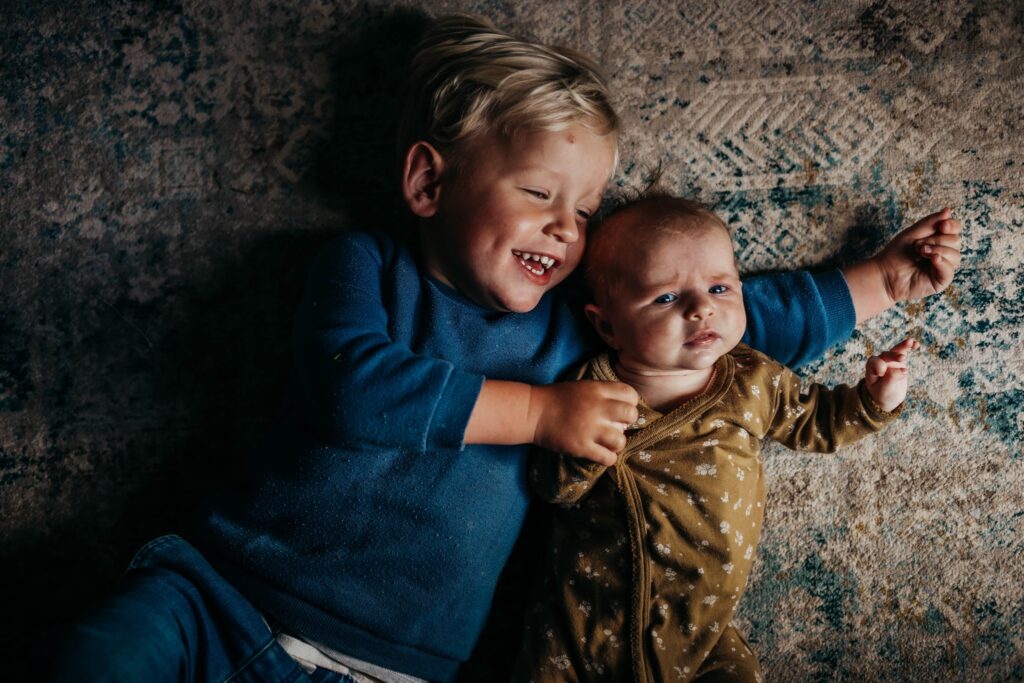
Coral Hagan, CLG Advanced Grad
A Great Natural Light Location (and everyone has one!)
Yep that’s right, your bed. Assuming you have a good amount of light in your bedroom, this location is perfect for portraits of babies, toddlers and small children for loads of reasons:
- It’s comfortable!
- It’s the easiest spot to pose small children together
- There’s almost always a nice big window at the side of the bed, giving you some gentle directional light
- The bed gives you a way to raise your kids up so you can more easily get to their eye level
- You can use their height to duck down and play peek-a-boo
- The bedhead gives you a ready made backdrop to hang a garland
- Beds are almost always butting up against a wall, which makes it very easy to avoid cluttering up the shot.
Top tip… horizon lines aren’t just for landscapes. In this instance it’s the bedhead, and always make sure your horizon line is straight.
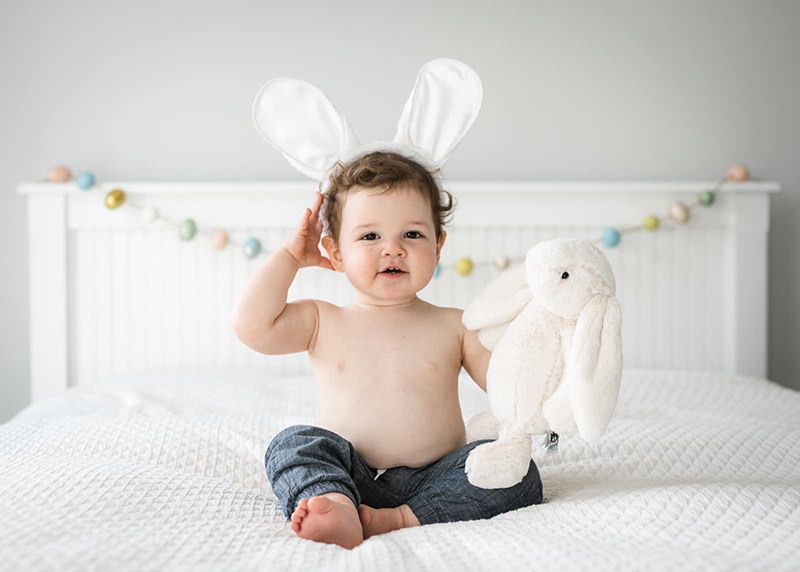
Courtney Yegian, CLG Advanced Grad
5. Make Your Subject The Star
The biggest difference between snapshots and beautiful, professional looking portraits is something we all love… a blurry background.
It helps draw the eye to our subject by creating a separation between them and everything else around them, and makes sure they’re the obvious star of the shot.
So how do you do that? By shooting in manual mode and choosing a wide aperture, eg. f/2.5 to around f/4. If you’re not already shooting in manual mode, try this article as a first step to understanding how it works.
Related: How to Shoot In Manual Mode
Where To Focus
Be sure that focus locks on your subject’s eyes, and the one closest to the lens will give the best results. If your subject is facing the lens straight on, any eye will do.
Related: Master Your Focus
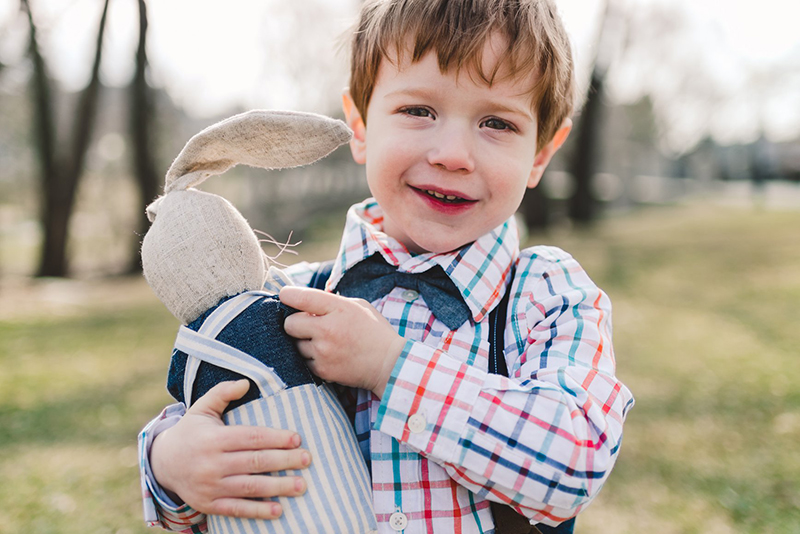
Meaghan Marmillod, CLG Advanced Grad
Get Blurry Backgrounds With Your Kit Lens
If you have a kit lens, you will find when you’re zoomed right in you can only open your aperture to f/5.6. But that’s ok, you can still get blurry backgrounds with a kit lens.
Try this:
- Shoot at f/5.6
- Zoom in as far as your lens allows
- Put LOTS of distance between your subject and the background (see the image below)
If you want to understand more about how this works, check out this article below
Related: How To Get Blurry Backgrounds (Even With a Kit Lens)
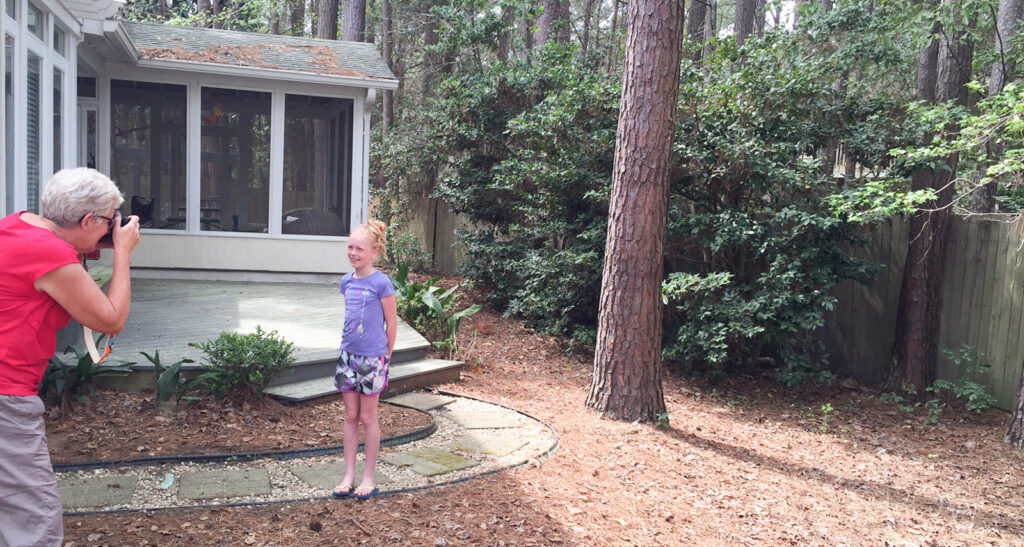
6. Get Sharp Photos
There’s lots of reasons why we can end up with blurry photos. But the most common cause is not having a shutter speed that is fast enough to freeze the motion. Even babies who aren’t sitting still can move just enough to end up with blurry photos. All it can take is a laugh or a wave of the hand and you’ve.got.blur.
Related: 6 Reasons Why You’re Getting Blurry Photos
The solution is to shoot in manual mode, and make sure your shutter speed is fast enough to freeze any unexpected motion.
For a baby that is quite young and laying on their back, a shutter speed of no slower than 1/200 will get sharp photos. If they’re sitting up and moving a little more whilst staying seated, try minimum 1/250 or 300. Faster is fine if you have enough light, but try not to shoot slower than these suggested settings.
Related: Getting Out Of Auto Mode
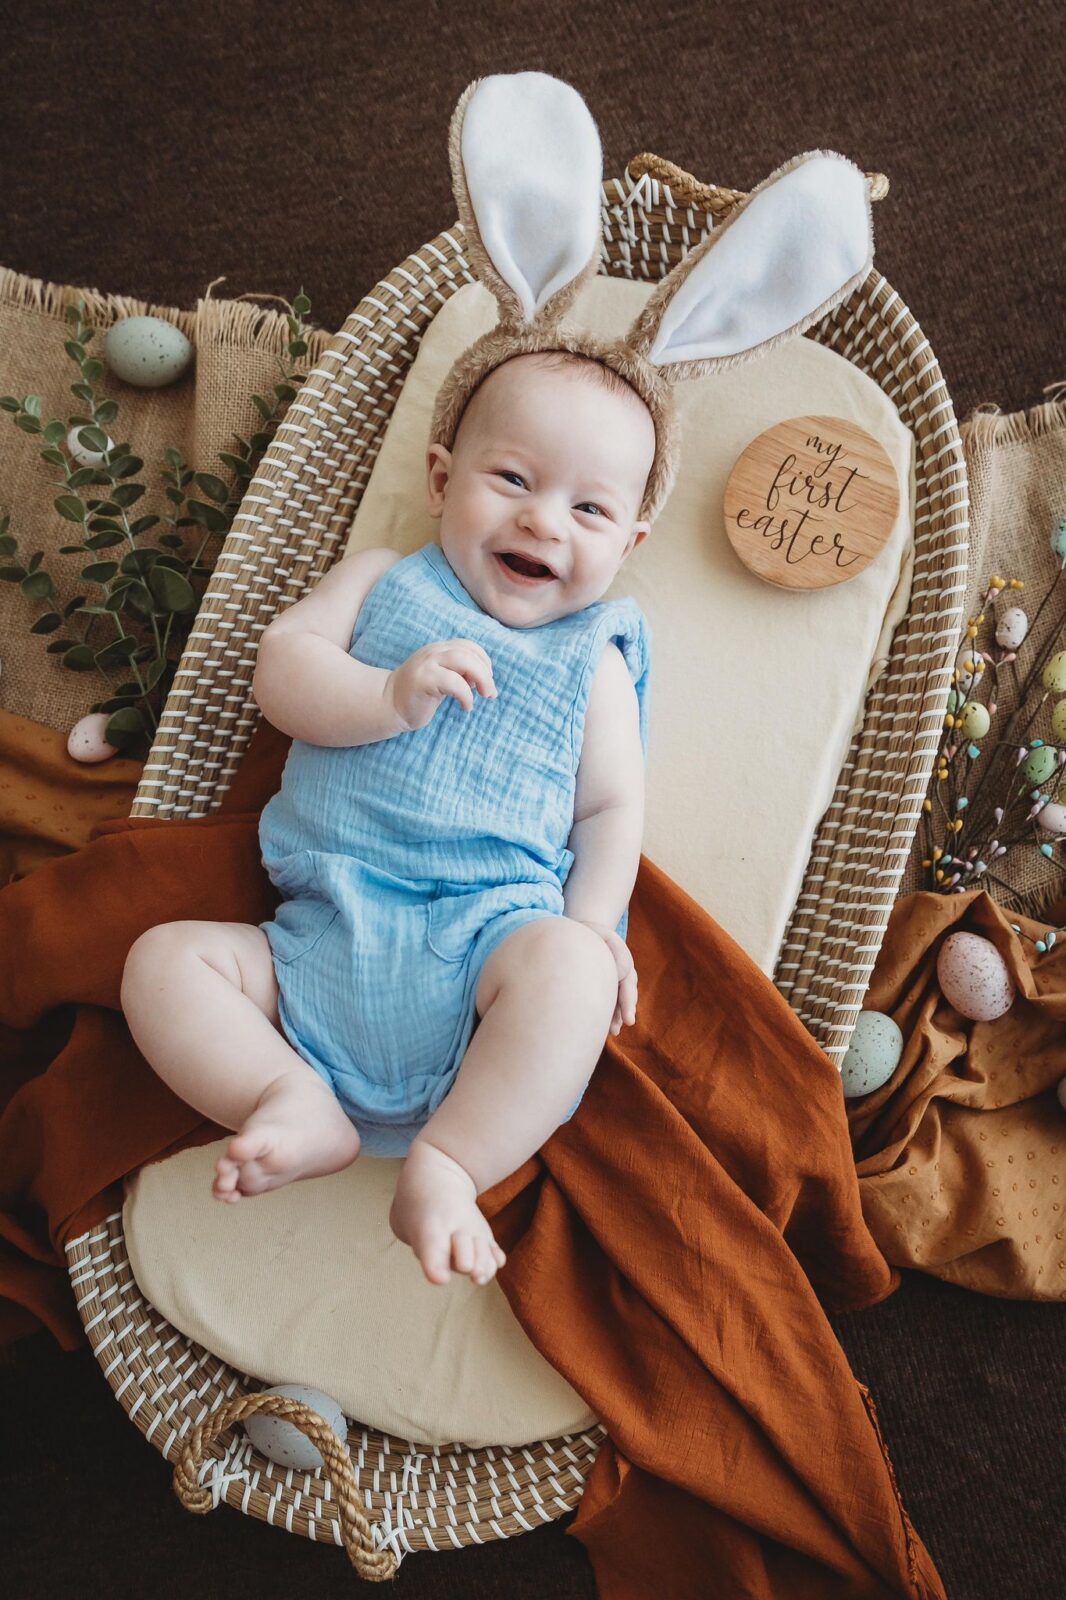
Sue Thorn, CLG Advanced Grad
If you’re capturing older children who are on the move, you’ll need to use an even faster shutter speed. For this type of action, try at least 1/400, and you should have enough light outdoors to be able to use fast shutter speeds.
Related: 7 Tips for Documenting Family
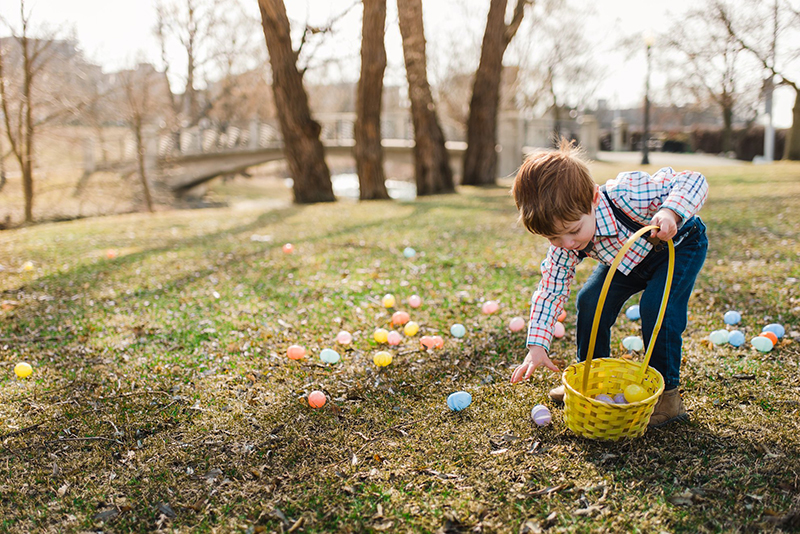
Meaghan Marmillod, CLG Advanced Grad
We hope you enjoyed these tips for beautiful easter pictures ! If you get any gorgeous shots of your babies we’d love you to share them on Insta and use the hashtag #clicklovegrow so we can see them. Have a wonderful and safe time!
If you want to master your camera and confidently take photos you love (on purpose, every time!)… our Enthusiast Photography Course begins soon. Click here to find out more and reserve your spot!

Leave a Reply Cancel reply
PRIVACY POLICY & SITE TERMS AND CONDITONS
CLICK LOVE GROW ™ Pty Ltd - COPYRIGHT 2024 ©
x
Join Now
Enter your info below to join the challenge!
Want a friendly reminder when I go live?
Pop in your number and I’ll shoot you a text.
* We will send text reminders for our live calls during the challenge! Reply ‘STOP’ to end or ‘HELP’ for help.
We promise not to ever share your details with anyone or send you spam! Check our privacy policy and terms of service.
Be the first to comment