Take your own Fabulous Business Headshots
How’s your profile photo online? Is it fabulous? Do you love it? Is it a true representation of your personality?
Or is it a little drab, blurred, or worse still a great angle of you but taken in the dark, out of focus, on your phone?
Now don’t get me wrong, I can rock an iPhone selfie with the best of them, but there are certain times in business where we all need a professional looking and clear headshot that really shows us at our best. Of course I’ll always suggest that hiring a pro photographer for a business branding photo shoot is a great option in an ideal world, but for those times when a DIY solution is on the cards I’ve put together this post to help you take your own fabulous headshots!
1. Choose a simple background
Look for a plain simple background with no clutter or distractions behind you! A plain wall indoors or outside will always work…

Photo: Pam Bradford, CLG Instructor
…or if you want something unique find fabulous textures or colours that pop!
2. Good Light is Key to Great Photos
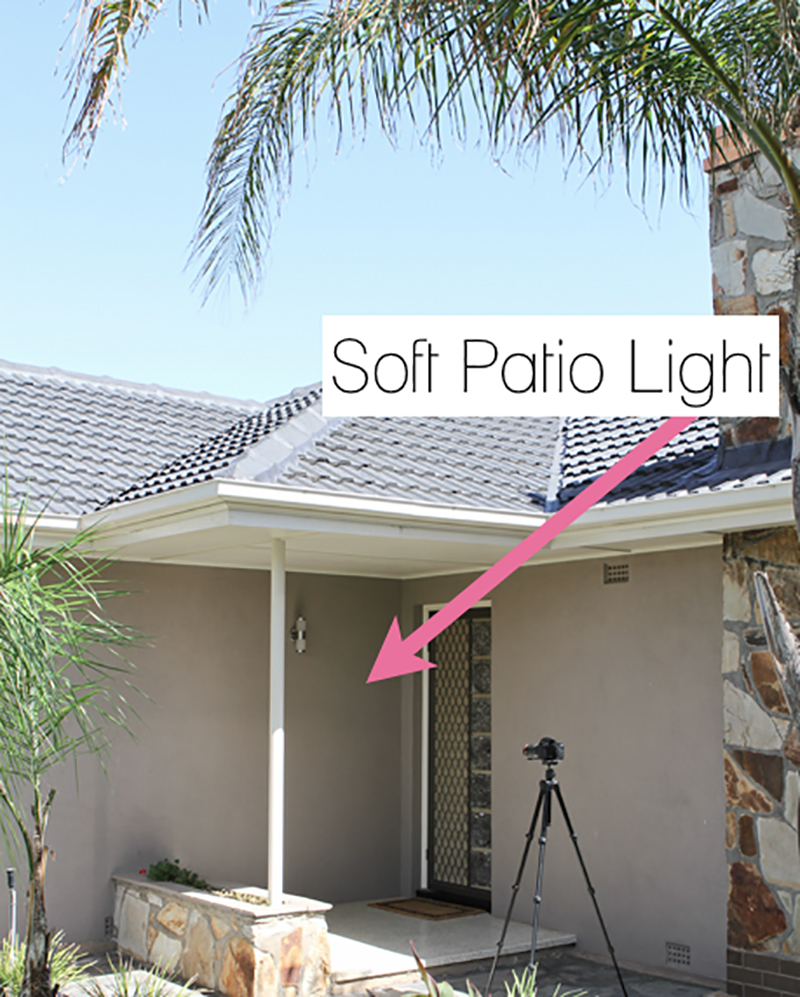
Find Soft Flattering Light
Natural light is easy to find and use, and can be really beautiful if you know what to look for and where to stand.
Shooting in harsh daylight will create strong, jarring shadows that are really unflattering and have you squinting into the camera. Instead, shoot in soft light which you’ll find in open shade under your patio, in your doorway, or even in your garage (with the door up;) or once the sun has moved behind the building. Soft light in the shade is perfect and flattering for shooting portraits.
Related: Garage Light for Beautiful Portraits; Doorway Light for Beautiful Portraits
Ring Light
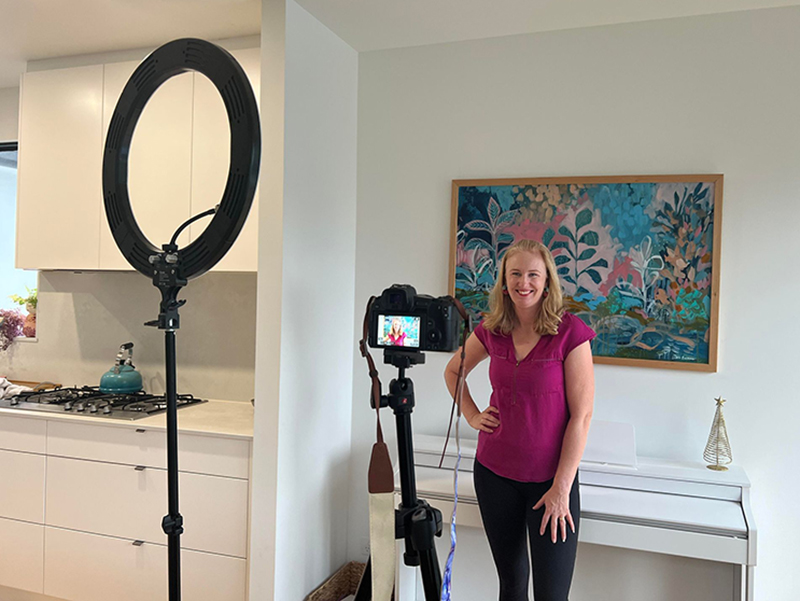
If you want to shoot indoors and don’t have great natural light, a ring light is inexpensive, easy to use and gives an even, flattering result.
All you need to do is set it up and turn it on!
In this shot below, I have natural light coming through a window at my left but as you can see it’s a little dull. So I placed the ring light at a 45 degree position to myself, on the opposite side to the natural light to act as fill light.
You can see in the resulting image below it gave just enough extra light to fill those shadows but it looks soft and natural. Always try it at it’s lowest power first and only increase until you get a good exposure without looking too bright.

3. Getting Ready to Shoot
Frame the Shot
Use a tripod or set the camera on something sturdy if you don’t have one. Either use the timer on your camera, a shutter release app if your camera has that function, or a remote timer. OR rope a kind friend into taking the picture for you.
Estimate where your head will be and frame the shot. Be sure to leave some room around your head and shoulders so it’s not too tight and follow the rule of thirds for composition.
Related: The Rule of Thirds for Strong Photos
How to Get Focus
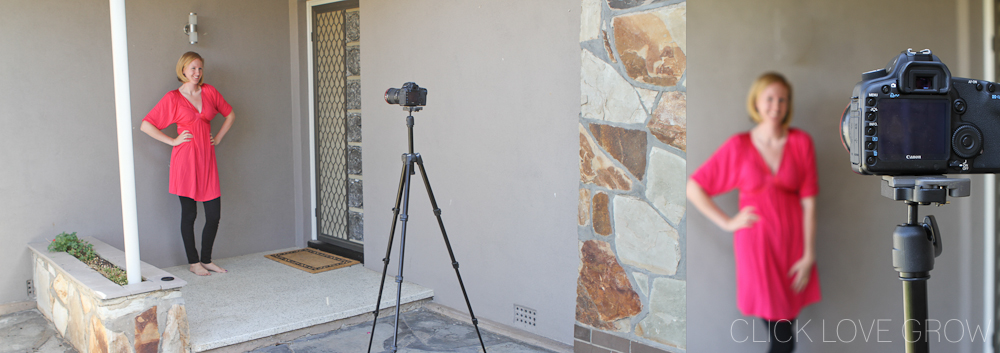
If you’re shooting by yourself you will need to stand something in to focus on. In these shot I used a tall broom upside down and focused on the brush. Or you can use anything that will sit out from the wall at eye level where you’ll be standing.
Focus on the object, then lock focus by switching your lens to manual focus.
Then use whatever method you have to release the shutter once you’re in place. If you’re using the self timer, hit the shutter after you’ve locked focus and then jump in quickly! Realistically its a lot easier to set up the shot and then grab an assistant, but there will of course be times this isn’t possible!

Photo: Pam Bradford, CLG Instructor
4. Feel Fabulous
Make sure you’re feeling good before you step in front of the camera. If you want a shot that’s really going to capture you, take time to plan your wardrobe, select colours you love and do your hair and makeup if that’s what you enjoy. Nothing like a confident smile when you’re feeling great about what you’re wearing!

Photo: Pam Bradford, CLG Instructor
5. Marketing Material
Before you start give some thought to what kind of content you might use your headshots for. Eg. If you want to create Instagram stories, you will need a vertical image with some space for text. If you want to add text to an image for instagram, you’ll need a landscape shot with some space. So take a few shots in different orientations, with and without negative space. Or just leave loads of room around yourself so you can crop it into different orientations and formats.
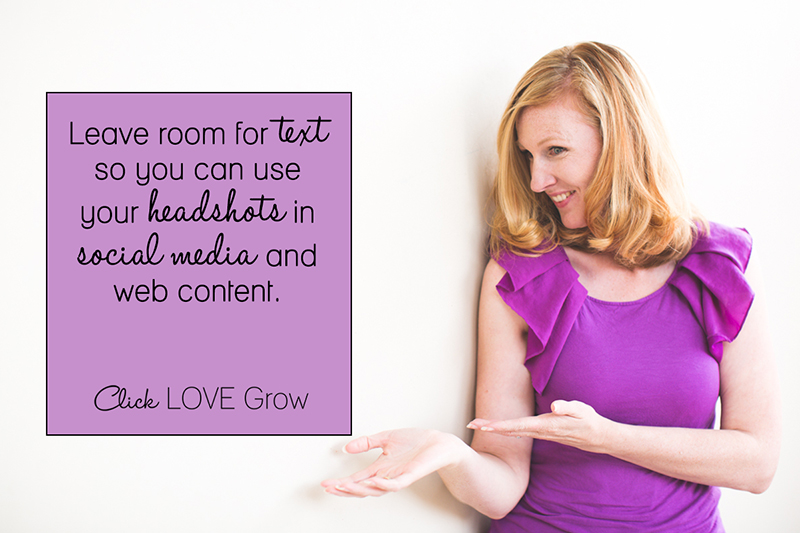
Photo: Pam Bradford, CLG Instructor
6. Ham It Up & Have Fun!
I’m happy to admit I’ve spent good solid time in front of the mirror. I pose women for a living, and the way I learnt what works and what doesn’t is by trying it all in front of the mirror! Here’s my posing tips:
- Stand up tall and straight
- Pop a hip by putting all your weight on your back foot
- Put your hands on your hips
- Chin forward
Then have fun! Xx
Move around, take loads of images, and play with your posing and let your personality come out into the shots! I took about 25 – 30 images just for one I loved… so don’t feel like you have to nail it first time!
Besides, you’ll have great ‘out-takes’ blog content if you get some crazy candids!
Related: How to Look Great in Your Self Portraits
Or get fabulously fun like my friend Bel with something that really shows off your personality
Once you nail the fundamentals for taking a flattering portrait in nice light and with good composition, you can take lovely shots on your phone as well! Follow us on Instagram and tag us to show off your new headshots!
Was This Helpful?
If you’d love more help in your business, check our Biz Builders Course for photographers. Whether you’re still thinking about it, or you’ve already launched and you’re ready to scale your profits, this was designed with you in mind.

Leave a Reply Cancel reply
PRIVACY POLICY & SITE TERMS AND CONDITONS
CLICK LOVE GROW ™ Pty Ltd - COPYRIGHT 2024 ©
x
Join Now
Enter your info below to join the challenge!
Want a friendly reminder when I go live?
Pop in your number and I’ll shoot you a text.
* We will send text reminders for our live calls during the challenge! Reply ‘STOP’ to end or ‘HELP’ for help.
We promise not to ever share your details with anyone or send you spam! Check our privacy policy and terms of service.



Great tips, but just one question: when you’re doing this on your own, how do you get the camera to focus on your eyes?! I’ve tried this and gotten great in-focus shots of the wall behind me. ;->
Oh Holly that’s a brilliant pick up – and one I had meant to include!! Thank you I’m going to amend now!
The way I get around this is by using a tall broom, or mop – or even pop something something on a chair … I put that where I will be standing and then focus and hit the shutter, then I jump in before the timer! It really is much easier to have someone else focus and hit the shutter – but sometimes we can’t get around it! Xx Hope that helps!