How To Look Great in Your Self Portraits!
There’s lots of reasons why we might want a self portrait… for work, to update our profile shot on our socials, for online dating, and even just for ourselves! Whatever the reason, when we’re putting ourselves out there, we all want to look our best, amiright?
But most people tend to be overly critical, and end up deleting most of the shots they take. Sound familiar? Well here’s the thing… what you probably don’t know is it’s not you… it’s light and posing. And often it’s both. To take a self portrait you love, all you need is a little knowledge about both (including what NOT to do). So today I’m sharing my top tips for taking a self portrait you’ll be happy to put out into the world!
Natural Light
Unless you’re a whiz with studio lights, use natural light for your selfies. It’s free, easy to find, and easy to work with. And there’s lots of different kinds of light and different ways to use it to get variation in your self portraits.
We recommend soft light as it wraps around our features gently, it’s kind to our skin and has a habit of minimising imperfections. There’s lots of different places and times of day you can find soft light.
Window Light
The easiest place to find soft light indoors is near a window. It will appear early or late in the day when the sun is low on the horizon and diffused by the atmosphere. You can also find soft light at any time of day if there is a little shade outside the window, for example that created by a porch roof.
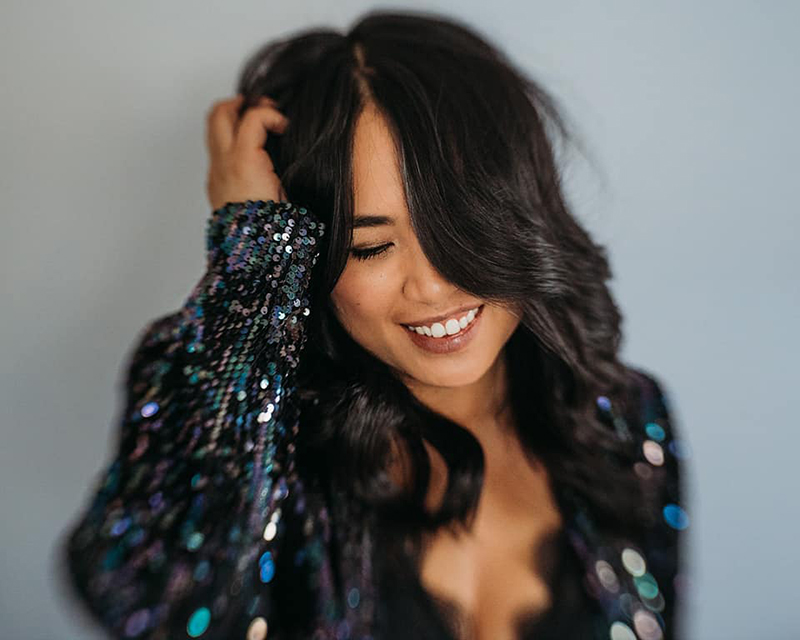
Hope de la Rosa, Advanced Graduate – soft front light can be found through windows or doorways.
You can also find soft light through windows with sheer curtains to diffuse the light.
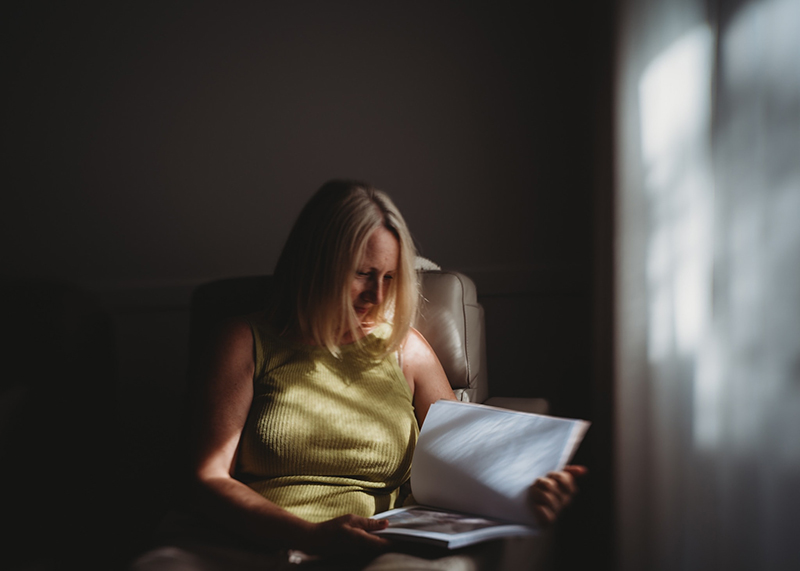
Vicki Cardilini, Advanced Graduate – light diffused by sheer curtains
Doorway Light
Do you live in a dark house and struggle to find beautiful light indoors to take photos? Head to the front door… you’ll always find great light just by opening it up!
Assuming you have some shelter right outside the door in the form of a porch, patio or even just a door overhang you can use this spot for beautiful soft light portraits. Depending on which direction your door faces, the shelter outside the door will create some open shade which is perfect for portraits.
Related: Doorway Light for Beautiful Portraits
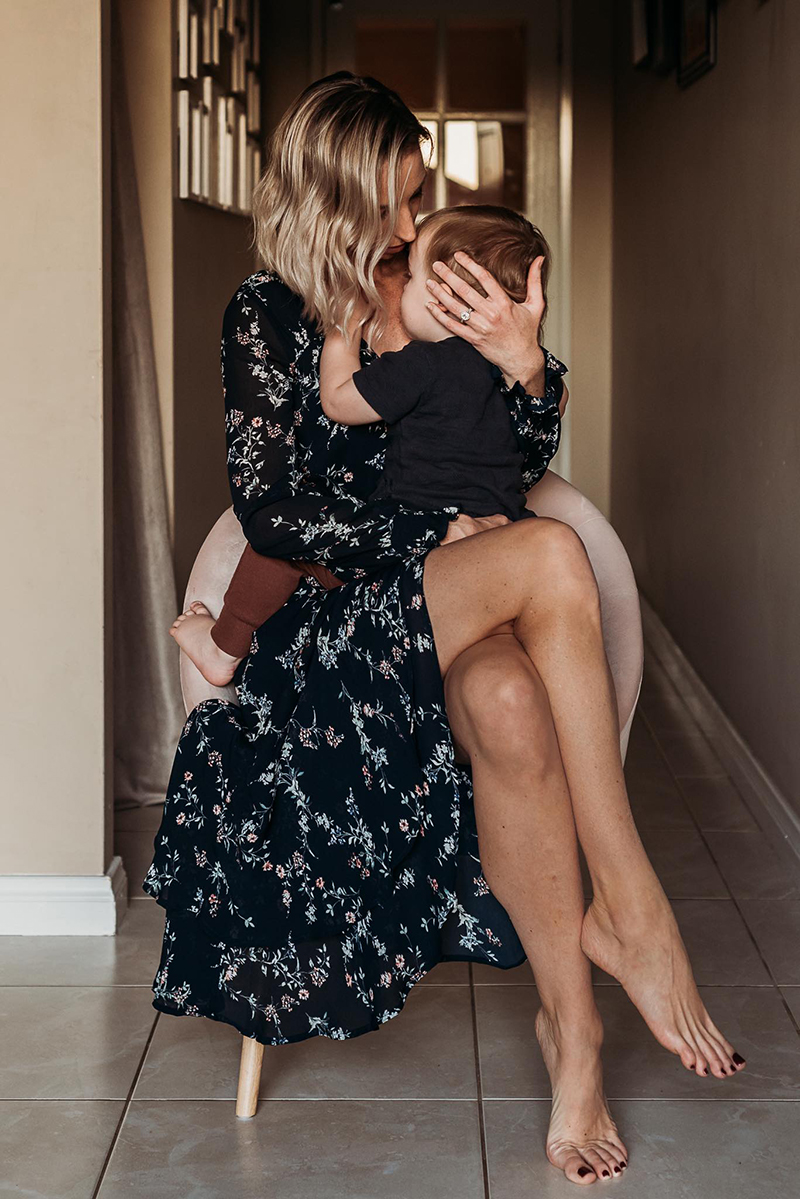
Bek Alexander, Advanced Grad – Got a dark house? You’ll always find great light at your open front door!
Open Shade
At other times of the day diffused by open shade (such as a porch overhang if shooting through your doorway), or sheer curtains which will help soften the light.
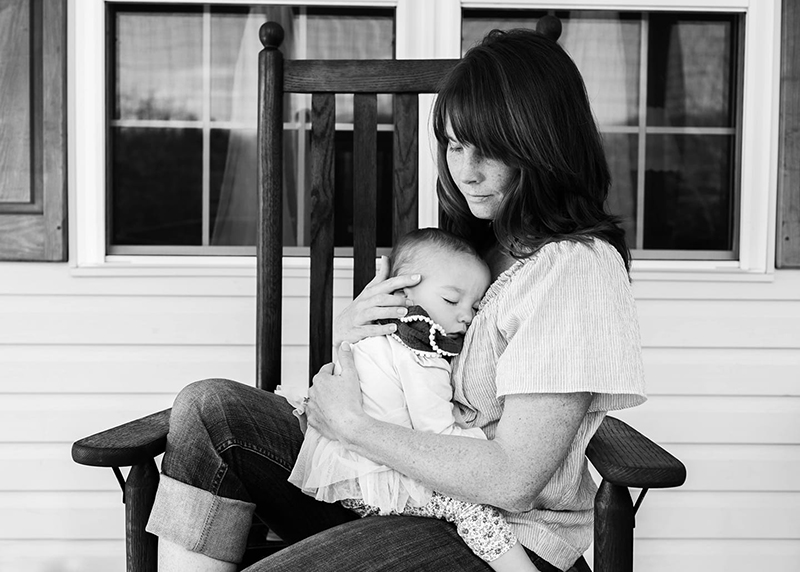
Amber Nicole Kesler, Advanced Grad – the open shade of this roofed porch provides soft light for portraits.
Garage Light
Another great spot for doorway light is your garage! It’s a form of doorway light but it could also be considered open shade. And one of the reasons it works so well is garages tend to be dark inside, so the clutter of a typical garage will be unrecognisable in a close up portrait. Stand just inside the doorway so the sun doesn’t hit the top of your head. Or if you have a garage door that opens up overhead and creates a roof, stand at the edge of that. In the blog post below you’ll find a diagram which illustrates where to stand.
Related: Garage Light for Beautiful Portraits
Where to Stand
Sit or stand about half to one metre away from the light source, depending how bright it is. Before you take a shot, use your phone camera or a swivel LCD screen in live view mode on your camera to see yourself. Try different positions and angles and take note of the way the light falls on you, and the way it softens your features. If it looks too bright on your features, move back a little. If the shadows look too harsh and it’s a bit dark overall, get a little closer to brighten things up.
Dramatic Light
Want something a little more dramatic? Position yourself on an angle to a soft light source for a directional light portrait. In this way one side of your face is lit, and the other side is in shadow. You can shoot from the shadow side and create a short lit portrait such as this one below. A short lit portrait is created when the shadow side of the face is closest to the camera and in full view, whilst the bright part of the face is further away from the camera and less visible. A short lit portrait will sculpt your features more than shooting directly front on and can be very flattering for many face shapes.
Related: Easy Dramatic Natural Light Portraits
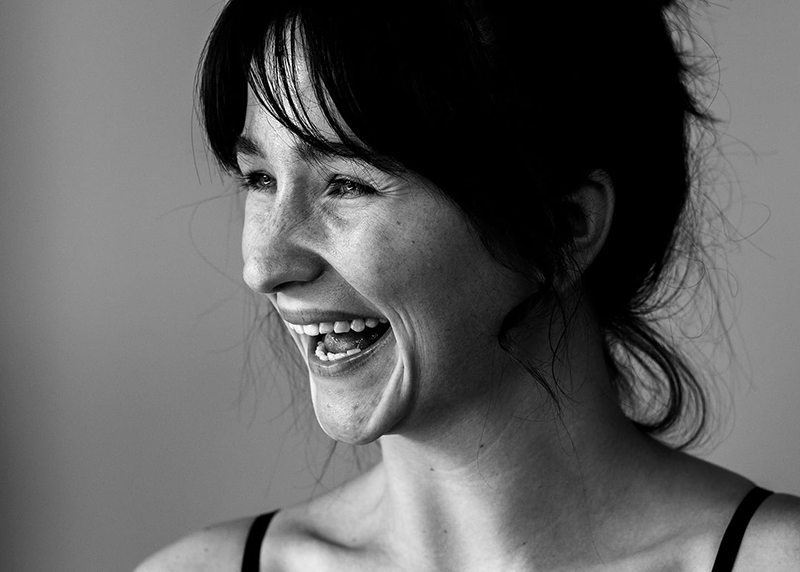
Jessica Lunn, Enthusiast Graduate – Short light directional portrait
Or you could shoot a broad lit portrait like this one, which is another way to sculpt your features and also very flattering. A broad lit portrait is created when the lit side of the face is closest to the camera and in full view, whilst the shadow part of the face is further away from the camera and less visible.
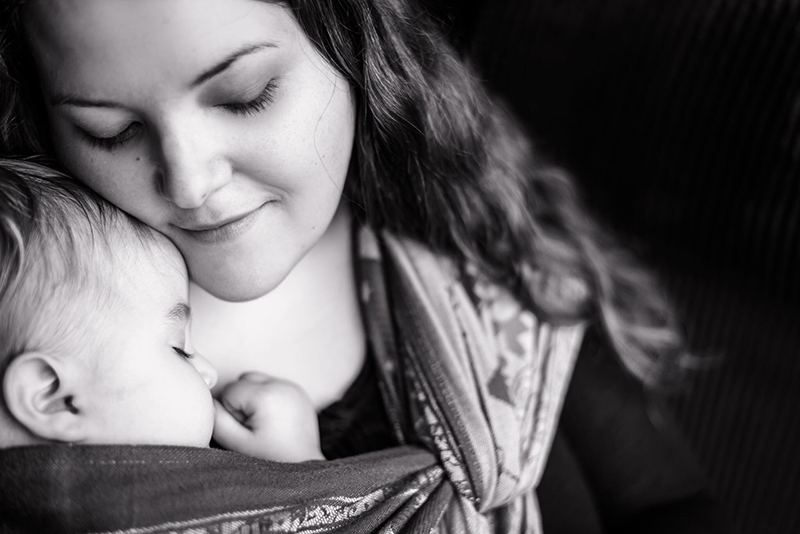
Lisa Burch, Enthusiast Graduate – Broad lit portrait
This shot below is a great pull back to illustrate how to position yourself and your camera in relation to the window light in order to create a soft directional light portrait. For a more dramatic look, you’d do exactly this but in a darker room so that the majority of light is coming from one side. And for a close up, you’d stay where you are and simply move the camera closer.
Related: 17 Ways to Use Reflections in Your Self Portraits
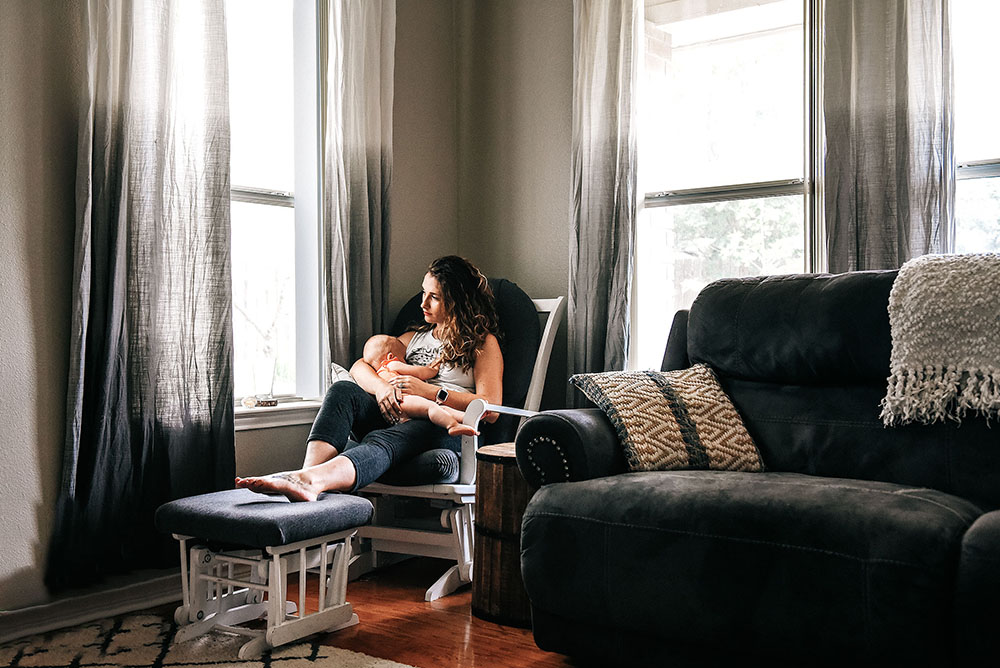
Tandra Hull, Enthusiast Graduate – where to position yourself and your camera for a directional light portrait.
The ambient light will determine how dramatic the shot is – a lighter room such as the one above will create a very gentle directional light portrait. A darker room will create a really moody, low key portrait like this image below.
In our Advanced Photography Course we take a deep dive into portrait lighting styles and low and high key creative exposures.
Related: How to Shoot Dark & Moody
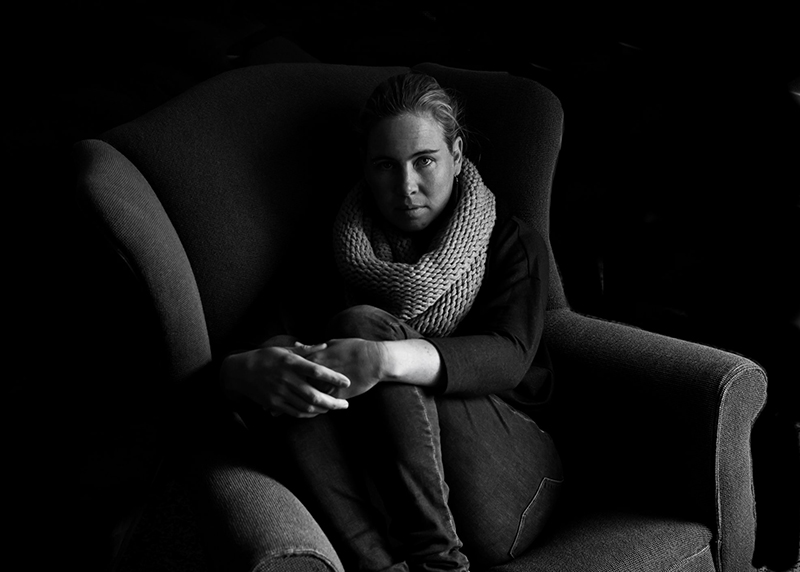
Kate Rankin, Advanced Graduate – Dramatic low key directional light
Outdoor Light
If you want to head outdoors for your self portrait, golden hour is king! It’s found early and late in the day in the hour or two after sunrise and before sunset. It’s warm and golden, soft and dreamy… and beautifully flattering! Position yourself with the light behind you, and preferably either filtering through or bouncing off foliage to create some gorgeous light bokeh.
Related: Golden Hour Photo Tips for Beginners
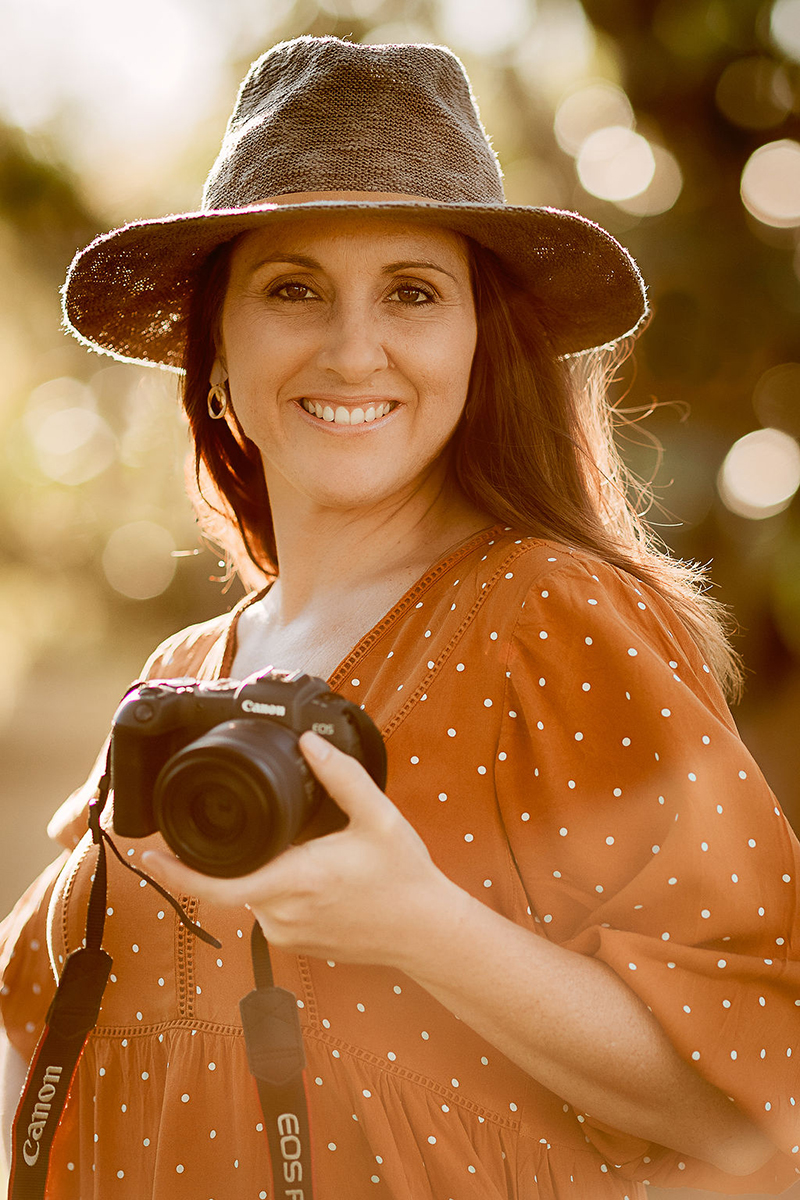
Brooke Hampson, Advanced Graduate – shoot outdoors during the golden hour for dreamy and flattering self portraits
Ring Light
A ring light is a fantastic tool for self portraits!
It’s portable, inexpensive, and makes it easy to get beautifully soft and even lighting. You can use them when you don’t have enough light, or you can use them in conjunction with natural light as fill light to give a more dynamic and flattering look.
I use one all the time for my lives for all of those reasons. If you want to buy one and experiment, we’ve got a great tutorial which dives into it and includes pull back shots so you know where to position yourself and the ring light in relation to the natural light.
Related: How to Take Your Own Fabulous Business Headshots
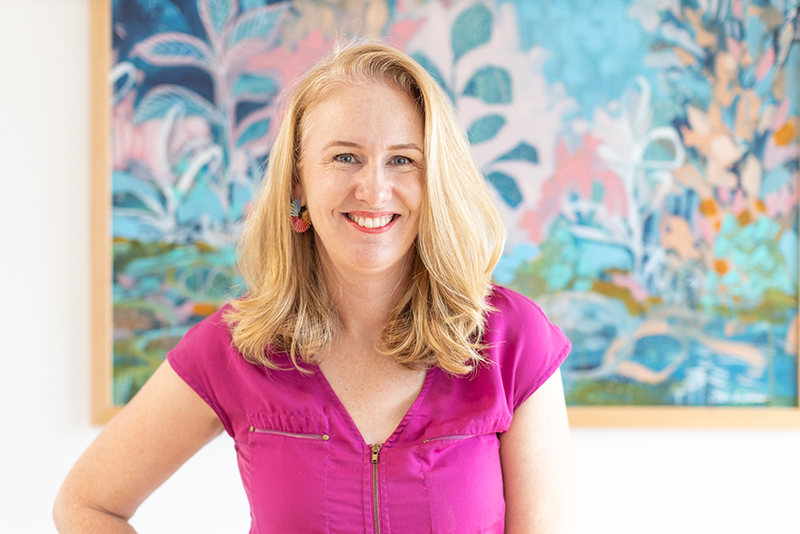
Self Portrait shot with ring light as fill light and camera self timer
Lighting Mistakes to Avoid
Midday Sun
Shooting in the midday sun is always frought with danger because it’s harsh and unflattering. It creates shadows in all the wrong places and when it comes to selfies, avoid avoid avoid! As it’s directly overhead, you can’t backlight with it. So if you can’t avoid shooting outdoors at that time of day, look for open shade. Or create your own open shade by popping on a broad brimmed hat like the image above!
Room Lights
Always turn off any overhead lights or lamps if you’re shooting indoors. They are a hard light source and they’ll create harsh shadows which are jarring and unflattering. Even if it’s a bit dreary inside, it’s better to capture more ambient light through your settings than to try to add to it by using your room lights.
Backlighting Indoors
Silhouette portraits can be beautiful and creative, but if you’re not aiming for a silhouette portrait, you need to know how to avoid doing it by accident.
Related: How to Take a Silhouette Photo
When you’re in a room with one main source of light, always face the light (either straight on or at an angle). If you position yourself with the light behind you, you’ll get a hazy effect and either your backlight will be blown out, or you will be underexposed. The exception to this is if the room is awash with light or there are other light sources. In those situations, you’ll have light falling on your face from other sources and you’ll be able to expose yourself well without blowing out the background light.
Flattering Angles for Self Portraits
When it comes to posing, there’s no one size fits all. One person’s best angle might be the next person’s least flattering! The easiest way to figure that out is to use your phone camera or live view mode on your camera and experiment different angles and heights. But we do have a few suggestions you can try:
- Shooting from slightly higher than eye level tends to be more flattering that straight on.
- Turn your face a little to the side then look back toward the camera
- Point your chin down and turn your eyes up toward the camera
- Lean your head slightly down toward your shoulder
- Dangling arms and hands lack interest and look awkward. Leaning against something is a great way to give your arms and hands something to do.
- Lean your upper body in slightly and point your chin toward the camera. Not only does this engage you with the lens (and in turn the viewer), it also helps to elongate your neck.
- With the camera slightly higher than your eyes, look down.
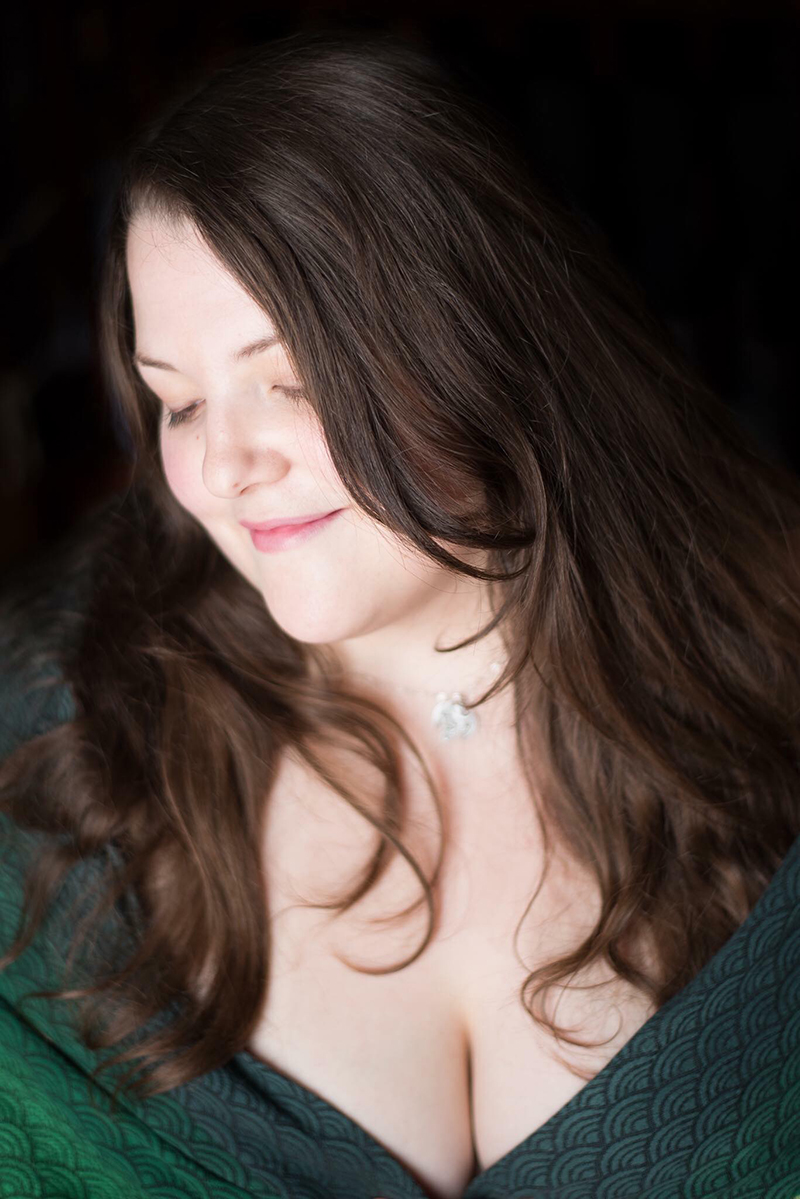
Lisa Burch, Enthusiast Grad – Shooting from slightly above eye level is flattering for everyone
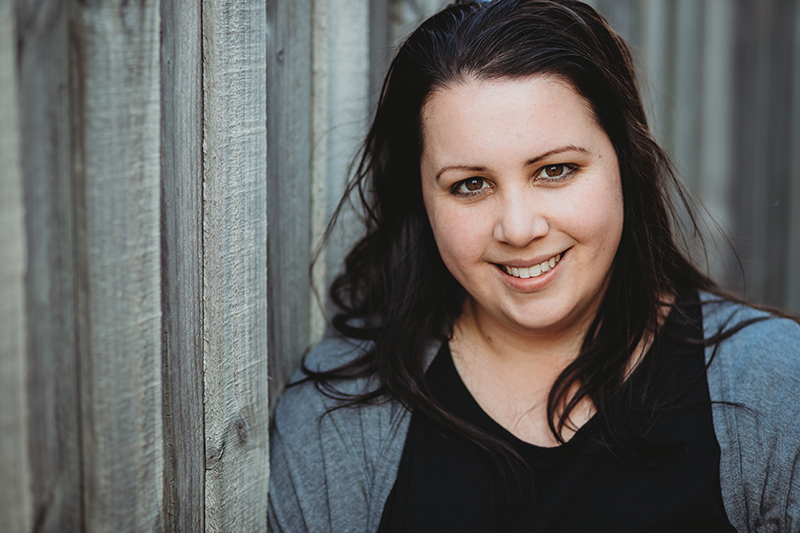
Megan Browne, CLG Instructor – Leaning gives your something to do with your arms and body and helps you relax for the camera
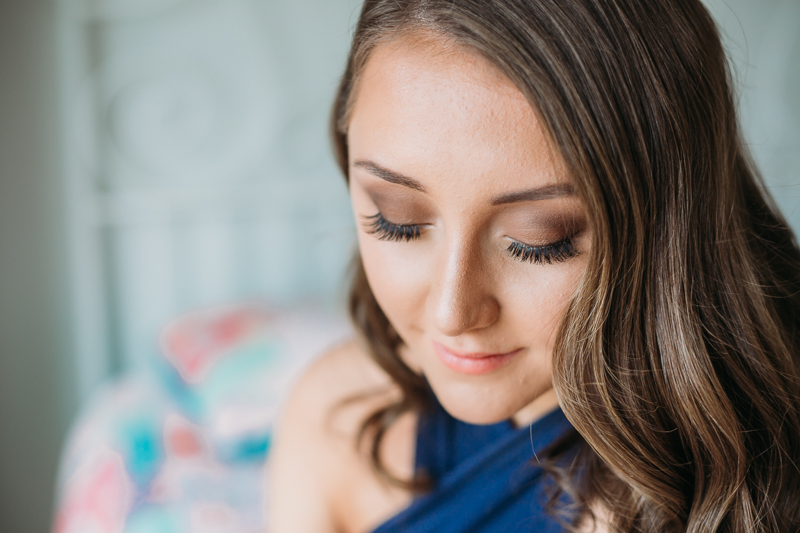
Pam Bradford, CLG Instructor – With the camera slightly higher than eye level, look down.
Shooting Front On
Shooting front on can be unflattering for most people unless you’re creating some interesting lines. This shot below was taken front on and directly at eye level works beautifully, for a few reasons.
It has a sense of movement, which she’s done by dropping her left shoulder, which in turn brings her right should up a little and creates a nice subtle diagonal line from one shoulder to the other.
Then she’s slightly tilted her head toward her right shoulder, and toward the light. This shows us more of the shadow side of her face, effectively making it a short lit portrait and beautifully gentle directional shadows. The darkness behind her helps her pop off the frame too.
And lastly, give yourself something to do with your arms and hands. In this pose Amanda is holding her left elbow with her right hand which frames her body and creates yet more lines for visual appeal. A common pose but with good reason!
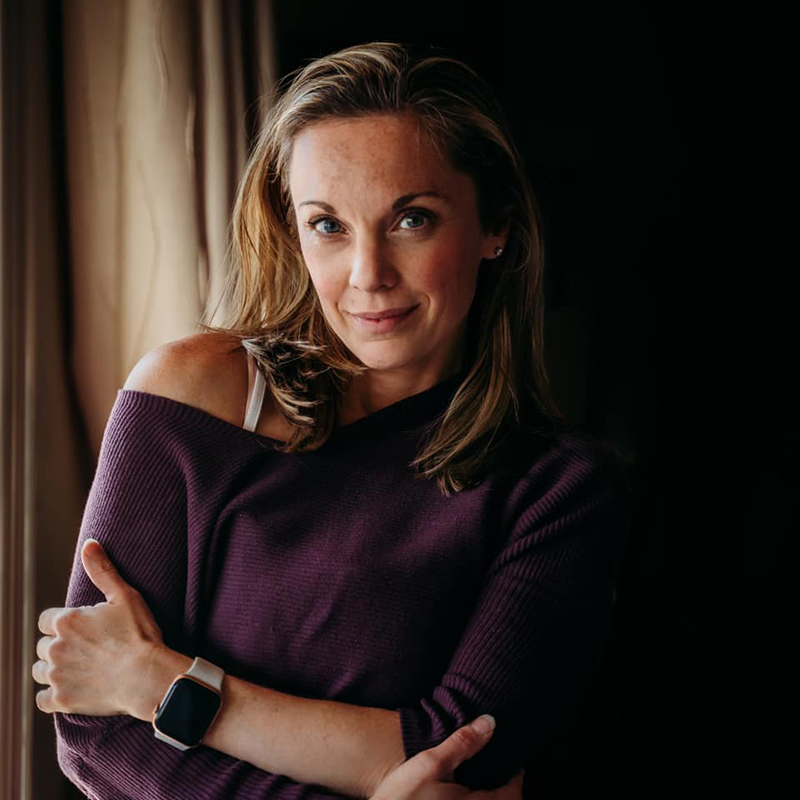
Amanda Marenghi, Enthusiast Graduate – tilt, turn and give your arms something to do!
Tech Tips
Ok so we can’t have a self portrait tutorial without the tech tips to pull it off!
If you’re using your phone you’re probably all over it and all your need are our light and posing tips to nail it. But if you’re using your big camera, now that’s a different story.
You’ll need a tripod, or somewhere safe to rest the camera and at a height that works for the shot you’ve envisioned.
You can use your self timer, a remote shutter release, or a phone app if your camera has that capability.
If you have an LCD screen you can swivel around, shoot in live view mode, and once you’ve framed the shot and locked focus, turn it to face you to make posing easier.
How to Focus a Self Portrait
Focus can be challenging but we have some tricks to get around that.
Firstly, place something or someone else in the spot where you’ll be standing, as close as possible to the focal plane where you think you’re face will be. Frame the shot and focus where you want it, then flick the lens to manual focus mode to lock it. Get in position, pose, and take the shot with whatever method you’re using the release the shutter.
To give yourself a little more wiggle room with focus, use a narrower aperture than you’d normally use with portraits. OR if you want a beautifully shallow portrait, use a wide aperture but be open minded about where on your face it lands.
Lastly… there is a big miss rate particularly as it’s hard to see if you like your pose and angle until you see the shot. So be prepared for it to take some time with lots of backwards and forwards. Don’t rush or you’ll end up in a big sweaty mess and try to approach it as a learning experience!
I hope you loved these tips! If you want to get more creative with your self portraits, try this blog post which experiments with reflections, shadows, double exposures, and loads of other creative effects!
Want to Get More Creative?
Hopefully this tutorial has inspired you to embark on a project of self exploration and start a self portrait series! You’ll need some inspo to get some variety in your images so check out this blog post to level up your selfie game!
Related: 19 Inspiring Ideas for Creative Self Portraits
Join my new workshop and learn Simple Steps For Taking Pro-Quality Photos of Your Kids & Family…and it’s totally FREE to join! Register here…

Leave a Reply Cancel reply
PRIVACY POLICY & SITE TERMS AND CONDITONS
CLICK LOVE GROW ™ Pty Ltd - COPYRIGHT 2024 ©
x
Join Now
Enter your info below to join the challenge!
Want a friendly reminder when I go live?
Pop in your number and I’ll shoot you a text.
* We will send text reminders for our live calls during the challenge! Reply ‘STOP’ to end or ‘HELP’ for help.
We promise not to ever share your details with anyone or send you spam! Check our privacy policy and terms of service.
Be the first to comment